How To Screen Record on Mac, Windows, iOS & Android?
Not sure how to record the screen activity of your digital devices?
Worry not.
We’ve got your back!
In this post, we’ll show you how to record your screen across all devices - PC (Windows, Mac), iOS & Android.
Let’s get started!
Table of contents
1.1 Built-in PC Screen Recorders
1.2 Third-Party PC Screen Recorder [Vmaker]
2.1 Built-in iOS Screen Recorder
2.2 Third-Party iOS Screen Recorder
3.1 Built-in Android Screen Recorder
3.2 Third-party Android Screen Recorder
1. How to Screen Record on a Computer
When it comes to screen recording on a computer, you have two options. You can either use a built-in screen recorder or use a third-party screen recording software.
Both these options have their own advantages & disadvantages.
The built-in recorders allow you to record your screen for free. But, they aren’t the ideal choice for recording professional screencasts as they don’t capture computer audio and microphone audio simultaneously. In order to be able to record tutorials, presentations, and gameplays, you need to capture both computer audio and microphone audio simultaneously.
Hence, the built-in recorders can only be suitable for light users who are just looking to capture their screen activity.
Let’s quickly explore both of these methods below.
1.1 Built-in PC Screen Recorders
First, let’s explore how to screen record on a PC (both Mac and Windows) using the built-in screen recorders (QuickTime Player & Xbox GameBar).
i) How to Screen Record on Mac using QuickTime Player
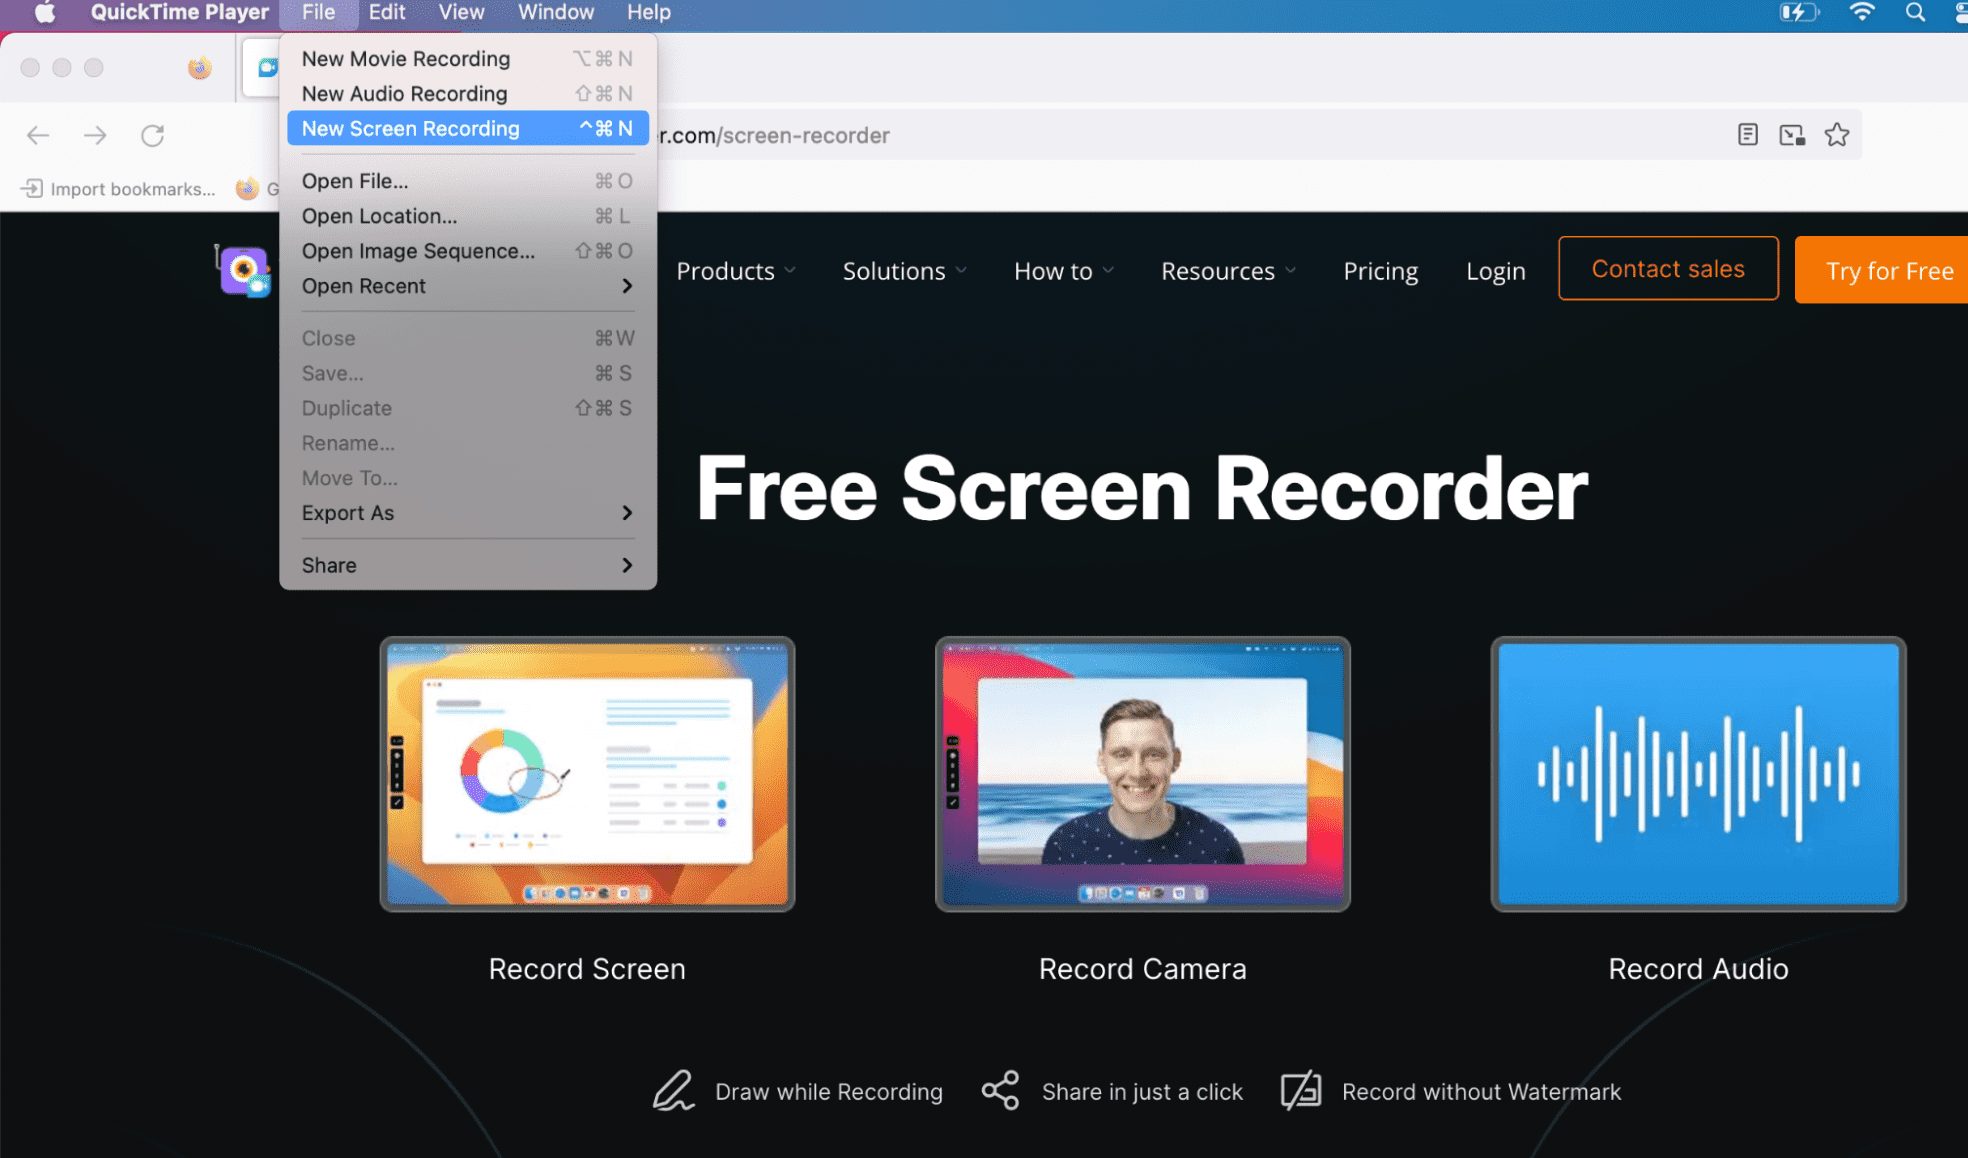
Step 1: Launch QuickTime Player on your Mac. Click on the 'File’ tab in the menu bar and choose 'New Screen Recording.'
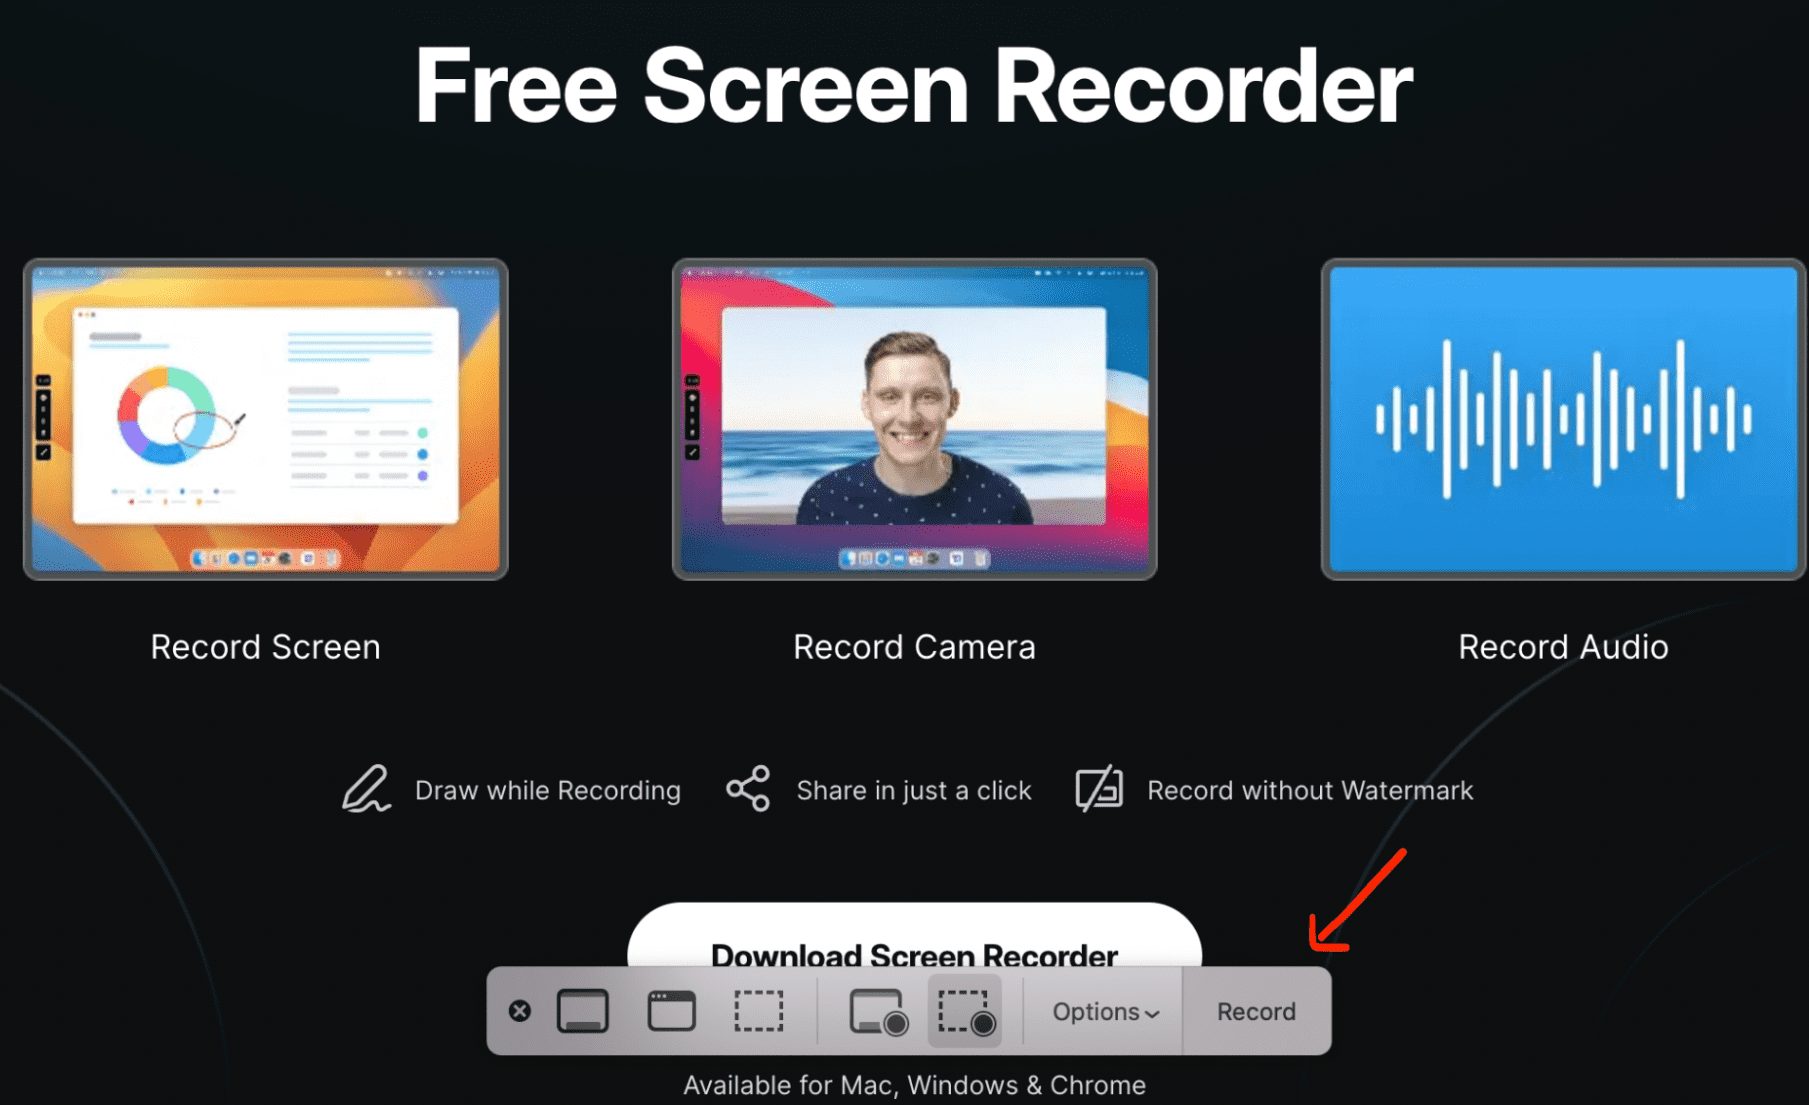
Step 2: A new screen recording window will open up. Whenever you're ready to record, click on the 'Record' button.
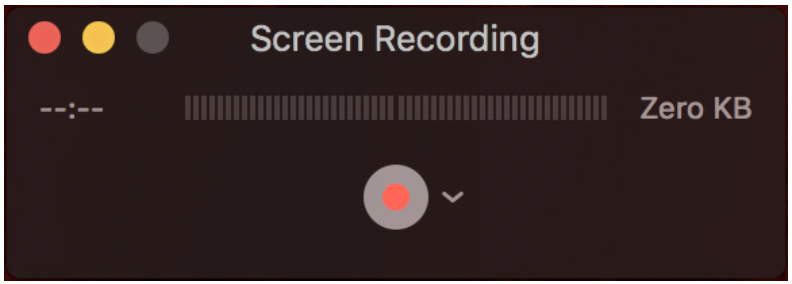
Step 3: As soon as you’re done, click on the red ‘Stop’ button to stop the recording.
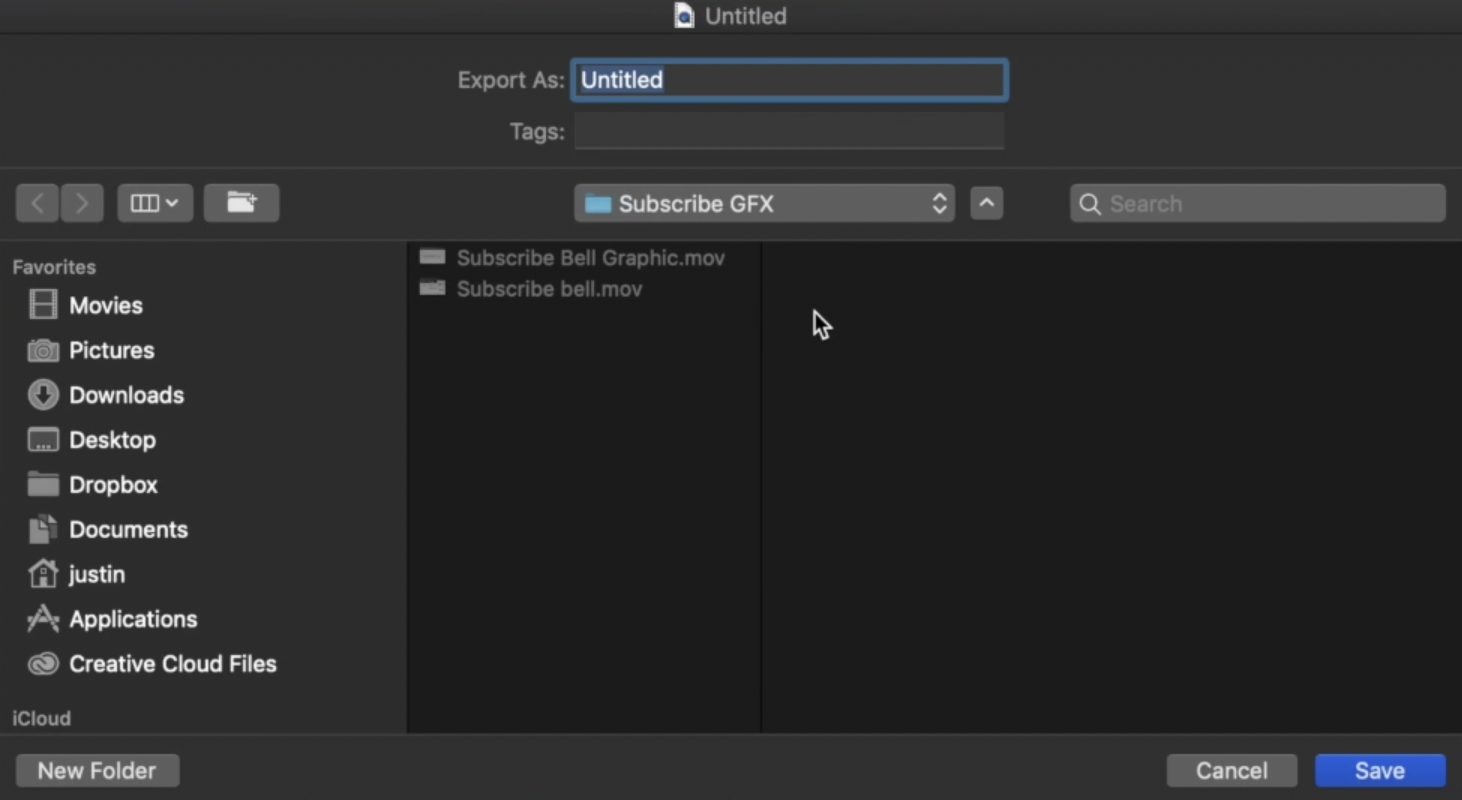
Step 4: You can now save your recording to a local folder. Just press ‘Command + S’, enter your file name, and click on ‘Save.’
Now, let’s move to the next method and see how to screen record on Windows using the built-in screen recorder ‘Windows Game Bar.’
ii) How to Screen Record on Windows using Xbox GameBar
Step 1: Close all the other applications running in your background. Keep only the application you wish to record from open.
As soon as you’ve closed all the background applications, you can launch the Xbox Game Bar on your Windows computer. Use the shortcut key combination (Windows Key + G).
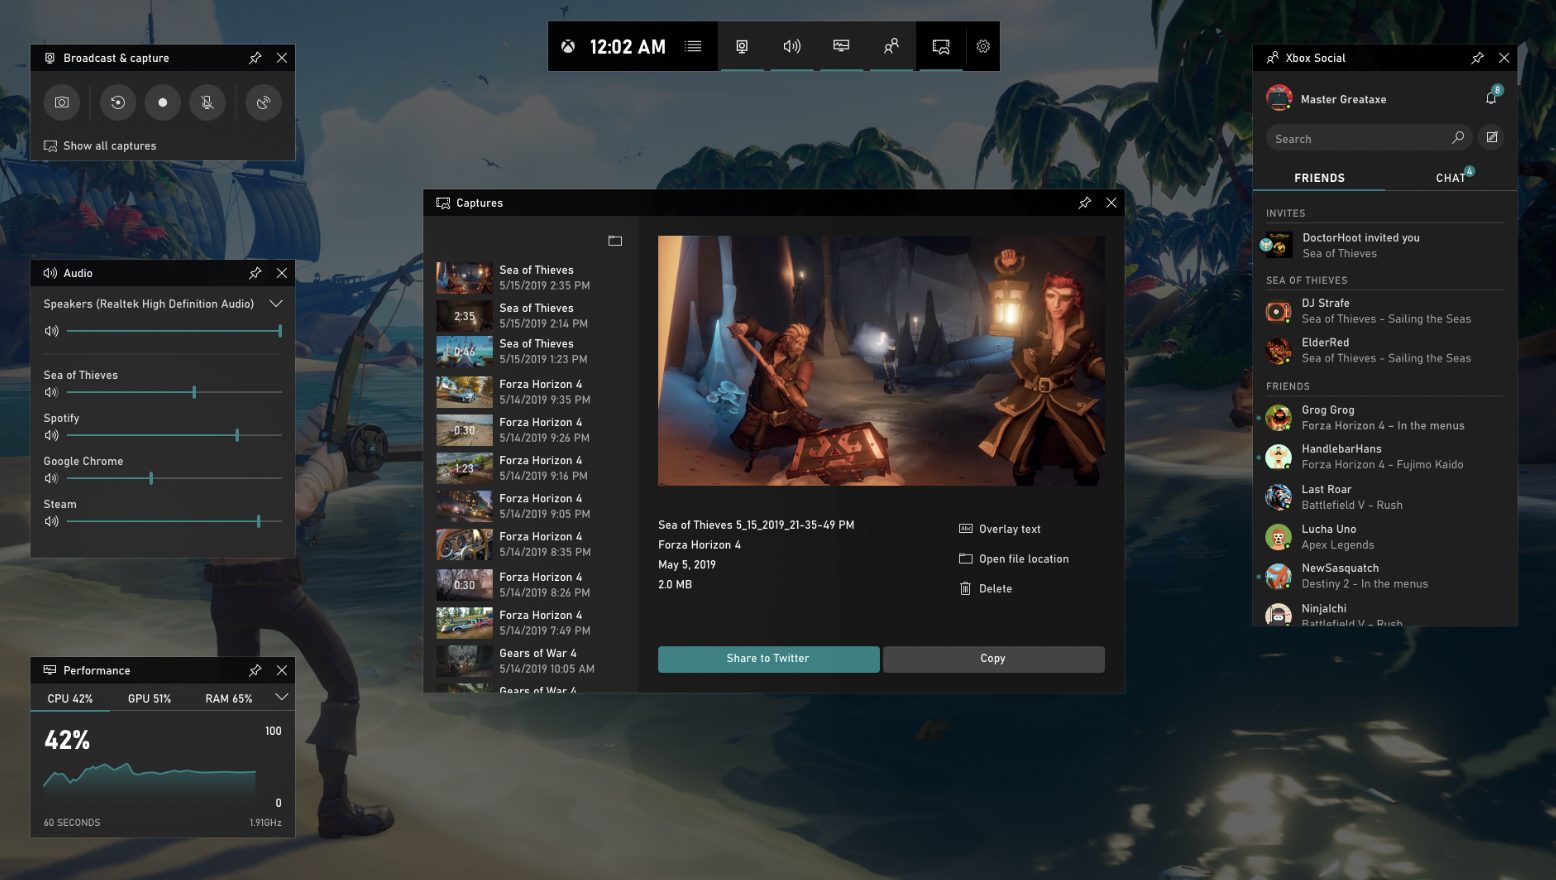
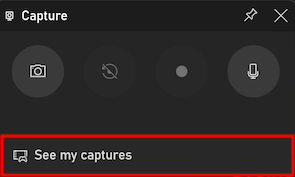
Step 2: Next, head over to the Menu bar and click on the ‘Capture’ icon.

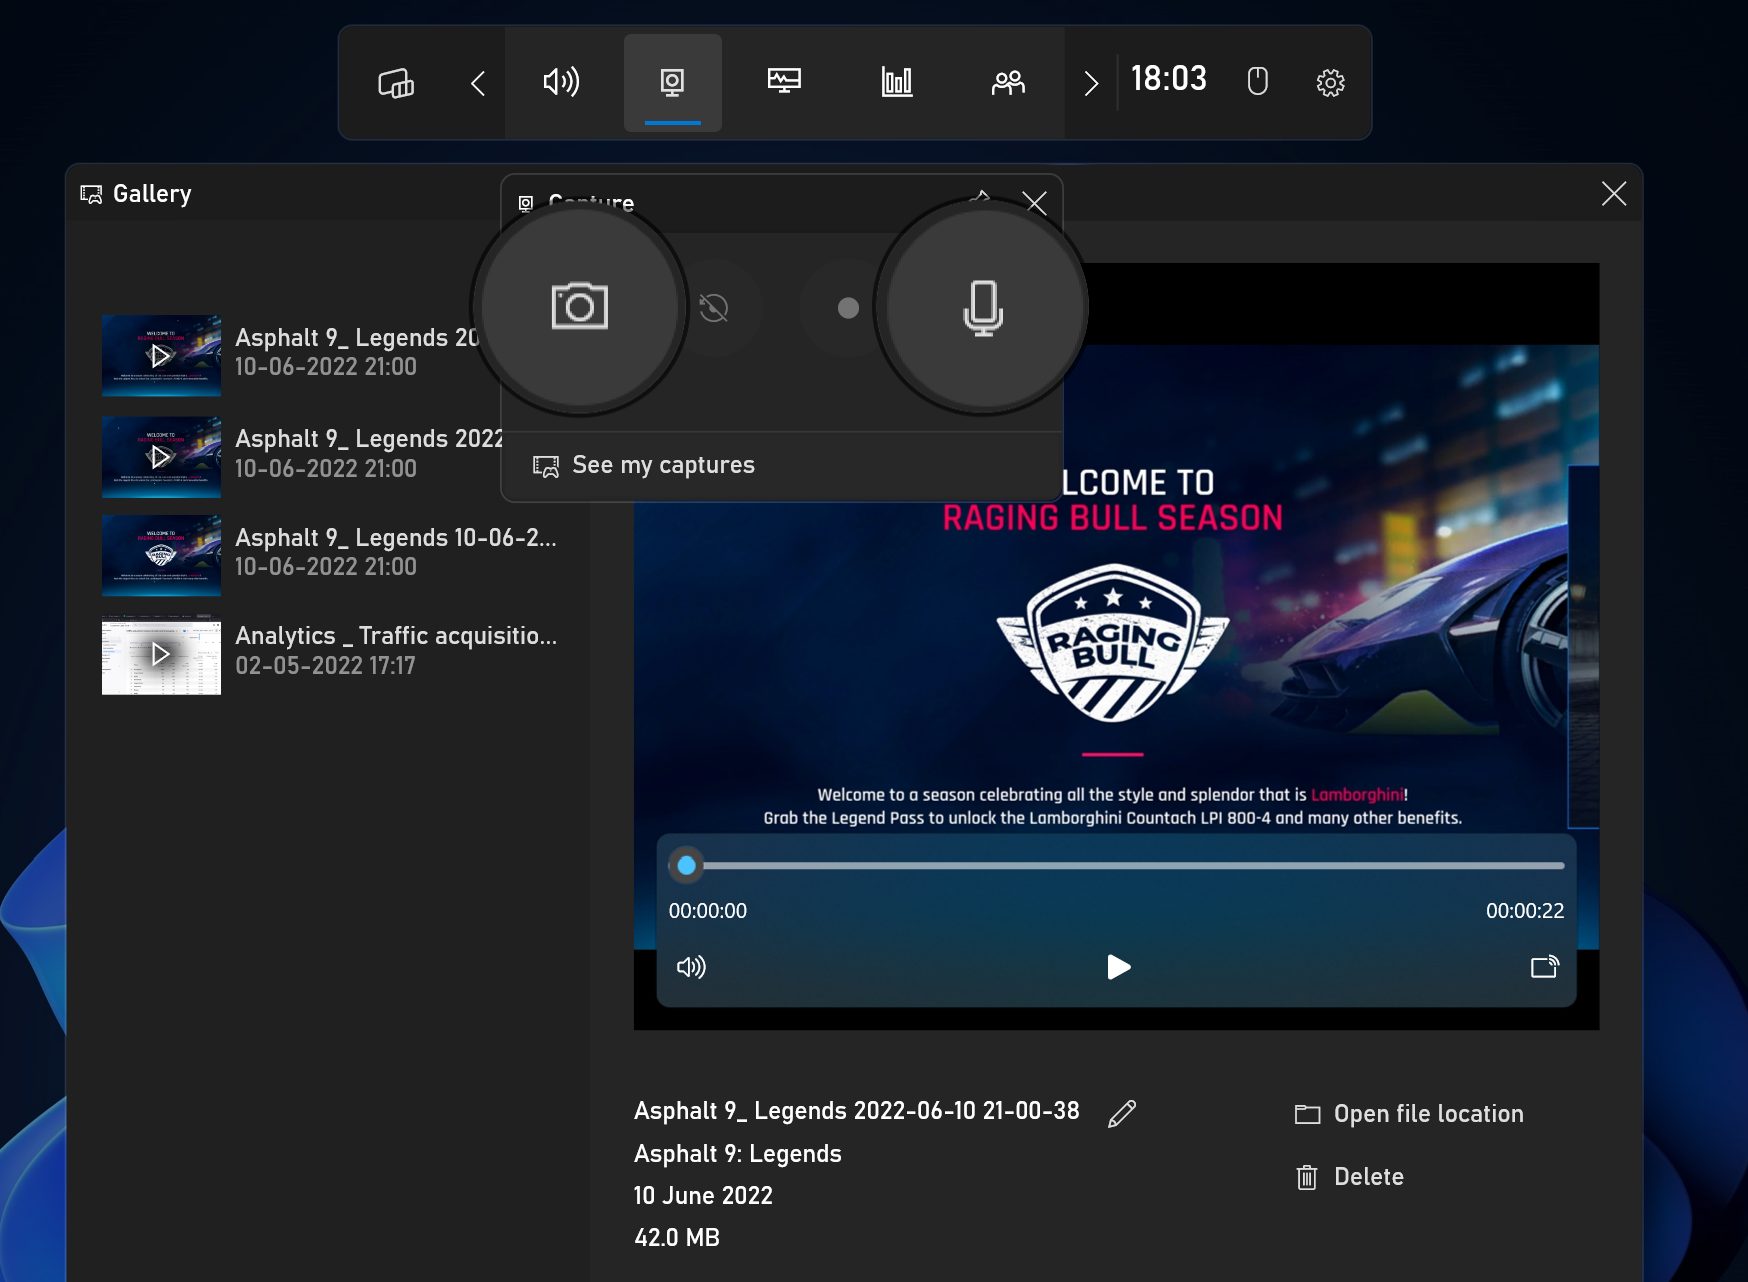
Step 3: If you wish to record your webcam and voice narration, check whether your camera and microphone are turned on.
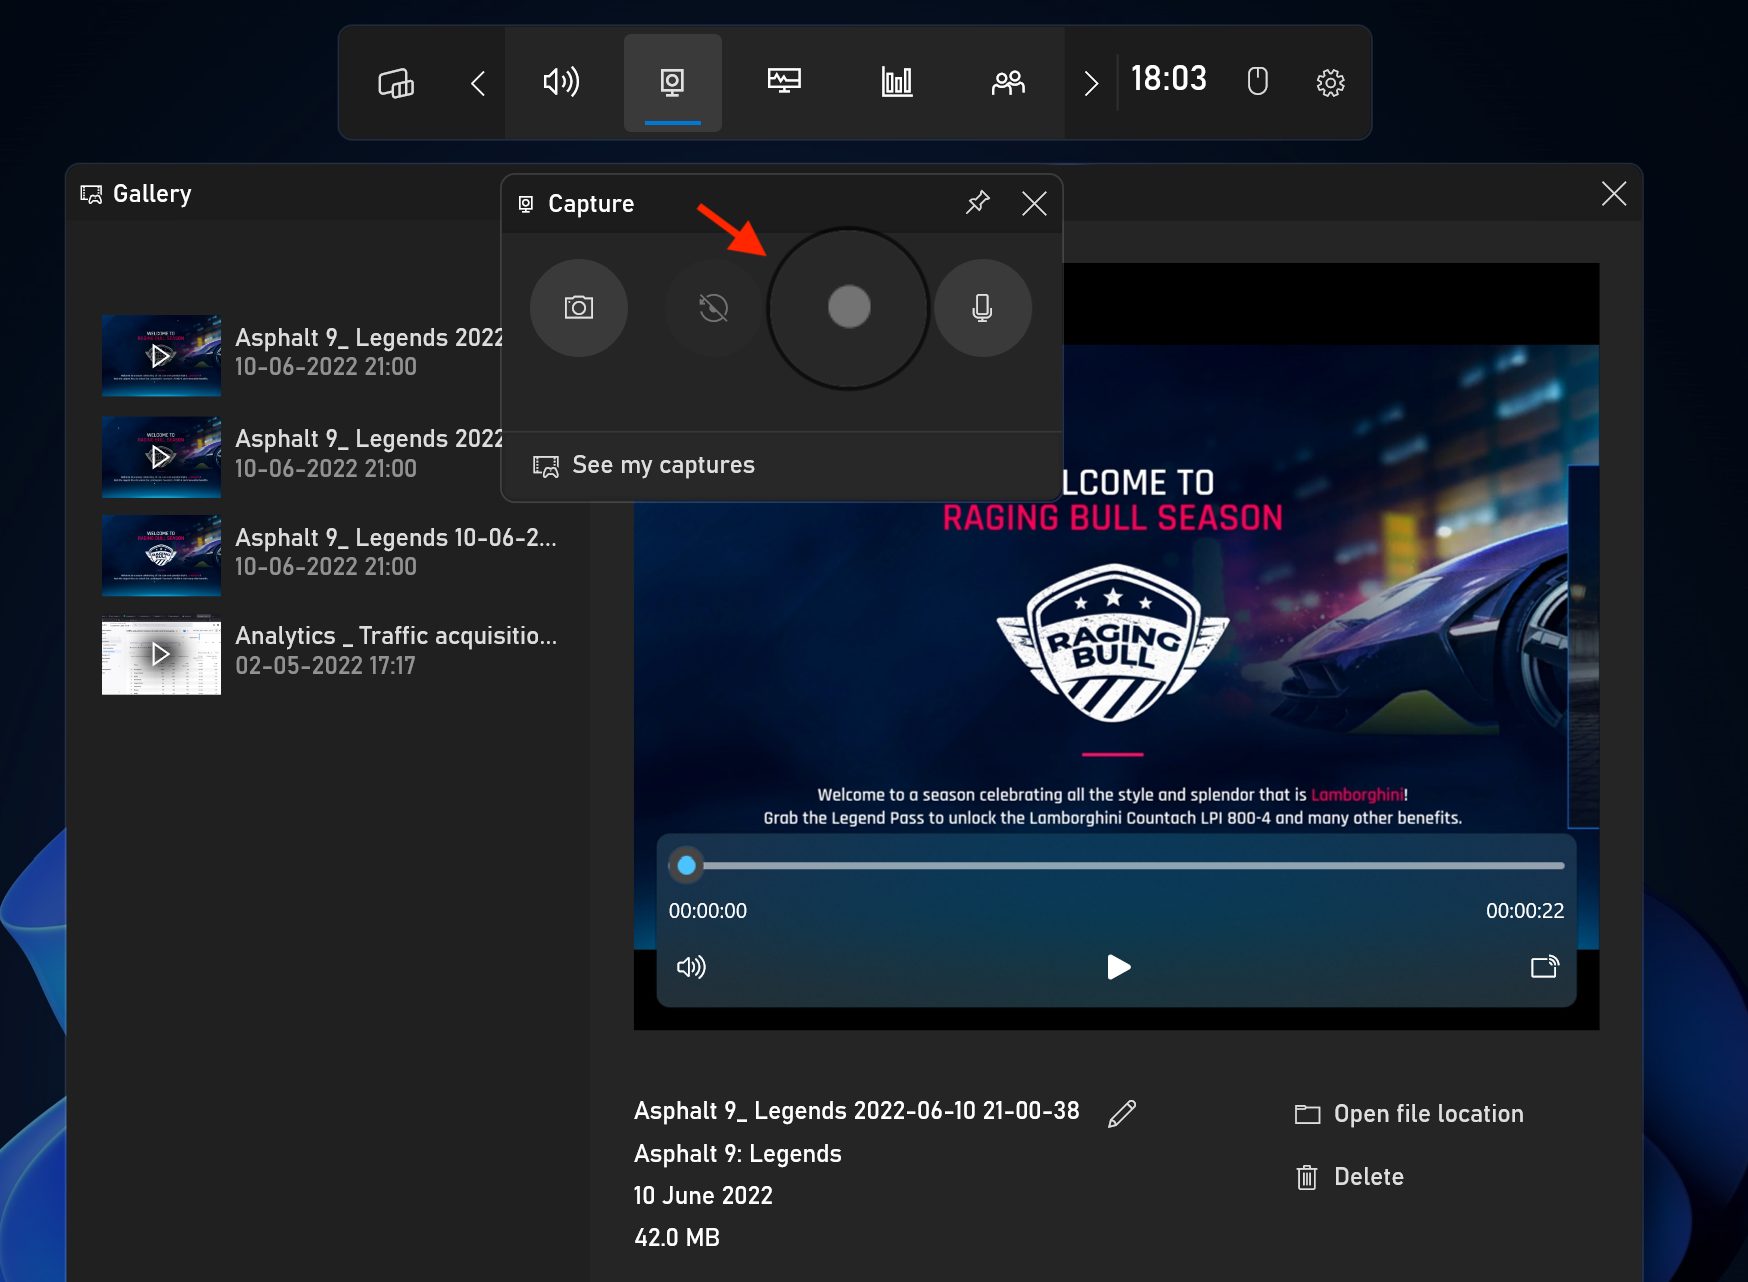
Step 4: When you're ready to record, hit the ‘Record’ button.
Step 5: Once the recording is done, you can access the recording by clicking on the ‘See my Captures’ tab.
1.2 How to screen record on Mac & Windows using Vmaker
Now, let's learn how to record your screen on Mac & Windows using an external screen recording application like Vmaker.
Vmaker is a user-friendly screen recorder that allows you to record your screen and camera with both computer and microphone audio.
It has more advanced features than the built-in recorders and would be a perfect fit for recording professional training videos, tutorials, and product demonstrations.
Follow these simple steps to start recording your screen using Vmaker.
Step 1: Head over to Vmaker's official page and create an account.
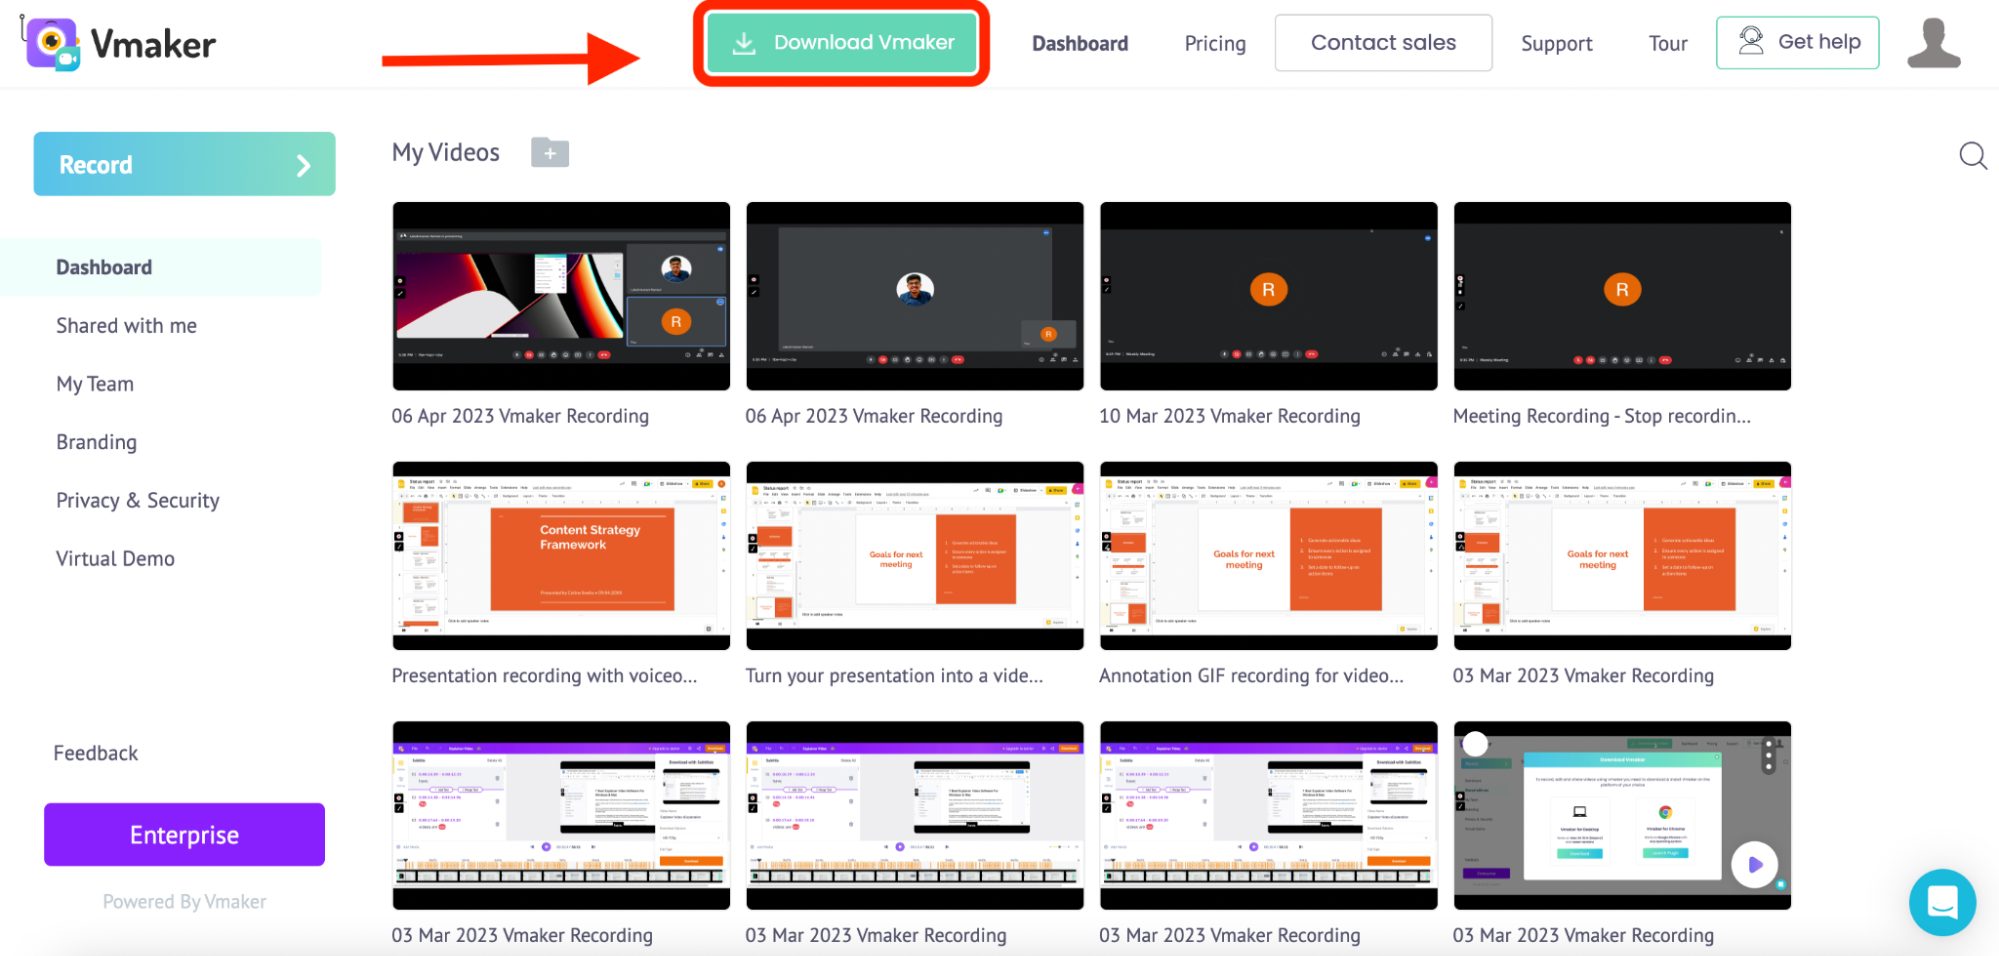
Once you've logged in, you can click on the 'Download Vmaker' button and download Vmaker.
It’s available for download in three formats:
- As a Mac application
- As a Windows application
- As a Chrome Extension
Download a format that’s compatible with your device and proceed.
Step 2: The next step is to launch Vmaker on your Mac device and customise your recording preferences.
Here are a few basic recording preferences that you should customize:
- Recording Mode - Choose whether you want to record your screen, webcam, or both screen and webcam simultaneously.
- Recording Area - Choose whether you want to record just your current tab or your entire screen.
- Audio Inputs - Enable or disable computer audio and microphone audio based on your requirements.
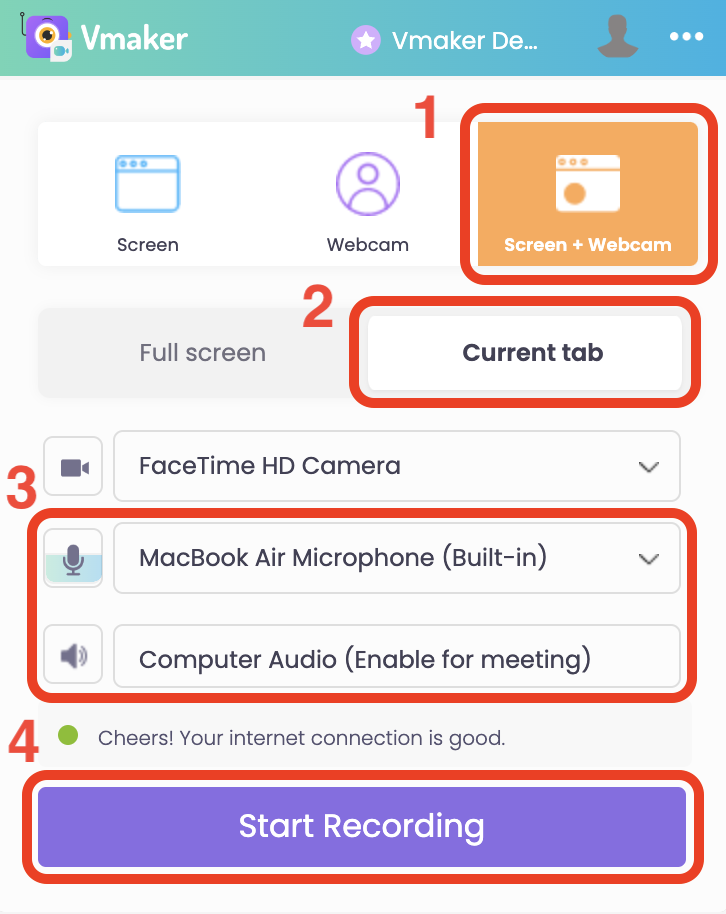
Once you’ve customized your recording preferences, you can go ahead and hit the 'Start Recording' button. A timer starts, and within a count of three, your screen will start recording.
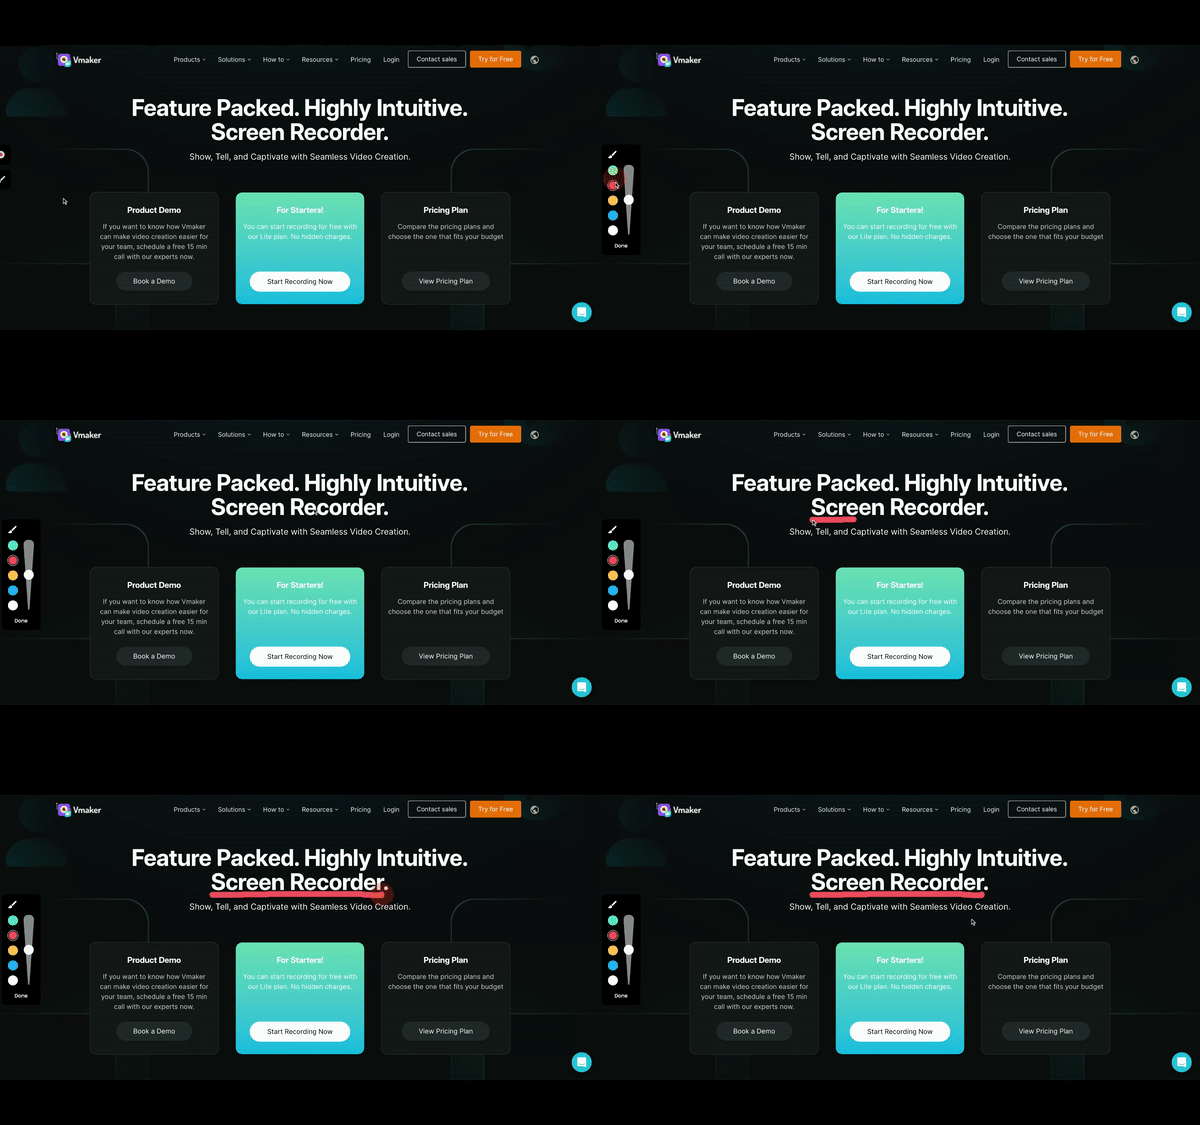
Additionally, you can also make use of the drawing tools while recording your screen.
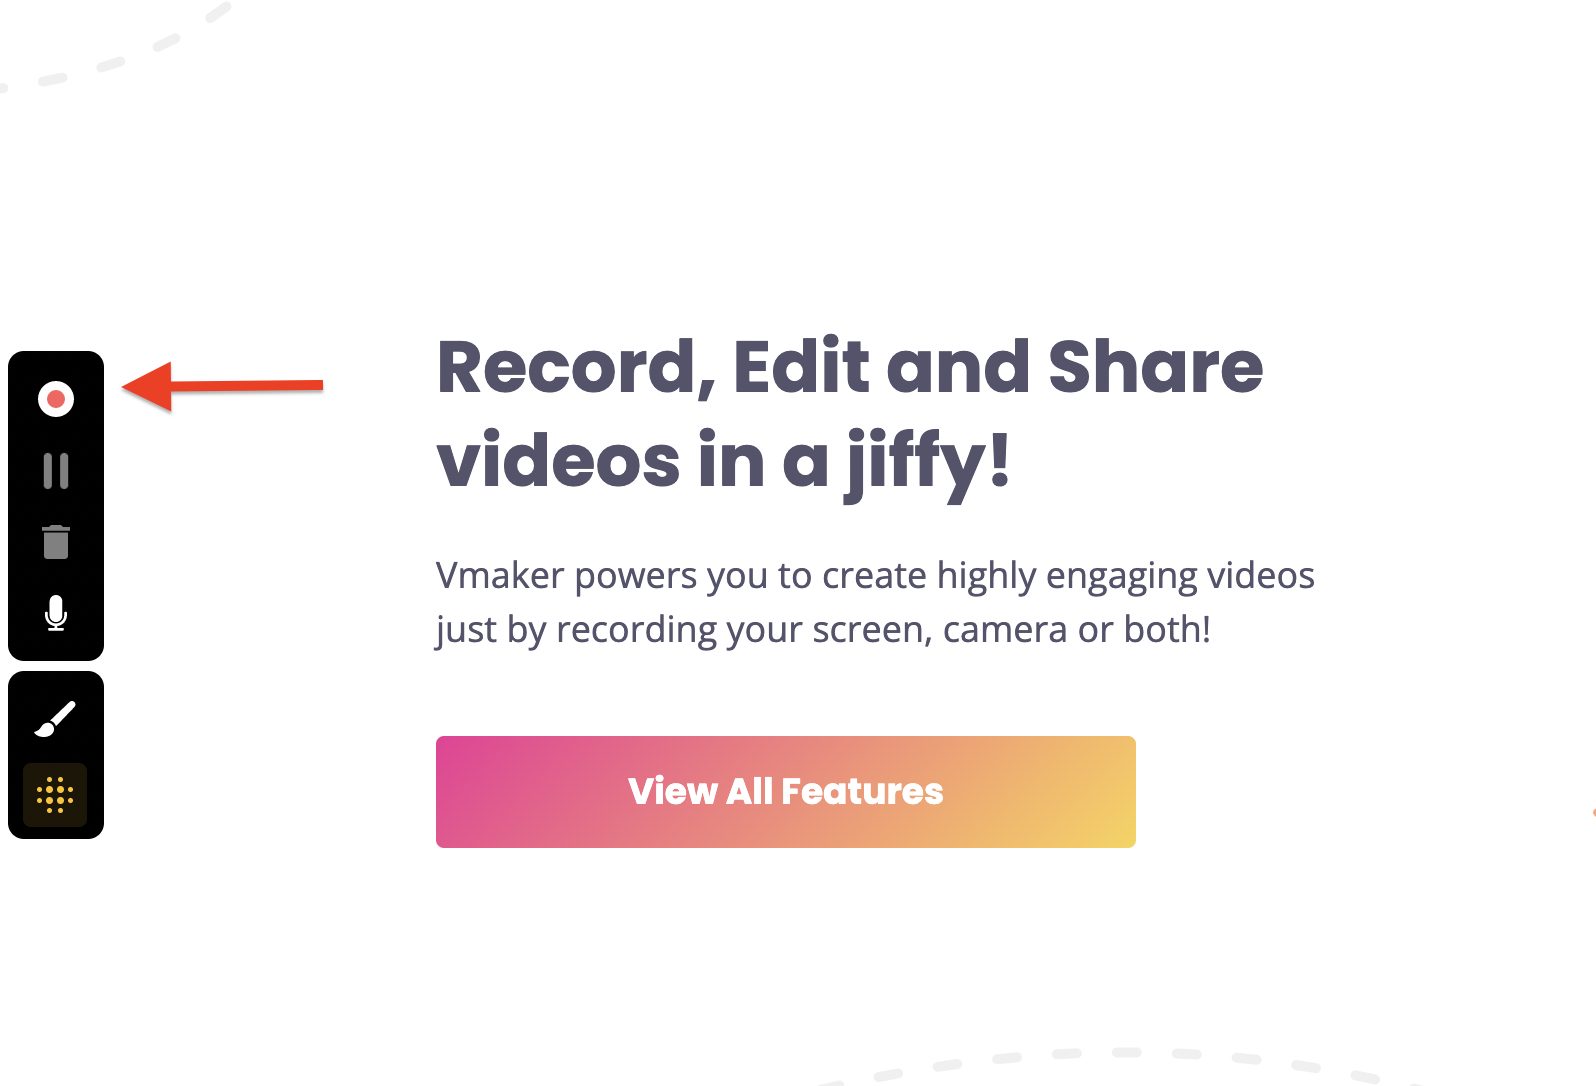
Just click on the brush icon on the left corner of your screen, choose the colour you want to annotate on and start annotating.
Step 3: When you’re done with the recording, you can click on the red dock button on the left to stop the recording.
Once the recording stops, you will directed to Vmaker’s player page from where you can download, edit, or share the video with everyone.
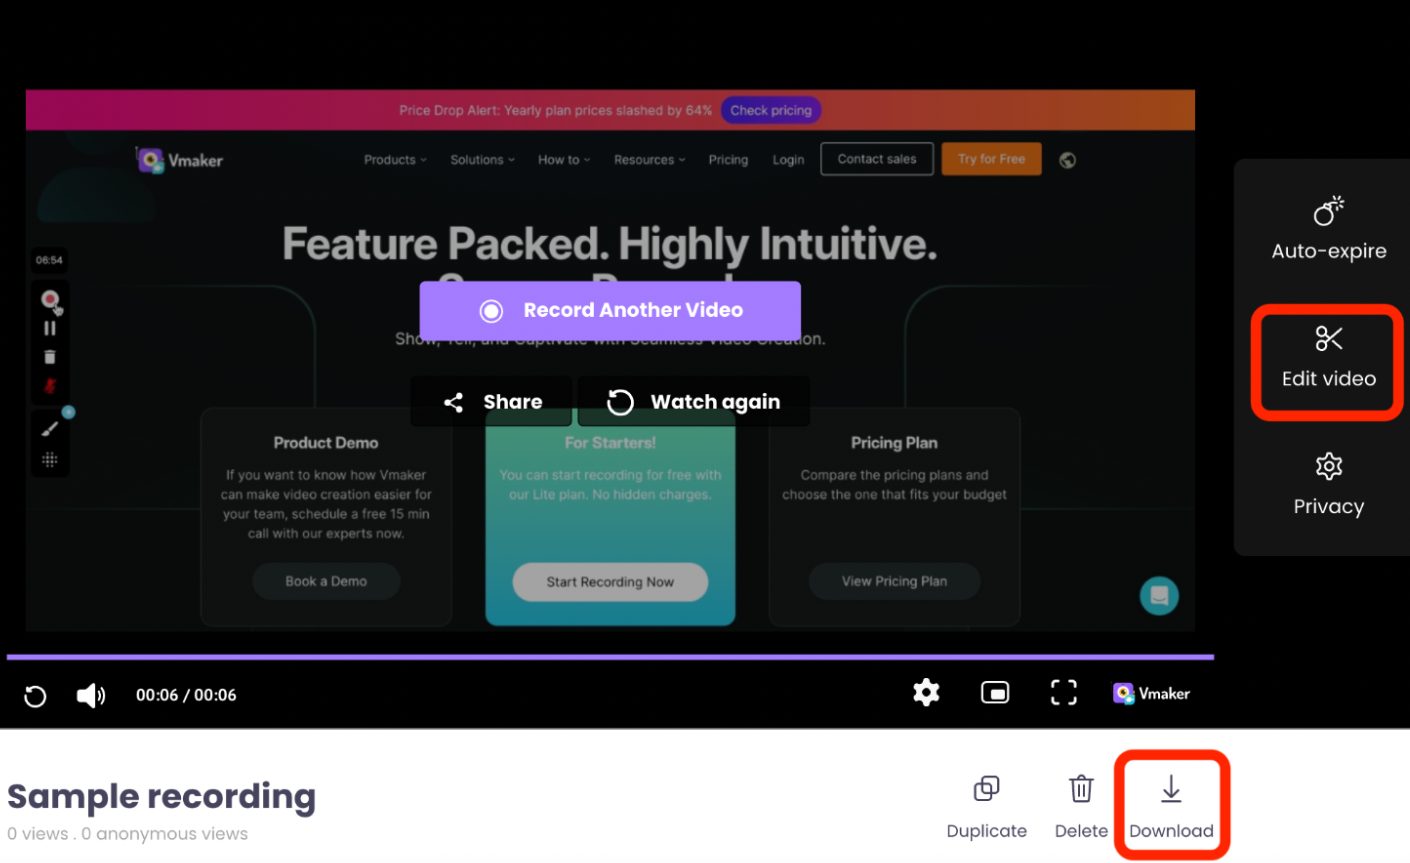
If you wish to edit the video, click on the ‘Edit’ button. You will be taken to Vmaker’s built-in editor where you can trim, crop, rotate, and resize your videos.
- Trim - To trim your videos, click on the ‘trim’ icon and cut out the unnecessary portions with the help of the cursor.
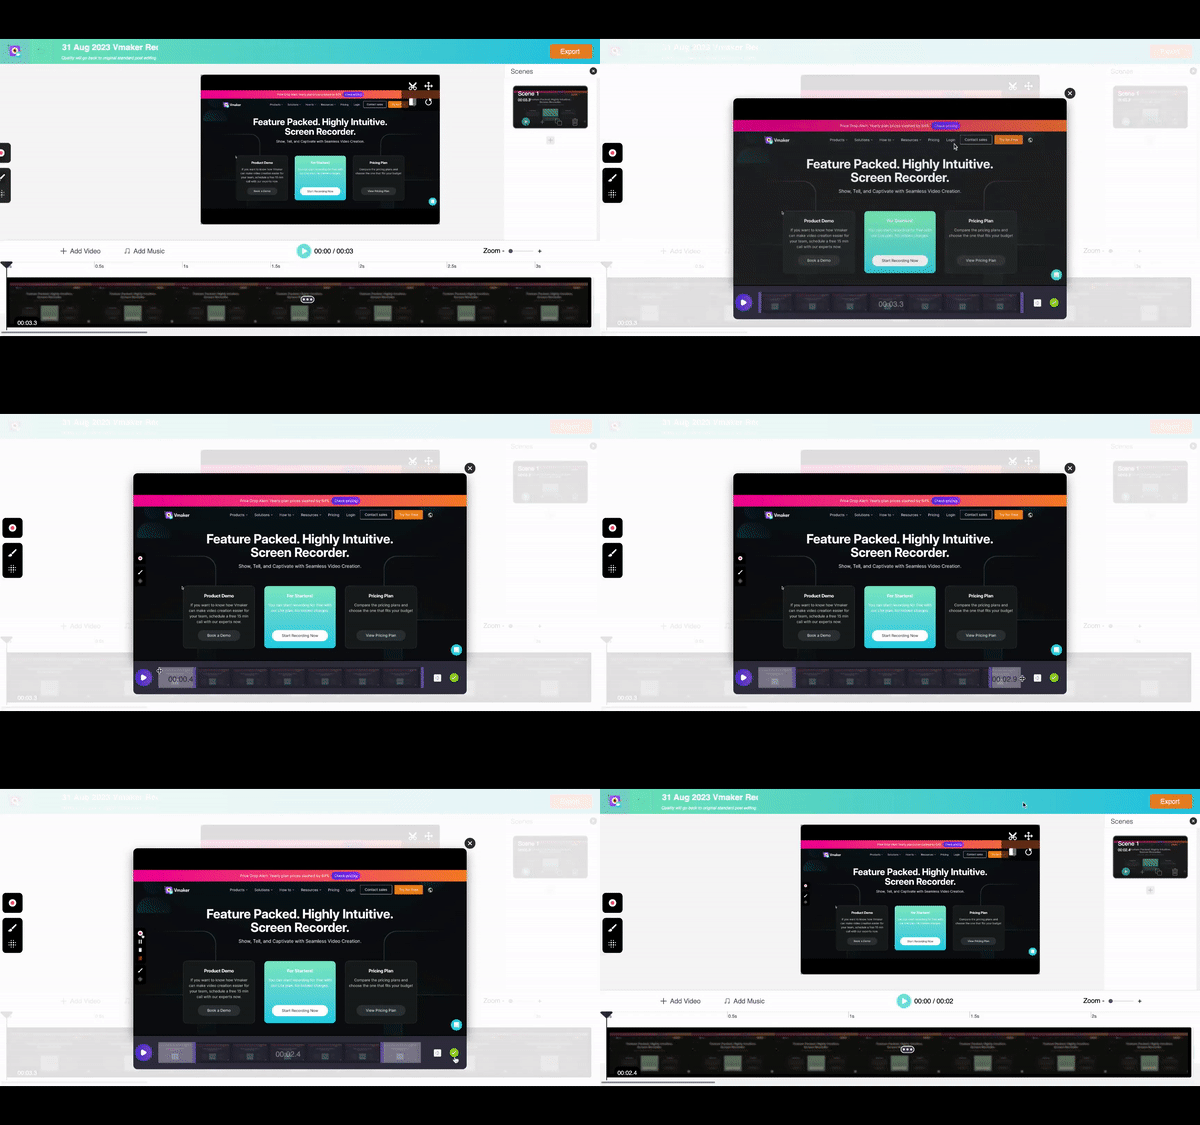
When you’re done, you can click on the ‘green tick mark’ and save the changes.
- Resize - To resize your videos, click on the ‘resize’ icon and drag the video to make it fit into your required dimension.
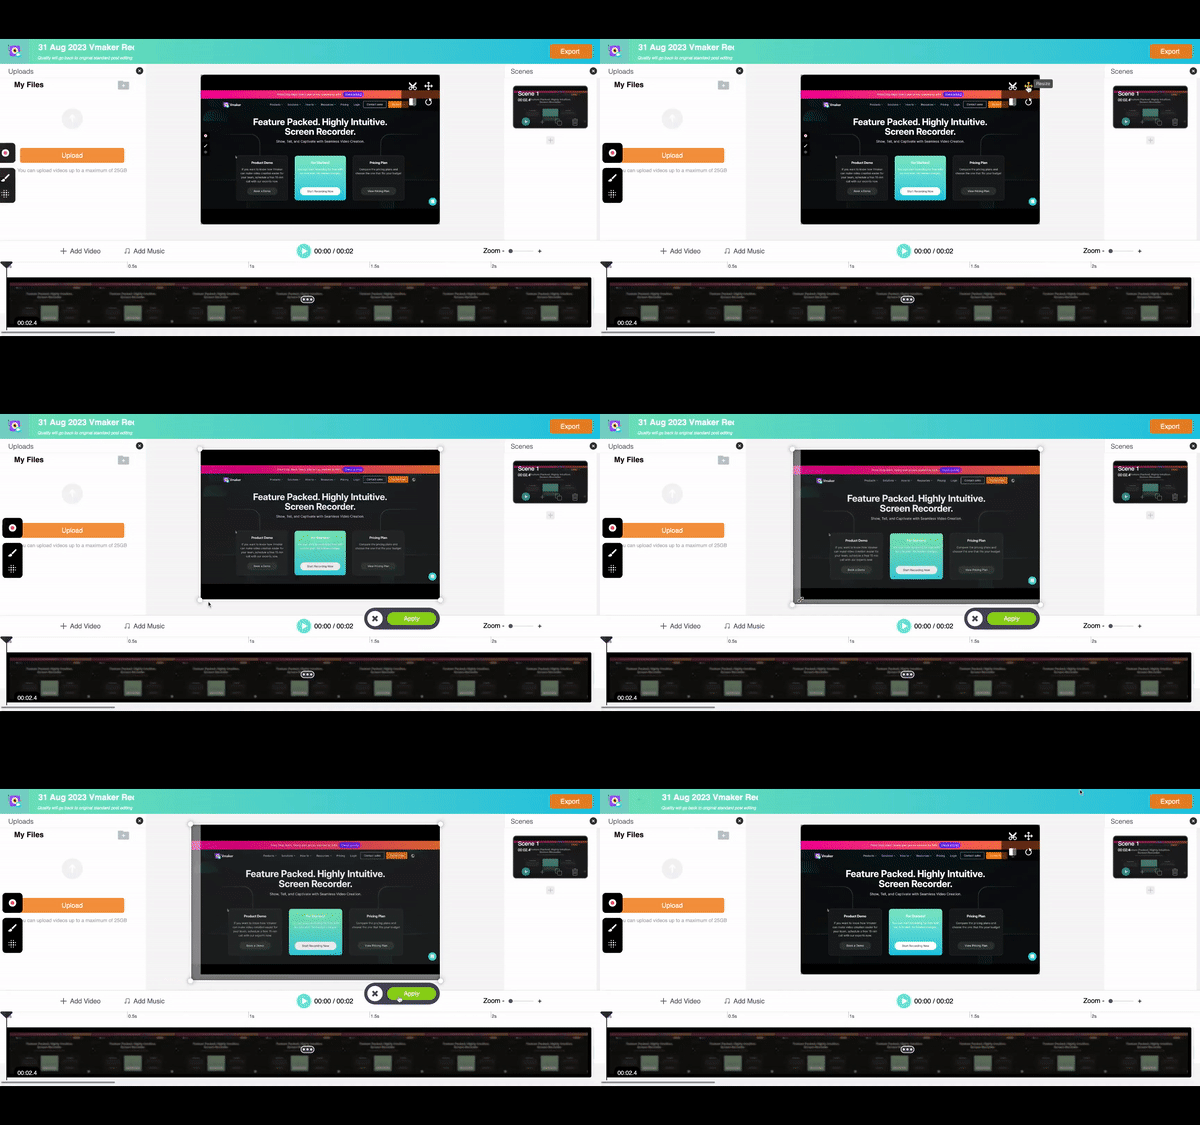
When you’re done, you can click on the ‘apply’ button to save the changes.
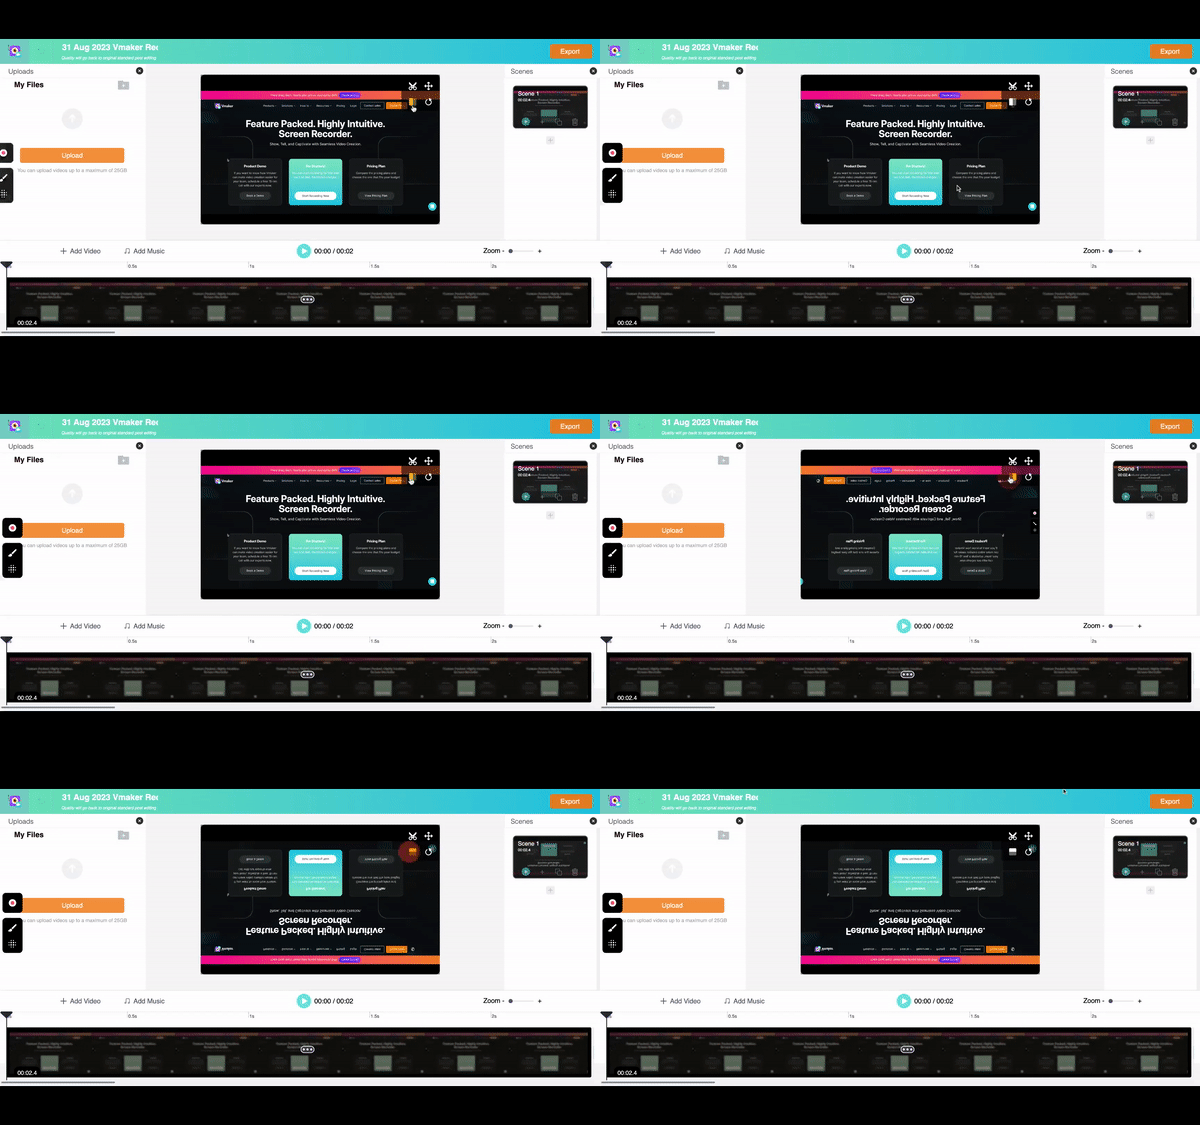
- Flip - To flip your videos, click on the ‘flip’ icon, and flip the videos to your desired requirements. This option can be pretty useful when you’re recording POV videos.
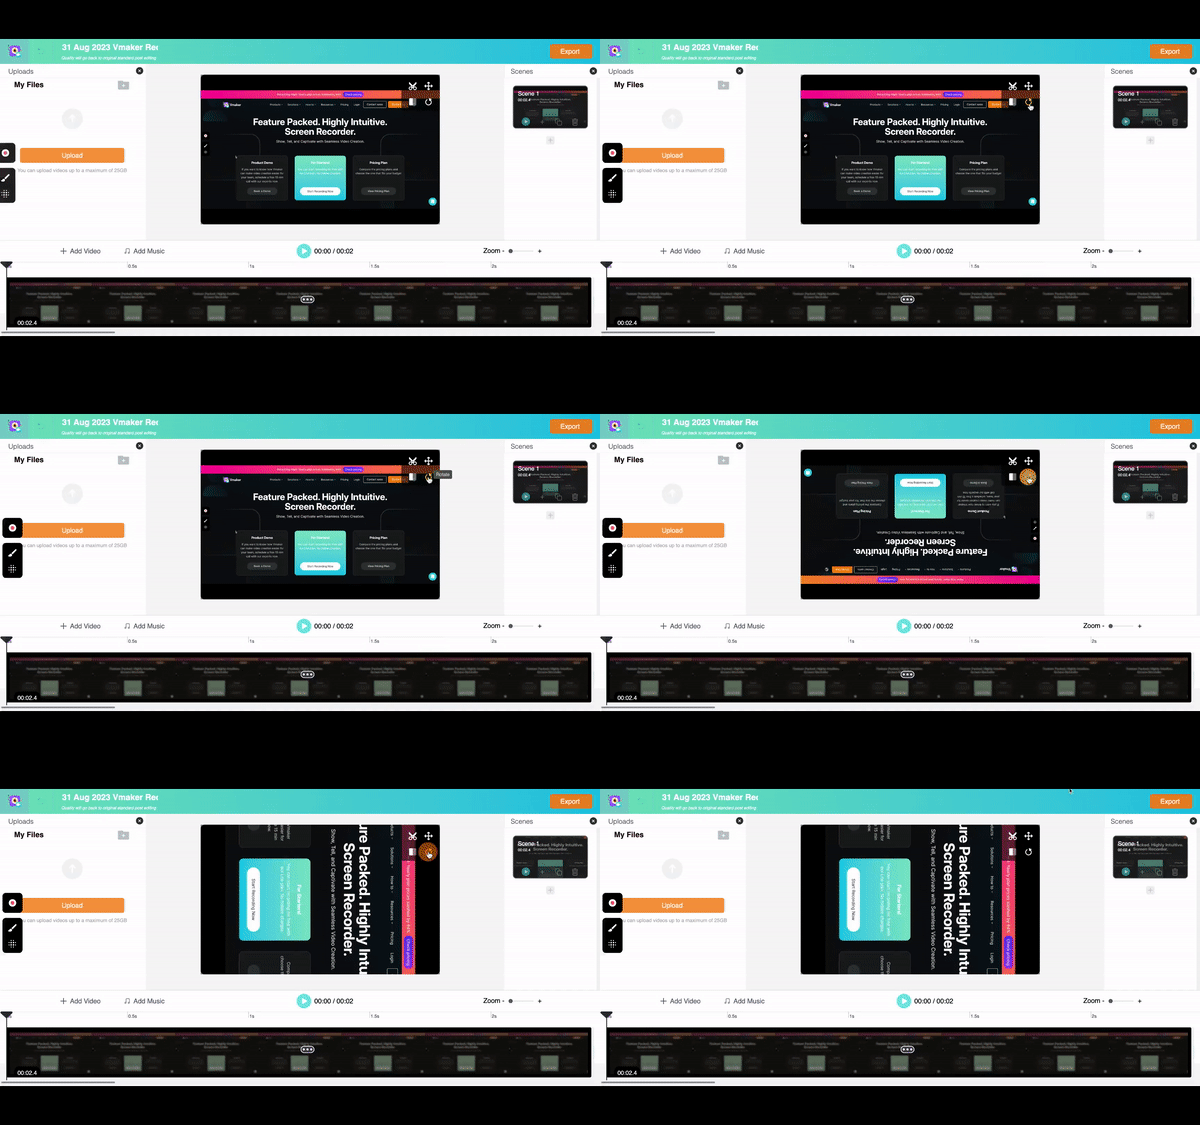
- Rotate - To rotate your videos, click on the ‘rotate’ icon and rotate the video horizontally or vertically.
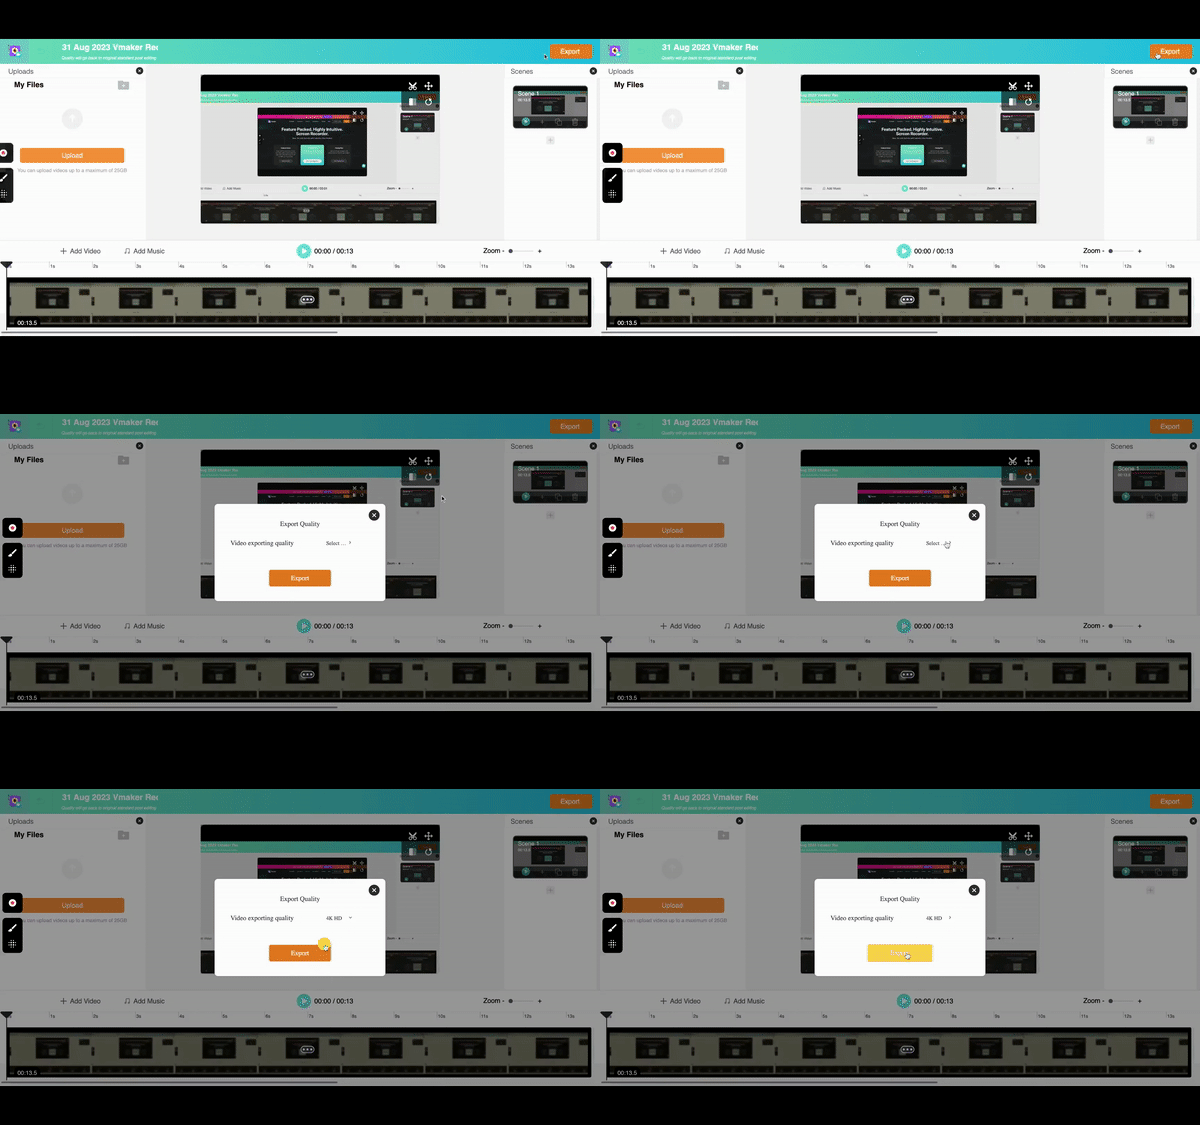
Step 4: Once you’re done with the editing process, you can click on the ‘Export’ button on the top right corner of your screen, and export the recording in MP4 file format.
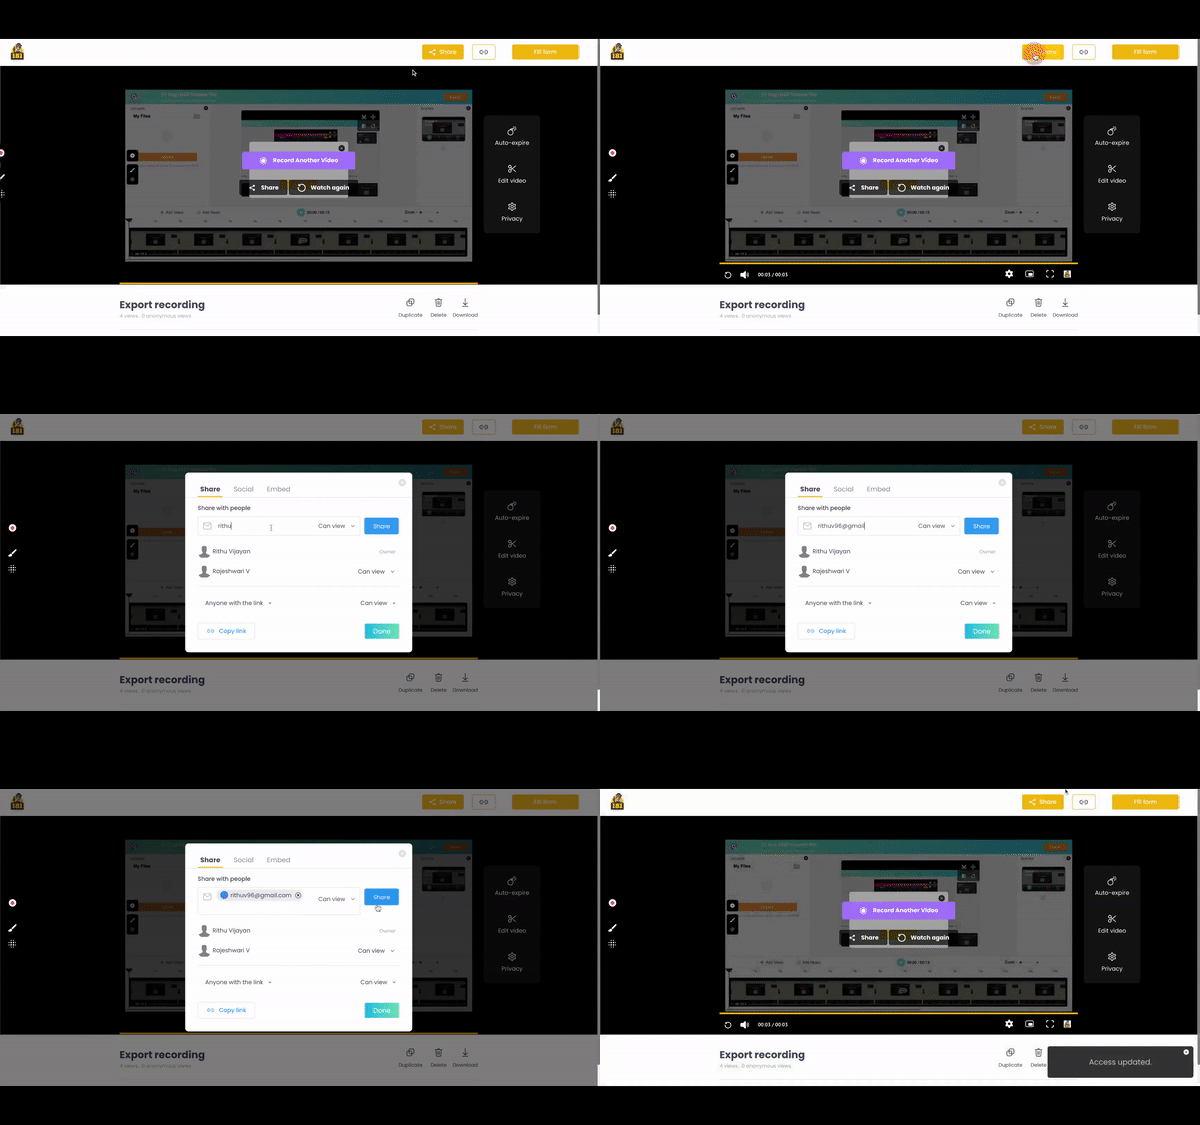
Step 5: After exporting your video, you can share your videos with others.
Note: If you don't like the idea of installing a screen recording application to your local device, you can try using Vmaker’s screen recorder Chrome extension. It doesn't suck up your storage space, and can easily be downloaded from the Chrome Web Store.
Now that we have learned how to screen record on both Mac & Windows, let’s go ahead and learn how to screen record on iPhone, iPad & Android devices.
2. How to Screen Record on iPhone & iPad
Just like all the above devices, iPhones and iPads also come with a native screen recording application.
However, if you wish to use advanced iOS screen recorders, you can download any one of the third-party iOS screen recorder applications like Record It, Go Record, or Screen Recorder +.
Let’s quickly explore both of these methods below.
2.1 How to record your screen on iPhone using the built-in iOS Recorder?
First, let’s learn how to screen record on iPhone & iPad using the built-in iOS recorder.
Step 1: Swipe down from the top-right corner (or swipe up from the bottom, depending on your iOS version) and tap on the ‘screen recorder’ icon.
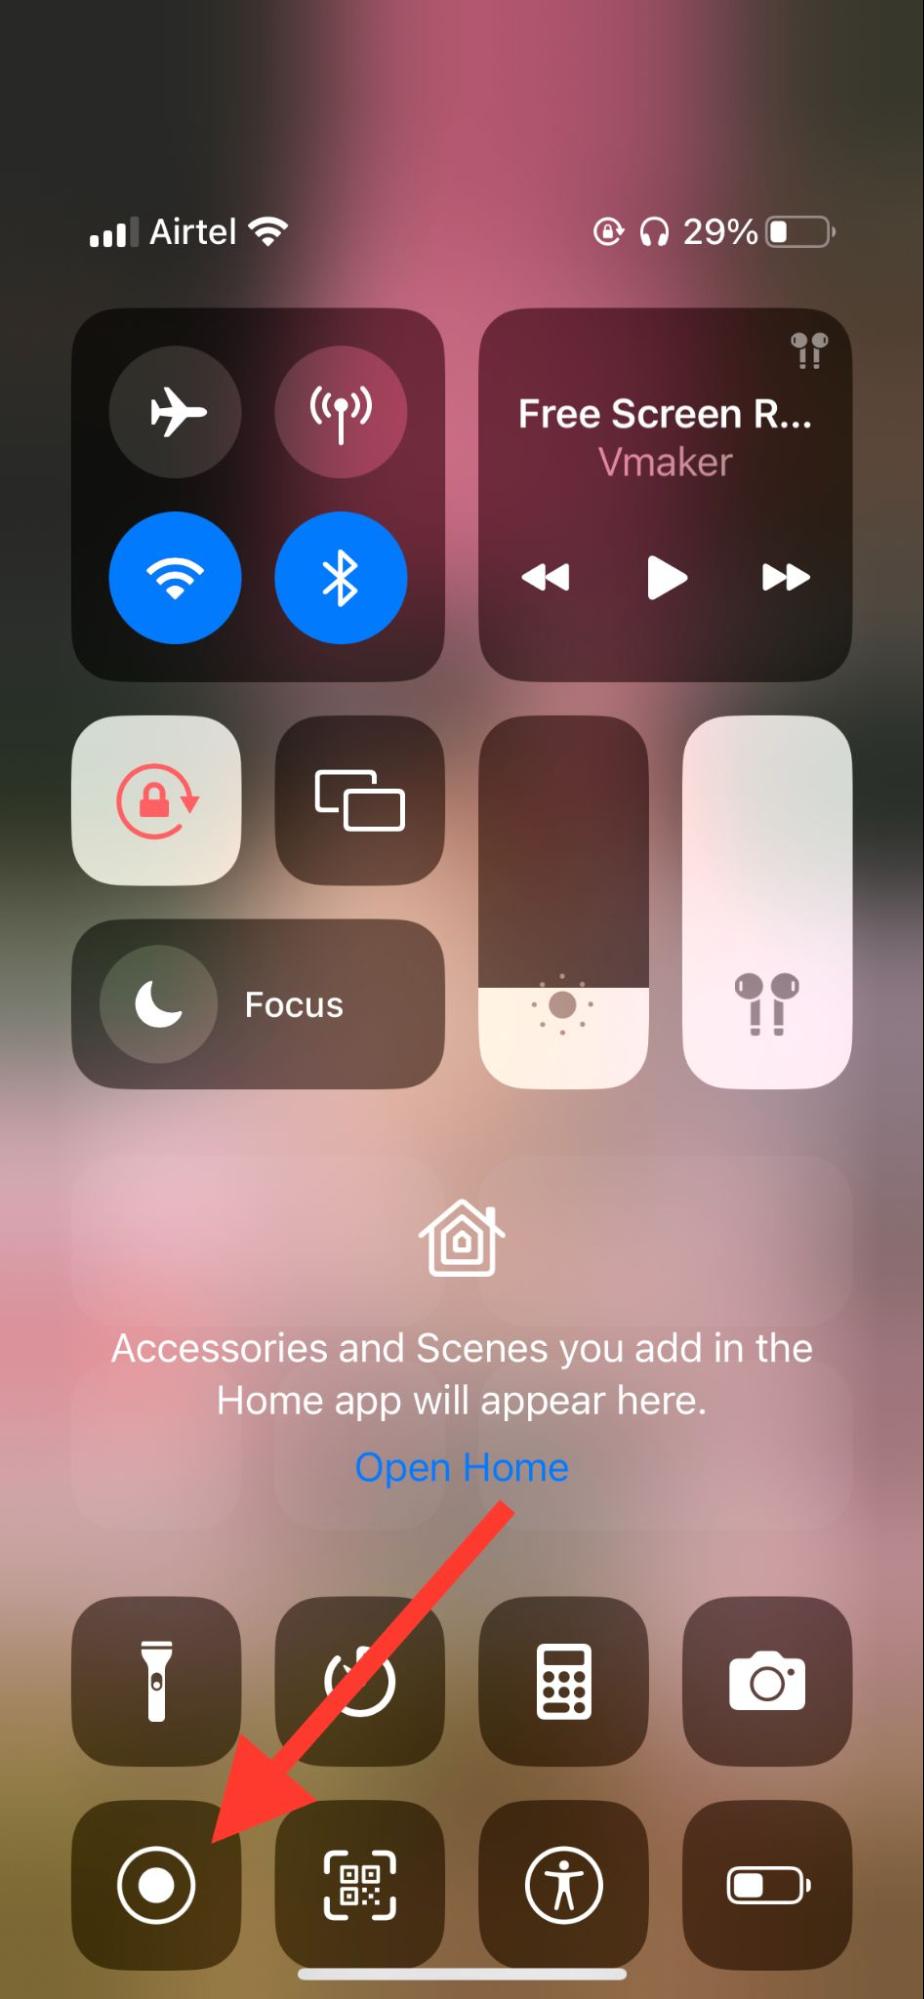
If you don’t have the screen recorder icon in your notification shade, you can enable it by customizing your settings.
- > Just go to 'Settings' on your iPhone and select the 'Control Centre’ tab. Then, choose 'Customise Controls.'
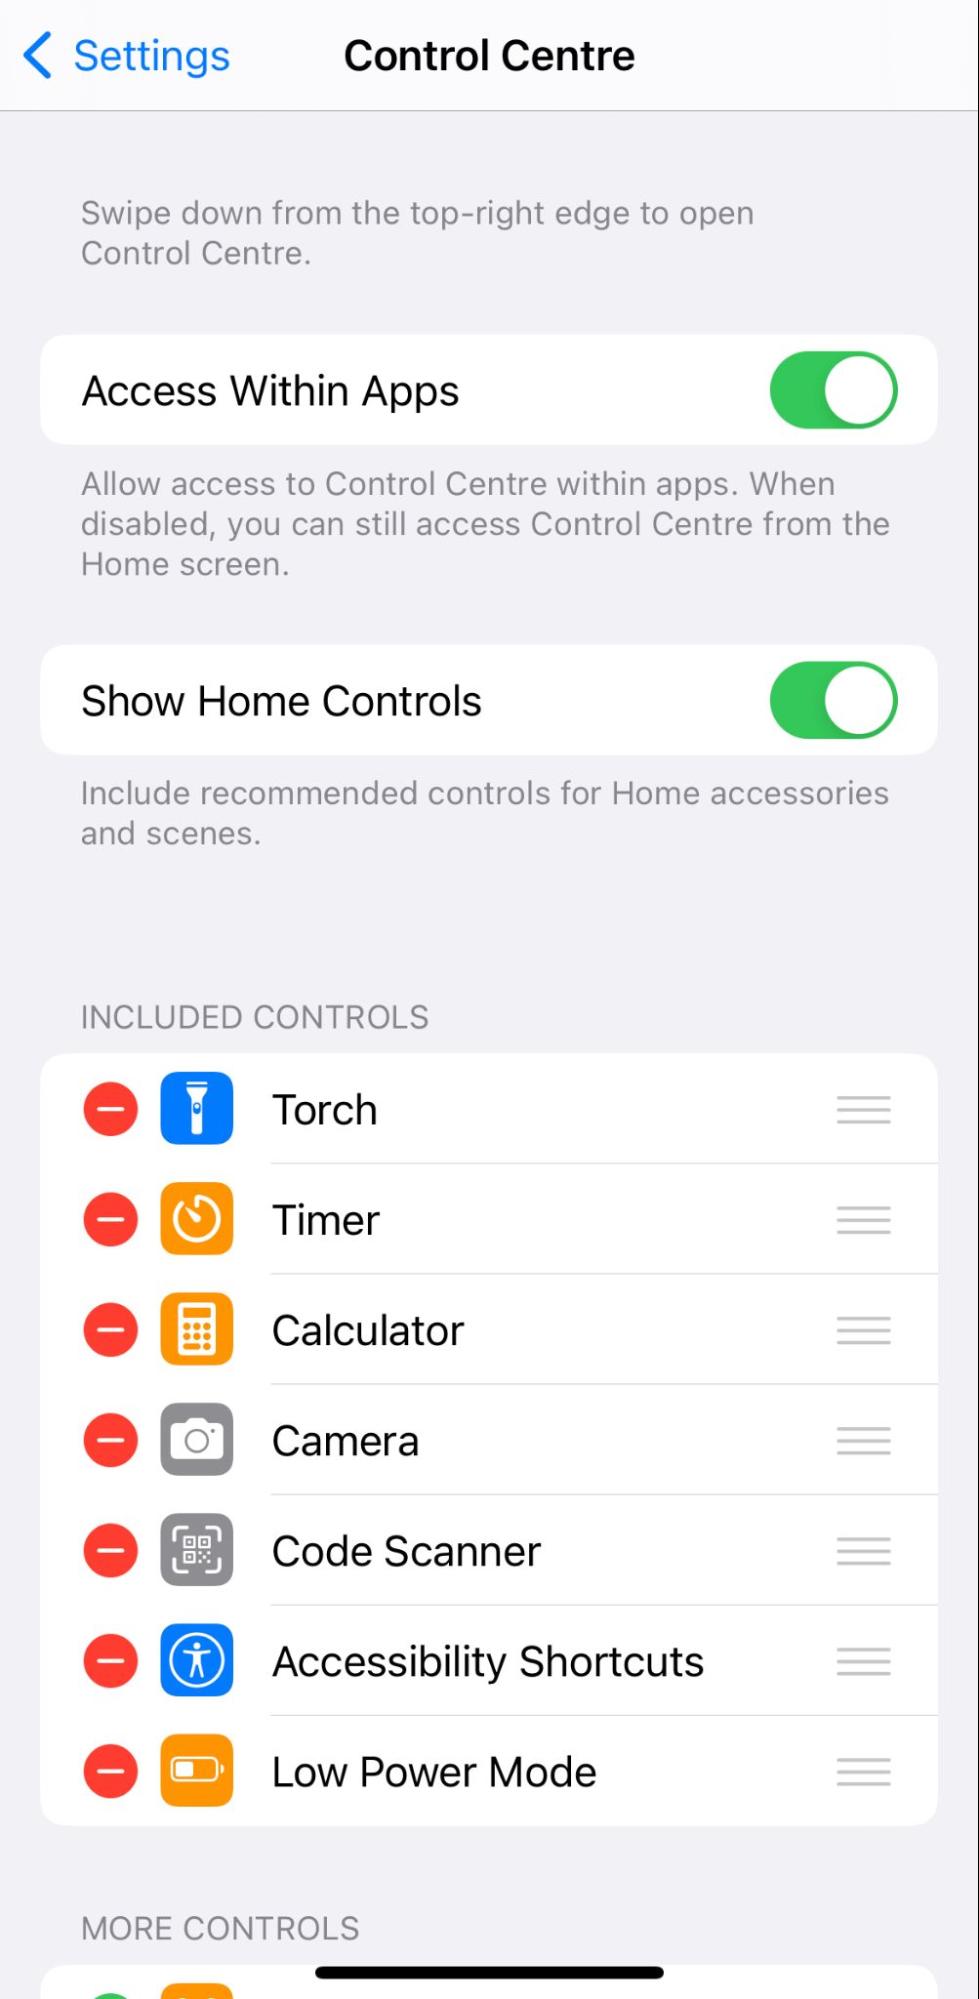
- > Search for the screen recording option and add it to the list.
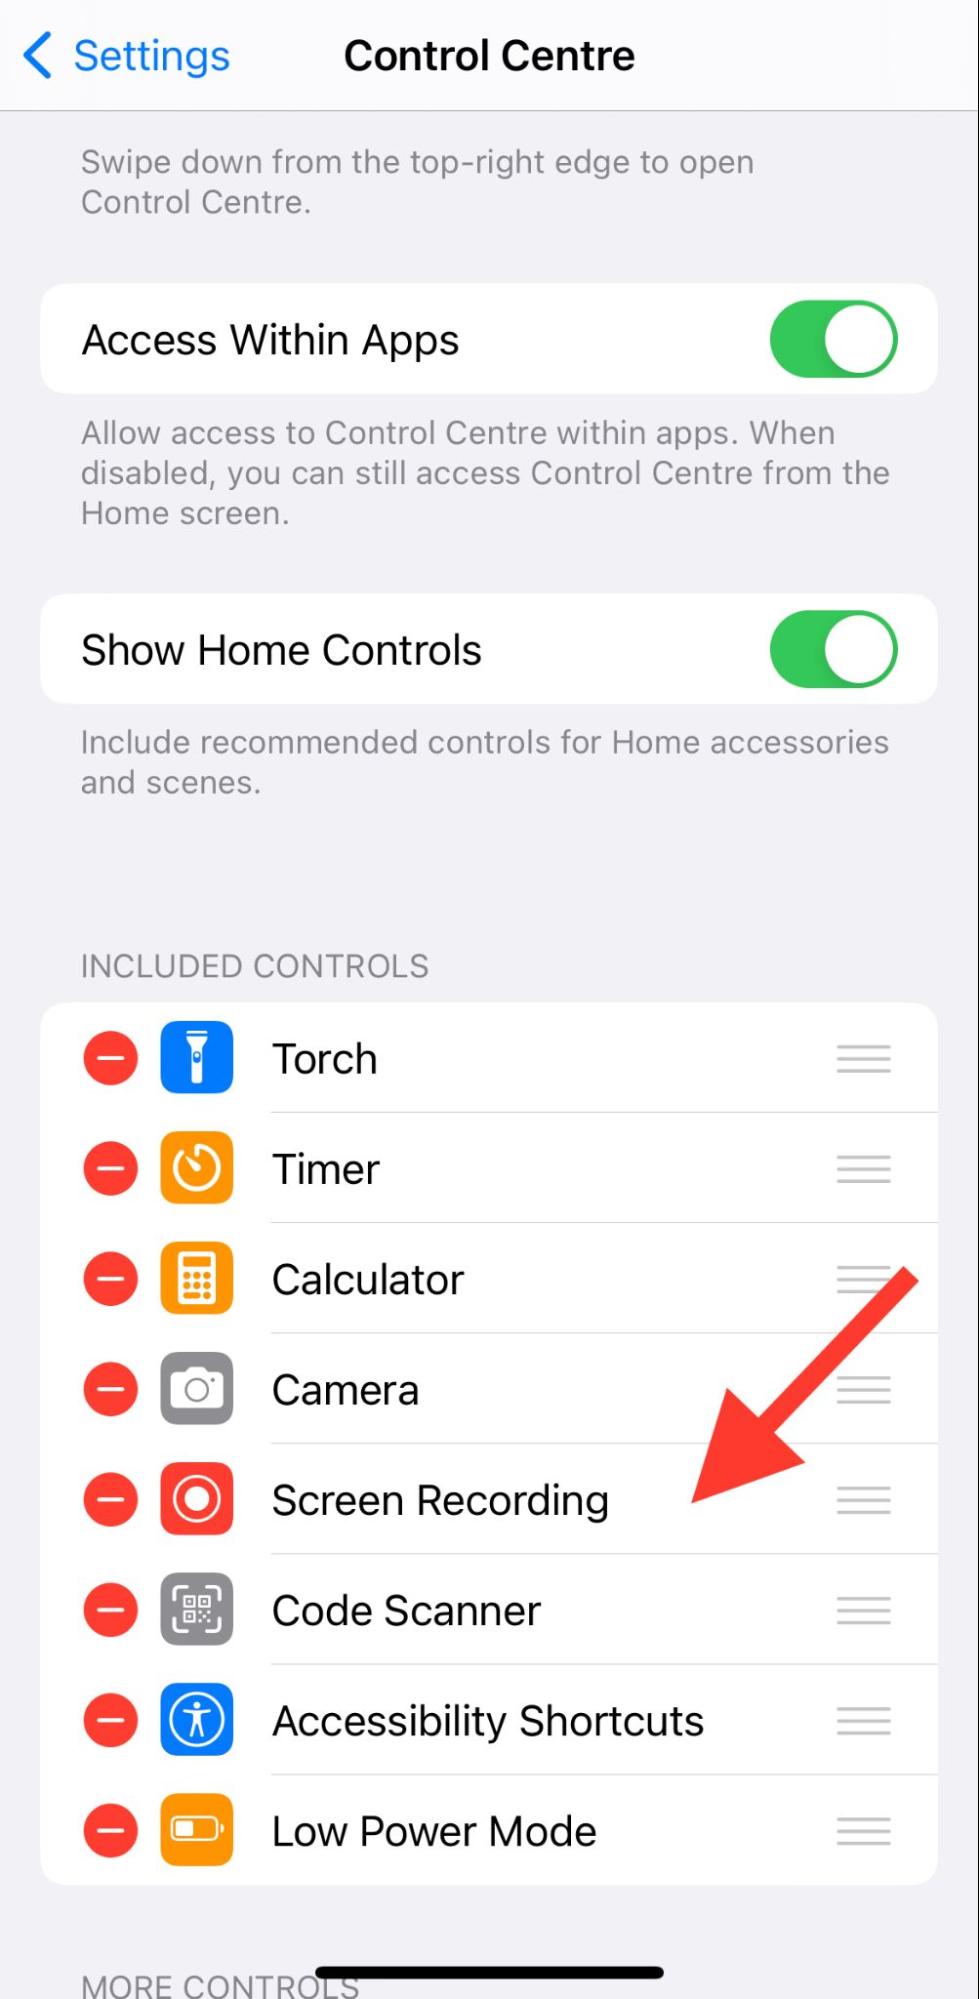
- > As soon as you add the screen recording option to the list, you will be able to access the screen recorder icon in your notification shade. Tap on it and start recording your screen.
Step 2: When you’re about to finish, click on the 'Red Recording Timer' at the top to stop the recording.
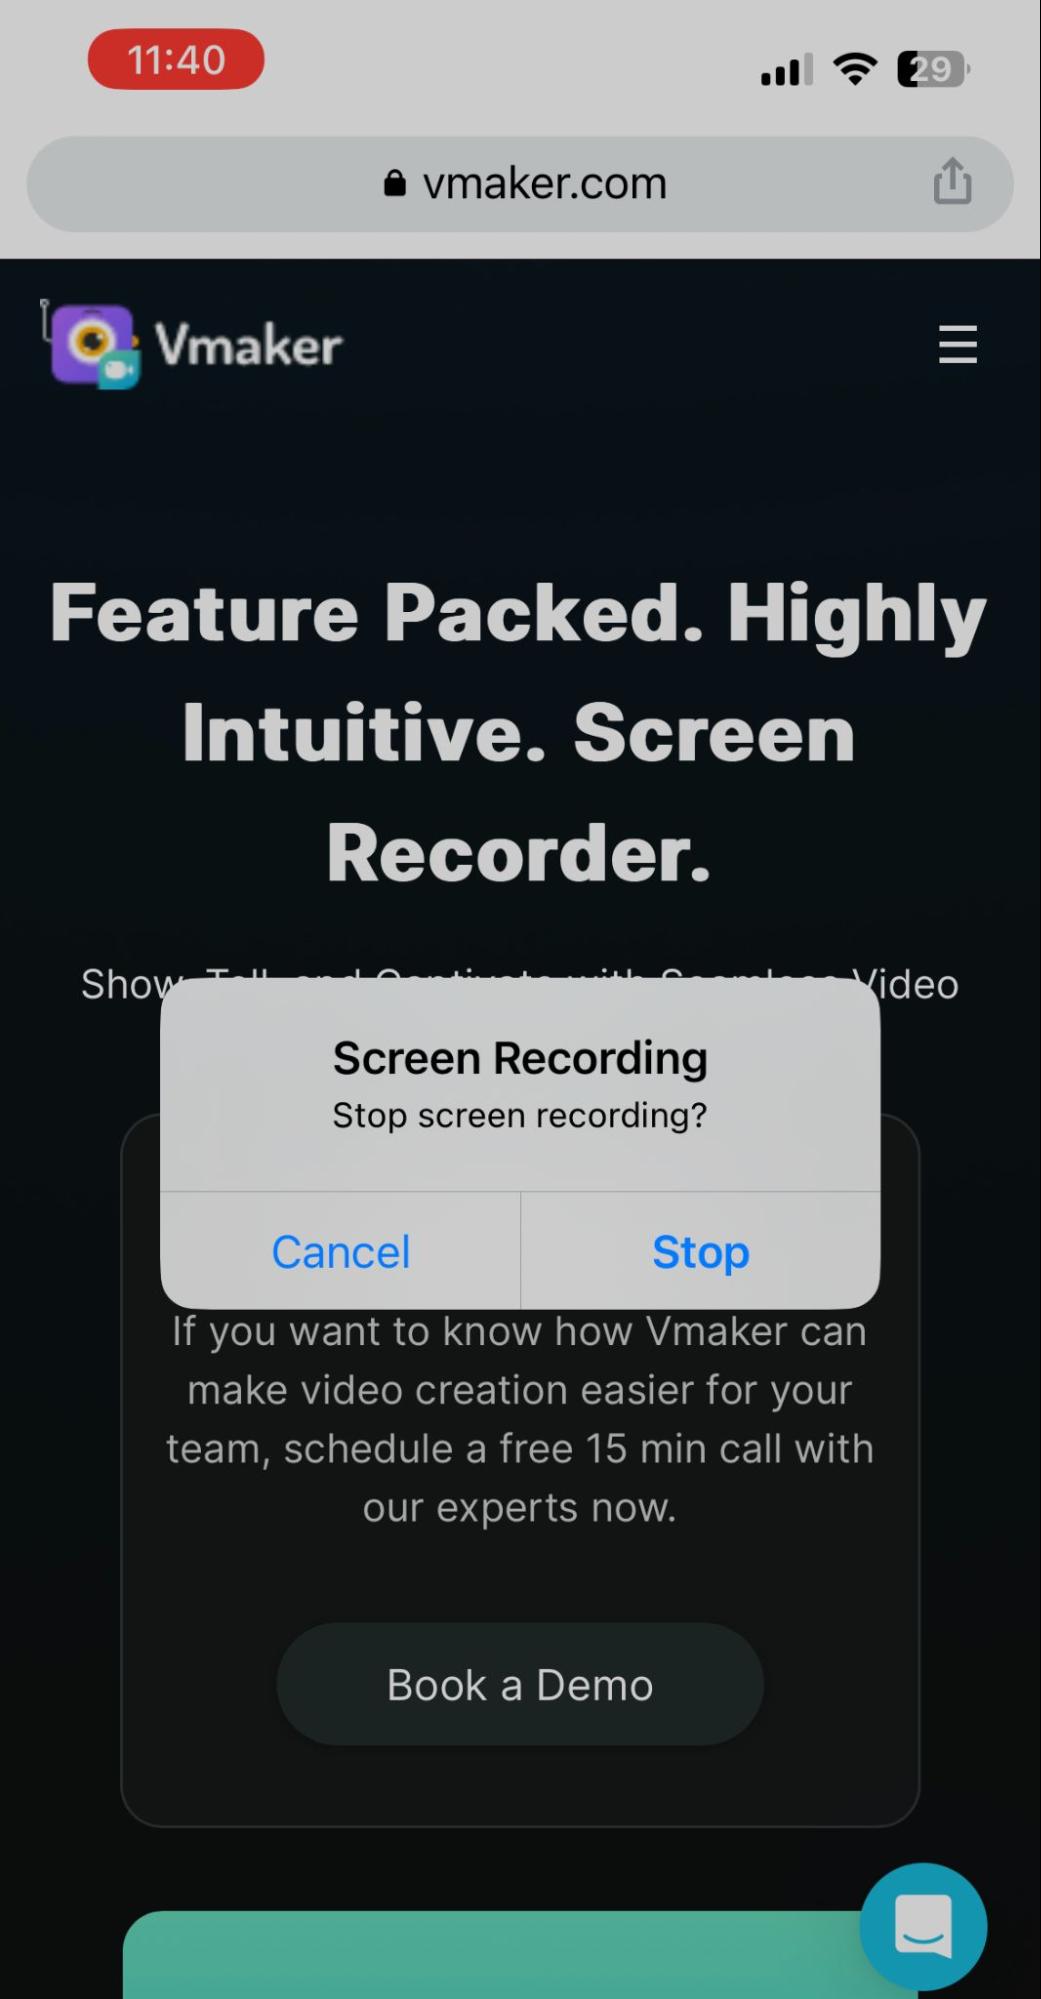
The recordings can then be accessed from the Photos App.
2.2 Third-Party iOS Screen Recorder
Next, let’s explore how to record your screen on your iPhone/iPad using a third-party application called ‘Record It.’
i) How to record your screen on iPhone using Record It
Just follow these simple instructions to get started.
Step 1: Download the ‘Record It’ application from the App Store.
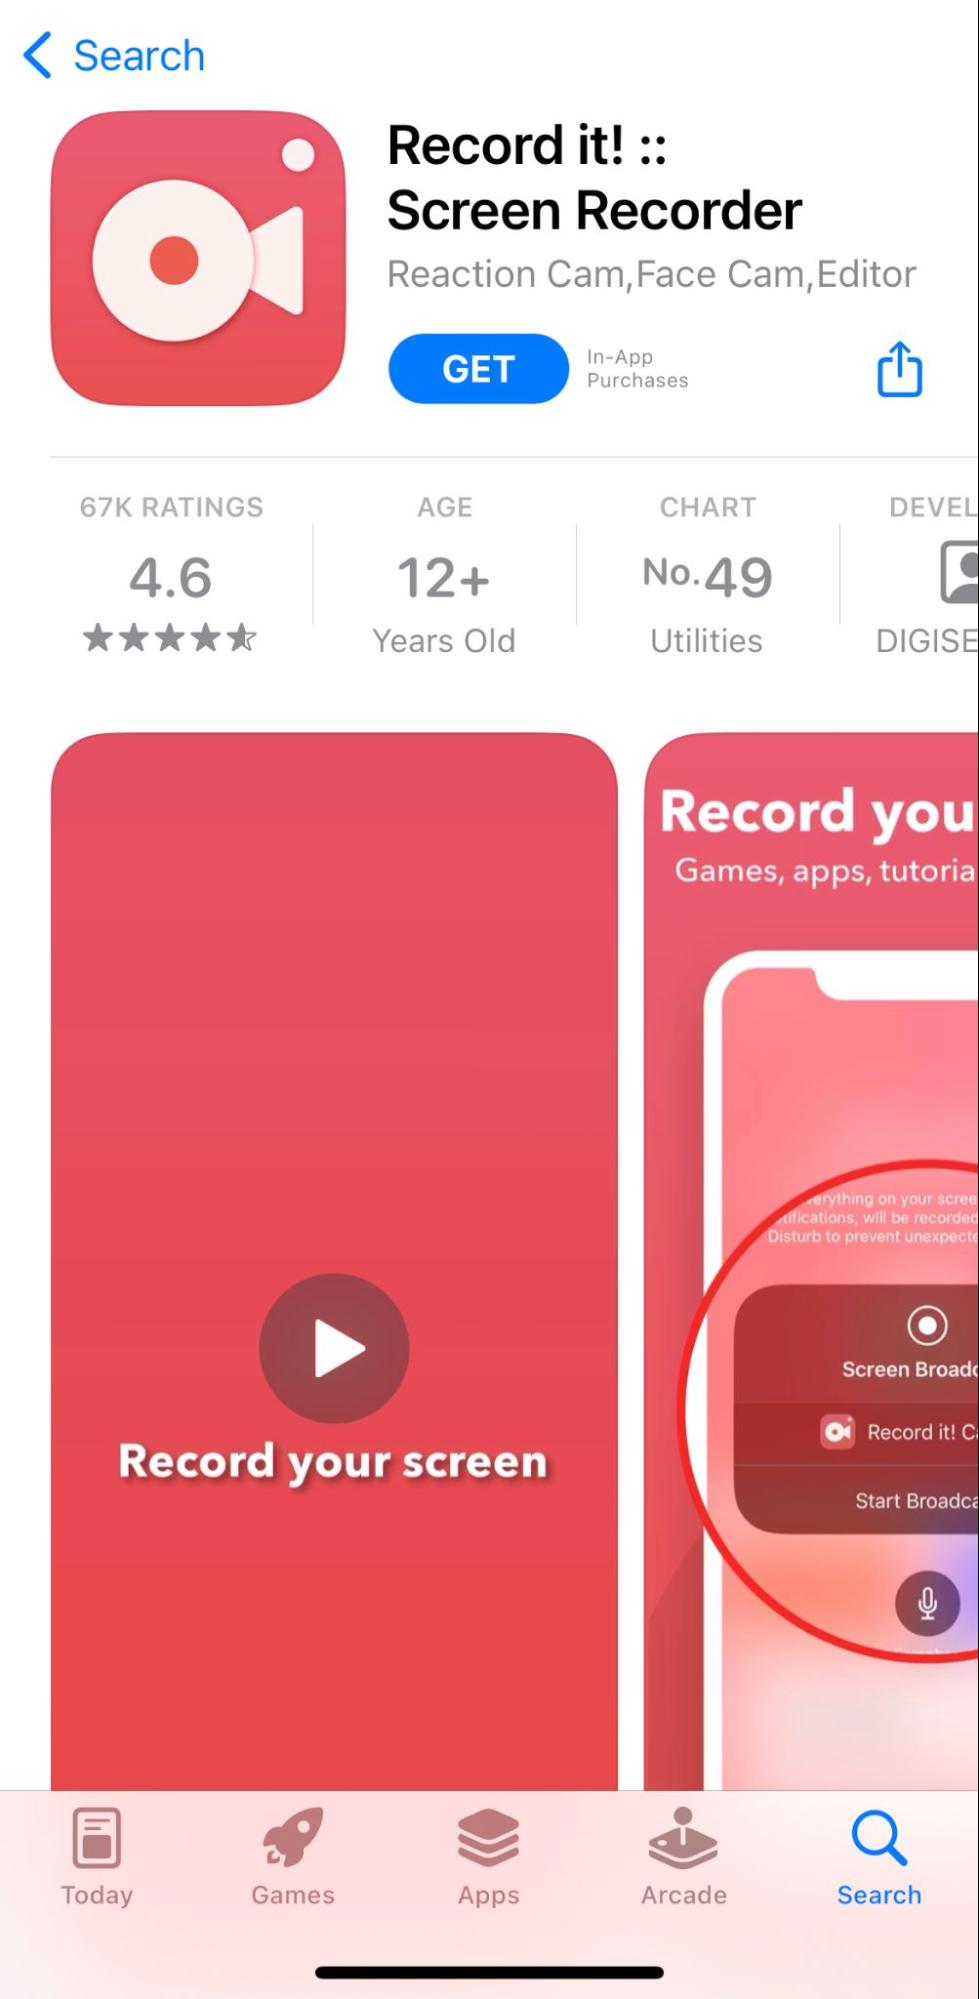
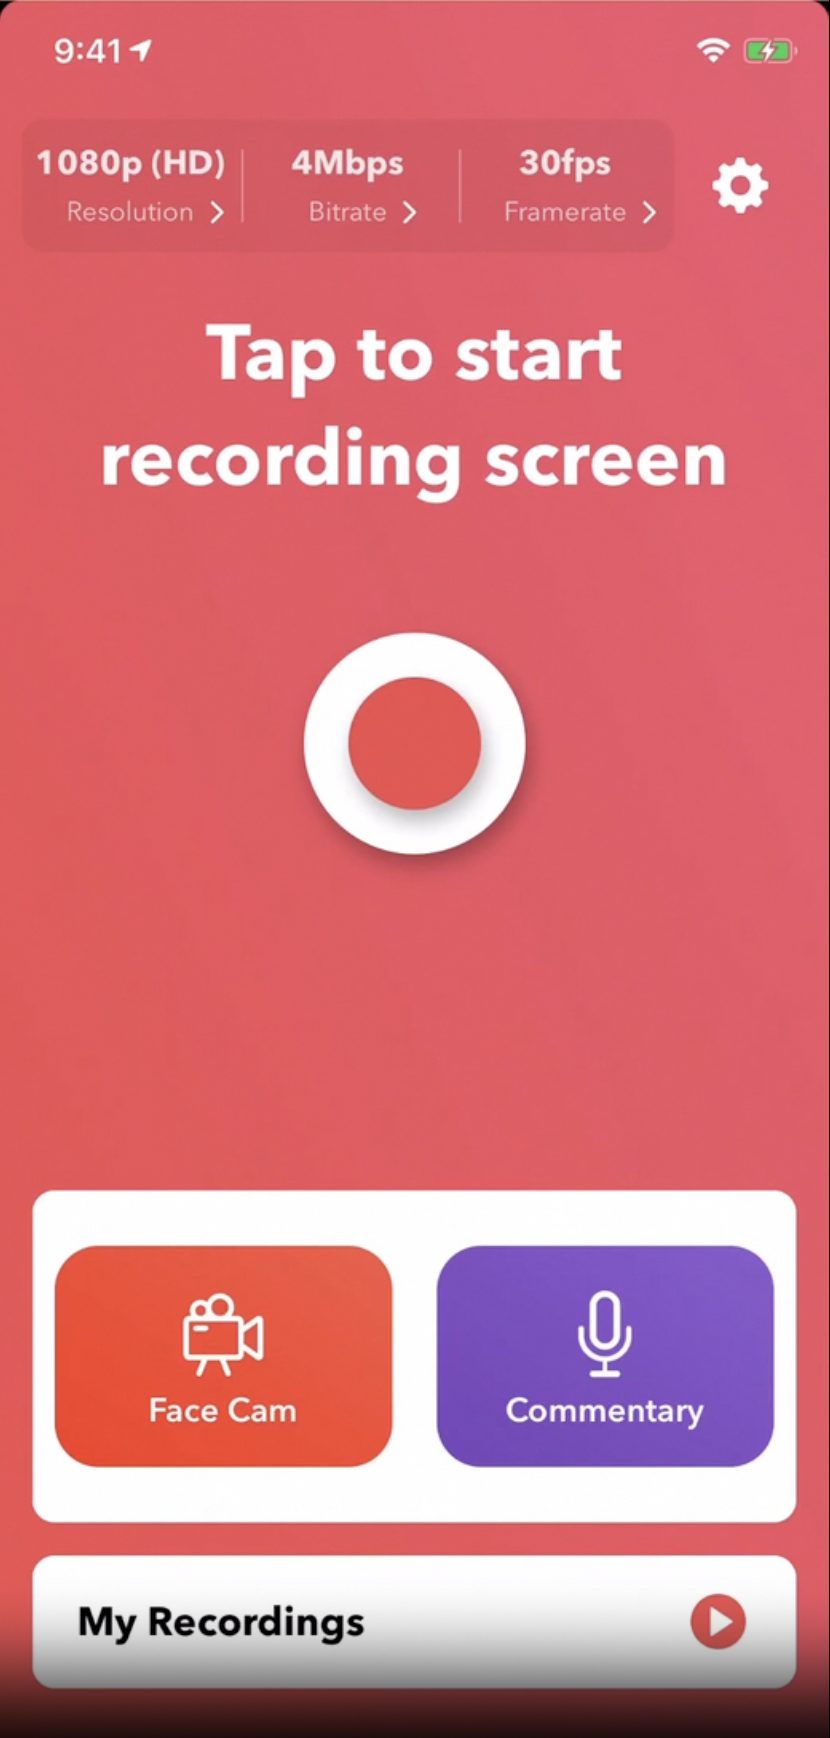
Step 2: Launch the application and tap on the ‘Red dock button.’
Step 3: You will now be directed to a screen where you’ll be asked to choose the application you'd like to record from. Choose 'Record it capture' from the list of applications. (Remember to enable your microphone if you wish to record your voice).
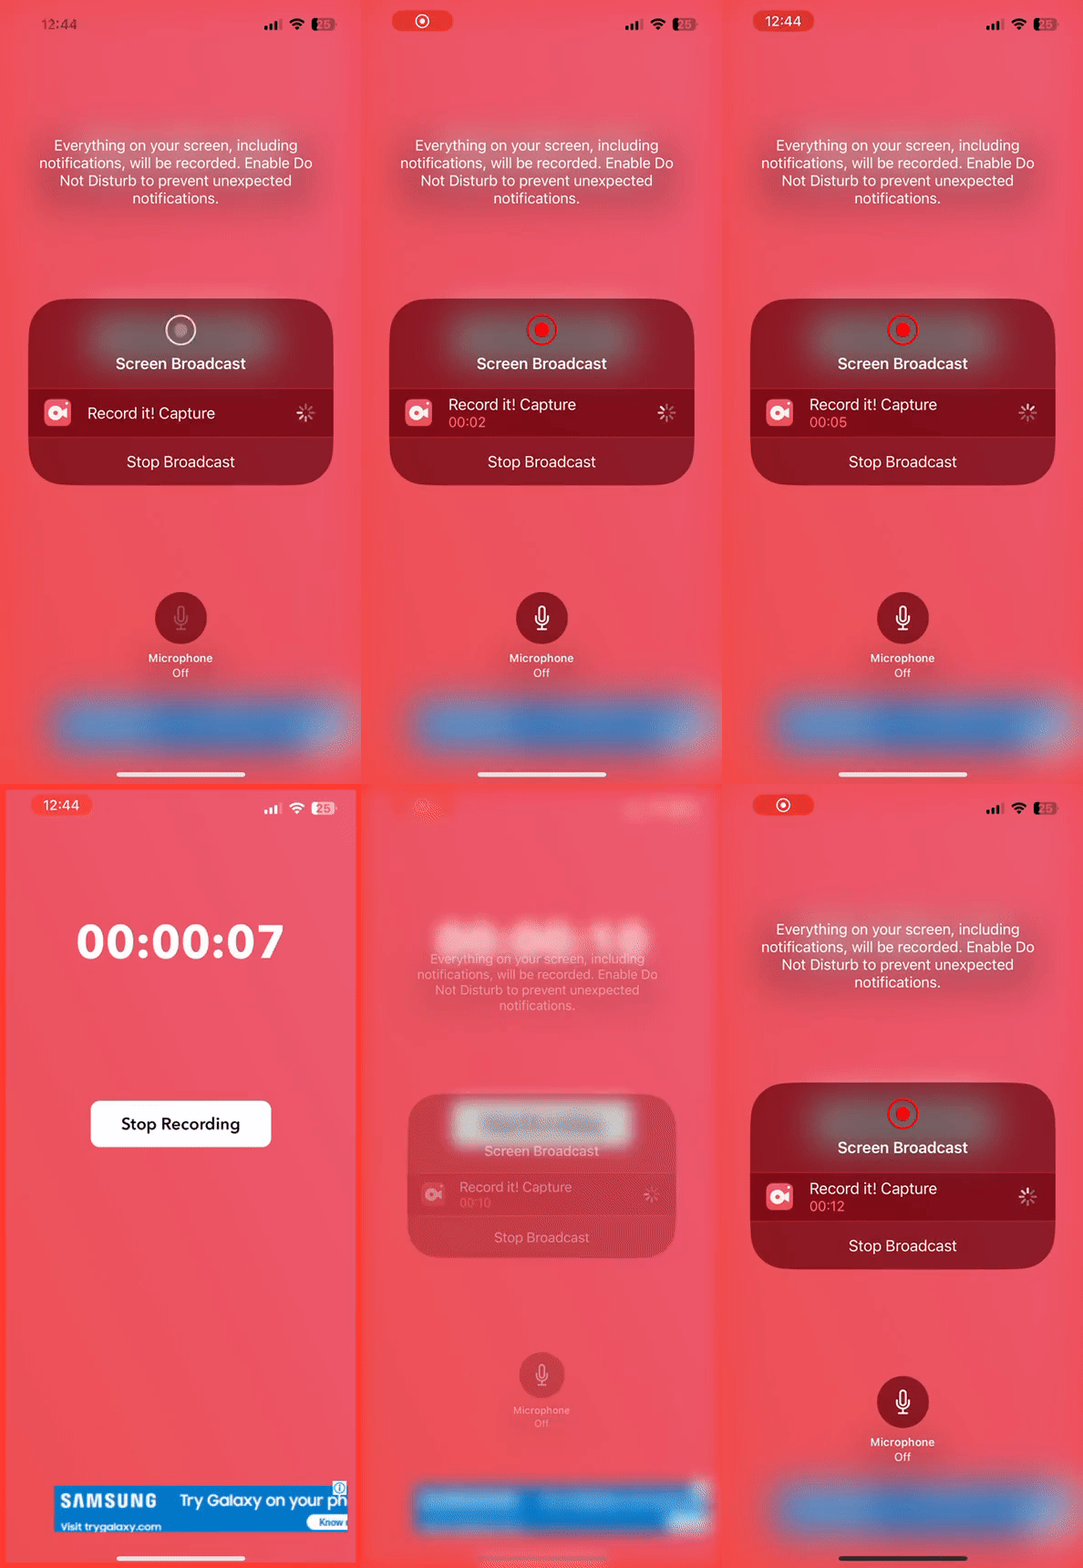
Step 3: Once you're done with the recording, you can stop the recording by clicking on the timer in the top corner of your screen.
The recordings will now be accessible in the Photos App.
Now, let’s go ahead and see how to record your screen on Android devices.
3. How to Record Your Screen on Android
Mobile phones that run on Android version 11 or higher come with an in-built screen recording application.
However, if you're using mobile phones that run on the older versions, then the only option is to use a third-party screen recording application from Google Play Store.
Let's quickly explore both these methods below.
3.1 How to record your screen on Android using the built-in recorder?
Firstly, let’s see how you can record your screen on Android using the built-in recorder.
Step 1: Swipe down the notification shade & tap on the ‘screen recorder’ icon.
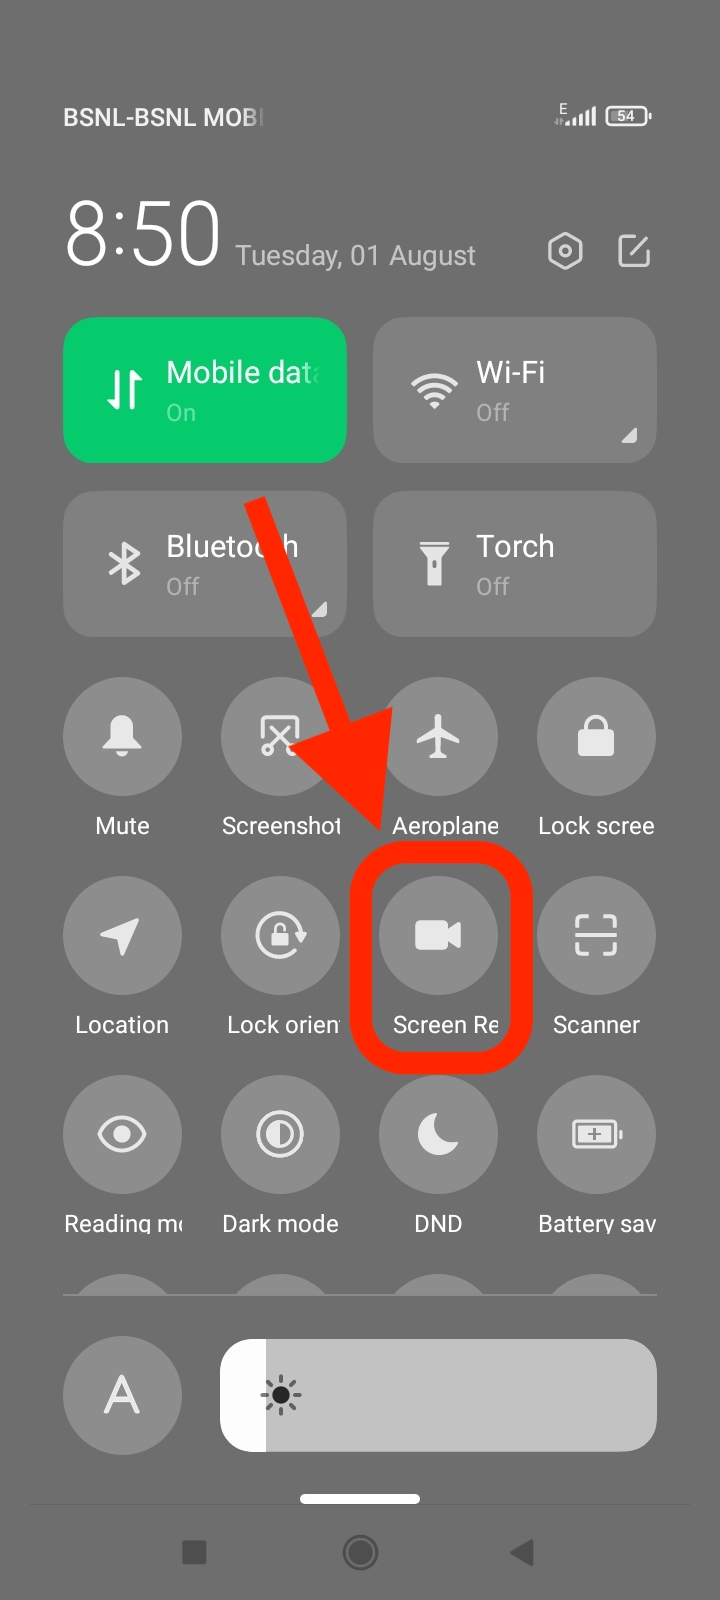
Step 2: Tap on the 'Red dock button’ when you’re ready to record.
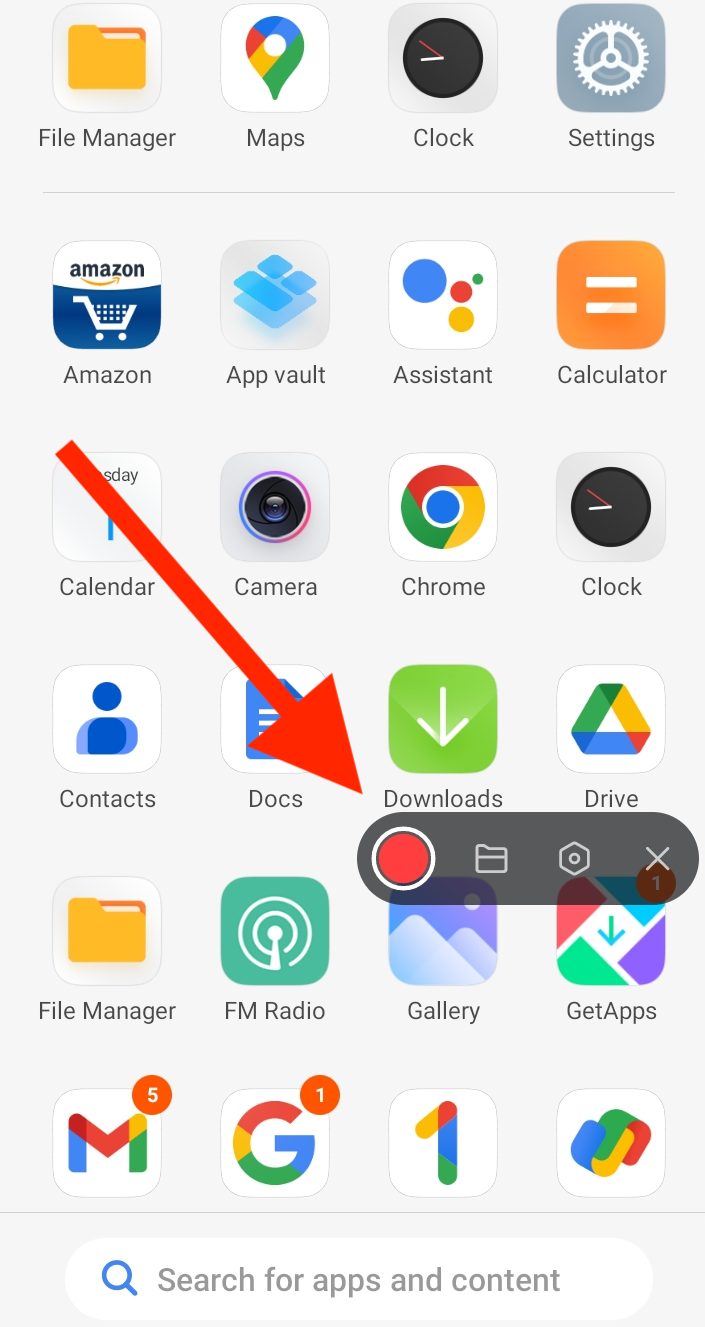
Step 3: When you’re done, tap on the same ‘Red dock button’ to stop the recording.
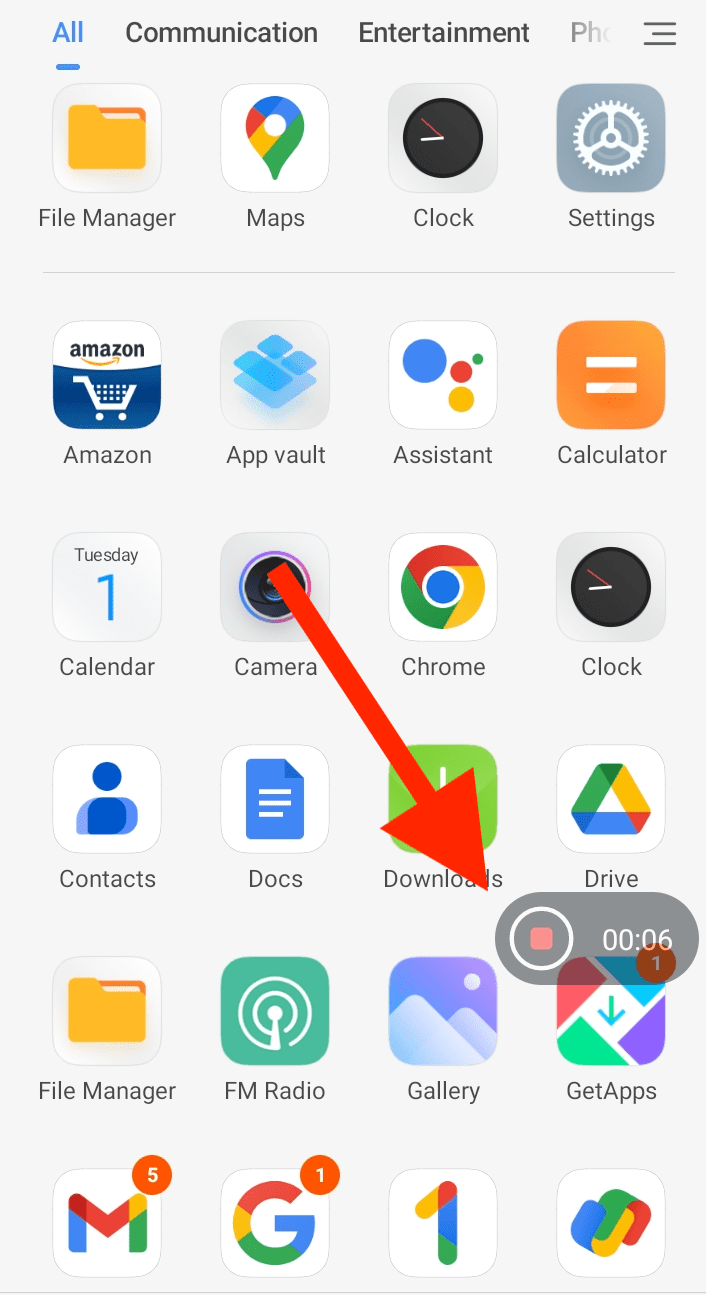
The recordings can then be accessed from the Photos App.
3.2 How to record your screen on Android using the AZ screen recorder?
Now, let’s go ahead and see how you can record your screen on Android using a third-party application called the AZ screen recorder.
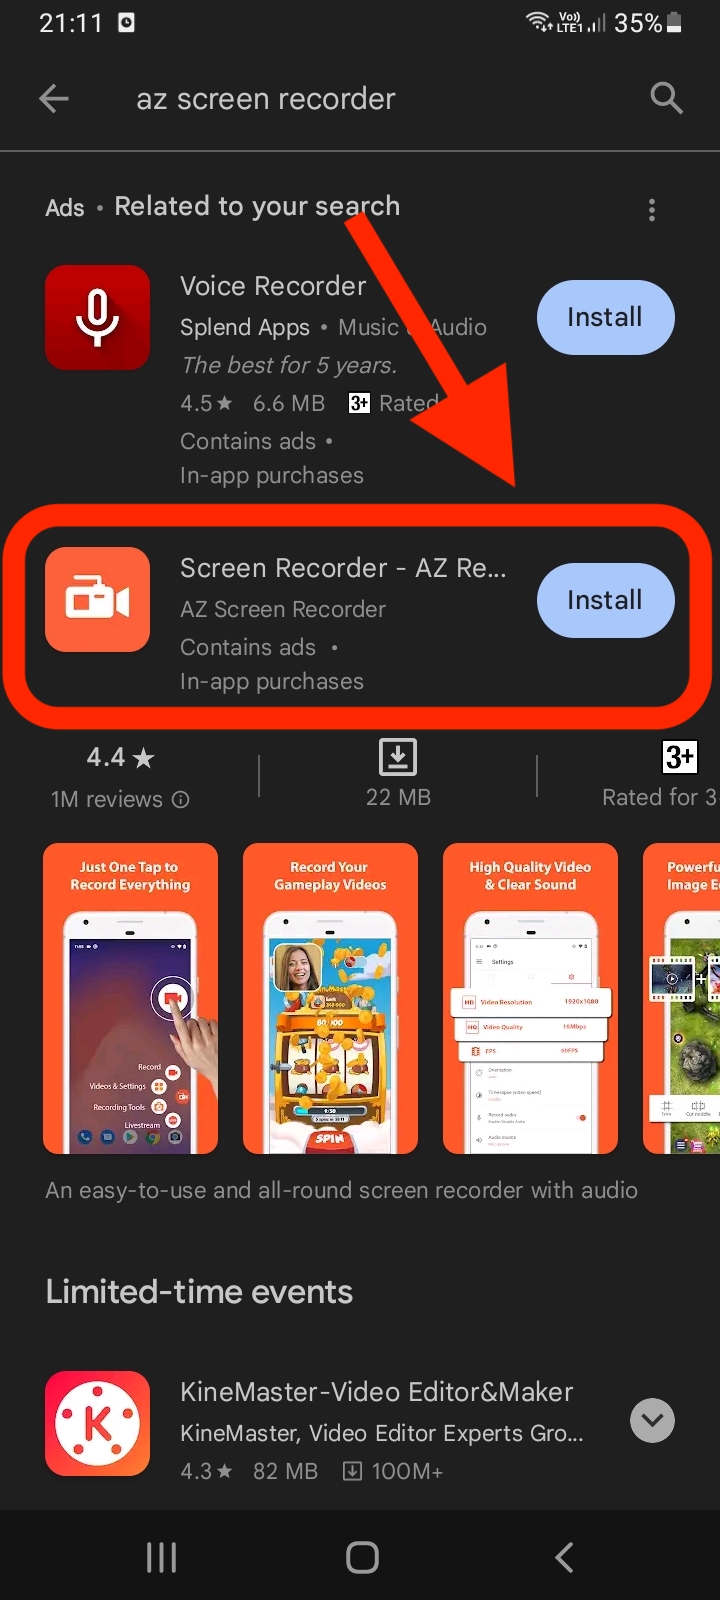
Here, we use an external screen recording application called AZ screen recorder. It's a user-friendly screen recording application that can easily be downloaded from the Google Play Store.
Here's how you can record your screen using the AZ screen recorder:
Step 1: Download the AZ screen recorder from the ‘Google Play Store.’
Step 2: Launch the application and tap on the ‘Camera icon’ to start your recording.
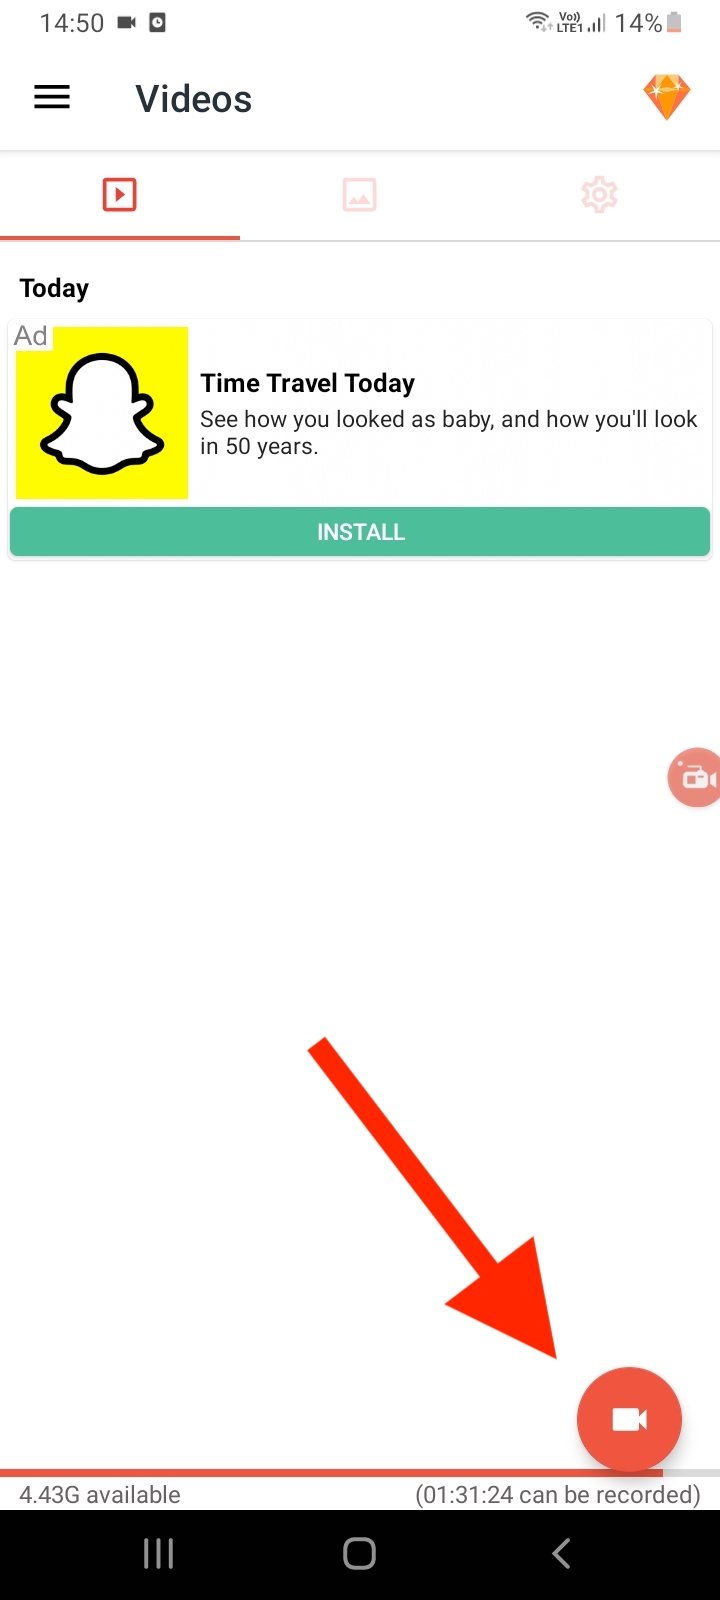
Step 3: When you're done, tap on the same recording button to stop the recording.

The recordings can now be accessed from your mobile's Gallery App.
Bonus Guide: Learn How to Master Screen Recording Like a Pro using Vmaker's Comprehensive How-To Guides
Comparison Table
| Products | Audio Capture | Features | Pricing | Platforms Supported | Export Formats |
| QuickTime Player | Microphone Audio only | Basic screen recording & editing features | Free | Mac | MP4, MOV |
| Xbox Game Bar | Microphone Audio only | Basic screen recording & editing features | Free | Windows | MP4 |
| Vmaker | Computer & Microphone Audio | Advanced screen recording & editing features | Free, Paid | Mac, Windows, Chrome Browser, iPhone & iPad (iOS beta version) | MP4 |
| Native iOS screen recorder | Computer & Microphone Audio | Basic screen recording & editing features | Free | iPhone & iPad | MOV |
| Record It | Computer & Microphone Audio | Advanced screen recording & editing features | Free, Paid | iPhone & iPad | MP4, MOV, GIF |
| Native Android screen recorder | Computer & Microphone Audio | Basic screen recording & editing features | Free | Android Devices | MP4 |
| AZ screen recorder | Computer & Microphone Audio | Advanced screen recording & editing features | Free, Paid | Android Devices | MP4, GIF, MP3 |
