How to make Animated gifs in 3 simple steps?
Whether you are planning to make a gif to add to your presentation or you have a meme idea while watching a movie. Here is the easiest way to convert any video or image into an animated gif. The best part is you don’t need to install any fancy software to do this. [ Yes, we are talking about Photoshop ]
Follow these 3 simple steps to create your animated gif.
Step 1: Create a new project in Animaker
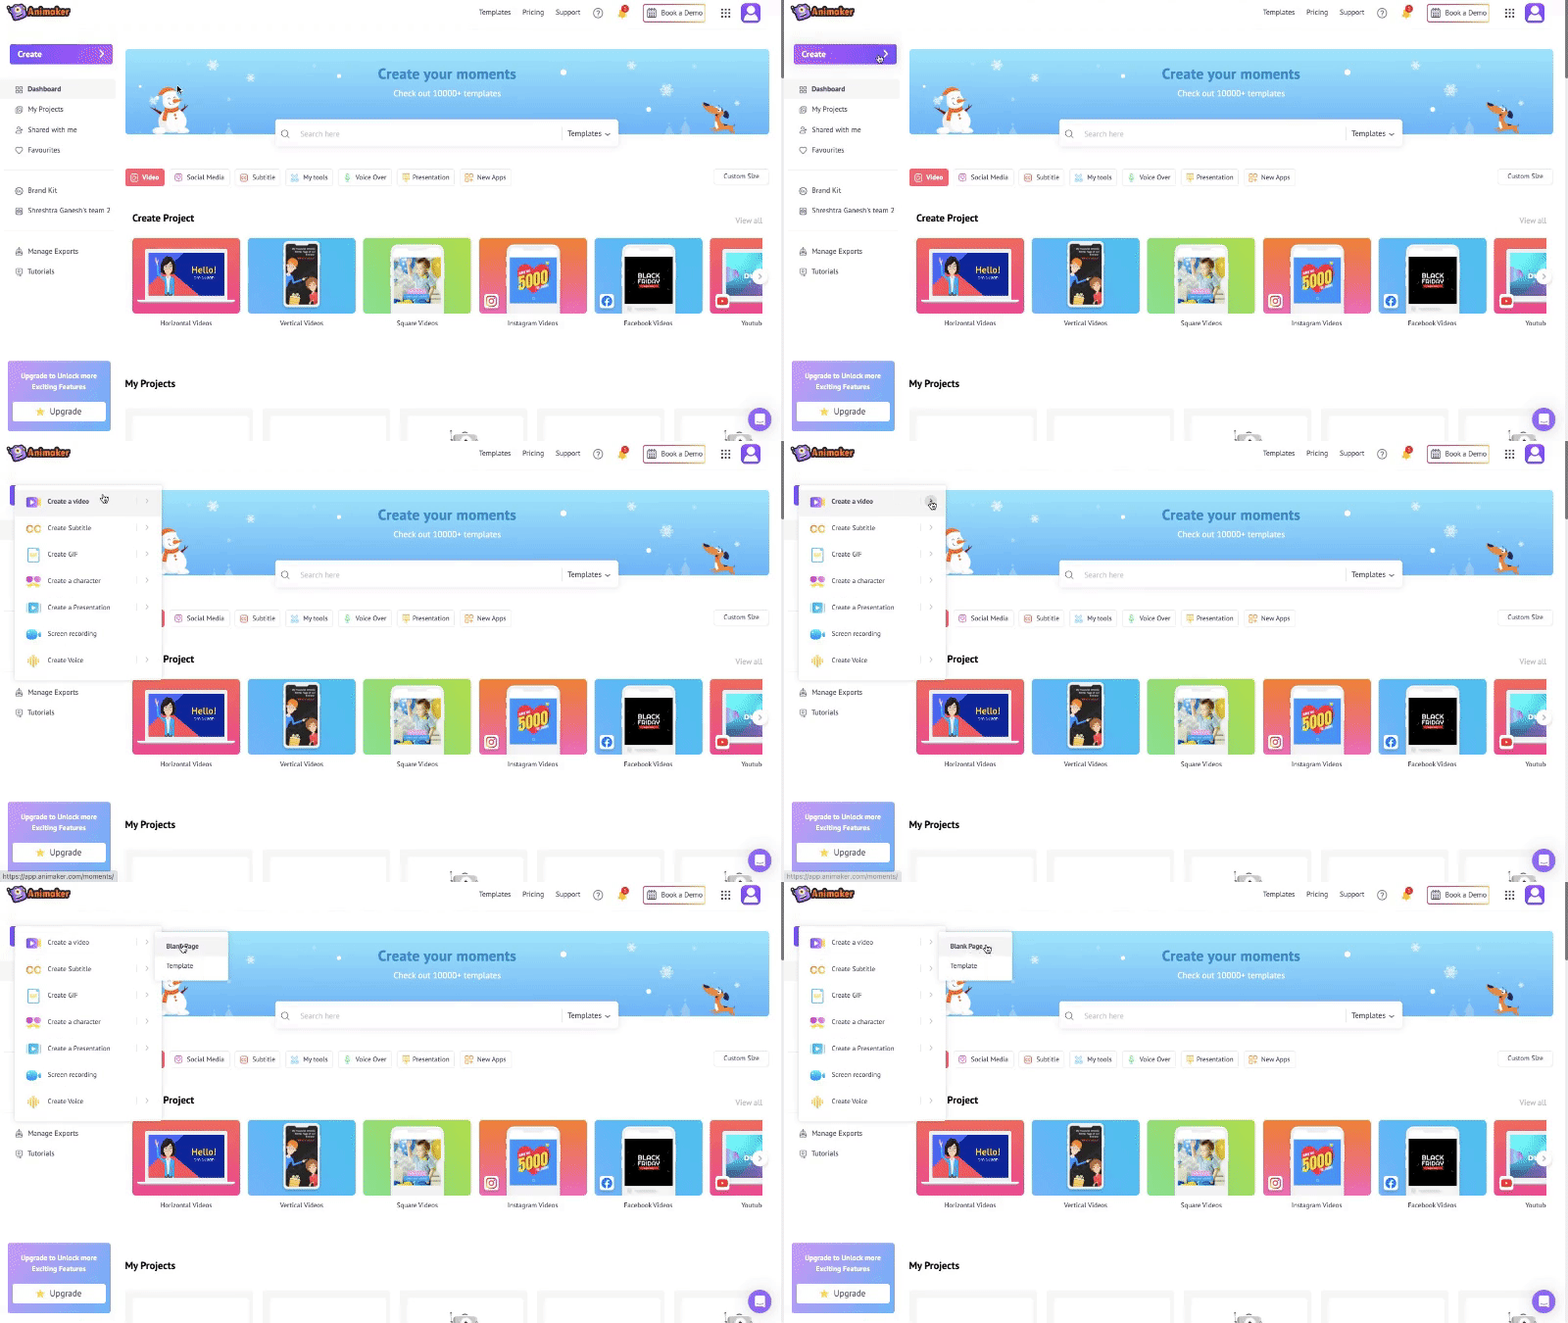
Visit the Animaker website and sign up for an account. From the dashboard, select Create > Create a video > Blank Project to create a new blank project.
Step 2: Add video (or images)
We are now in the project window. Let’s understand the interface better.
In the center of the interface lies the workspace, where you can create and edit your video. On the left, you will find the library, which offers millions of assets you can include in your video.
The timeline below the workspace is where you can precisely adjust your video and its assets.
The scenes section on the right allows you to efficiently manage and organize your scenes.
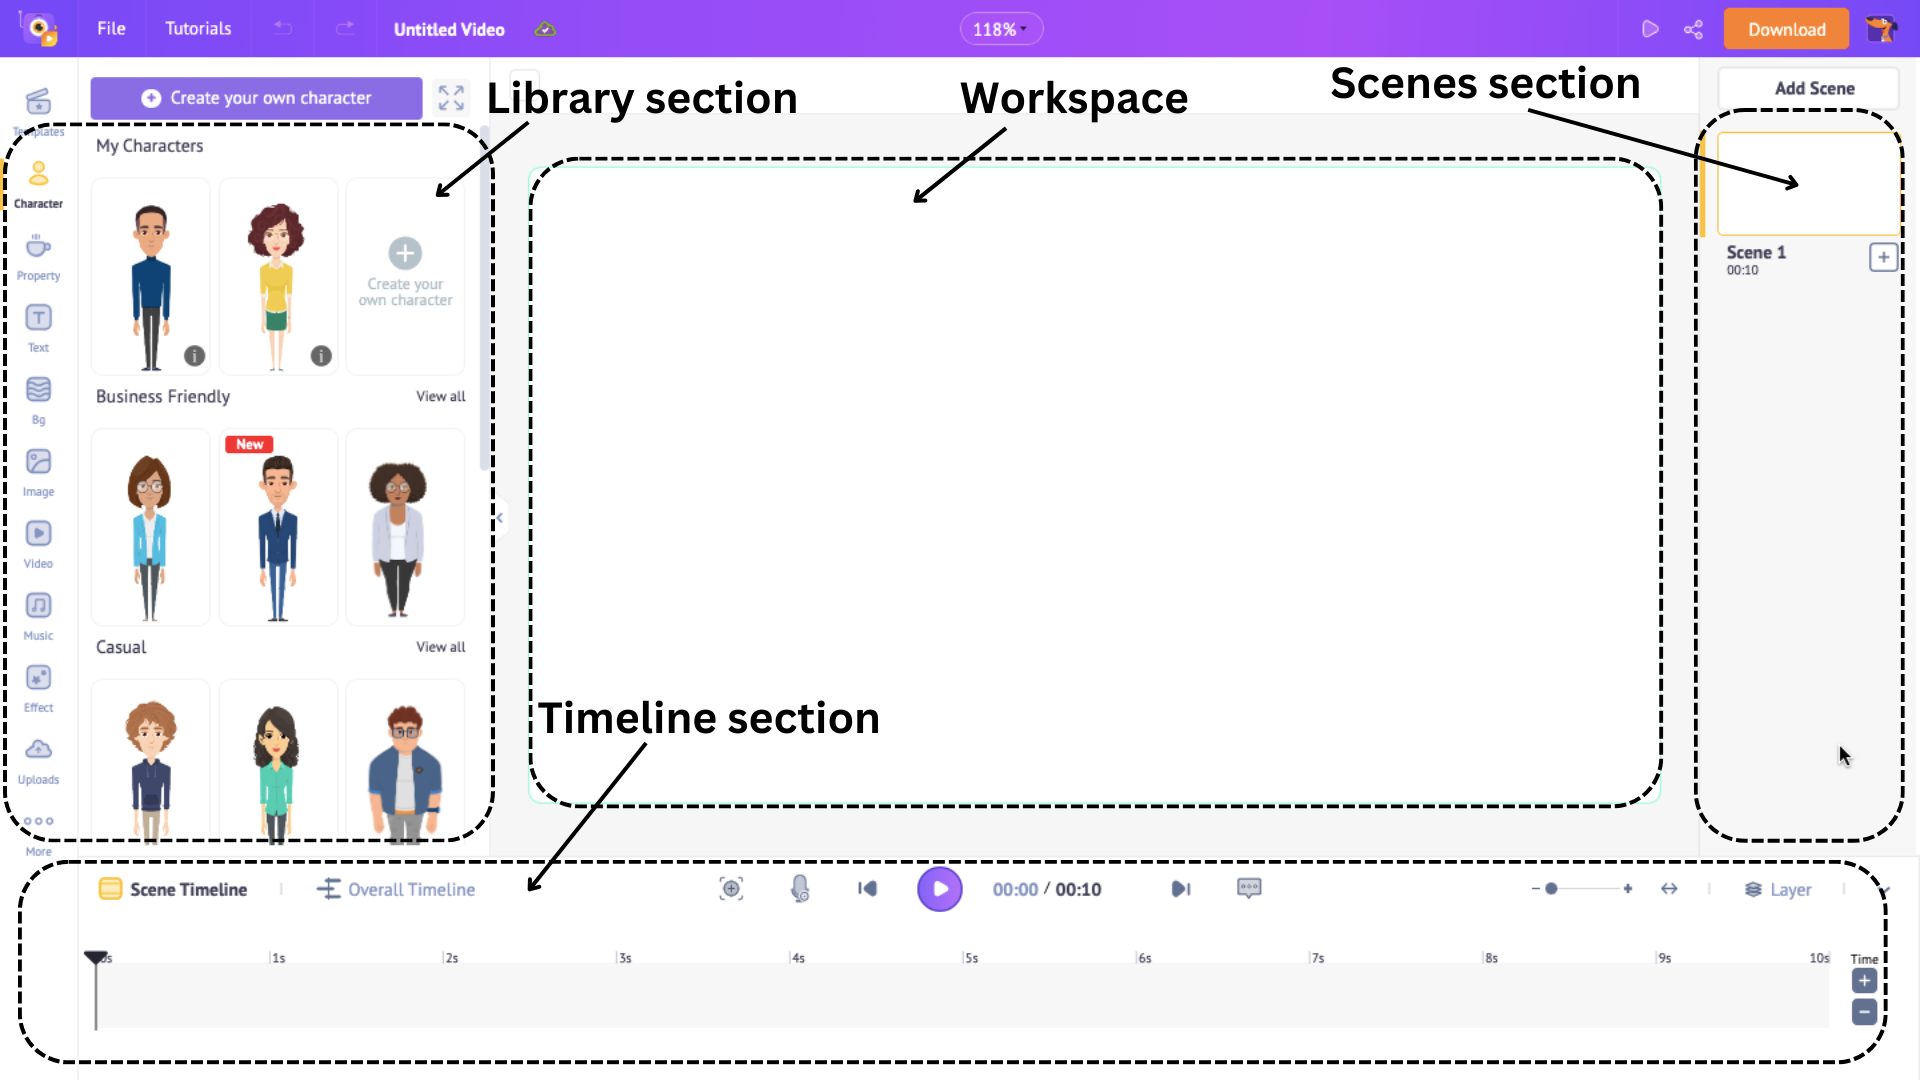
Now that we know the interface better, let’s make a GIF by uploading an image/video.
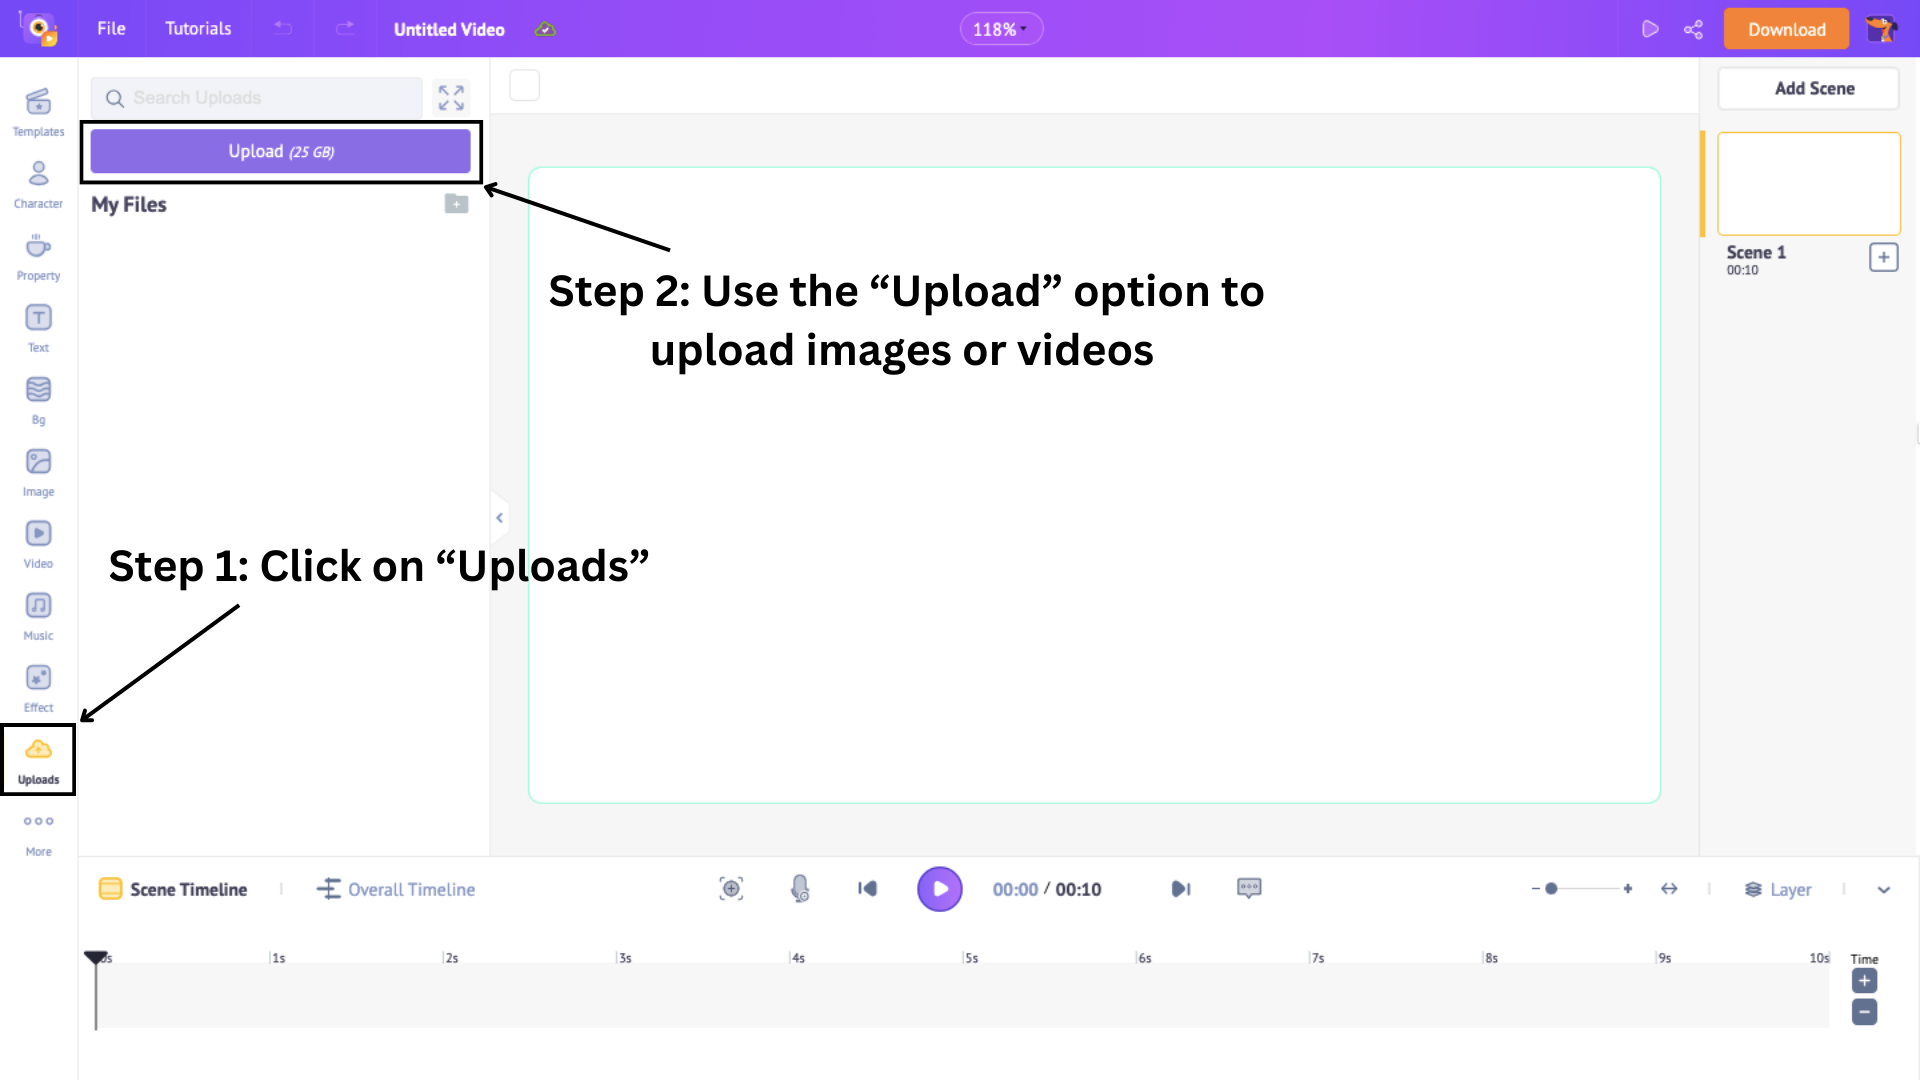
To upload your own media, go to the Uploads section at the bottom of the library and click the Upload option. You can also drag and drop the files directly into the project.
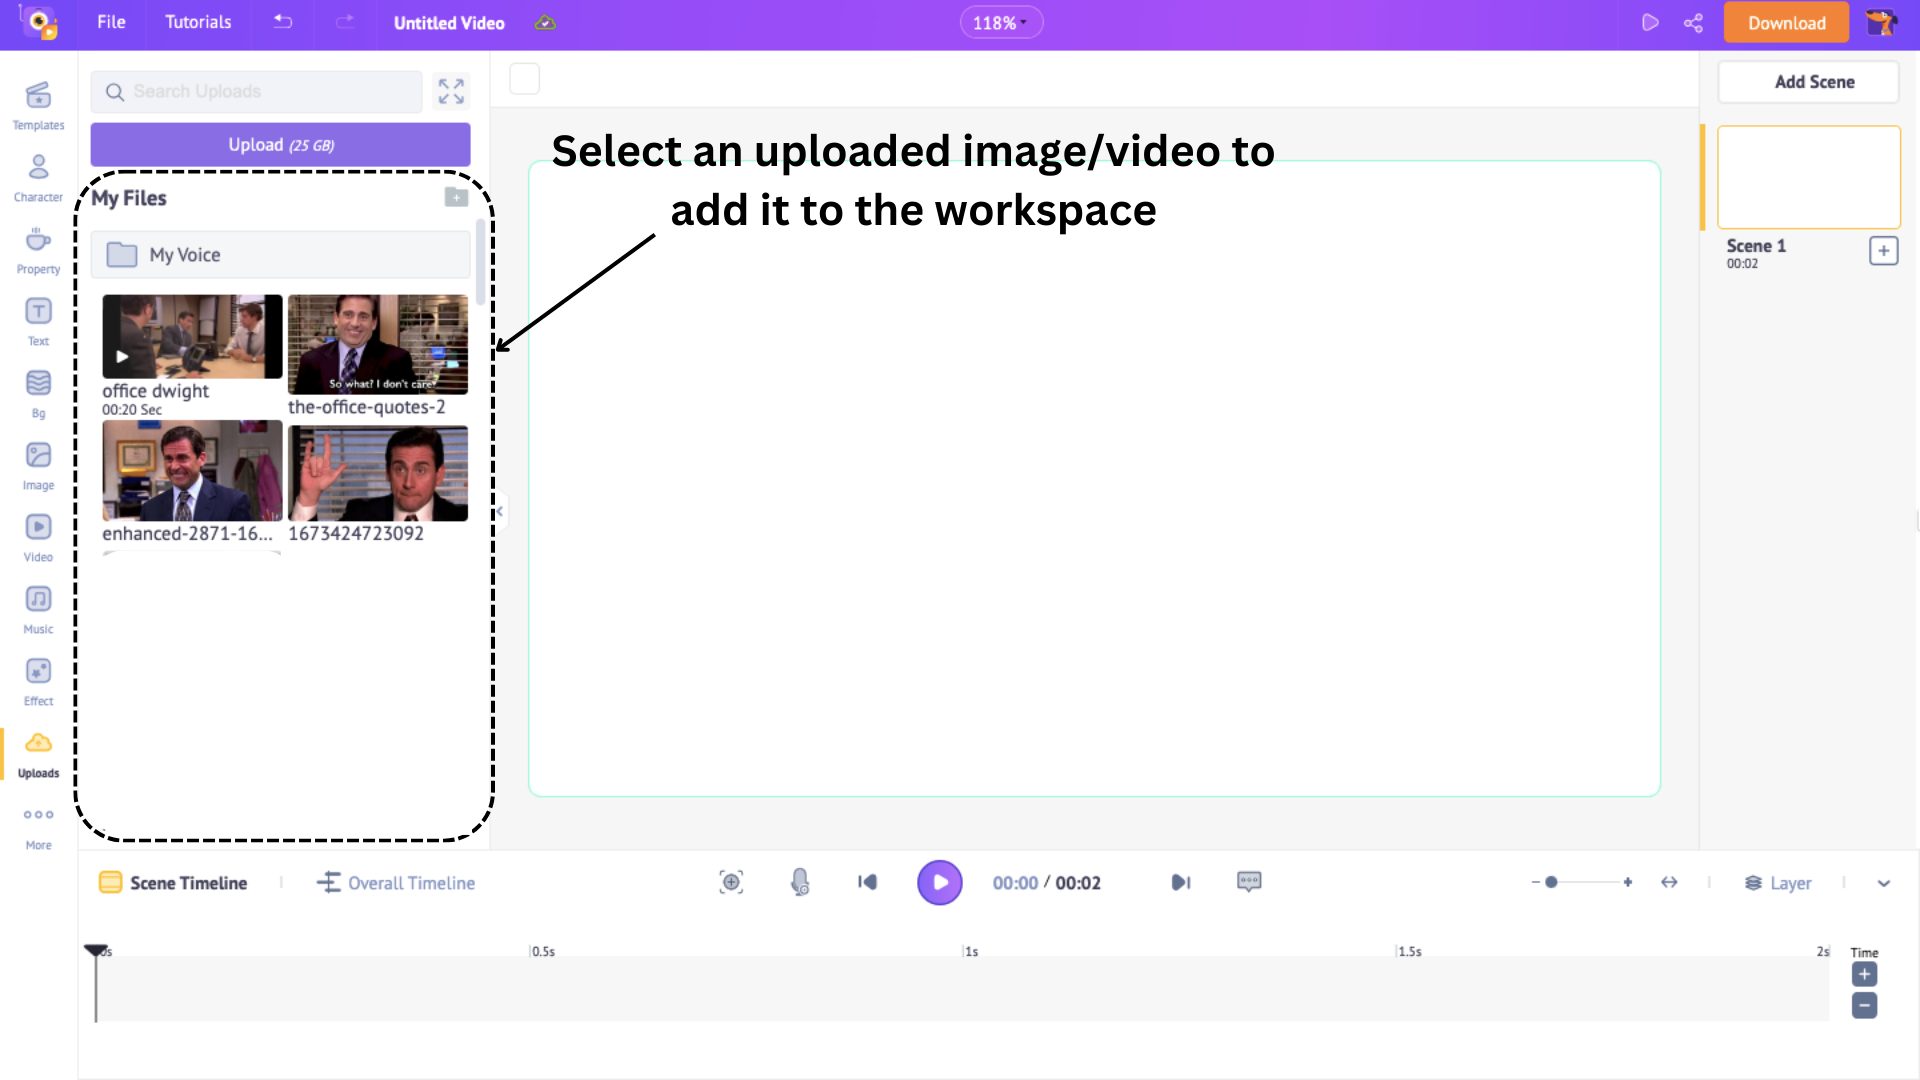
Now select the uploaded media to add it to the workspace.
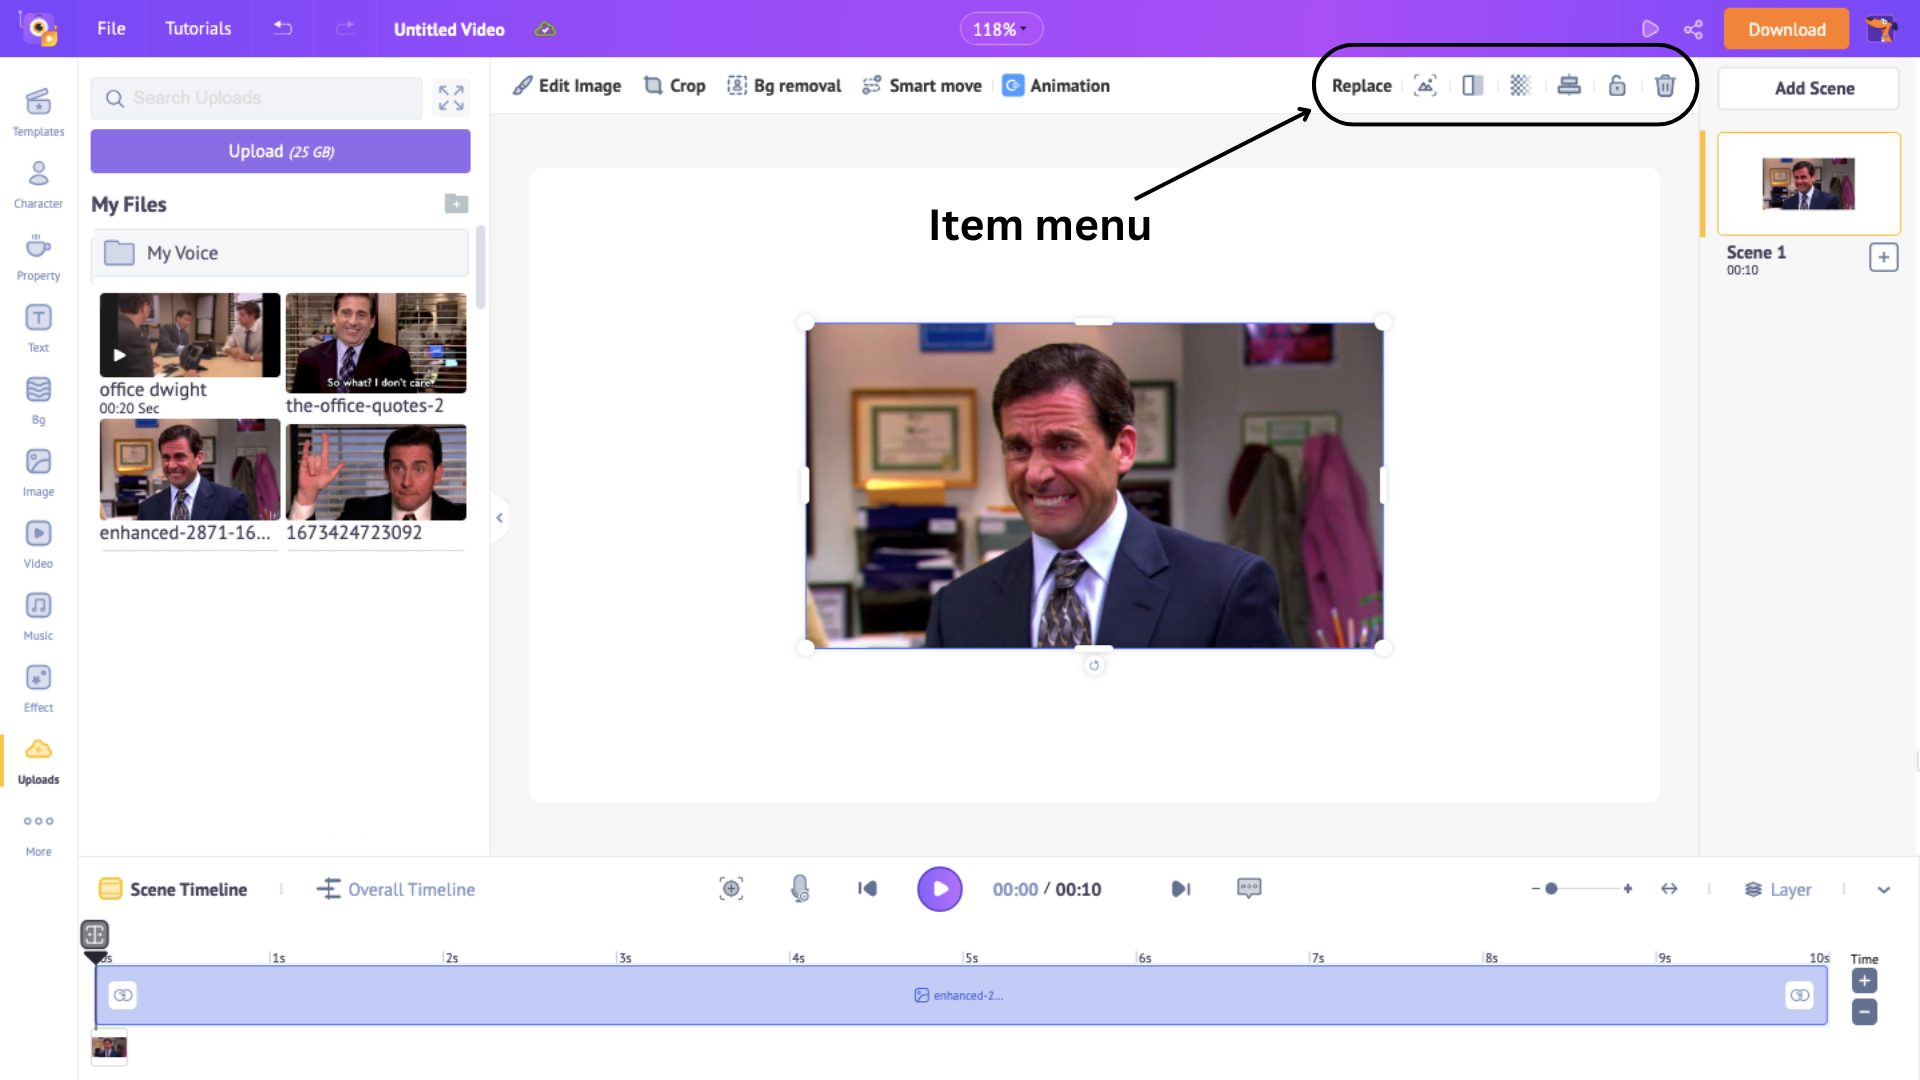
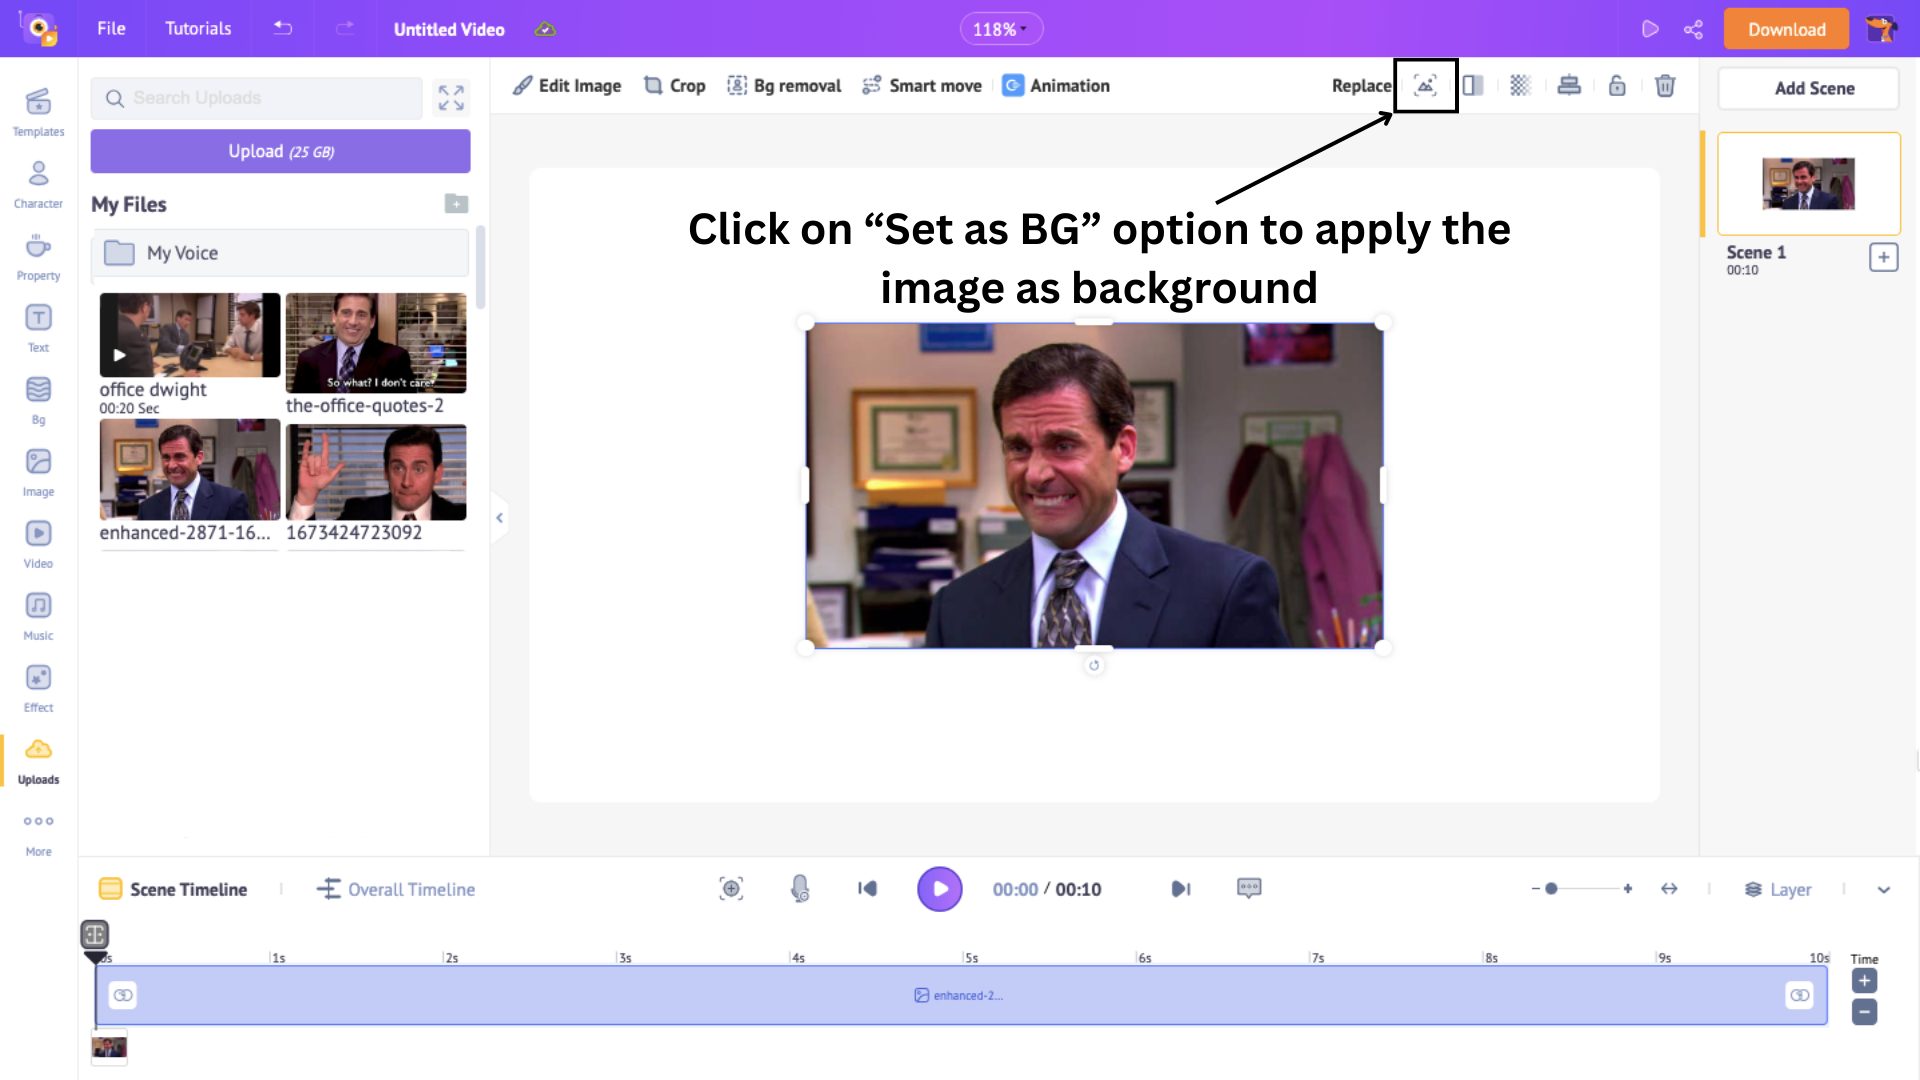
If you add an image from the uploads library, you will see a couple of options appear above the workspace. This is called the Item Menu.
Use the option Set as BG in the item menu to apply the image as the scene's background.
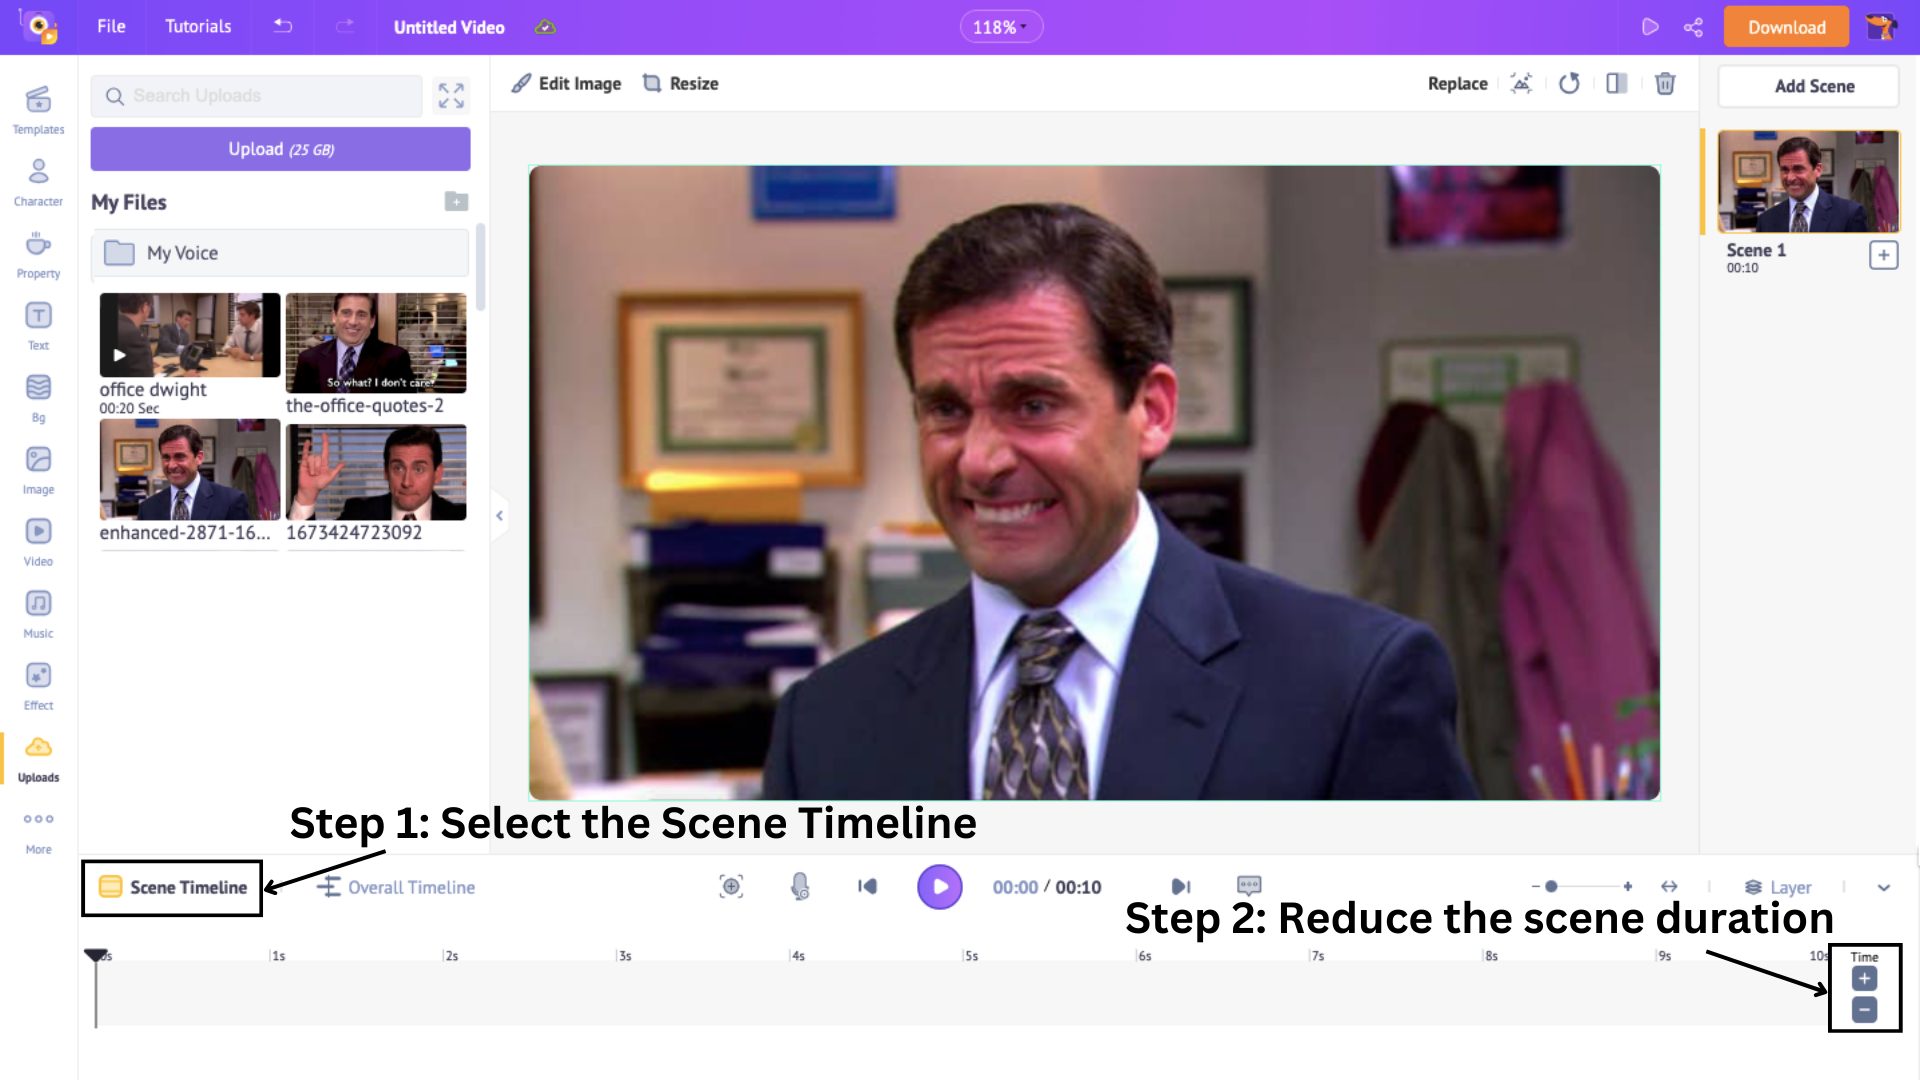
Now, reduce the duration of the scene. By default, the duration of a scene is 10 seconds. You can increase or decrease the duration of a scene using the ‘+’ and ‘-’ options at the bottom of the animation timeline.
Since GIFs are usually short, ensure that your GIF is somewhere between 1 and 5 seconds. I reduced my scene’s duration to 1 second.
For my GIF, I will add the video I uploaded to my uploads library.
Clicking on the video from the Uploads library will automatically fit the video to the background, unlike images, which you must apply as a background.
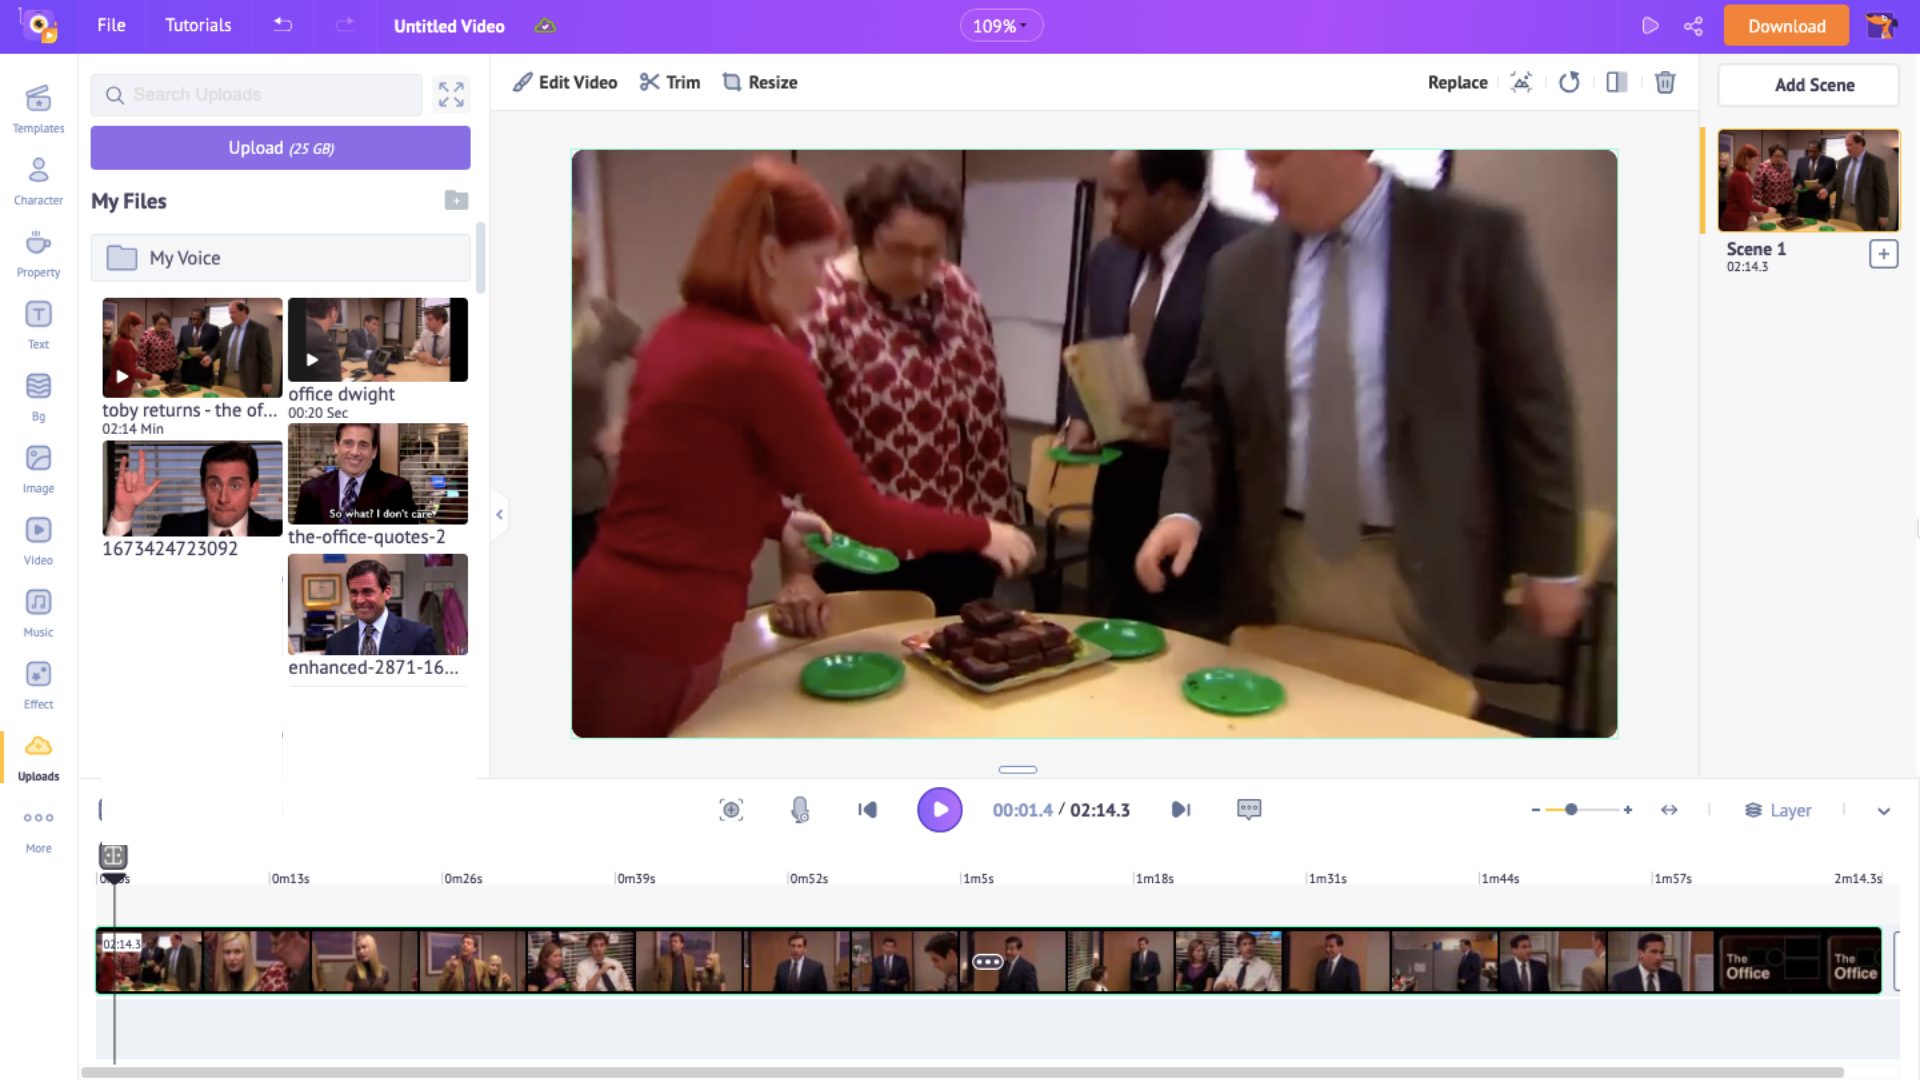
Once I added the video, I trimmed it to a particular part I wanted to turn into a GIF.
To do that, click on Trim and drag the ends to the particular part. Then click the Trim button.
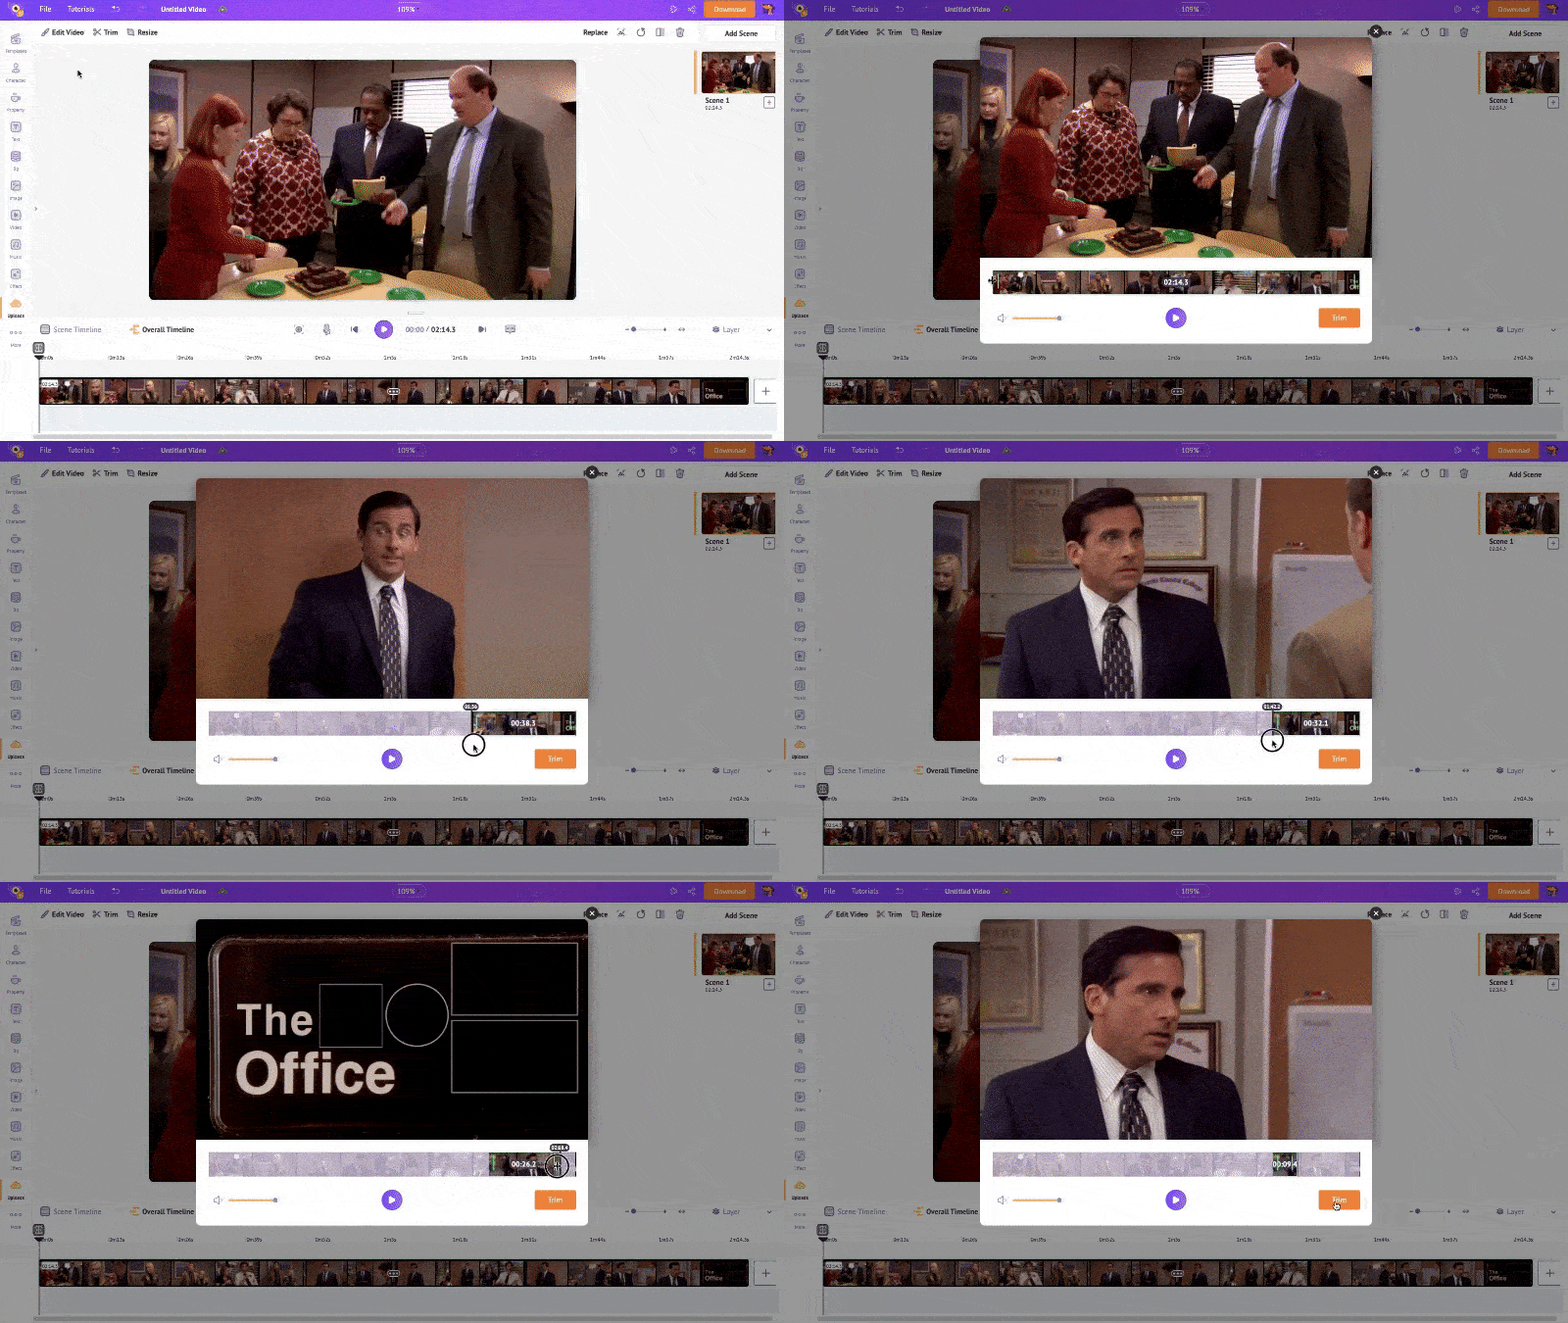
The part that I have trimmed has Michael shouting “NO.” To make it funny and relatable, this trimmed part needs a text. So, let’s see how to add text.
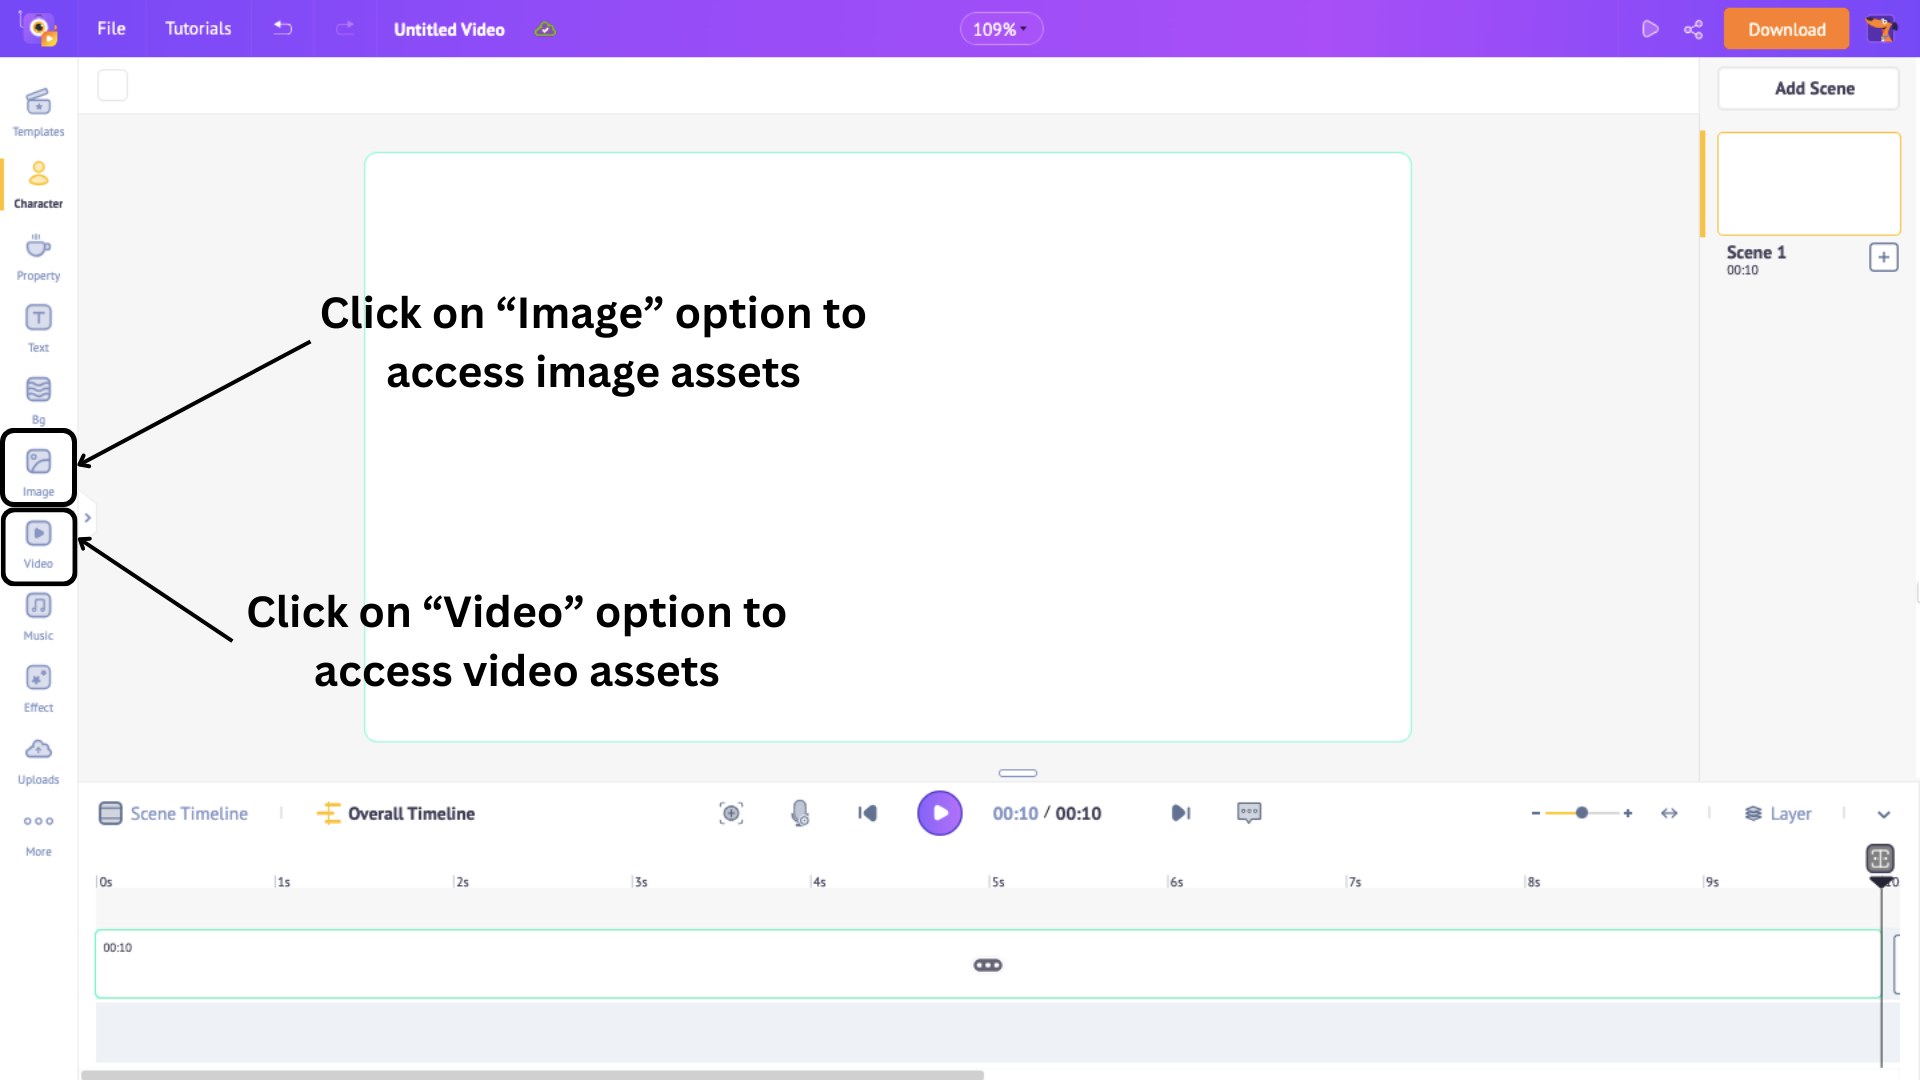
Alternatively, if you want to use images/videos from the Animaker library for your gif, click on the Image or Video option from the library. Animaker has over 100 million stock assets, so that you can search for an image/video of your choice.
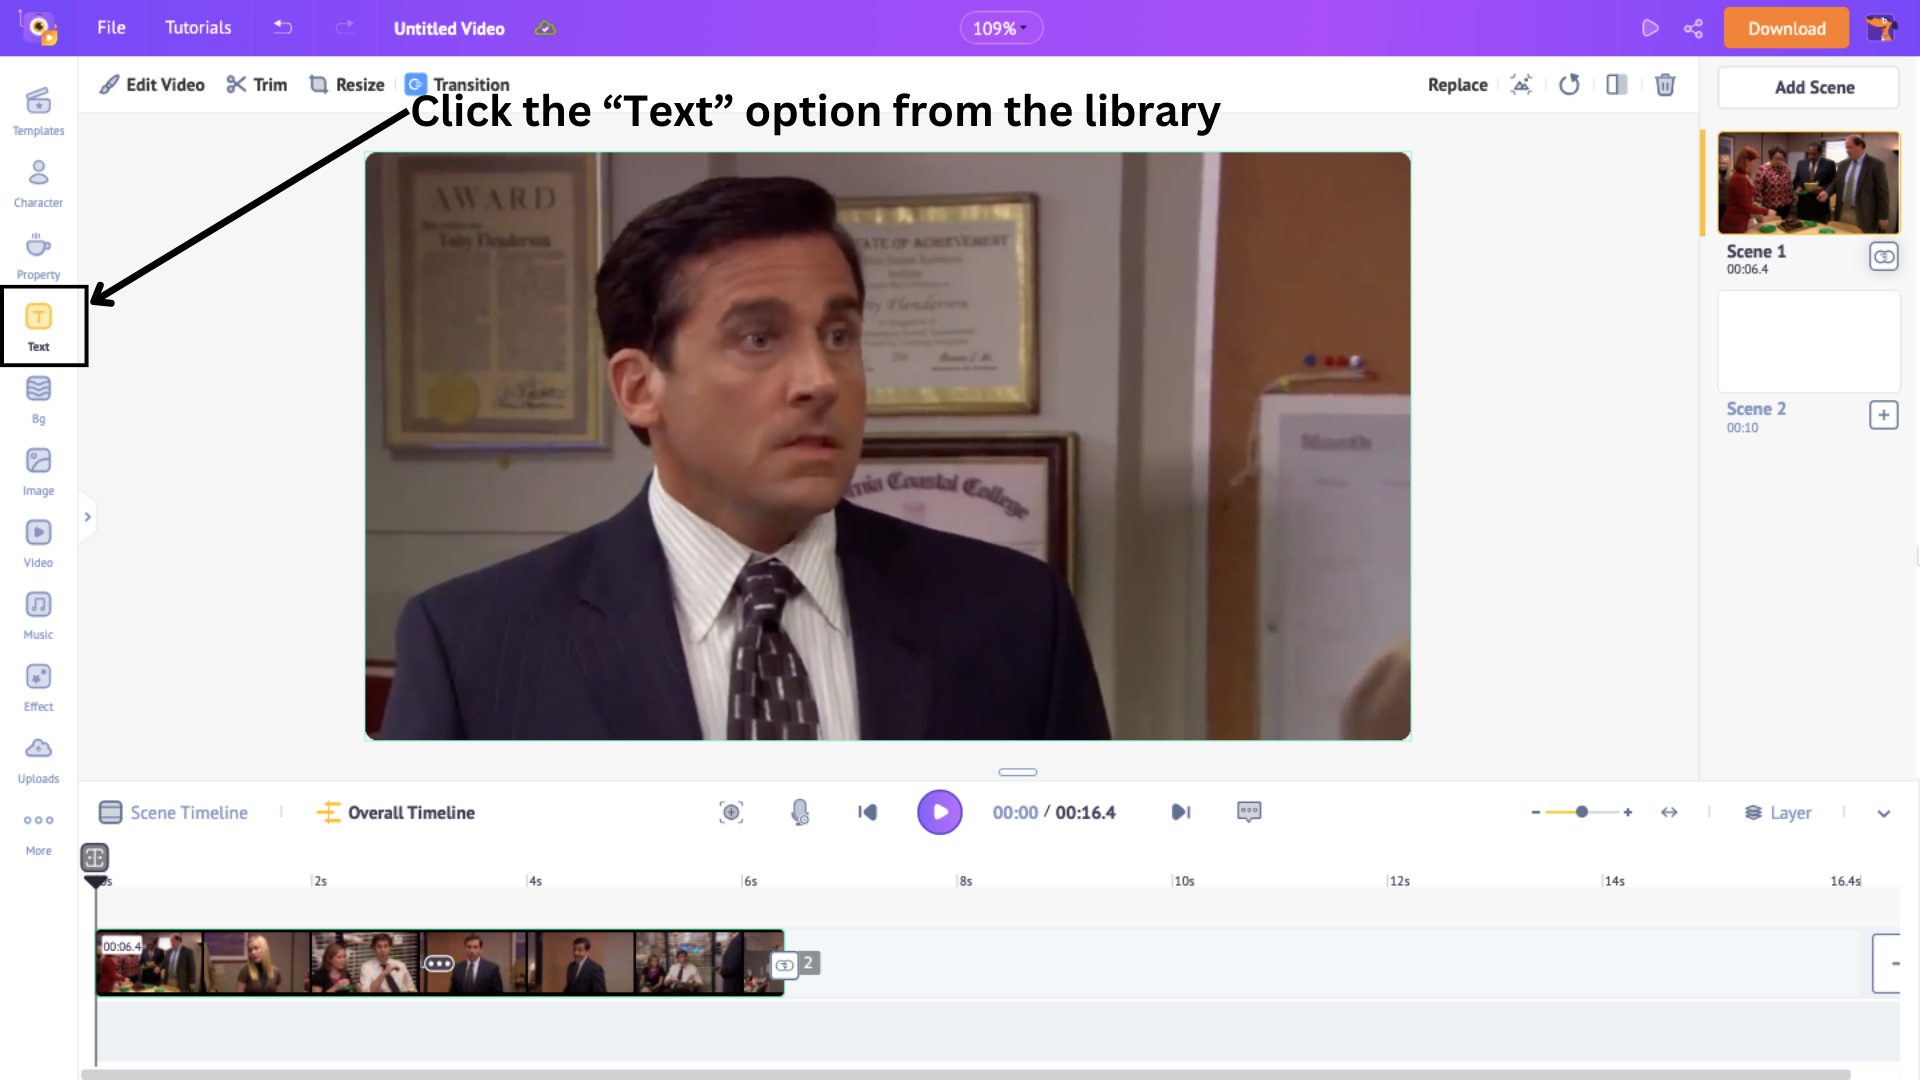
Every GIF needs text to make it funnier. So, to add text, click on the Text option from the library.
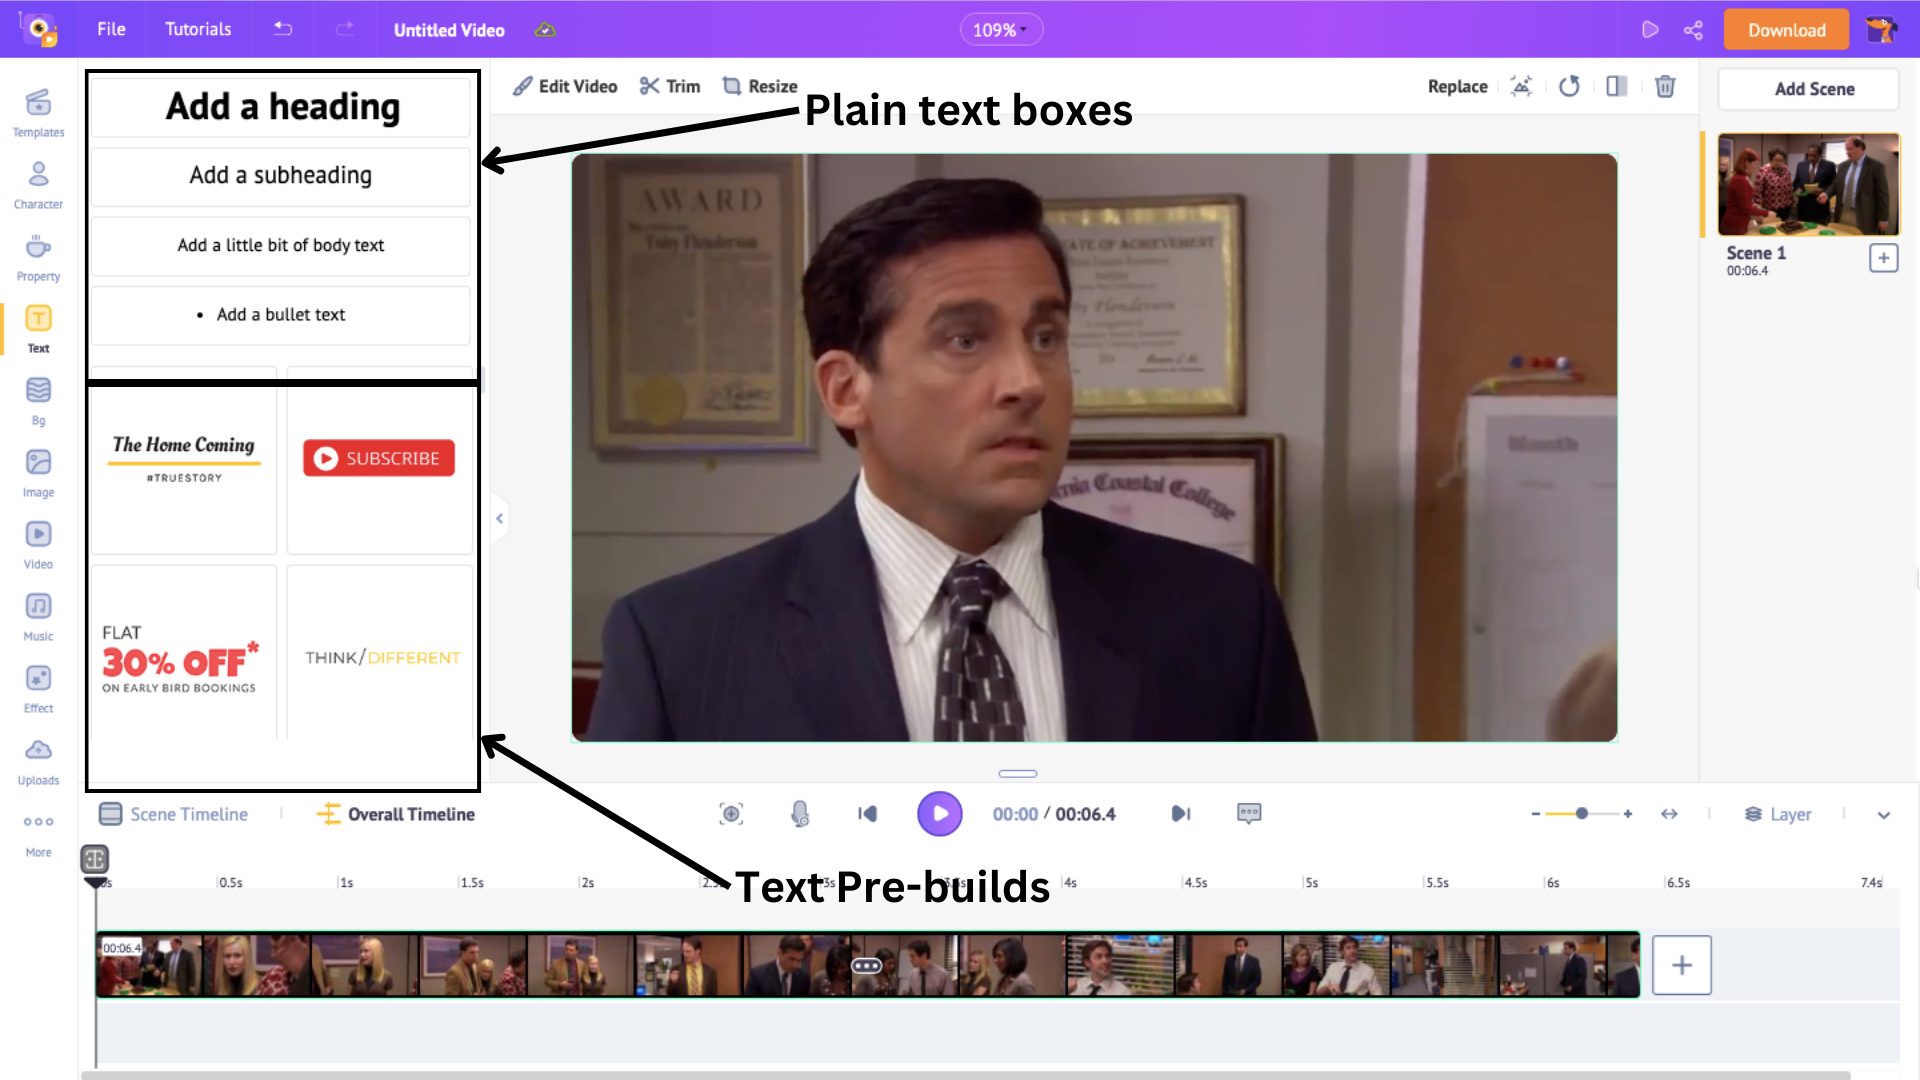
This will open a side panel with two types of text boxes - Pre-builds and Plain.
Pre-builds already have design, font, and animation effects added, while Plain text boxes, as the name suggests, are plain and require designing from scratch.
Select a text box and position it in the scene. Then, type in the text for your gif. I’m going to choose a text pre-build for my gif.
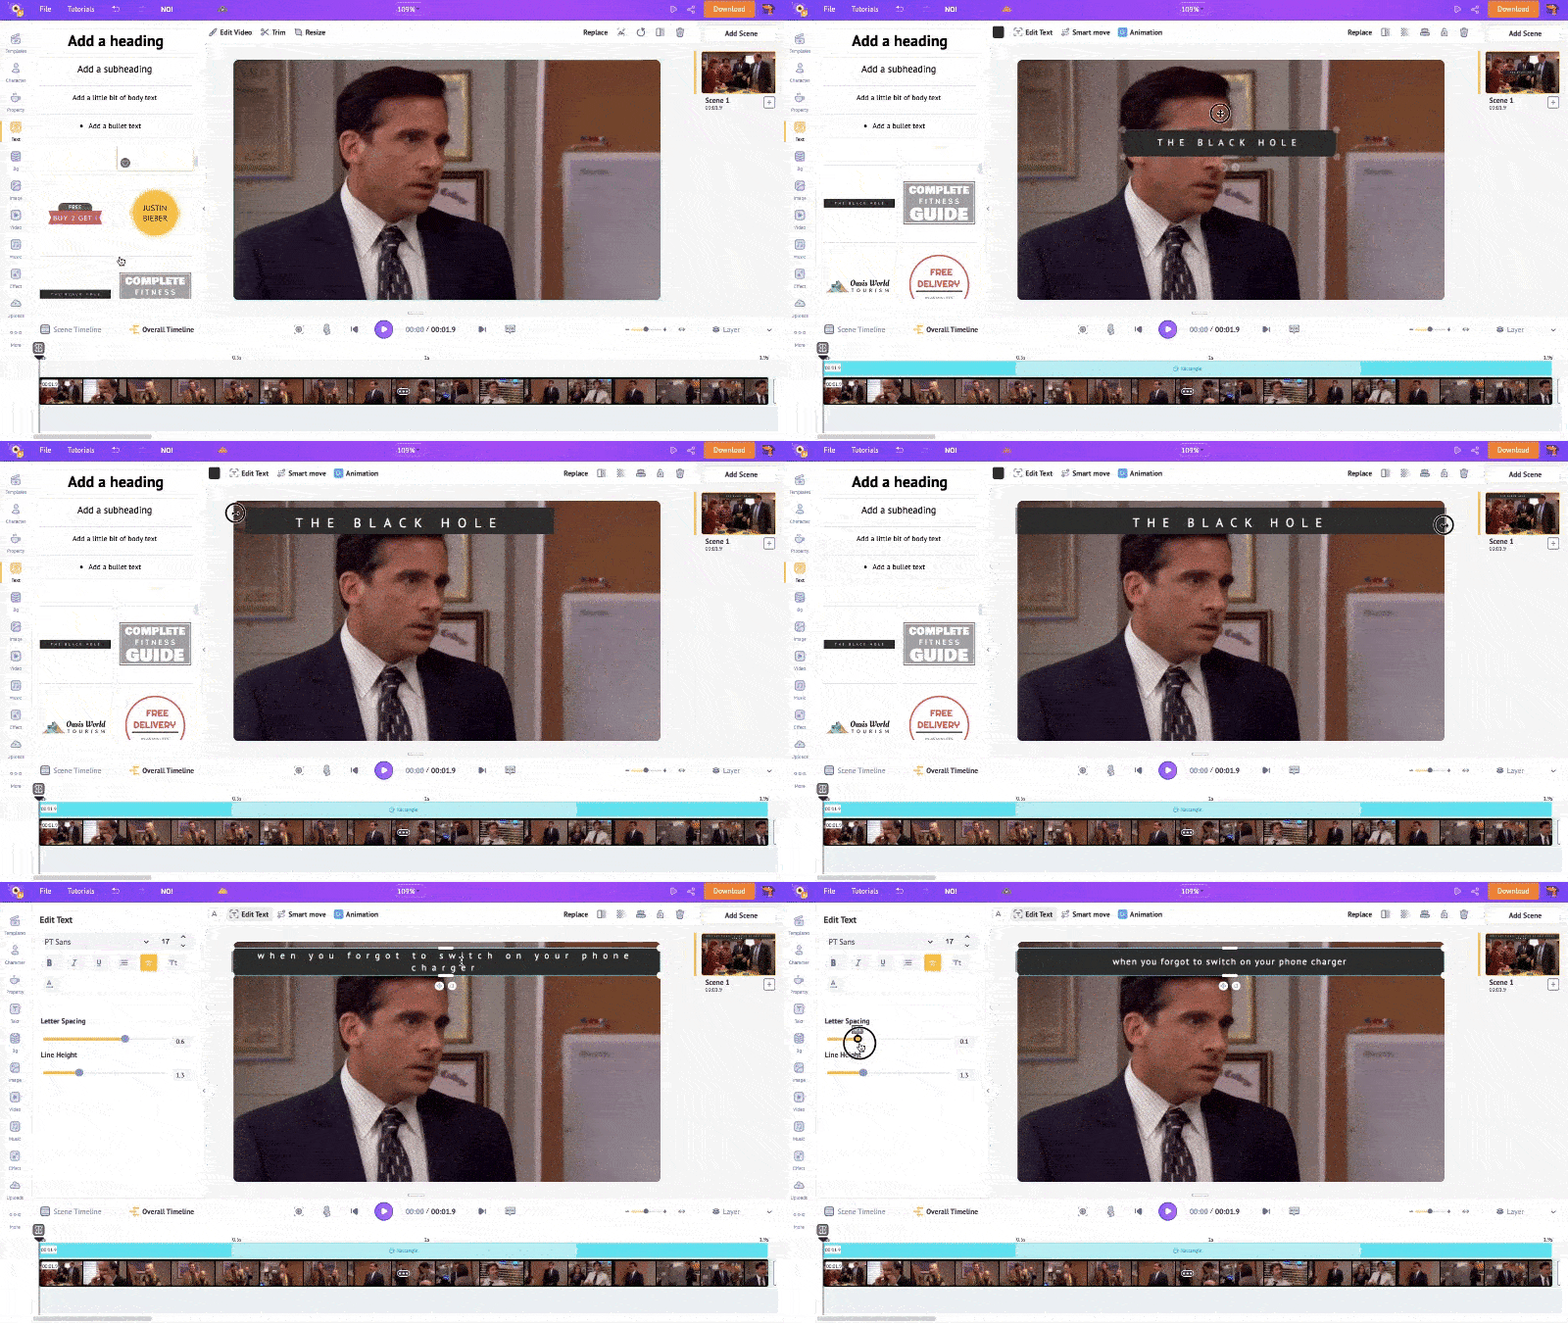
Click the Change Color box above the workspace to change the colors of the pre-build.
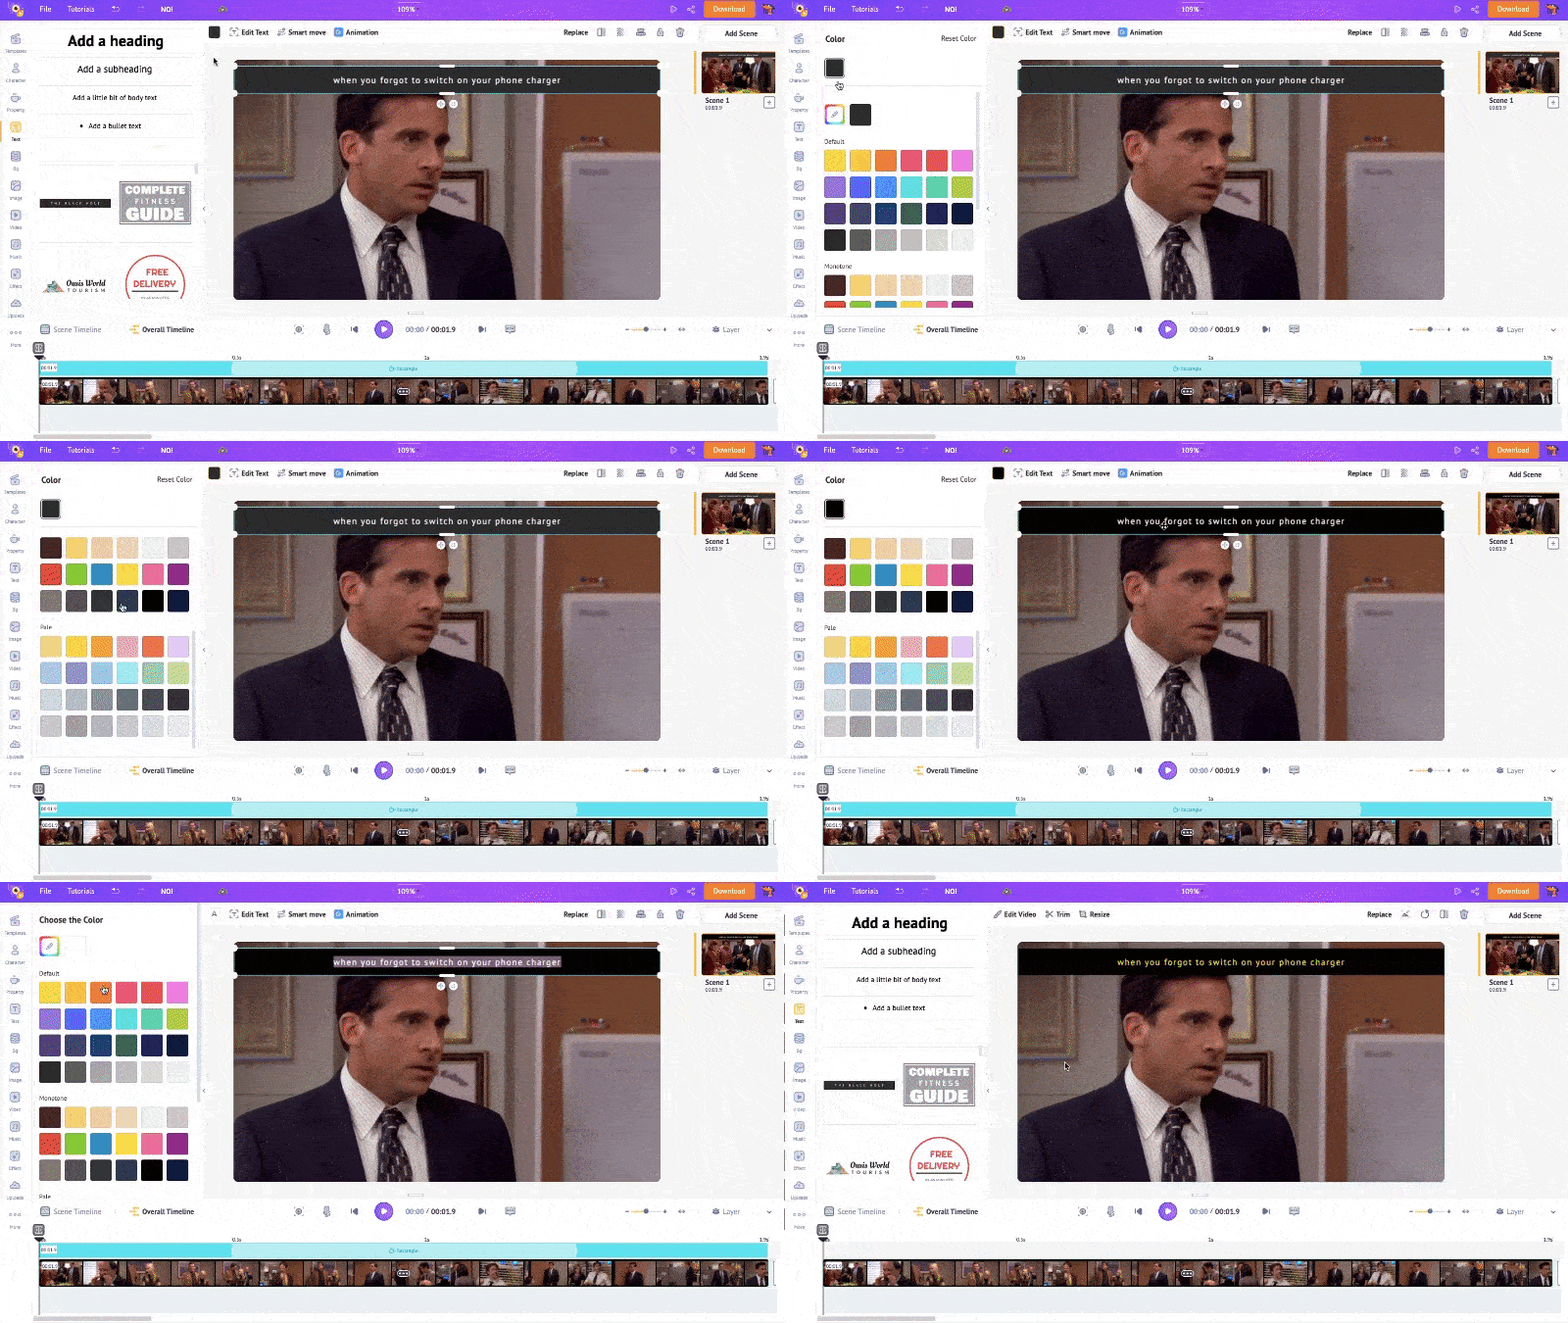
If you want to edit the text further, click the “Edit Text” option. This will open the edit text panel, where you can change the font, adjust its size, and add effects to the text.
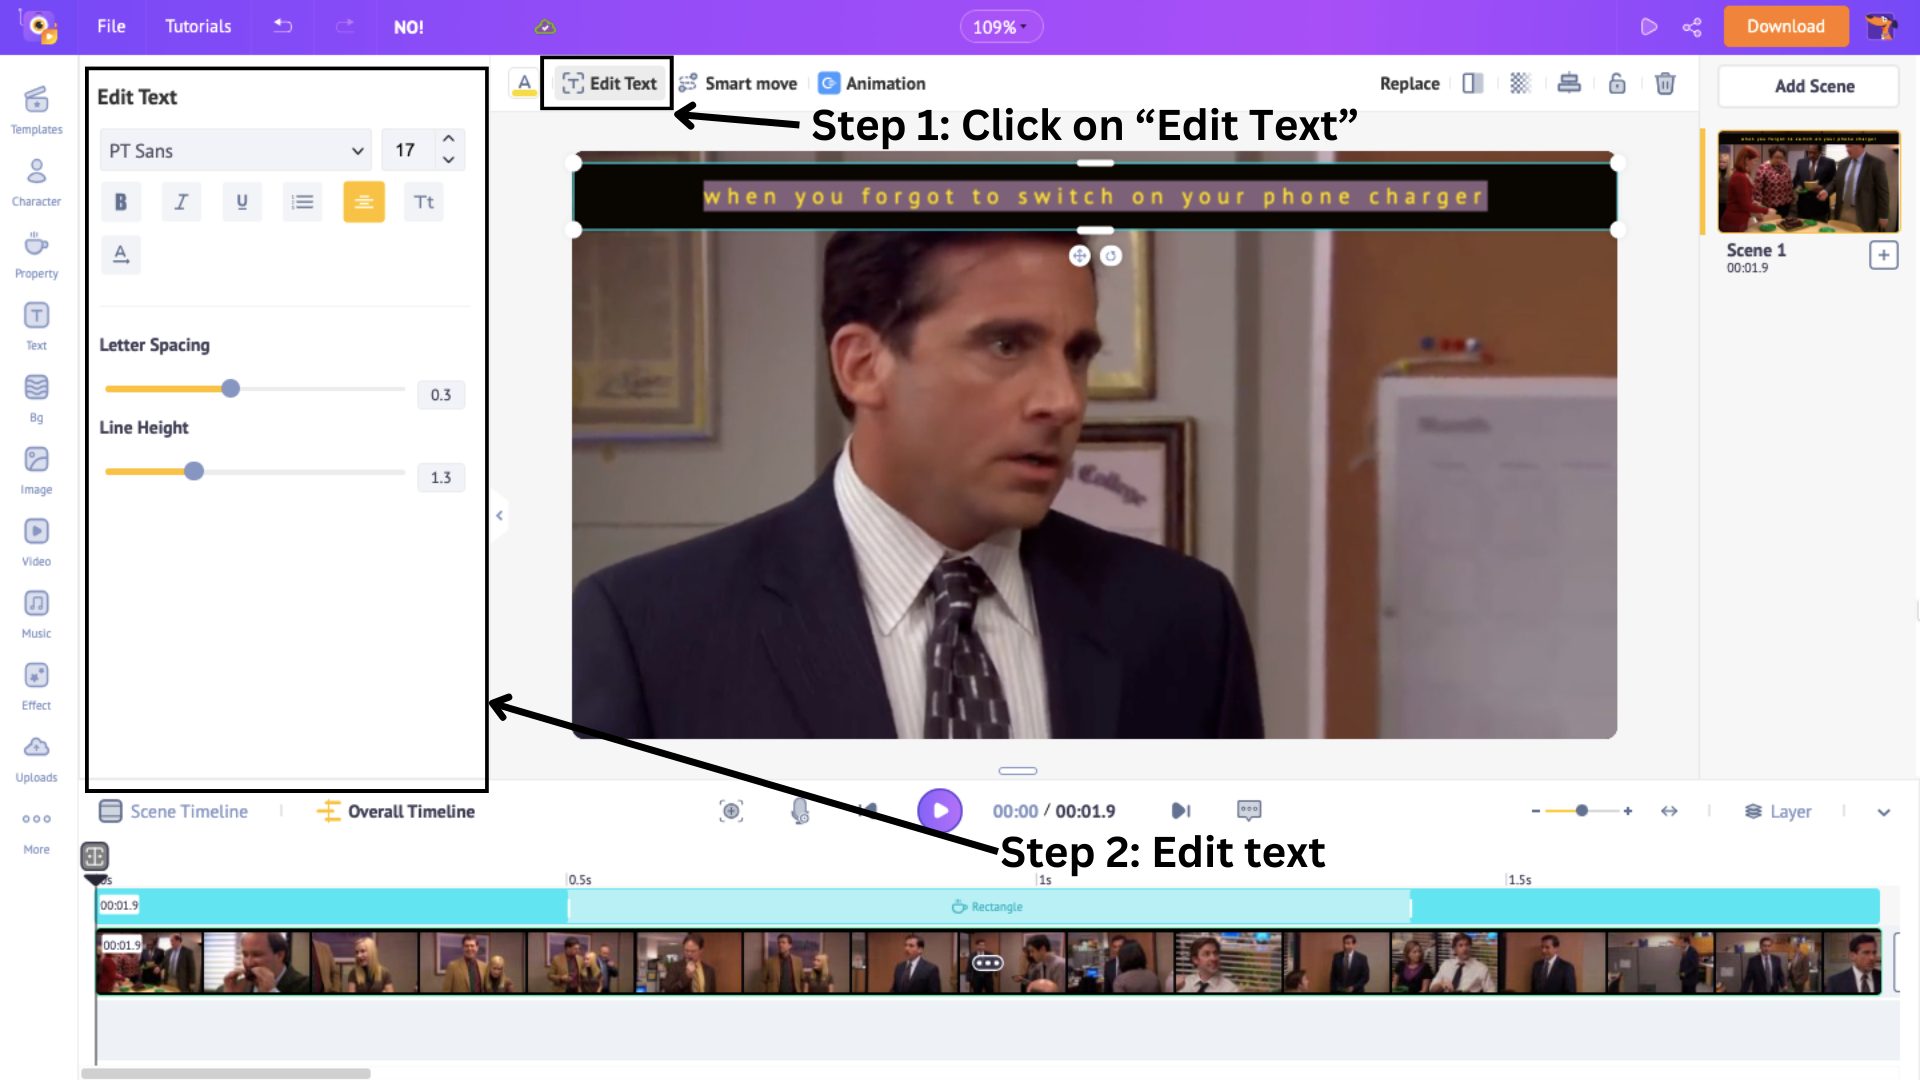
I have changed the font style for my text. If you notice, a colored section gets added to the timeline when you add the text to the workspace.
This indicates the duration of the text in the scene. You can adjust the appearance of the text in the scene by dragging the corners of the section across the scene timeline.
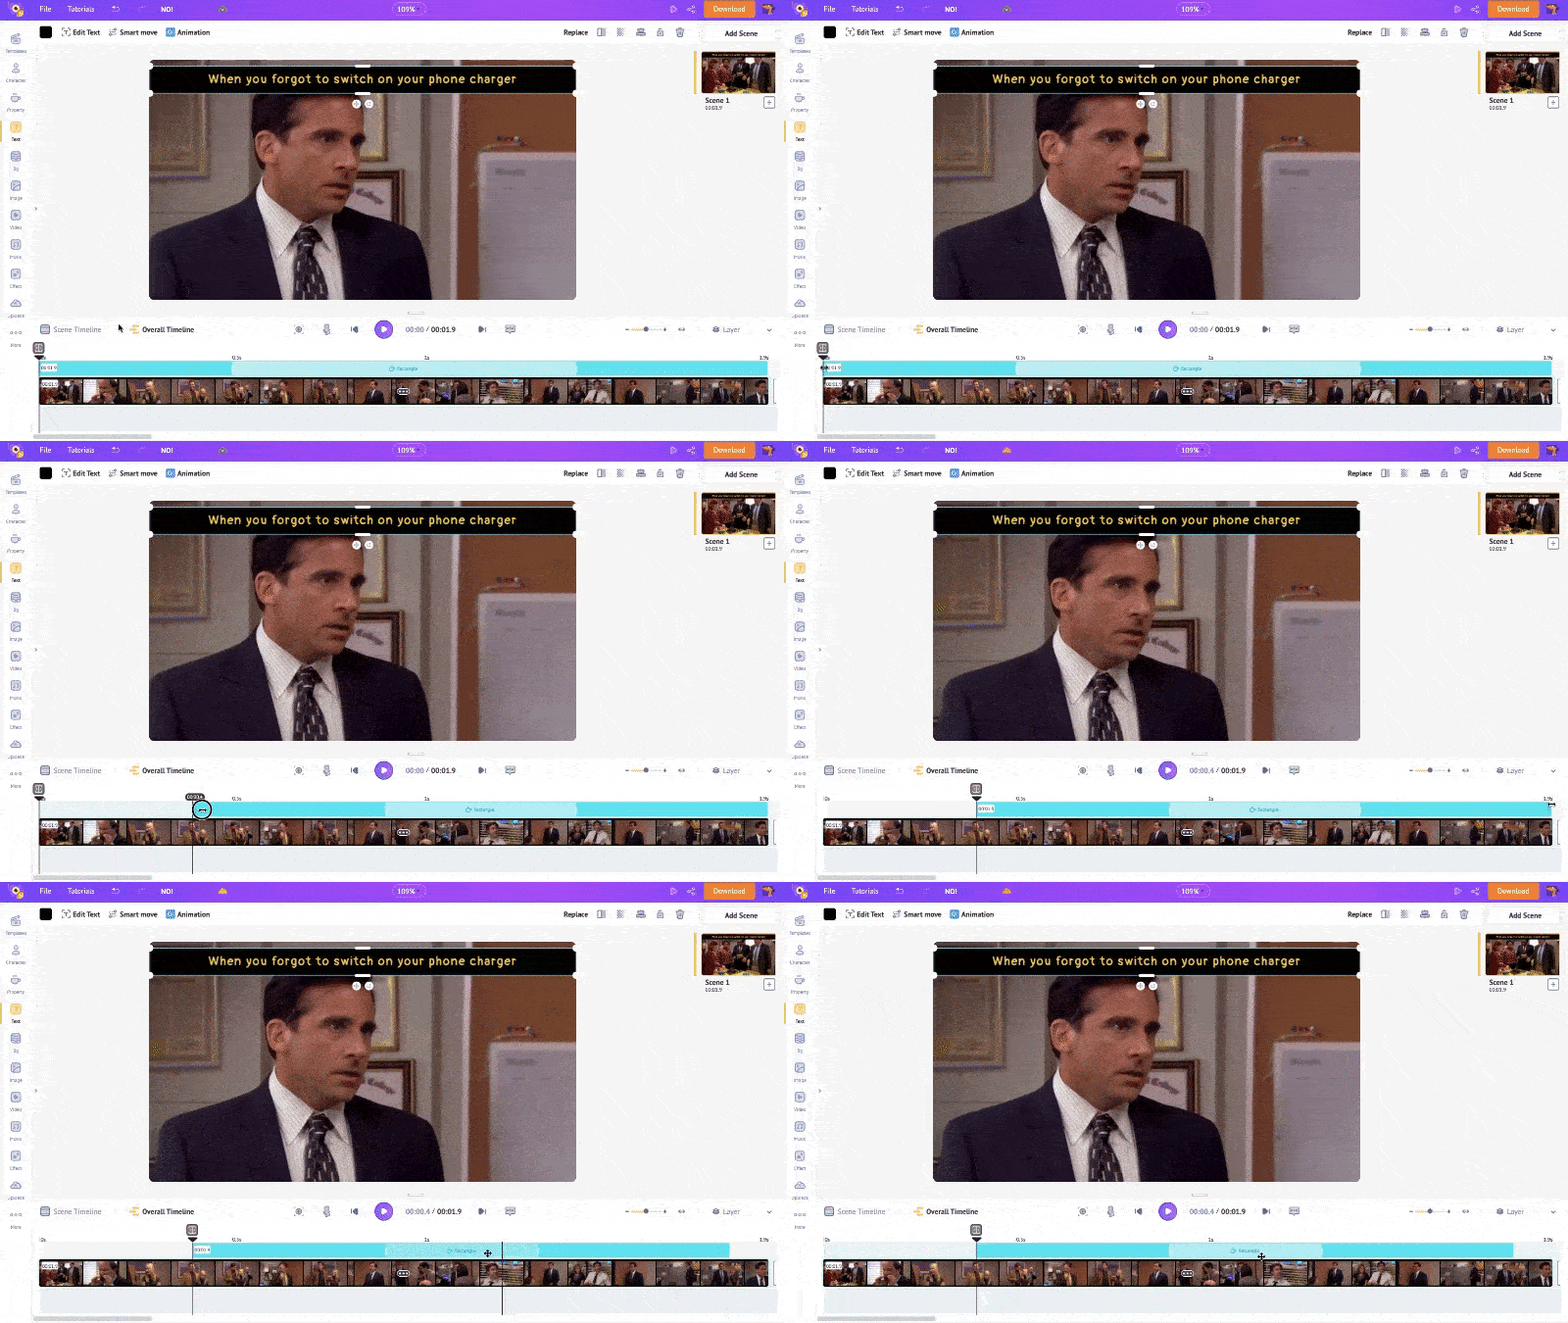
If you want this text box to appear throughout the scene, drag the colored section to the end of the scene timeline.
Another thing to notice is that the colored section has highlighted parts on either side. These indicate the animation effects and their duration. Animation effects are already added in text pre-builds.
If you want to change the animation effects, there is a way.
To do that, select the text box and click on Animation.
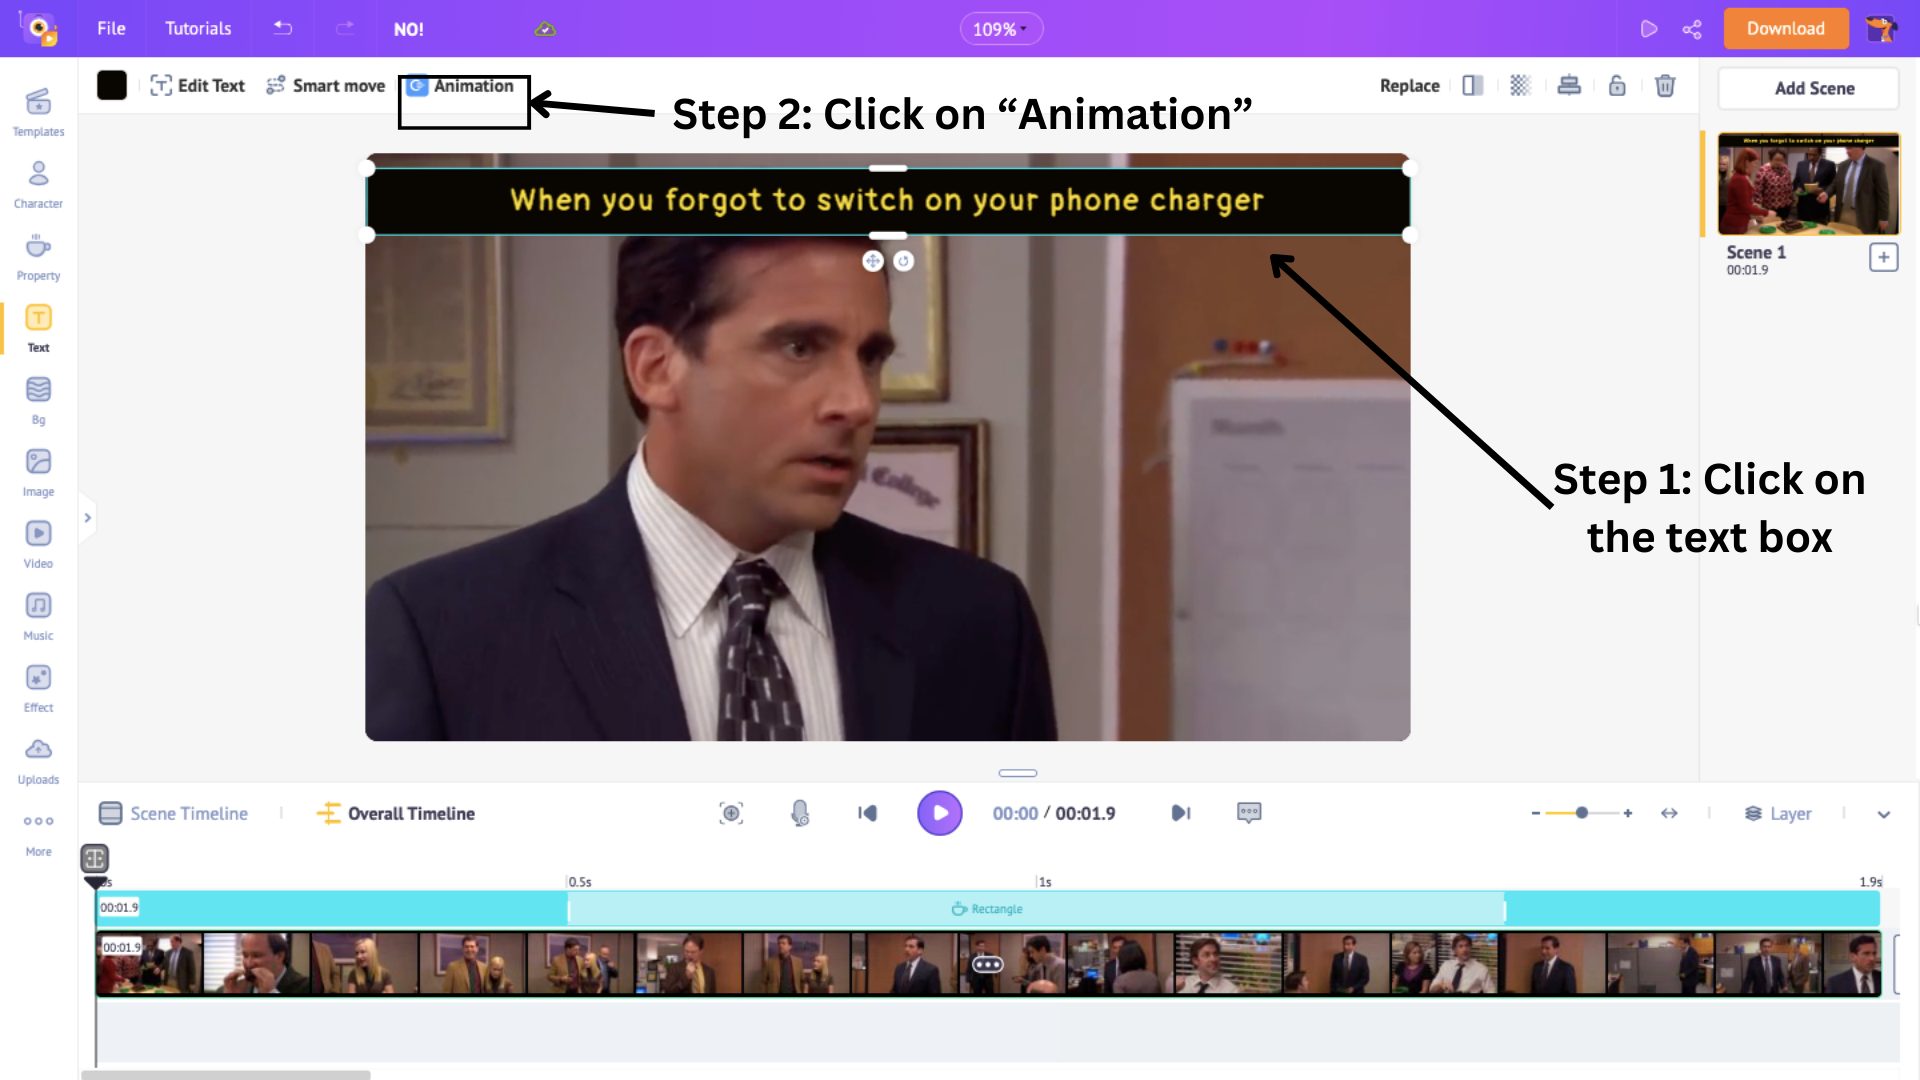
This will open the Animation panel with 35+ enter and exit animation effects for your text. Once you choose the enter and exit effects, they replace the existing animation effects.
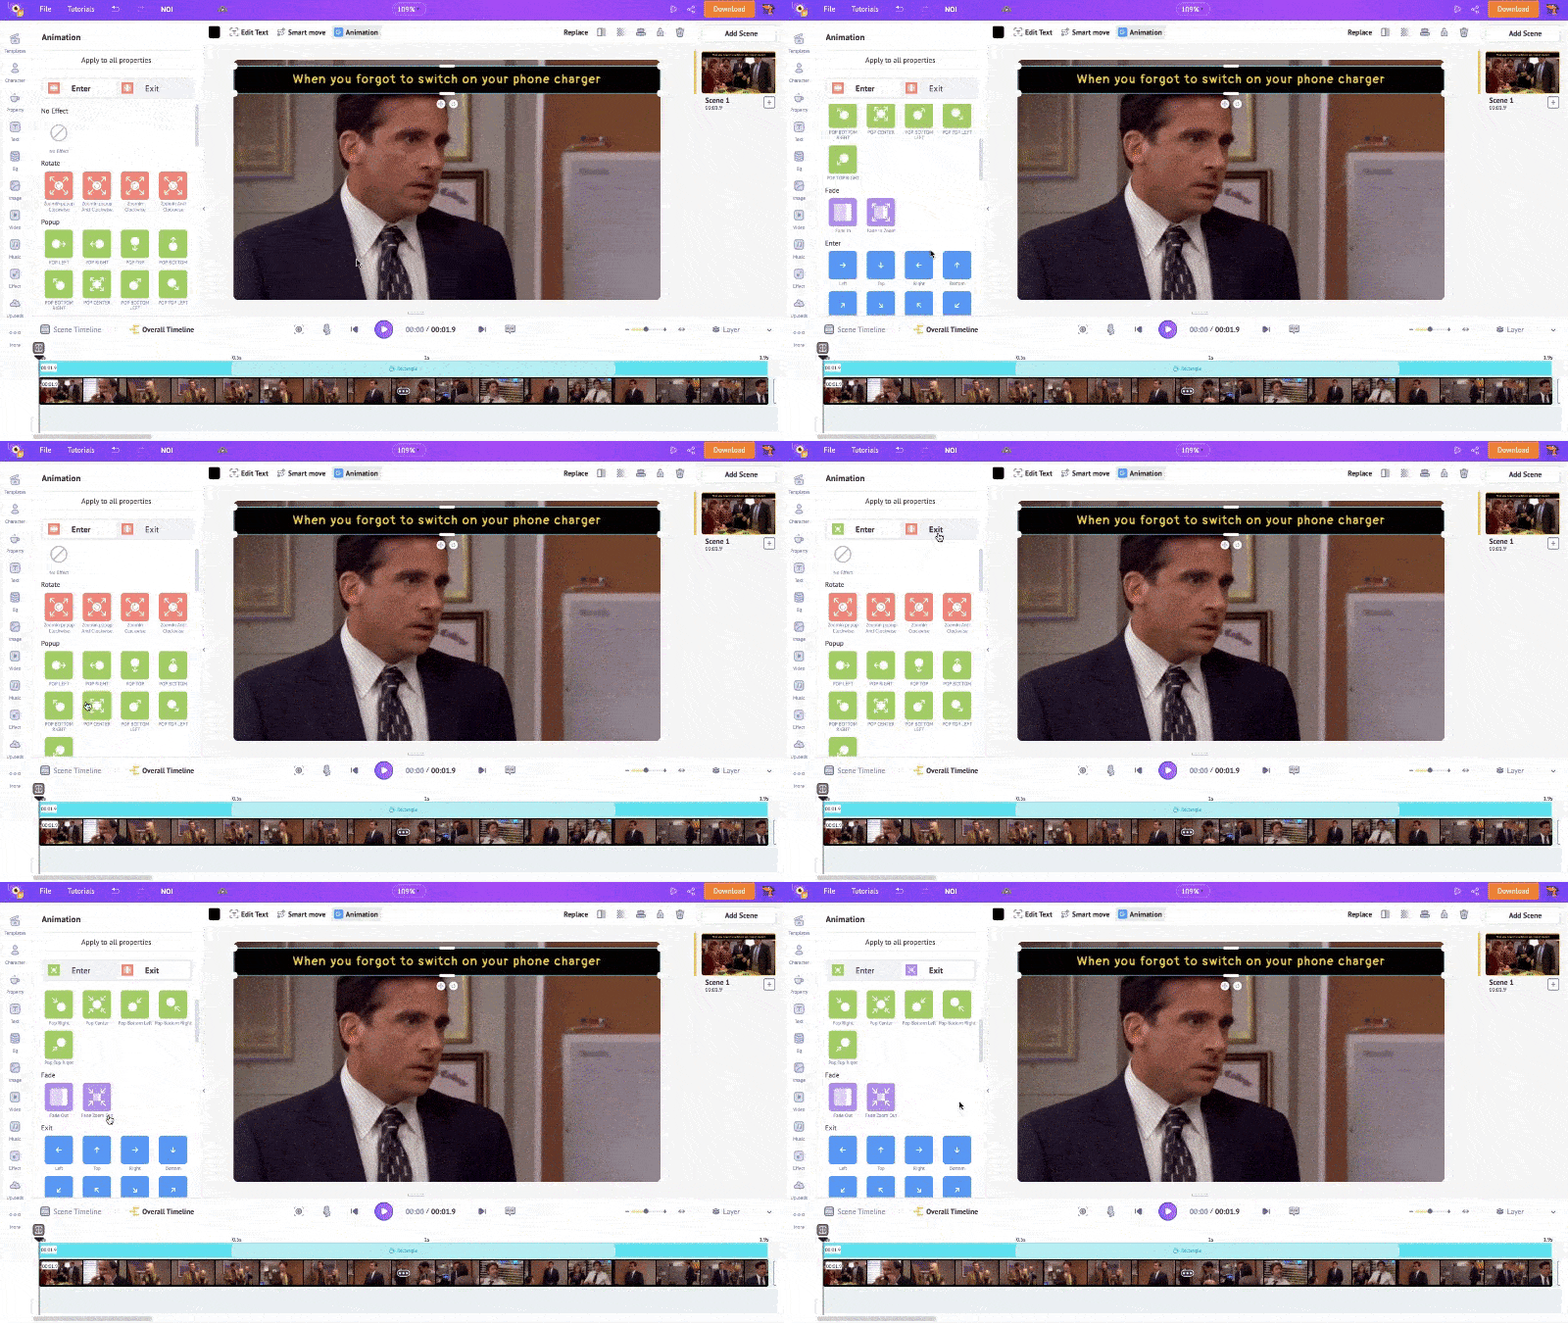
To adjust the duration of these animation effects, drag the inner corners of the highlighted section across the colored section.
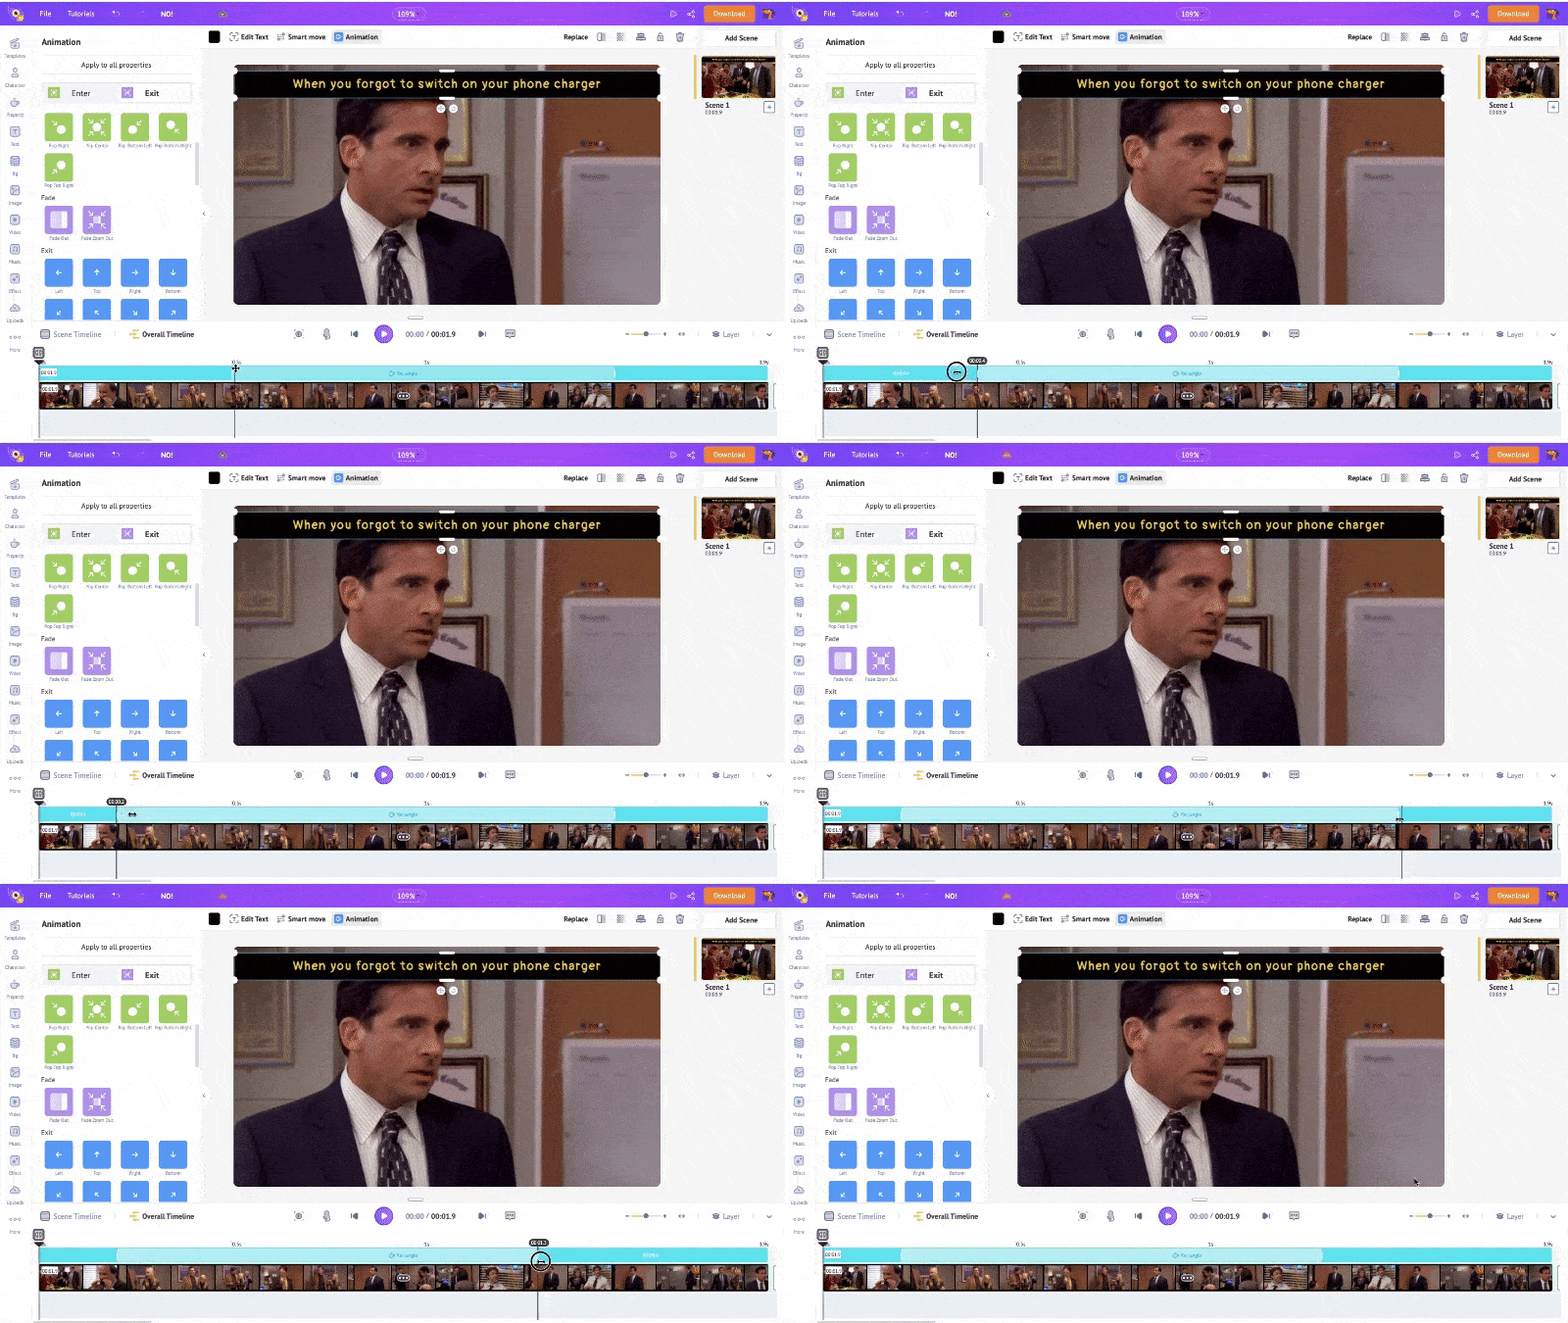
This way, you can add multiple text boxes to the scene, adjust its duration, and add animation effects.
That’s it. We’ve successfully added our video and added text to it. To see how the project looks so far, hit the Preview button.
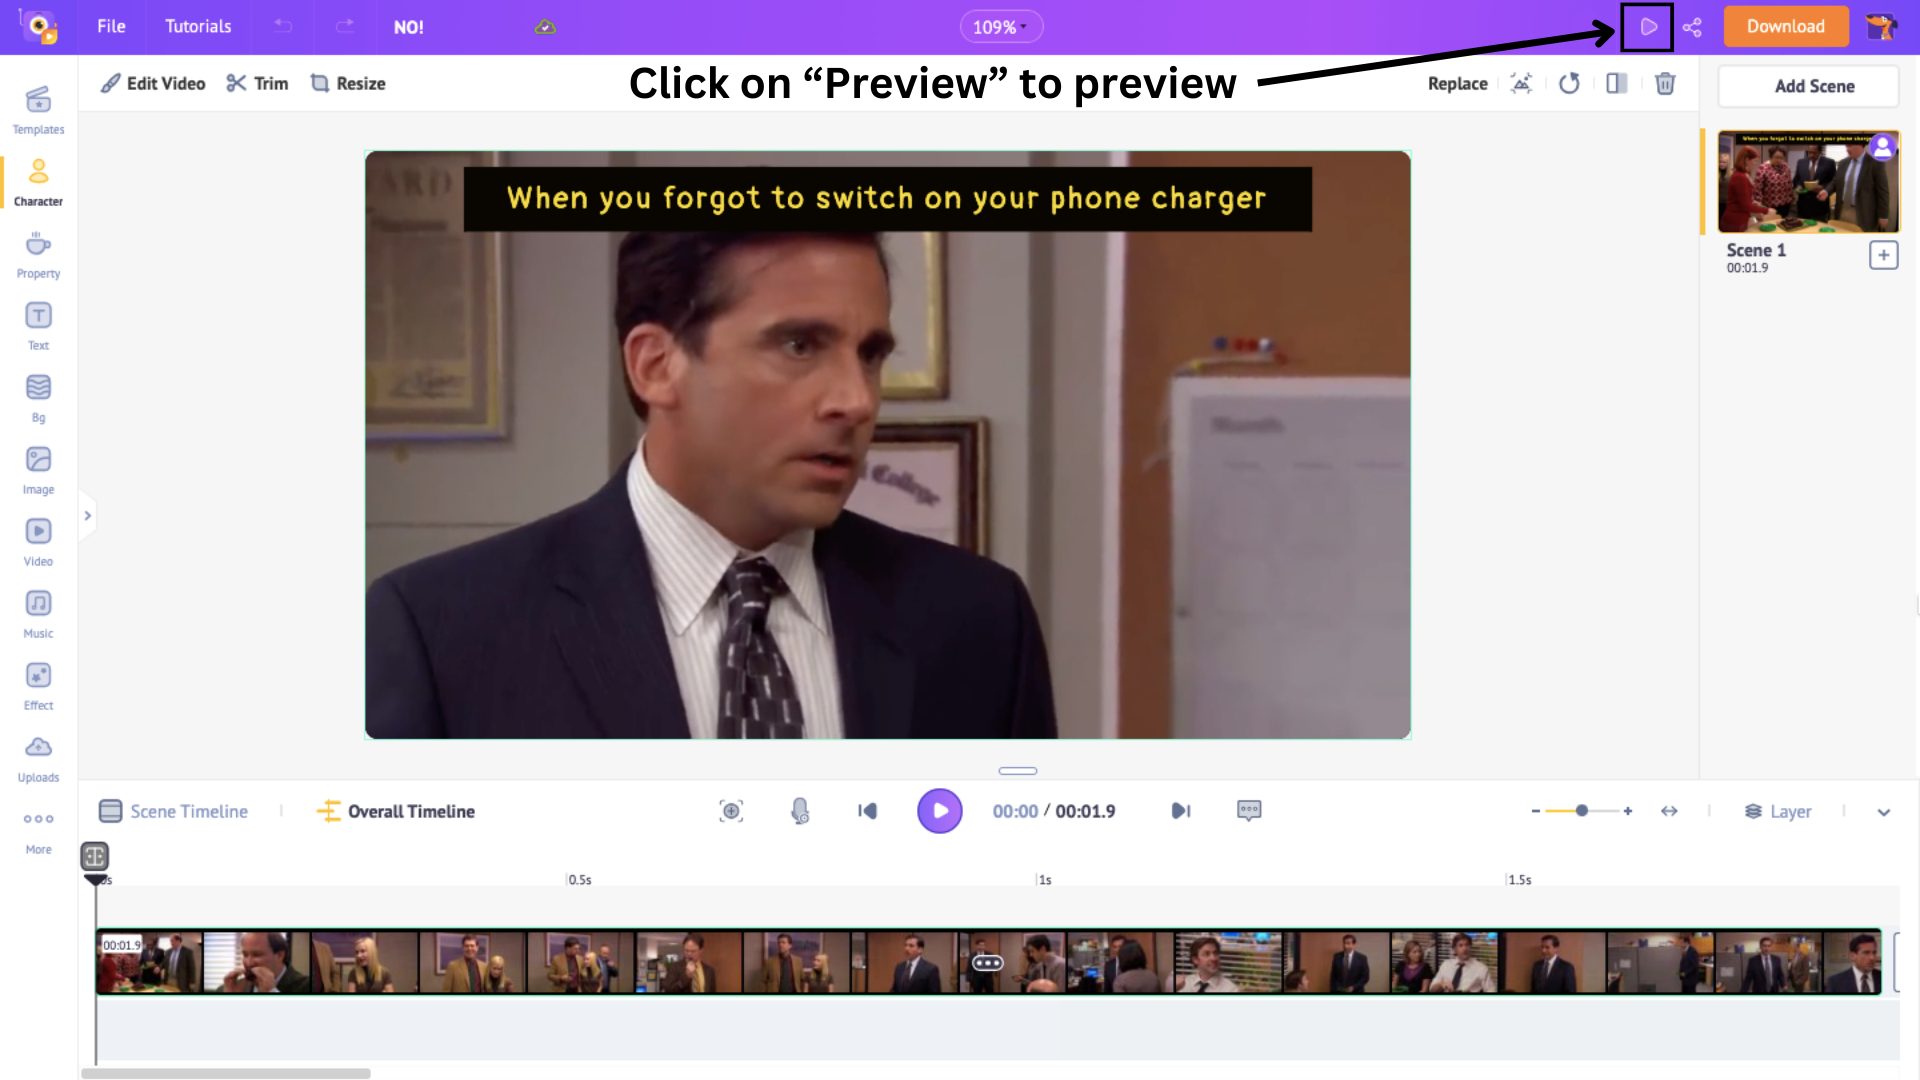
After previewing, make changes if necessary. We can move to the last step when you feel satisfied with your project.
Step 3: Download it as a GIF
Downloading the project as a GIF is quick and easy. Click the Download option at the top, then select the Download Gif option.
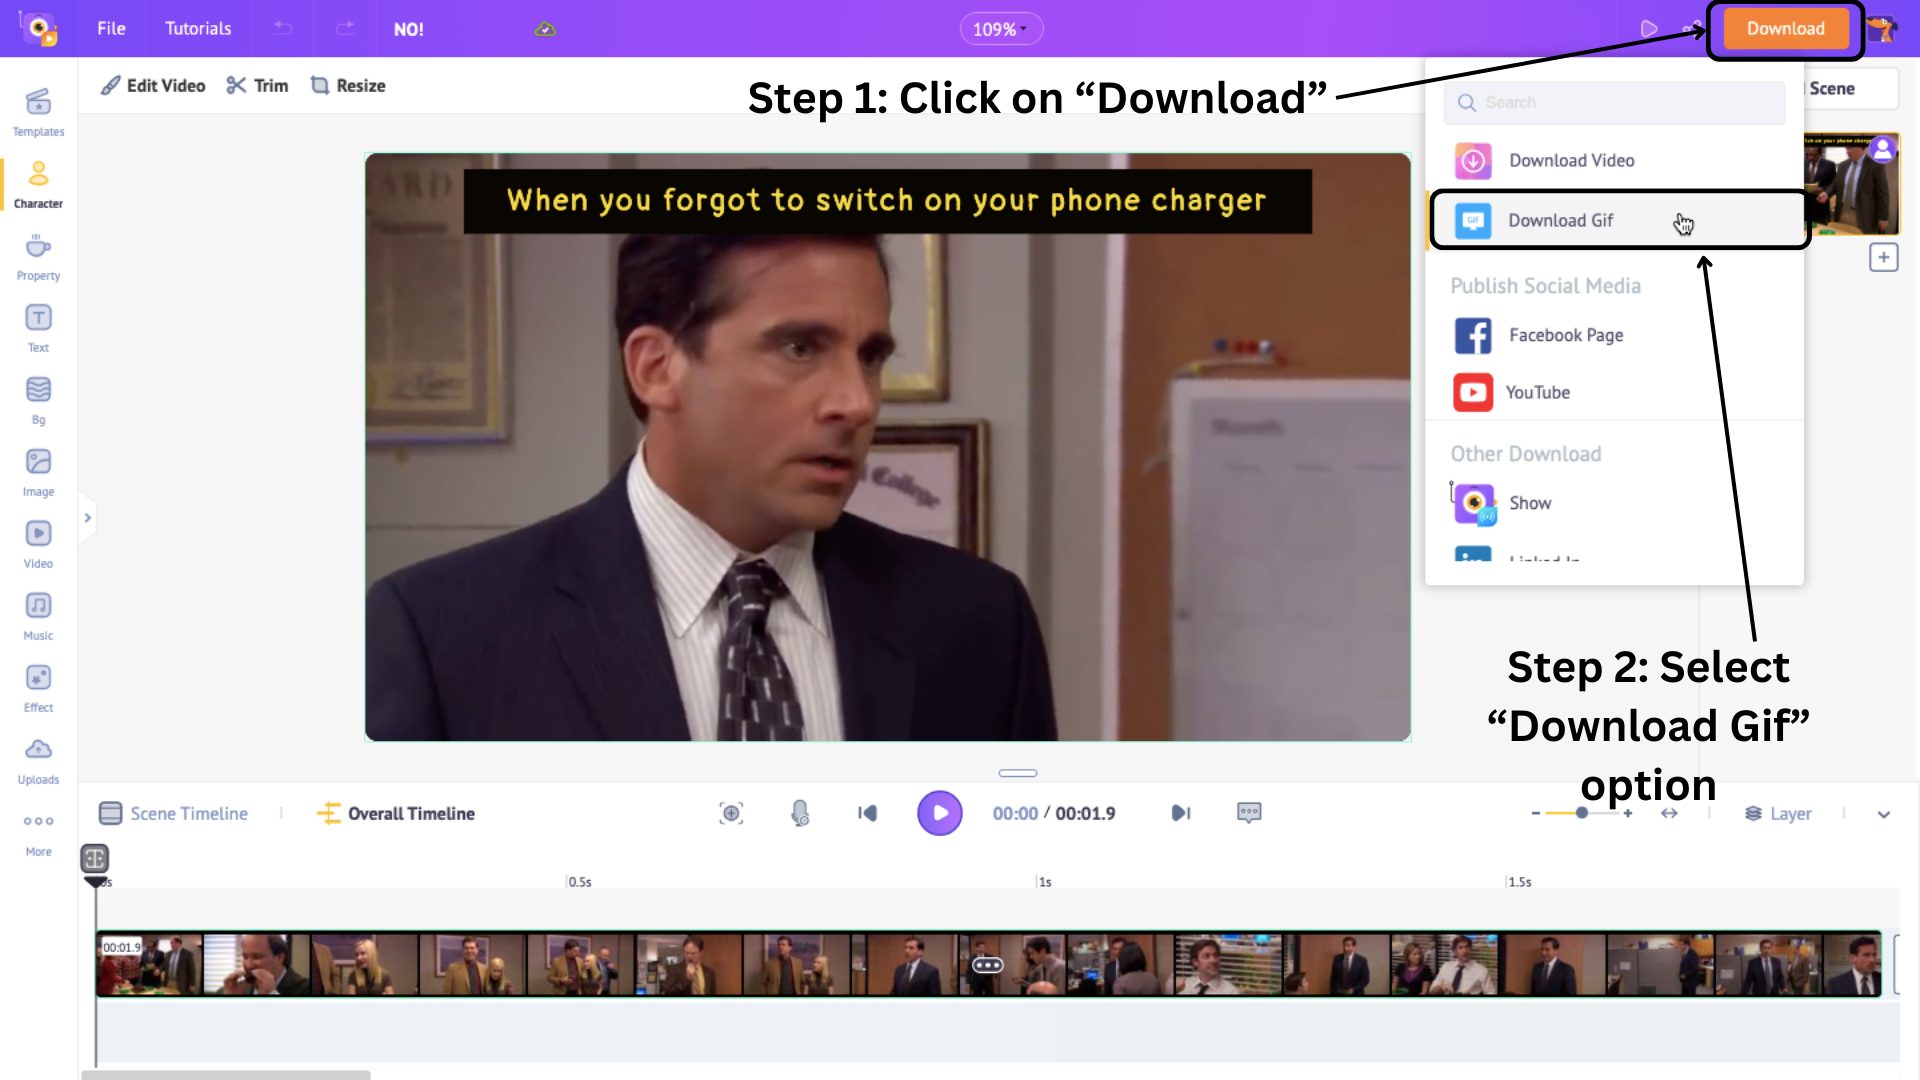
Then click on Download.
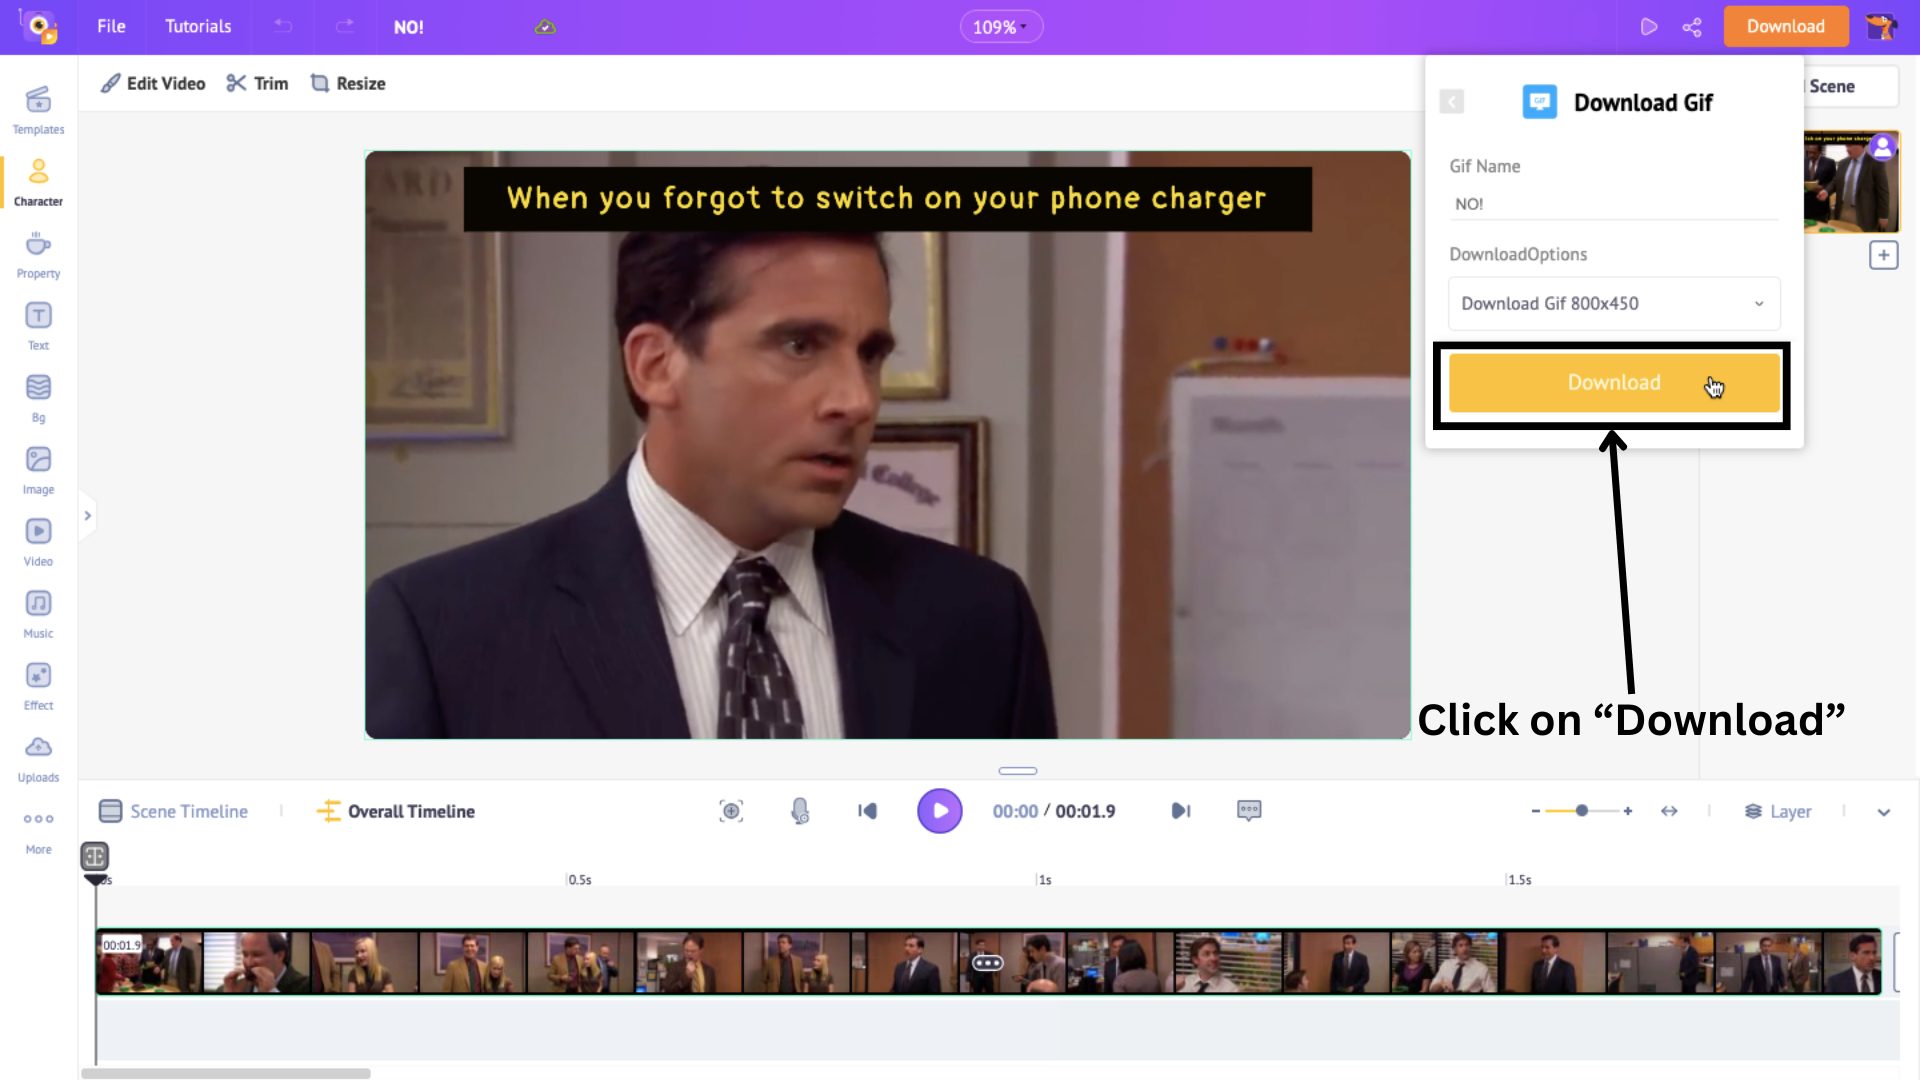
Your gif will be rendered in a few minutes and will be ready for download.
Look at how my GIF turned out.
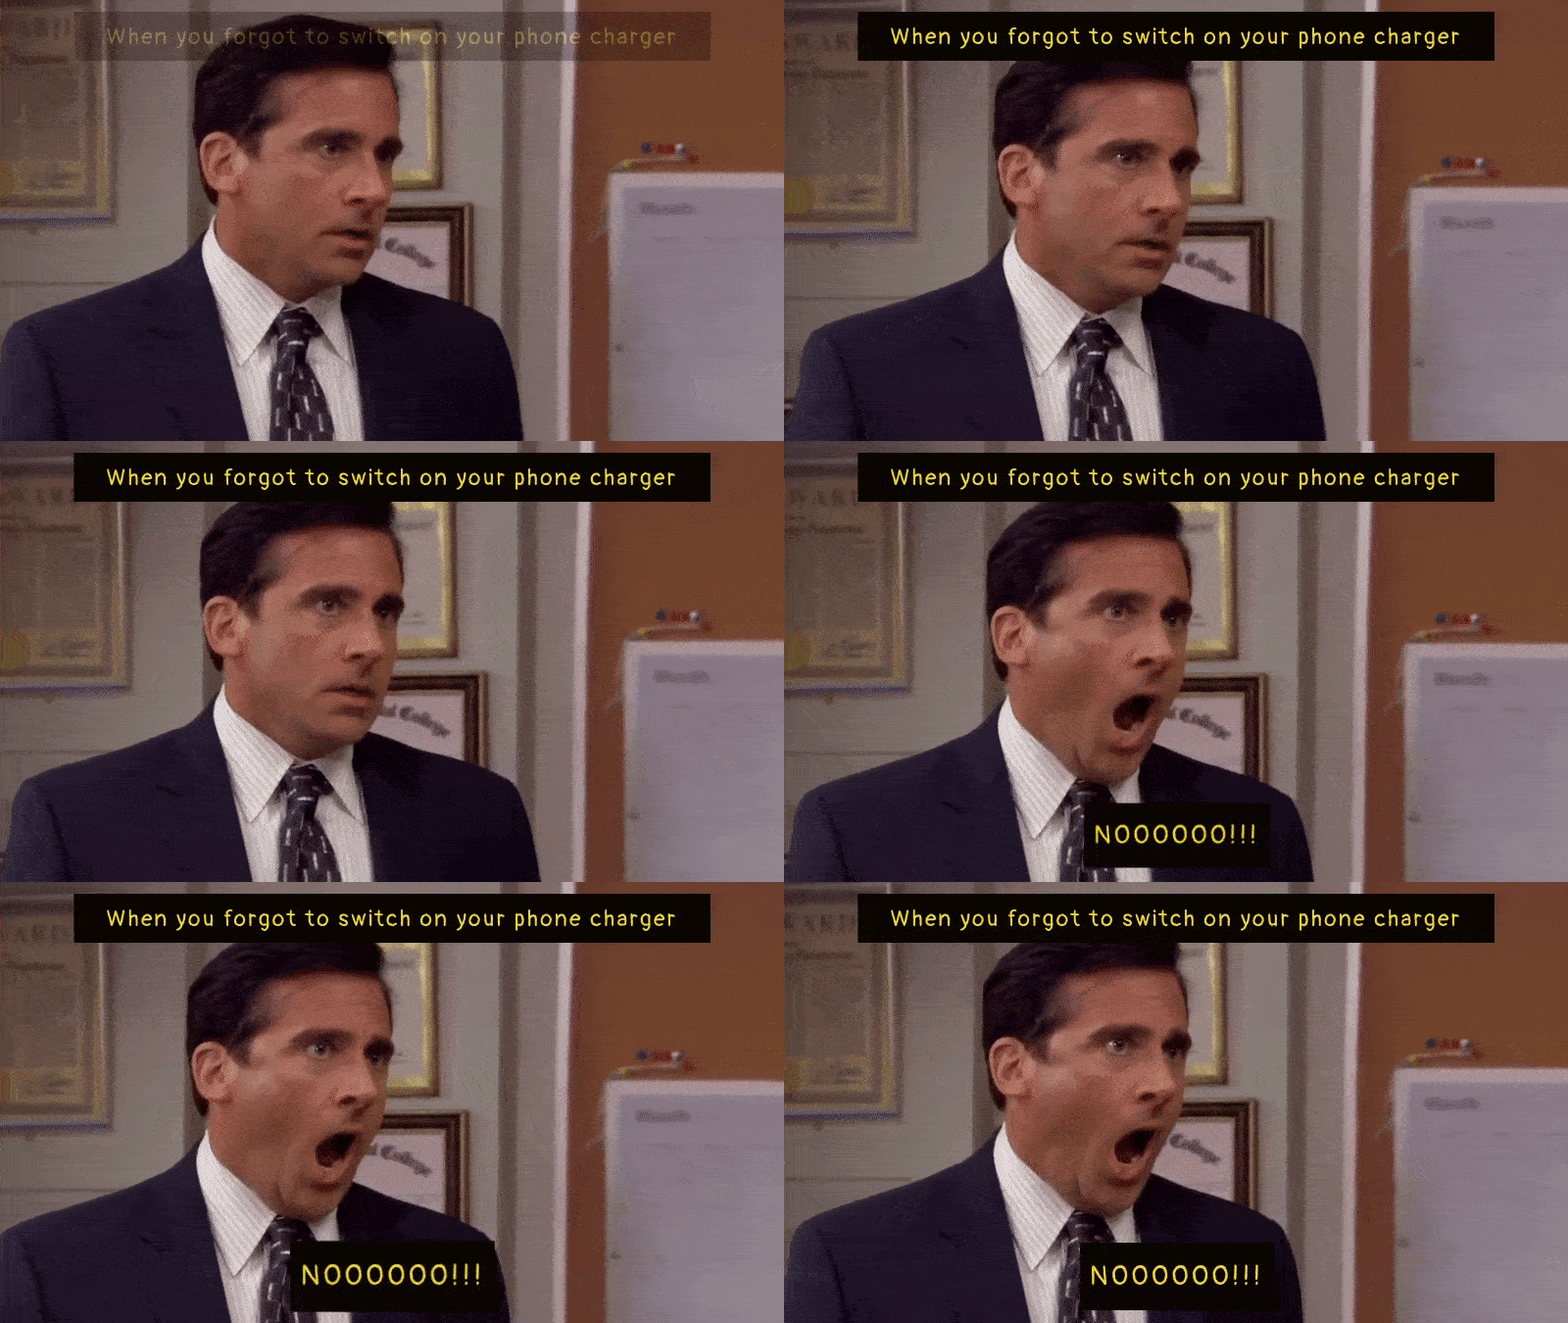
Painfully relatable, right?!
Well! We already told you this is one of the easiest ways to create animated Gifs!
Now that you know how to make animated gifs, what are you waiting for?
Click here to create your Gif!
Wanna learn how to turn a video into GIF? Check out the link provided (or) watch this video.

