How To Make A YouTube Intro on iPhone? [In Under A Minute]
Intro video is the first thing a viewer will notice about your YouTube video. So it’s essential to have an intro that grabs your audience's attention and leaves an everlasting impression.
But how do you do it?
How do you make a good video intro for YouTube? Especially without having access to expensive software or equipment?
Fear not, iPhone users!
This blog post will walk you through the step-by-step process of how to make a free YouTube Intro on your iPhone and make your channel stand out.
Yes, you heard it right!
Whether you're a seasoned content creator or just starting out, these tips will help you make a great first impression on your viewers.
So grab your iPhone, and let's get started!
How to make a good intro using Animaker?
Before we get started, you might be wondering why you should choose Animaker. How is it the best Intro Maker app available on the Appstore?
Here’s a short answer. Animaker Video Maker & Editor is an exclusive app from the house of Animaker Inc (which has over 18 million users). Within 6 months of its official launch, the Animaker iOS App has gained a global rating of 4.8 / 5 and is skyrocketing to the top as the best Intro Maker!
There couldn’t be a better Intro Maker App to help you create a perfect Intro Video.
So let’s get started.
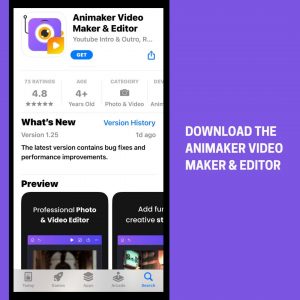
Step 1: Downloading the Animaker Video Maker & Editor
Step 2: Searching for “Intro” Templates
Step 3: Editing the YouTube Intro
Step 1: Downloading the Animaker Video Maker & Editor
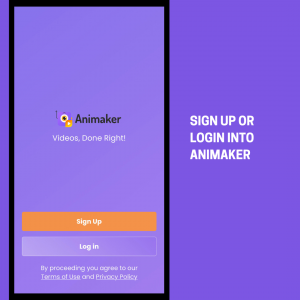
And create an account or log in.
Step 2: Searching for “Intro” Templates
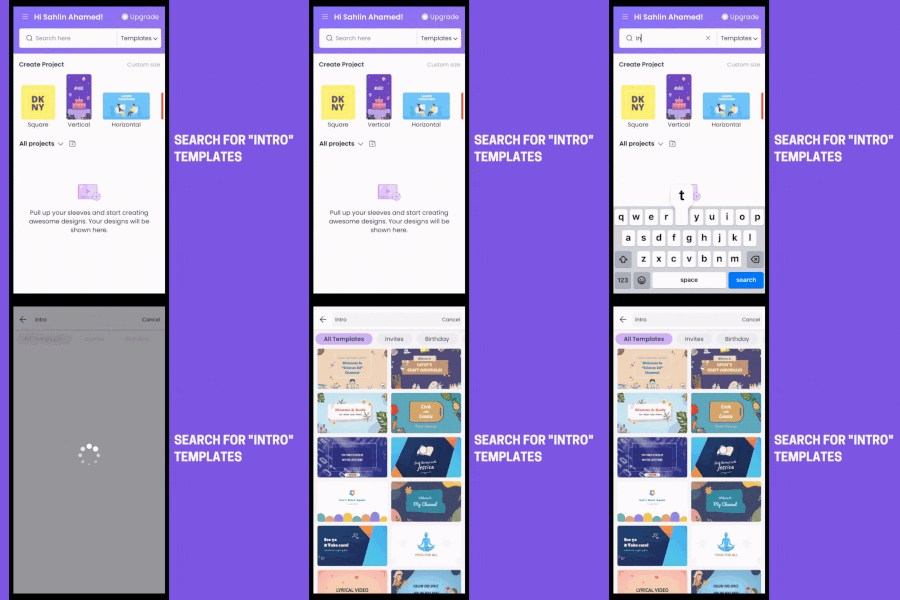
There are hundreds of awesome intro templates that you can pick from.
To preview a template, simply tap on it.
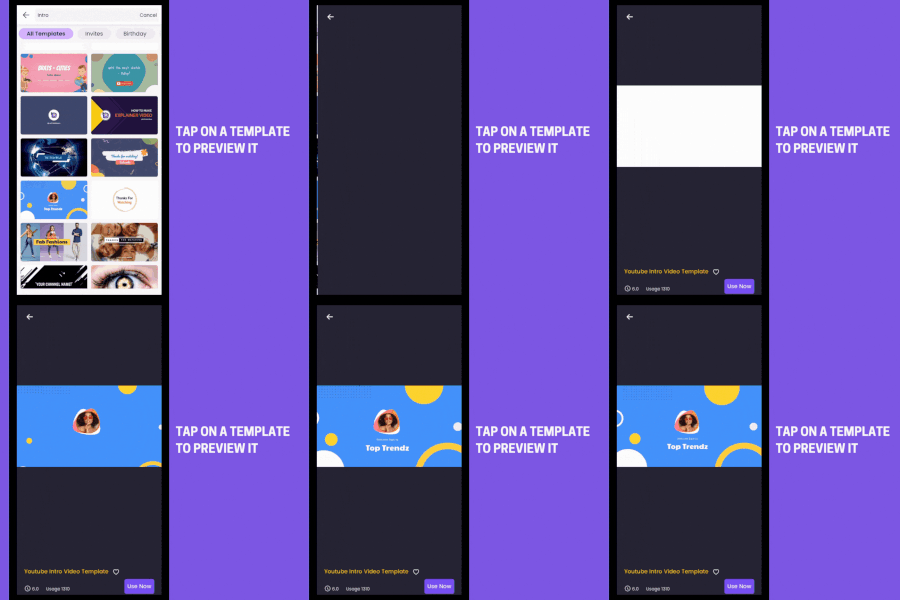
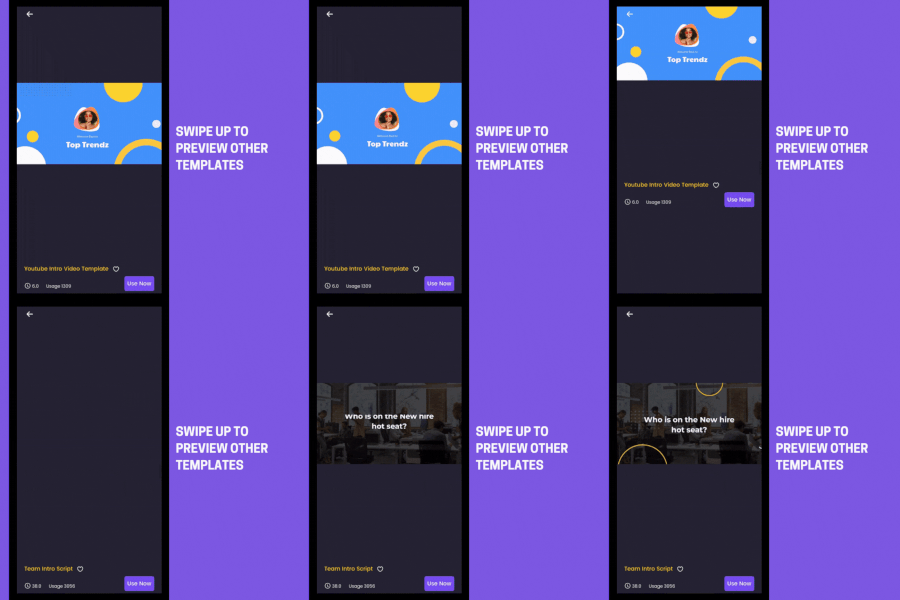
From here, you can also preview other templates by scrolling up.
Step 3: Editing the YouTube Intro
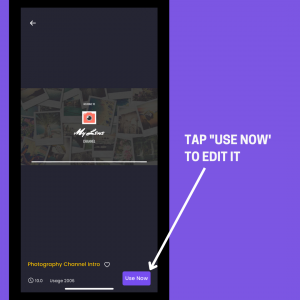
Once you decide on the template you would like to customize, click on the “Use Now” button.
Here’s where Animaker has made it really simple.
It gives you the option to choose your preferred Editor - Lite & Advanced.
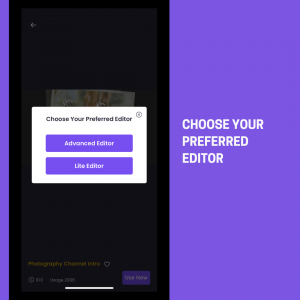
Lite Editor will help you make quick edits. You can easily customize the primary elements and edit the intros within a minute. You can tap and swap the text, image, and video present on the template.
Whereas the Advanced Editor will help you edit in detail. You can access a wide range of video editing tools that will help add animations, filters, special effects, etc.
3.1 - Here’s how to edit using the Lite Editor
A. How to Edit Text in Your Intro Template
B. Changing Images / Videos in Your Intro Template
C. How to Download Your Intro Video
3.2 - Here’s how to edit using the Advanced Editor
B. Editing Text using the Timeline
C. Changing the Images / Videos using the Timeline
D. How to Download Your Intro Video
3.1 - Editing Your Intro using the Lite Editor
After you choose the Lite Editor, the swappable elements (Texts, Images & Videos) are highlighted at the bottom.
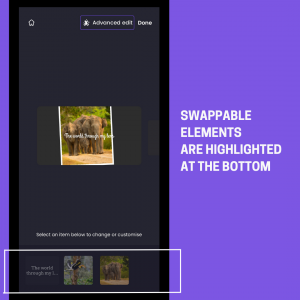
Just tap to edit them.
A. How to Edit Text in Your Intro Template
Tap on the textbox you want to change from the swappable items shown at the bottom.
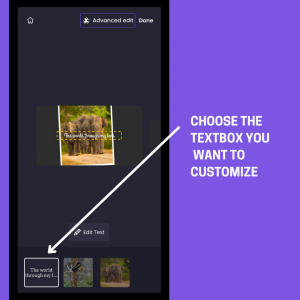
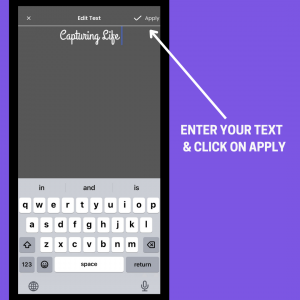
Once it’s selected, click on the “Edit Text” button to add your content.
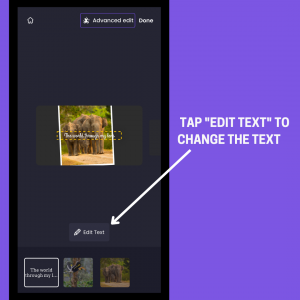
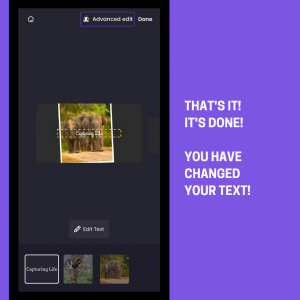
Once you’re done adding your text, click on “Apply” to save your changes.
B. Changing Images / Videos in Your Intro Template
Images & Videos are also swappable on the Animaker App.
Here’s an example.
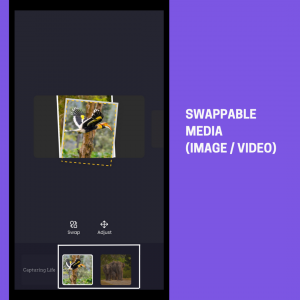
Tap change the image/video you want to change from the swappable items shown at the bottom.
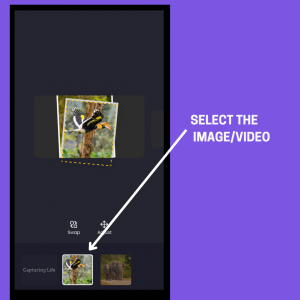
Once it’s selected, click on the “Swap” button to replace the image/video.
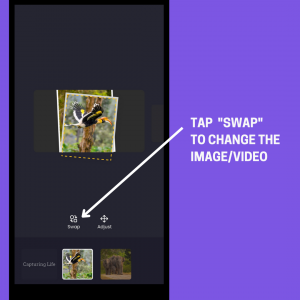
You can either replace it by uploading your own video or even take advantage of the 100 million watermark-free stock assets available in the library.

Once you select the image/video, it gets added to your video project.
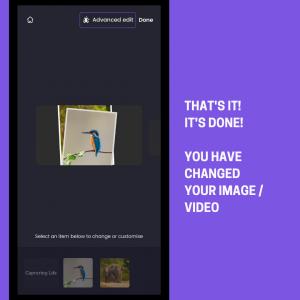
This way, you can edit as many Images/Videos on the template as you like.
C: How to Download Your Intro Video
Once you’re done editing your video, click on “Done.” The preview of the video loads.
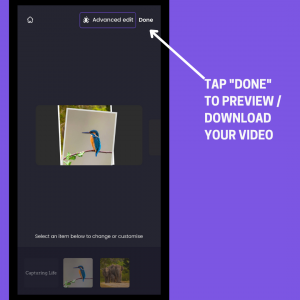
If you’re happy with the result, click the “Download” icon to download the video.
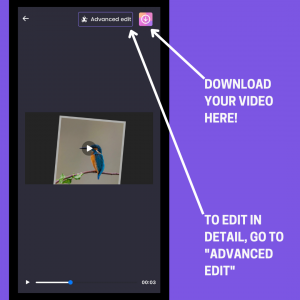
Note: If you are not fully satisfied with the edits you made in the Lite Editor, you can further detail your intro template by clicking "Advanced Edit”.
It will help you access the Advanced Editor with many editing tools that will help you detail your project even further.
3.2 - Editing Your Intro using the Advanced Editor
The Advanced Editor gives you access to many professional video editing features, such as special effects, text effects, etc., to detail your video and help you make a good intro video.
It’s quite easy to use. Here’s how.
Once you choose the Advanced Editor, the scene editing tools load on the bottom.
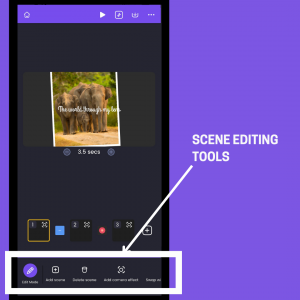
A. Switch to “Edit Mode”
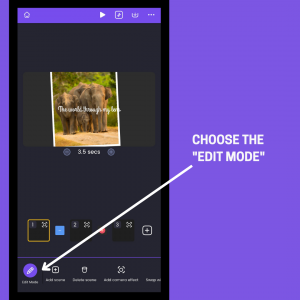
Click on the “Edit Mode” to switch to the Timeline. The Timeline displays all the elements used in the scene.
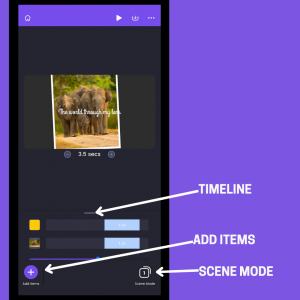
There are three sections here that allow you to do different things.
i) Timeline - To edit the elements present in the Scene.
ii) Add Items - To add more elements to the Scene.
iii) Scene Mode - To access scene editing tools.
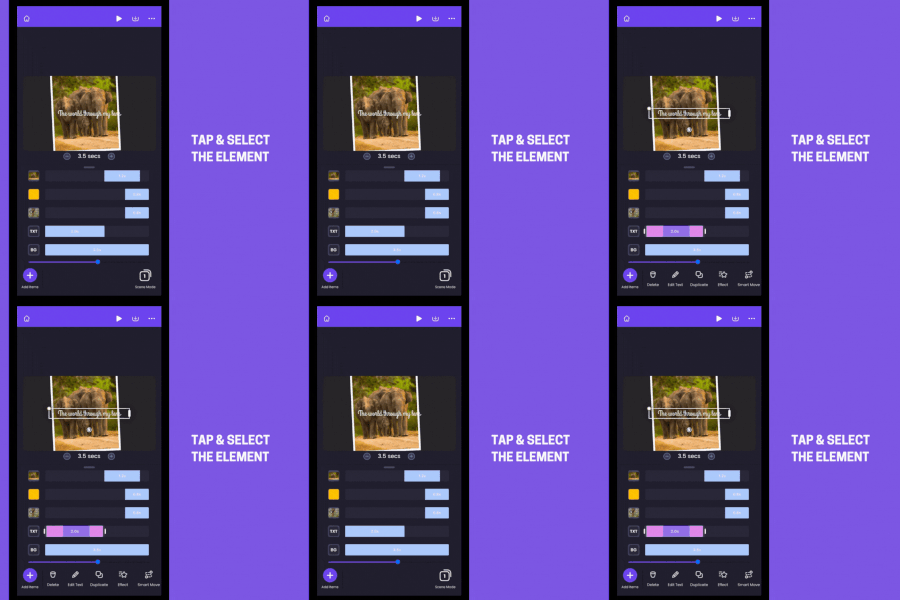
B: Editing Text using the Timeline
Pull and expand the timeline to view the elements in it.
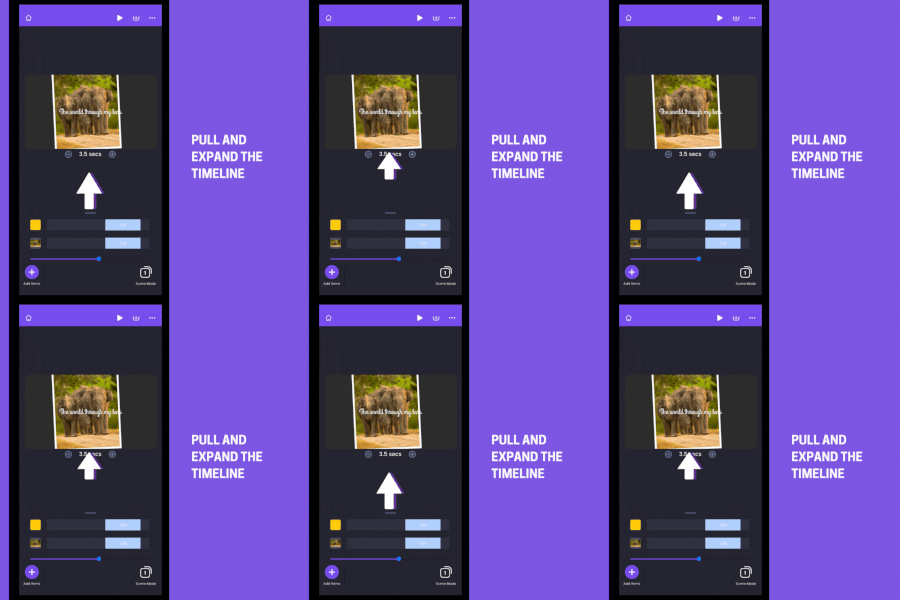
From the scene above, select the textbox that you want to edit. The editing tools load at the bottom.
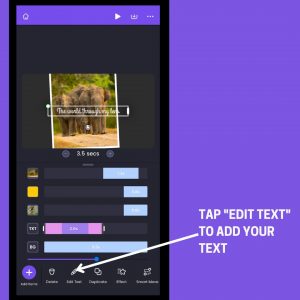
Click on the “Edit Text” button to add your content.
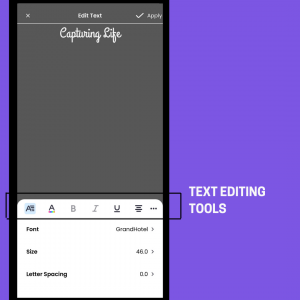
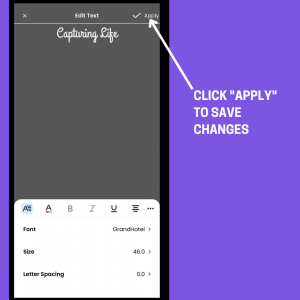
The Text Editor Opens. Here you can enter your text. Further, you can also change the font style, size, etc.
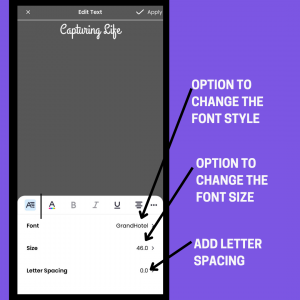
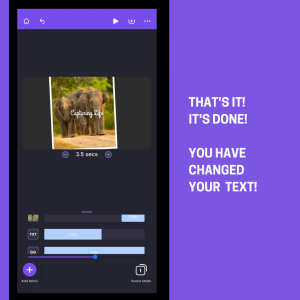
Once you’re done, click “Apply” to save your changes.
C: Changing the Images / Videos using the Timeline
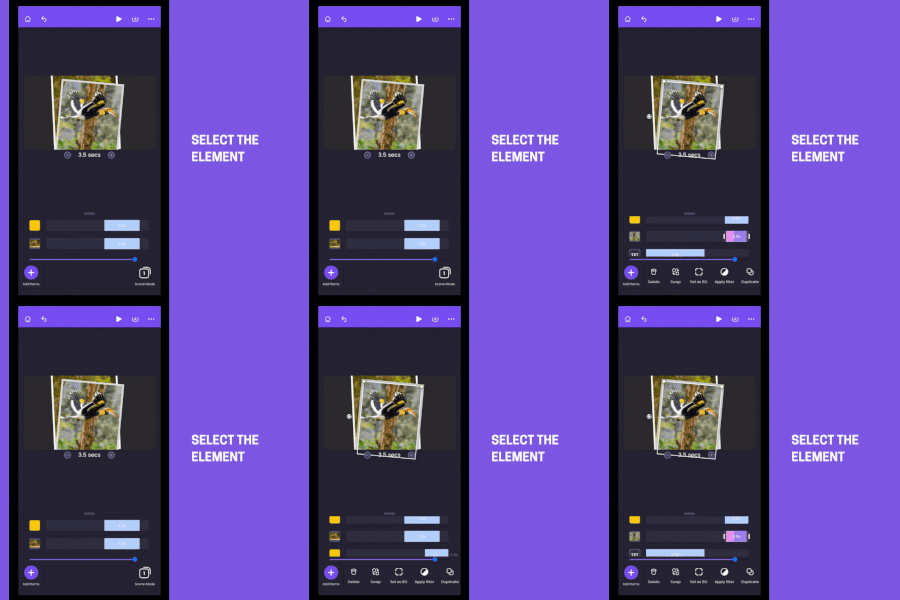
Just like how you selected the text from the timeline, tap the image/video that you want to edit. The editing tools load at the bottom.
Click on the “Swap” button to change your image/video.
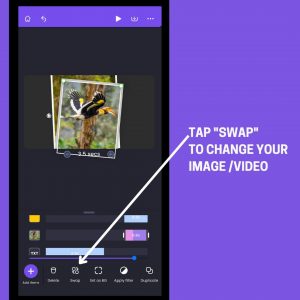
You can either replace it by uploading your own video or even take advantage of the 100 million watermark-free stock assets available in the library.
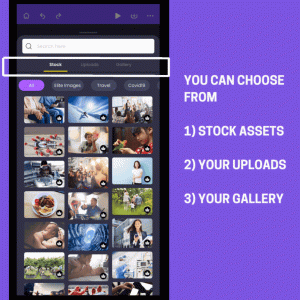
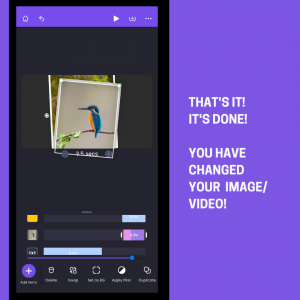
Once you select the image/video, it gets added to your video project.
D: How to Download Your Intro Video
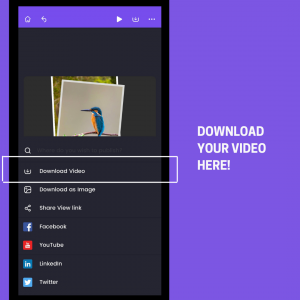
Once you’re done editing your video, click on the “Download” icon and choose how you would like to export your video.
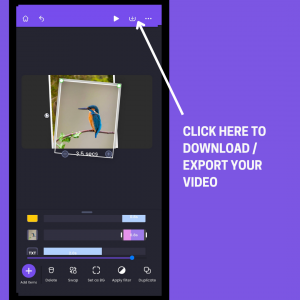
You can either directly download the video to your phone or publish it across social media platforms such as Facebook, YouTube, etc.
Bonus: How to Further Detail Your Intro Video
If you would like to make your video even more engaging by adding more elements, go to “Add Items.”

In it, you will find the wide range of features available in the Animaker library.
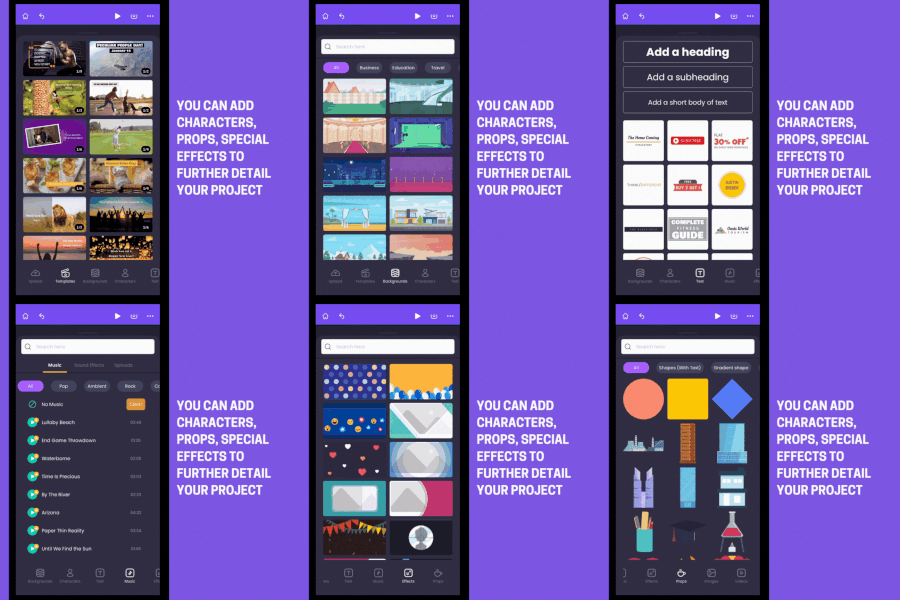
With it, you can further
- Add Characters to your Intro Video
- Add Special Effects to your Intro Video
- Add Animated Props & Detail Your Scenes
- Add Trendy Music
- & plenty more!
Now that you know how to make a Youtube Intro on your iPhone, I am sure you are going to make your intro video right away. So, best of luck with that.
Please feel free to ask any questions you may have in the comments section below. I would love to answer them for you :)

