How to make a video collage? [Web+Mobile]
Video collages are a fantastic way to bring together a series of short videos and images to create a lasting memory or even a spectacular social media post!
But how do you make video collages, especially if you are an amateur? 🤔
Well, look no further! Try Animaker’s Video Collage Maker!
It not only has the most user-friendly free video collage maker, but it also offers the most stunning collage templates that you can find online! (Don’t believe me? Here’s a sneak peek!)

Impressed? 😄
There are over 100+ collage templates that will make your viewers go, “WOW! 😲”
So, in this article, we'll look at a few simple steps that will help you create your own video collage.
So choose your device & let’s get started!
Choose Your Device
i) How to make a video collage on your Laptop/Computer?
Even if it is your first video collage, you would just be spending 5 minutes to create one! It’s very easy!
You can create a stunning video collage just by following these 5 steps!
Step 1: Choosing the right template for your video collage
Step 2: Uploading your videos & pictures
Step 3: Customizing text and font styles
Step 4: Choosing and adjusting background music
Step 5: Previewing & downloading your completed video collage
Bonus: Tips for making your video collage even more memorable!
Let’s get started!
Step 1: Choosing the right template for your video collage

Choosing the right template is crucial in making the perfect video or picture collage. So keep in mind the amount of content you want to include in your video collage.
If you have a lot of pictures and videos, choose a template that includes multiple frames. On the other hand, if you only have a few photos or videos, choose a simple and straightforward collage video template.
So here’s how you begin.
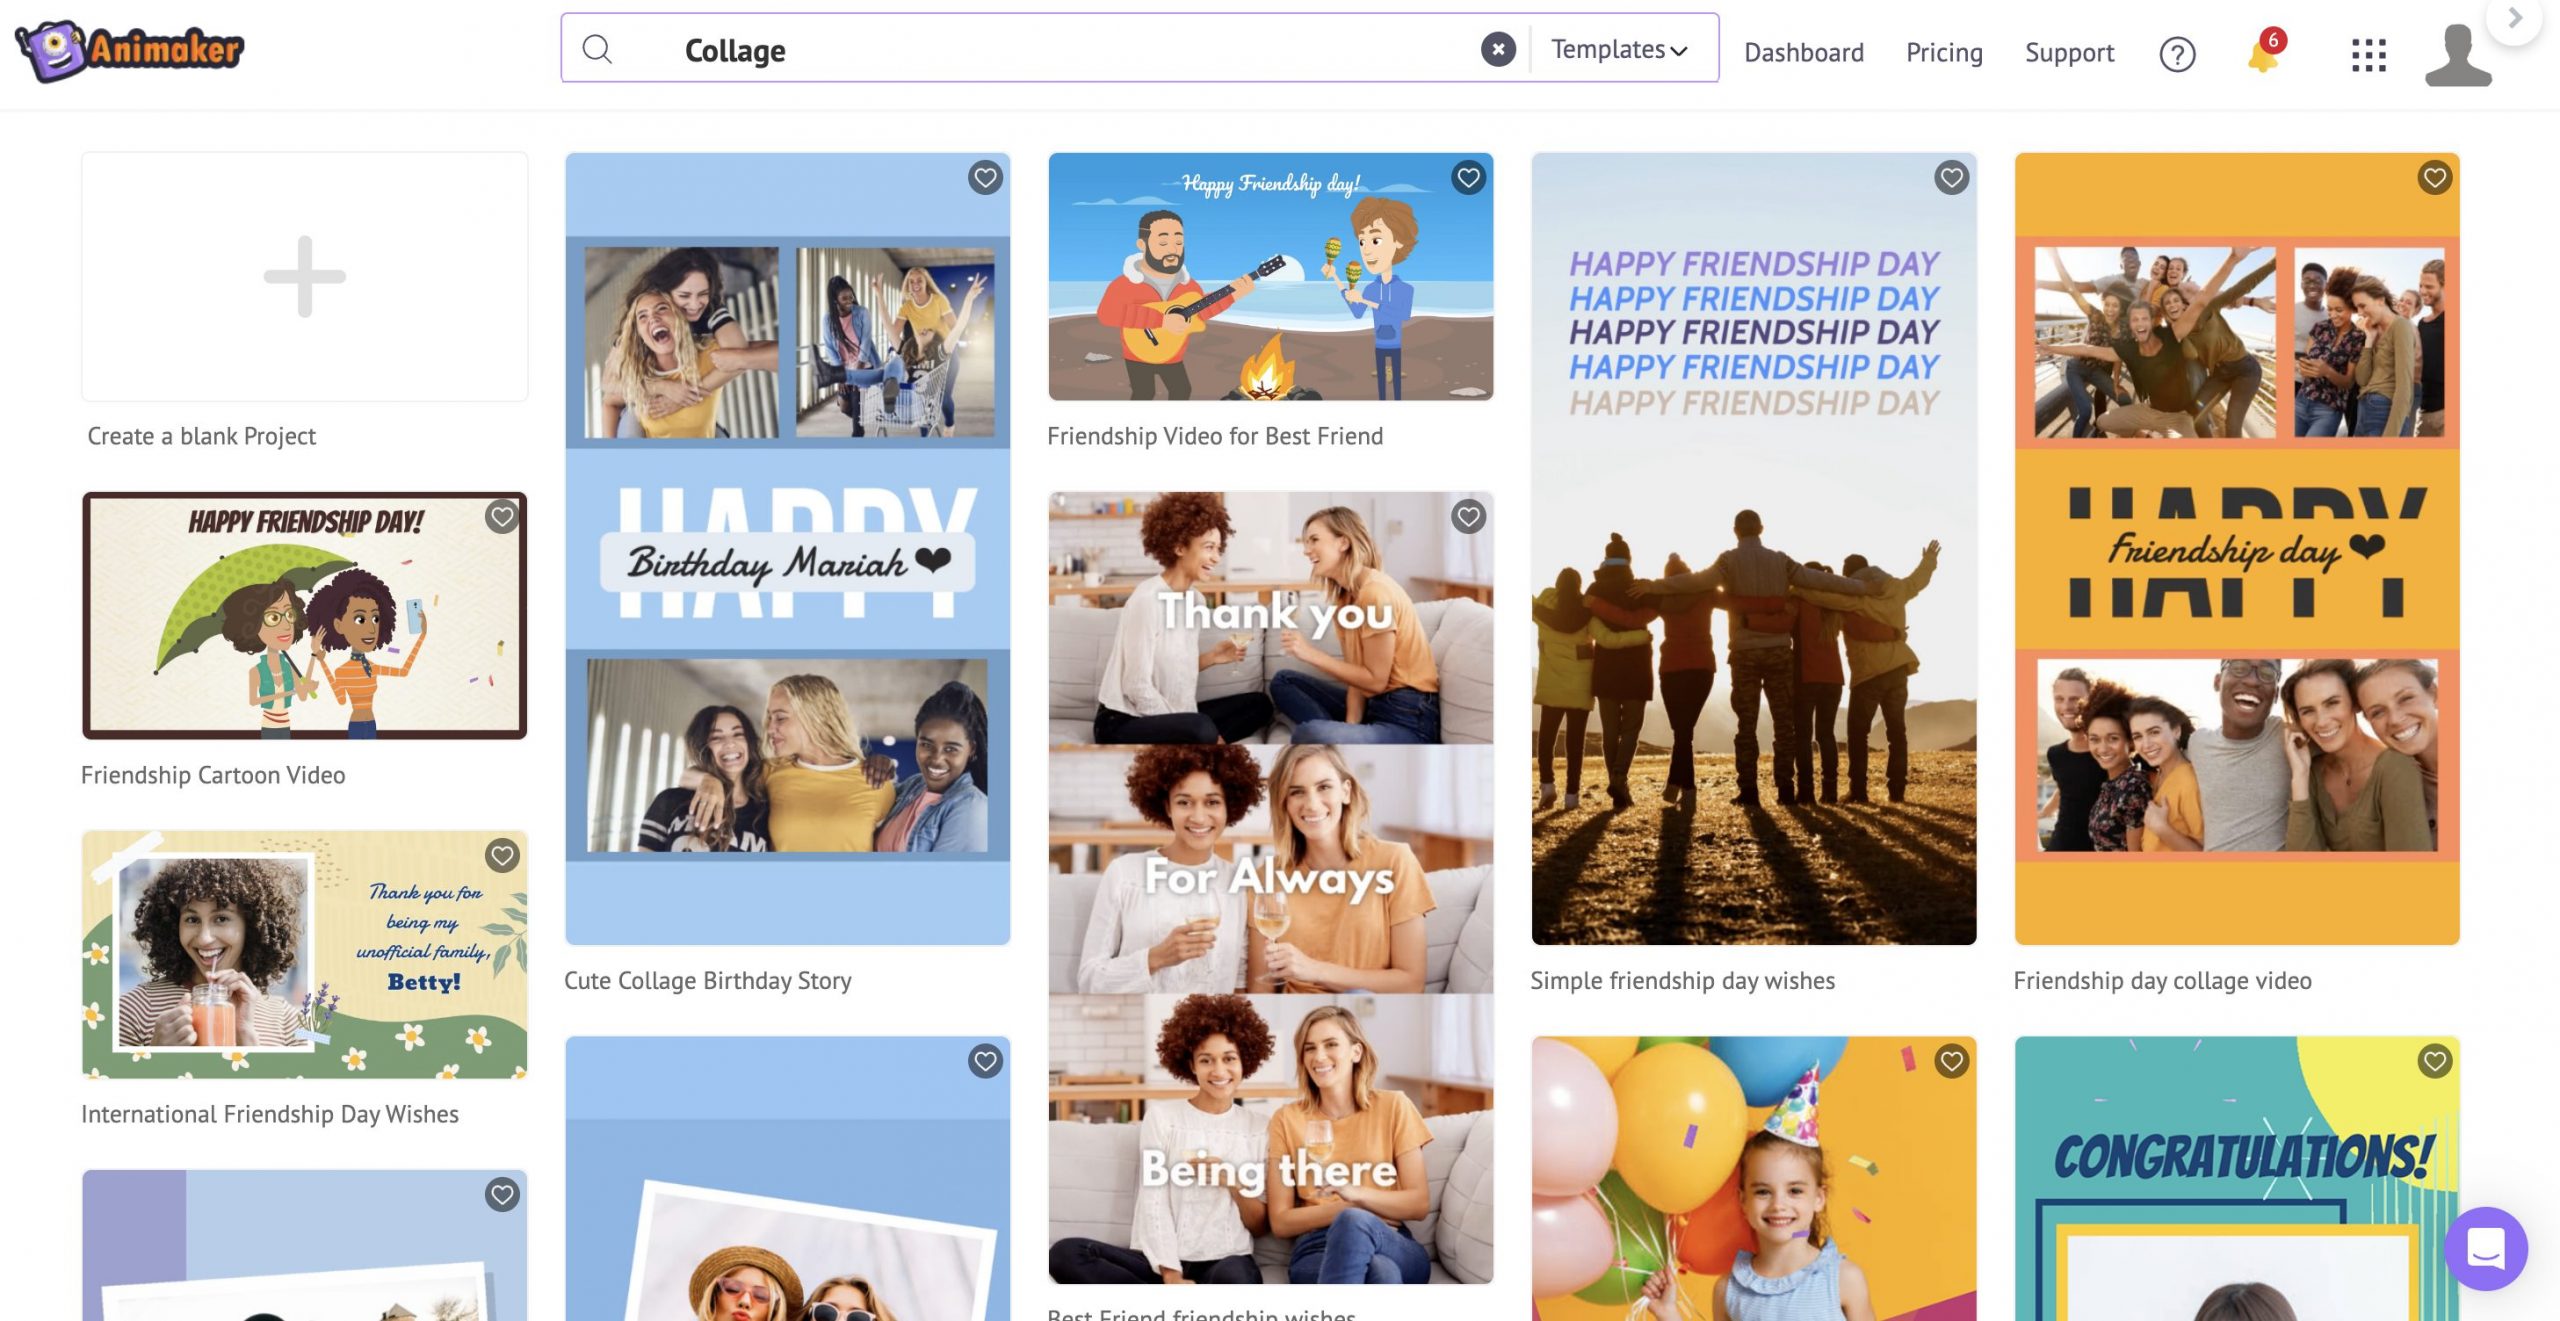
Signup or log in to Animaker. And search for “Collage.”

From the collection displayed, select the video collage template you would like to use.
Step 2: Uploading your videos & pictures
After selecting a template, how do you upload your videos and images into the video collage template?
It’s very simple! You can add it in just a couple of clicks using the “Replace” feature.
All you have to do is,
i) Select the video (or image) you want to replace. Click on the three dots on top and tap on the “Replace” button.
ii) You can either choose from the stock asset library or switch to “Uploads” to upload your own video (or image). Here’s how you upload your own video or image to the library.

Click “Apply” to save the changes, and that’s it! It’s that easy!
Repeat the same steps for all the videos (or images) you would like to replace in the collage video.
Step 3: Customizing your text and font styles
To change the content on your collage video template, just double-tap on the textbox and enter your content! Just like the example below.

Alternatively, if you would like to replace (or add) a different style of textbox, go to the “Text” Section. You will find a huge collection to choose from.
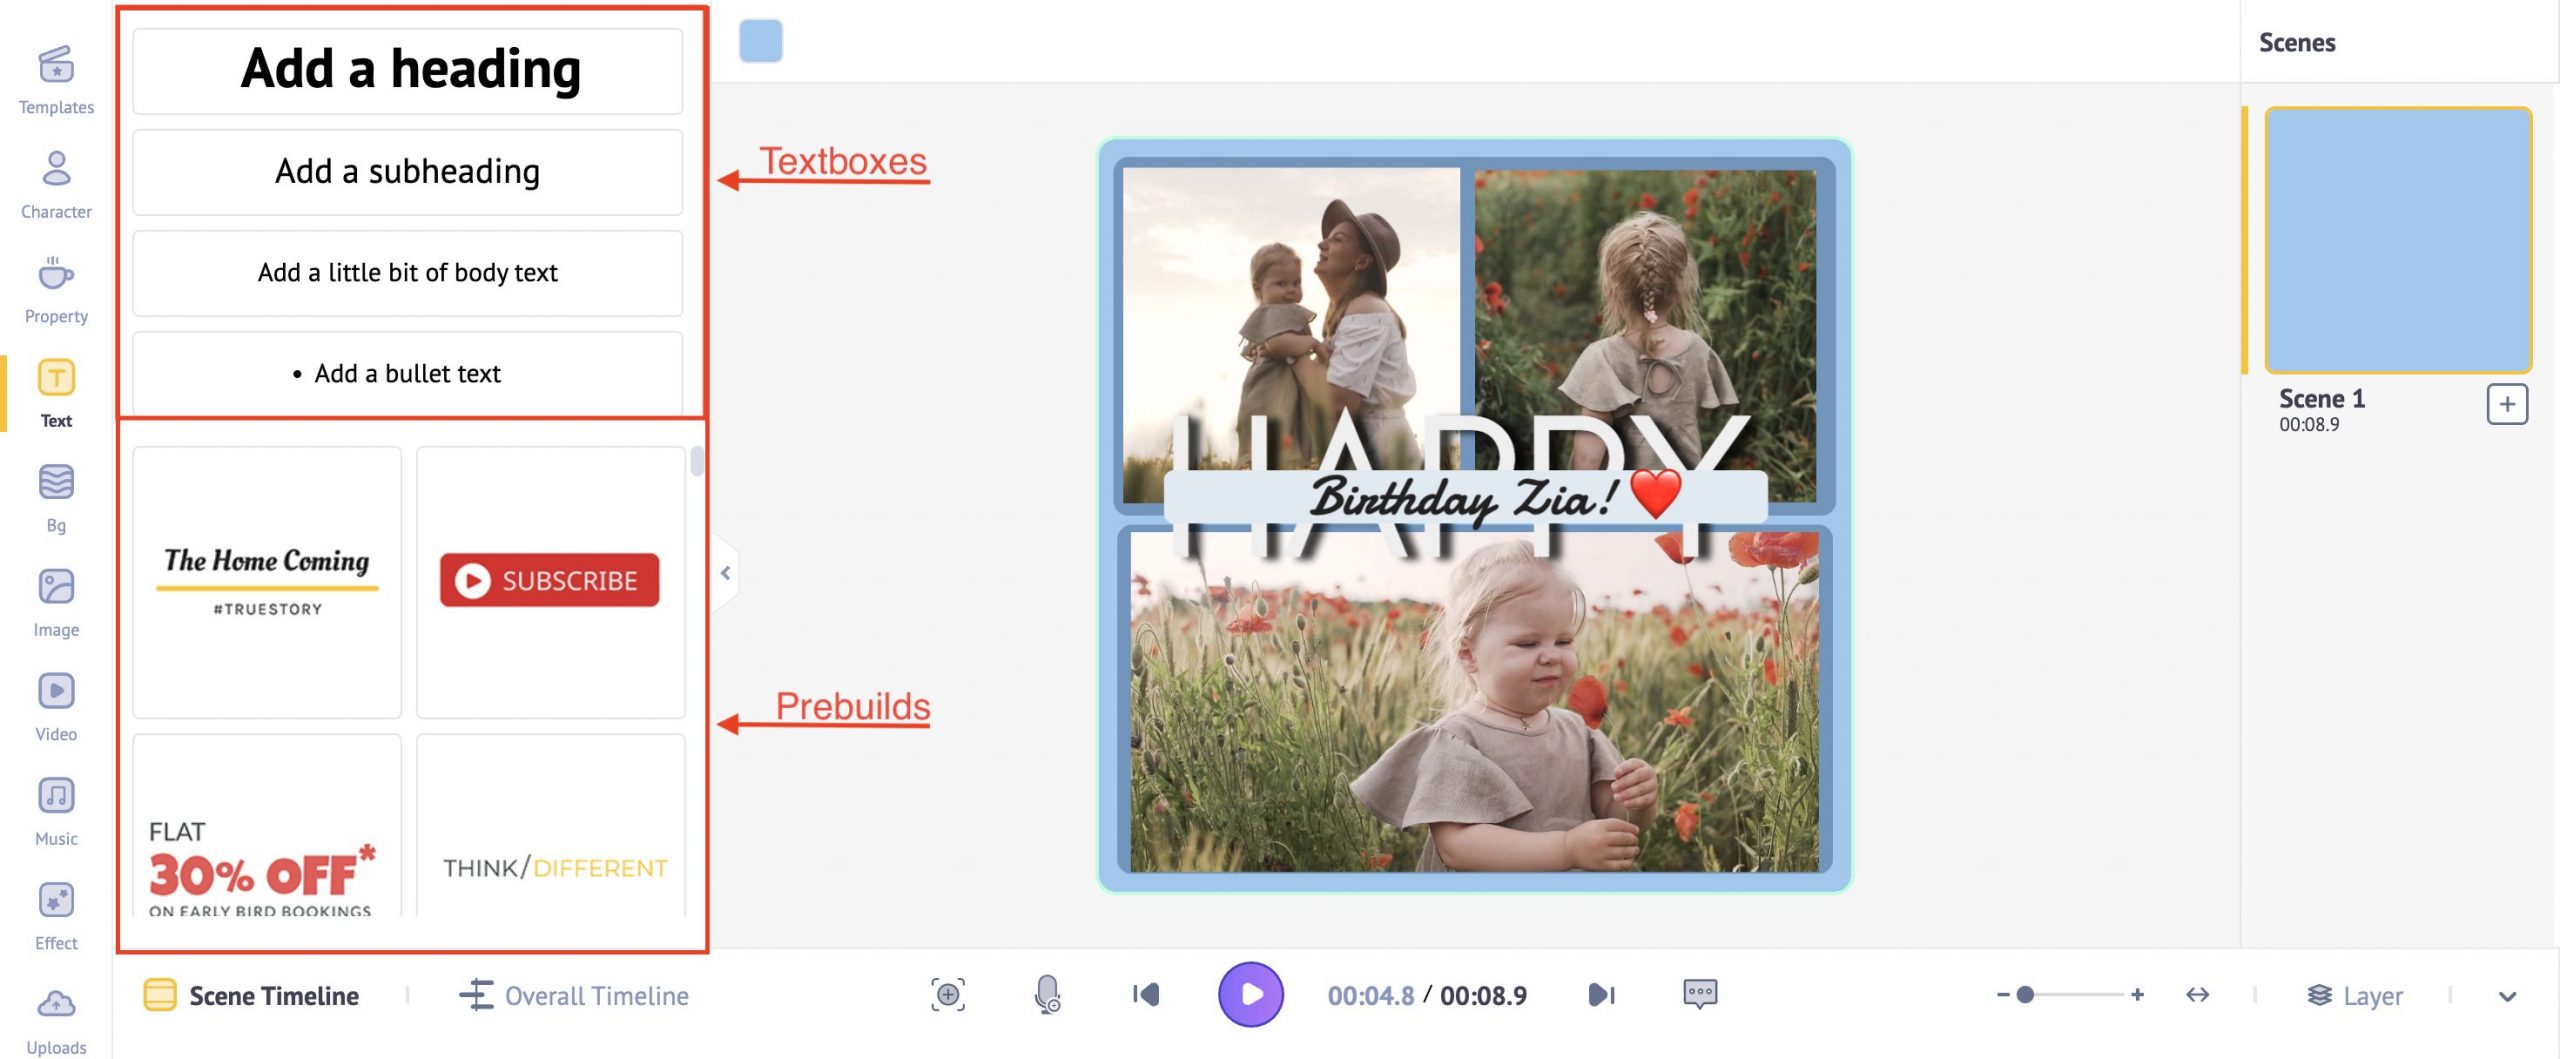
Here, you can either choose a text pre-build (that already has pre-build animation) or choose a textbox (and add animation manually).
Now, let’s see how to do it both ways!
Option A: Using a Text Prebuild
Option B: Using a Textbox
A) Using a Text Prebuild
There are 200+ trendy text prebuilds in Animaker that you can use.

All of these contain visually stunning animations set by default. So you don’t have to worry about adding animations yourself!
To add a text prebuild to the collage,
i) Scroll and choose a text prebuild that you would like to use.
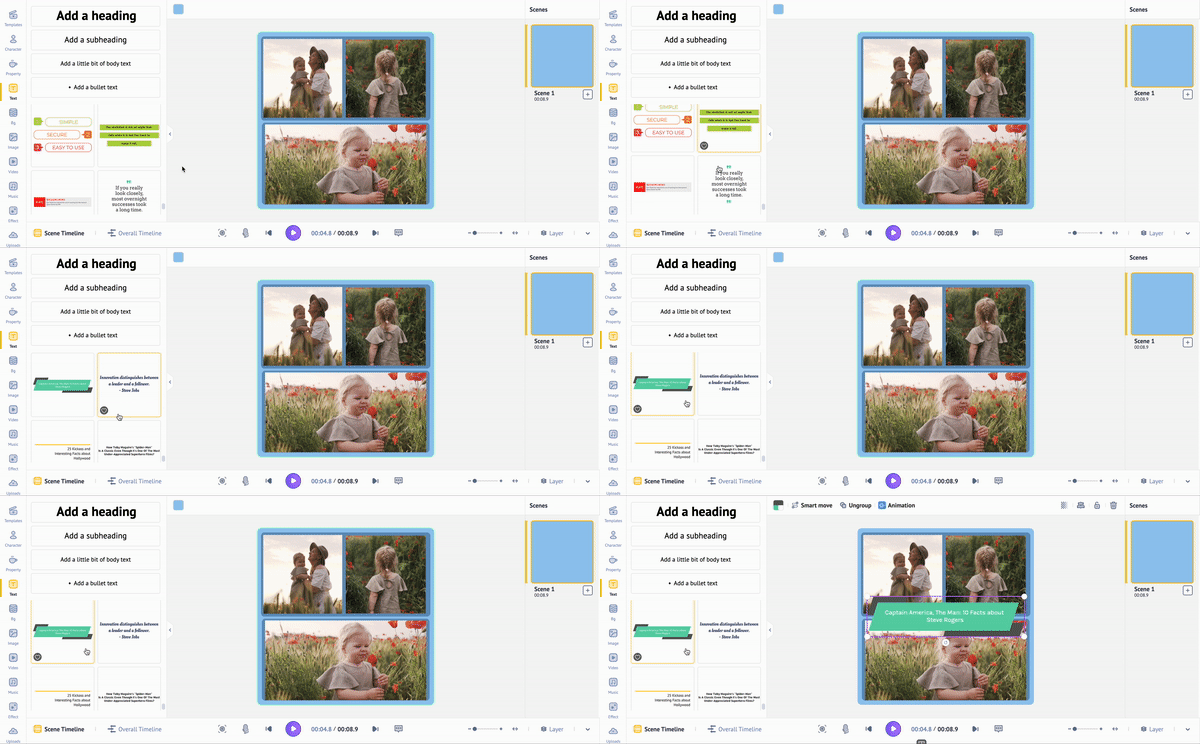
ii) And enter your content by double-tapping on the textbox!
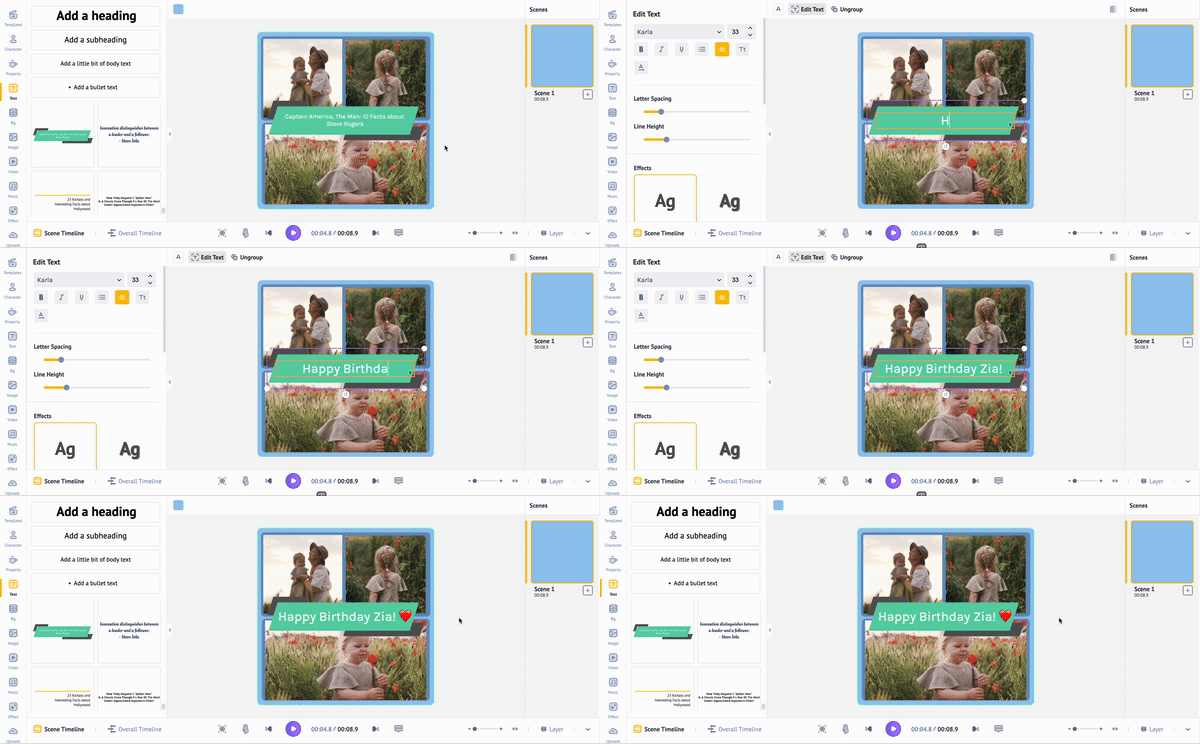
It’s THAT easy!
B) Using a Textbox
In case you go with a Textbox, here’s how to add one and animate it.
i) Choose a textbox (displayed above text-prebuilds) & double-tap to enter your content.
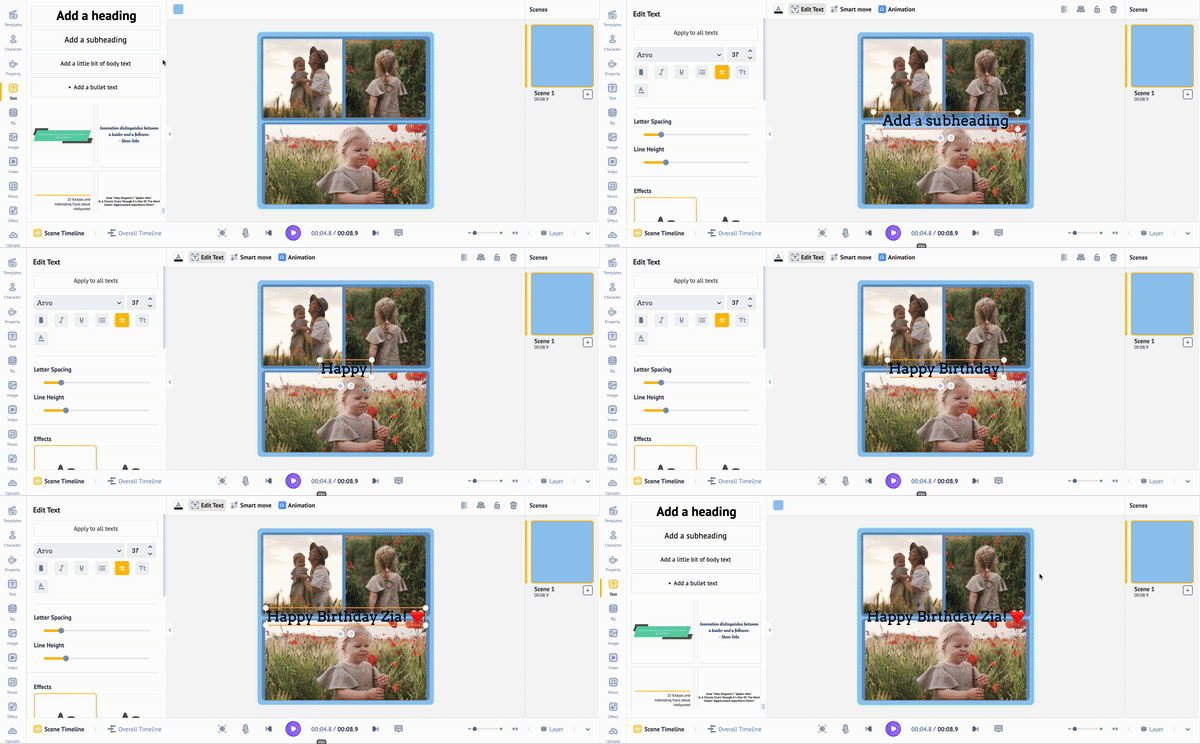
ii) You can further style your text by changing the font, font color & font size under the “Edit Text” section.
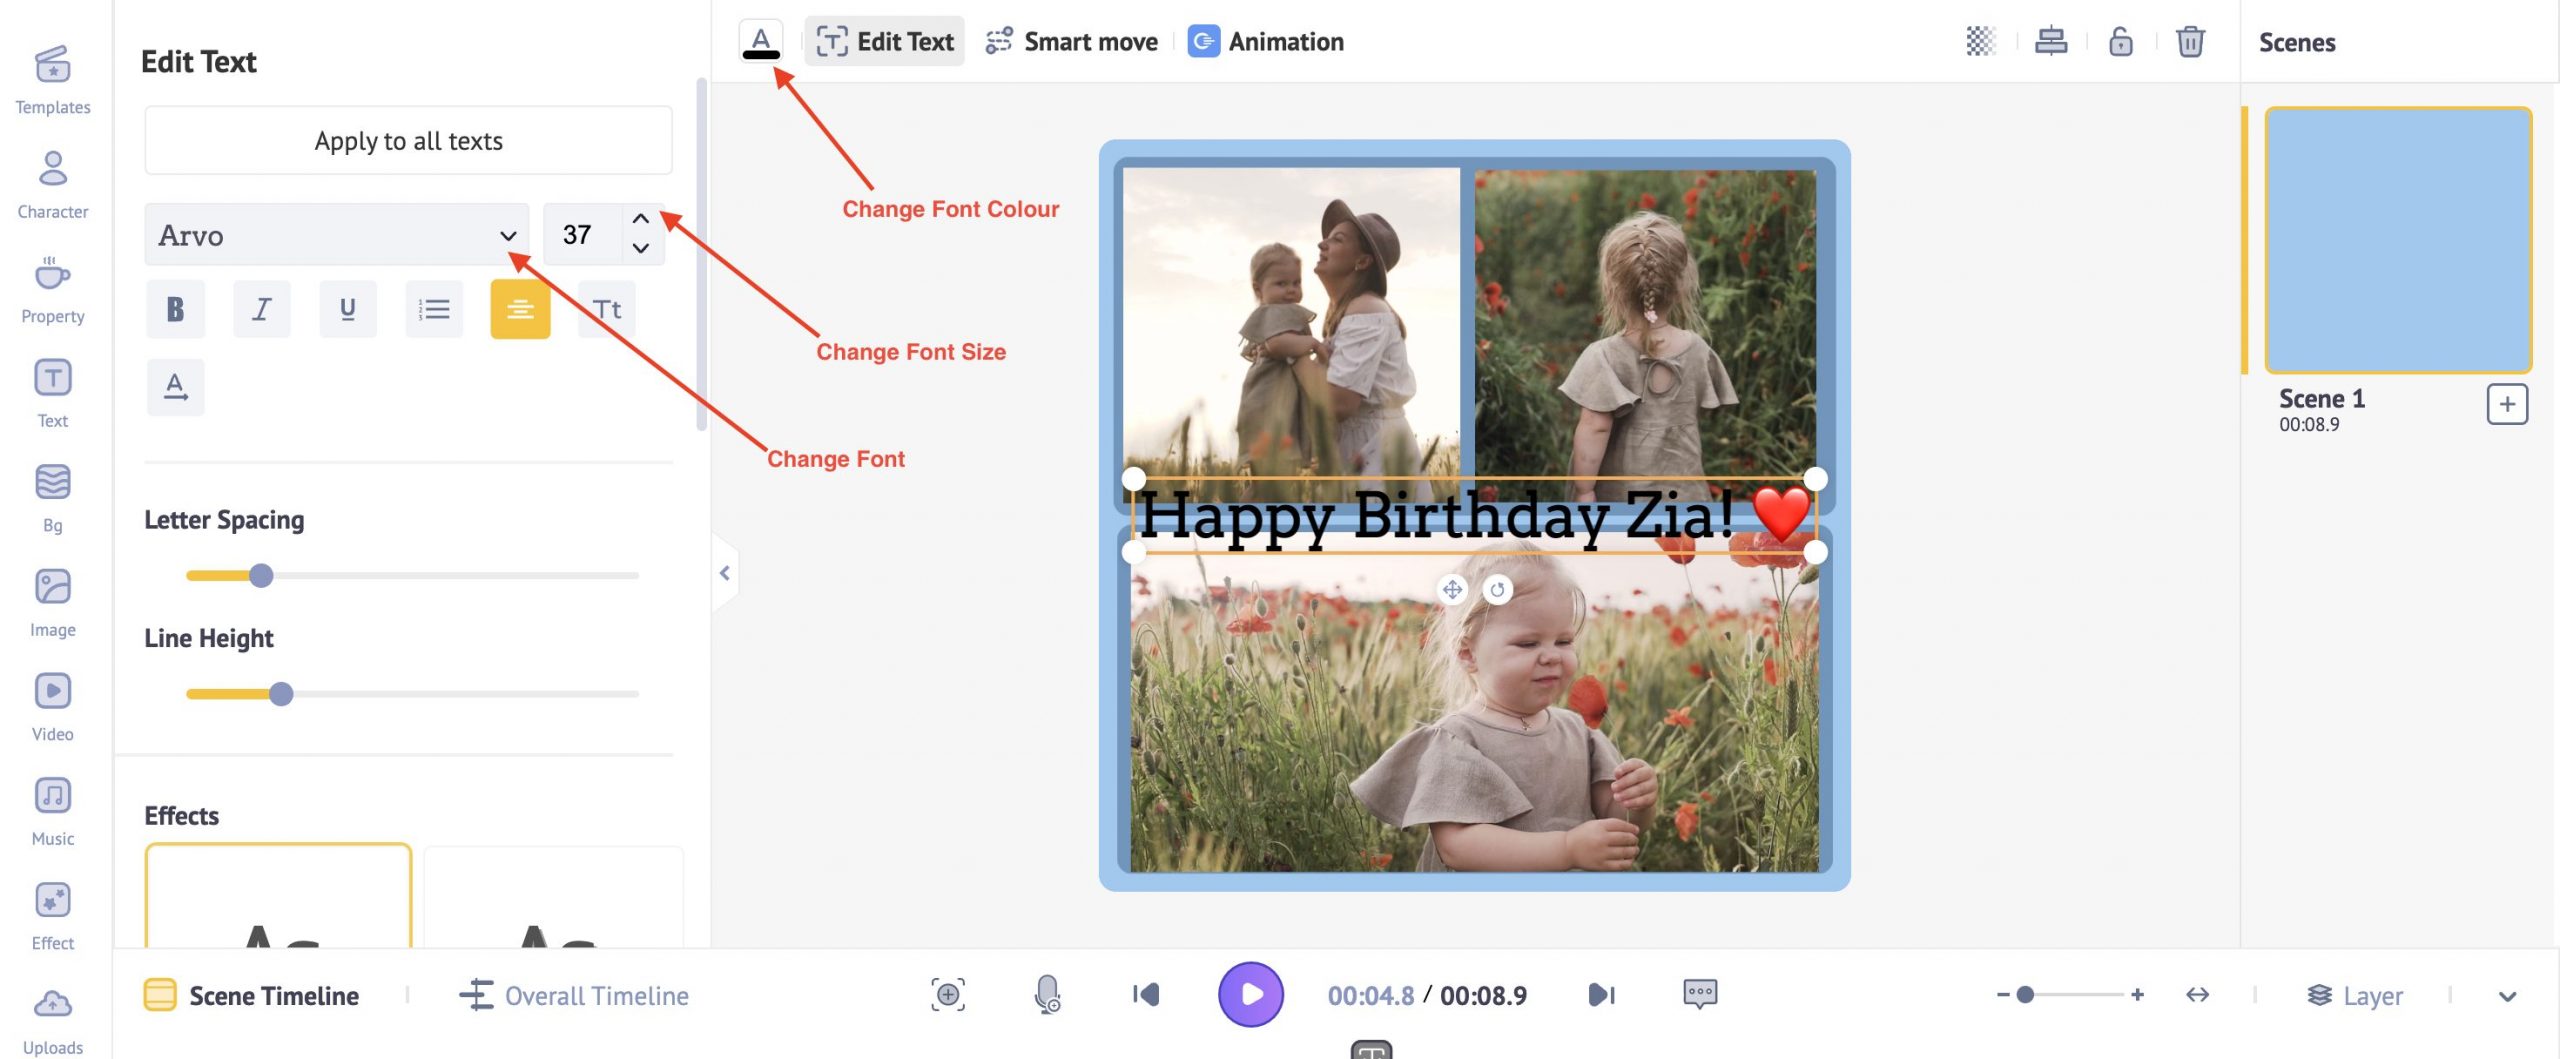
That’s it! It’s done! You can place the textbox where you want it on the collage.
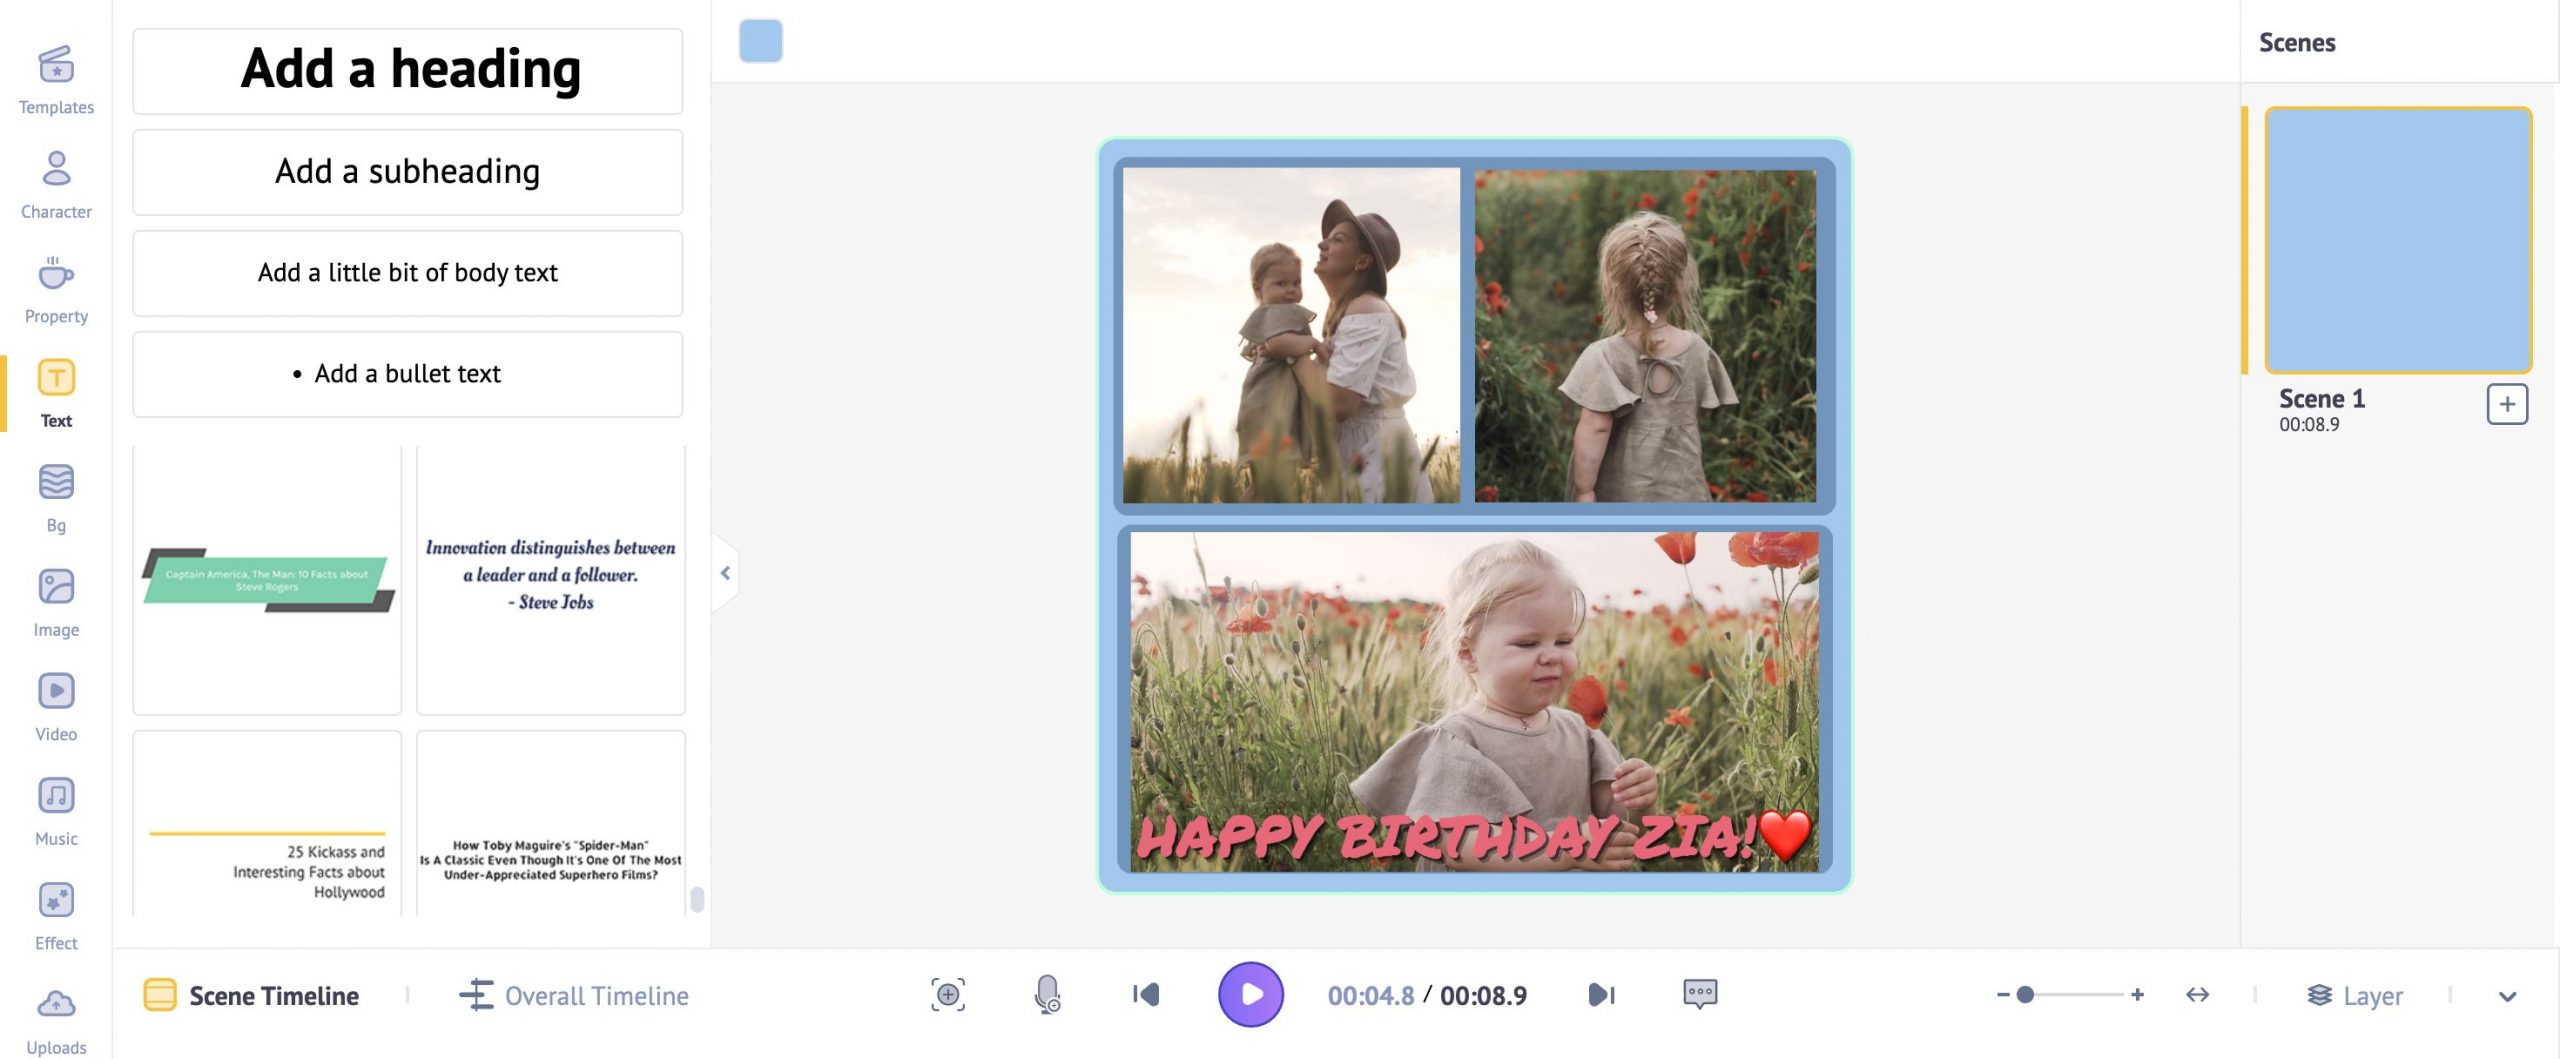
Now that we have added our content, here’s how you can animate it!
Select the textbox and tap on the “Animation” button above it.
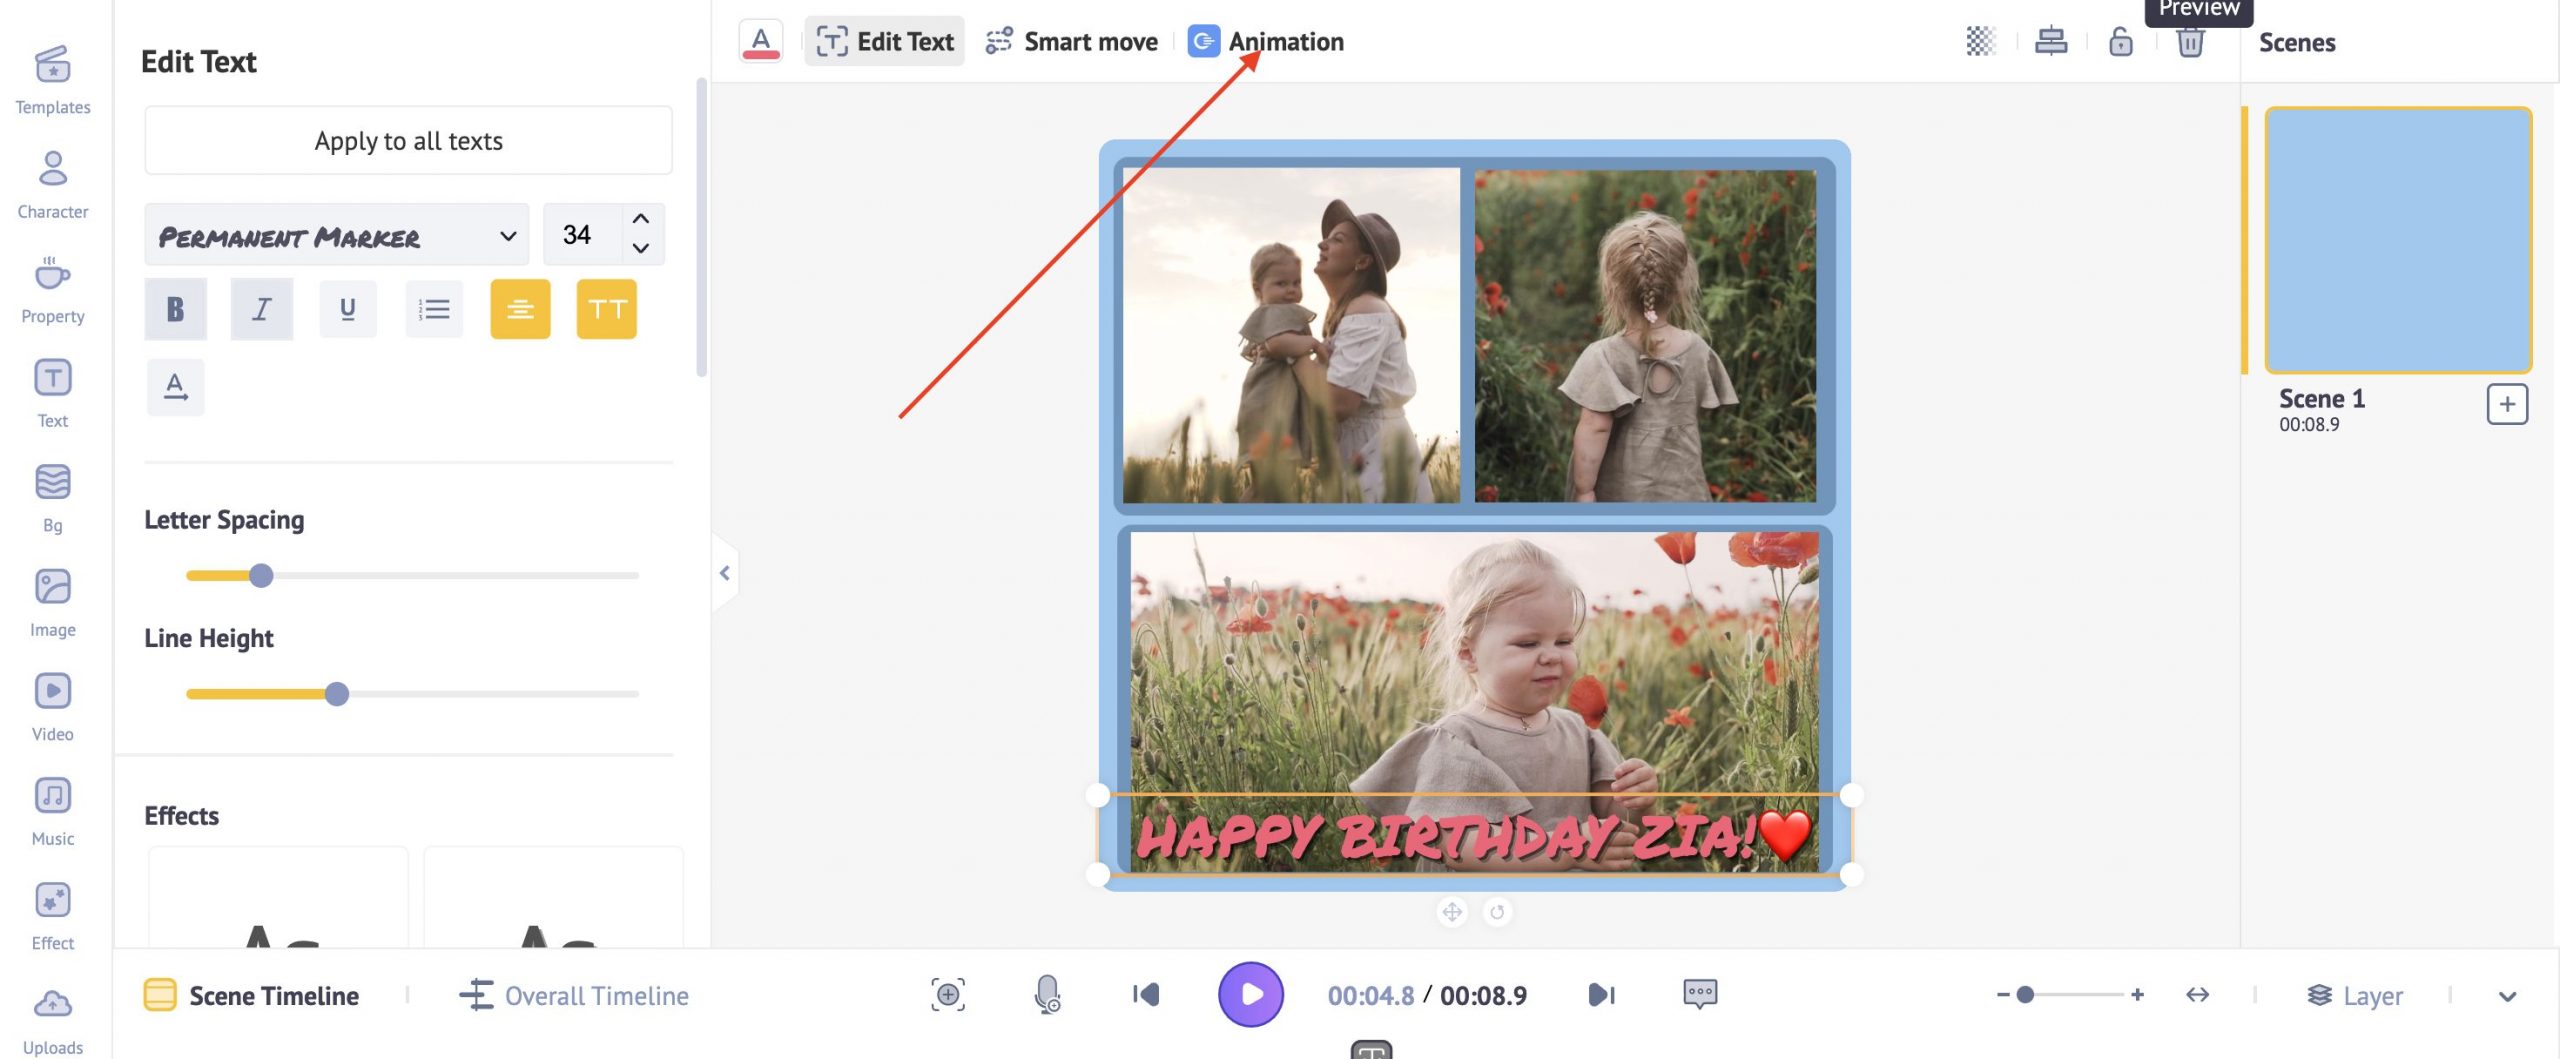
There are two types of animation effects you can add to your texts - Entry Effect & Exit Effect.
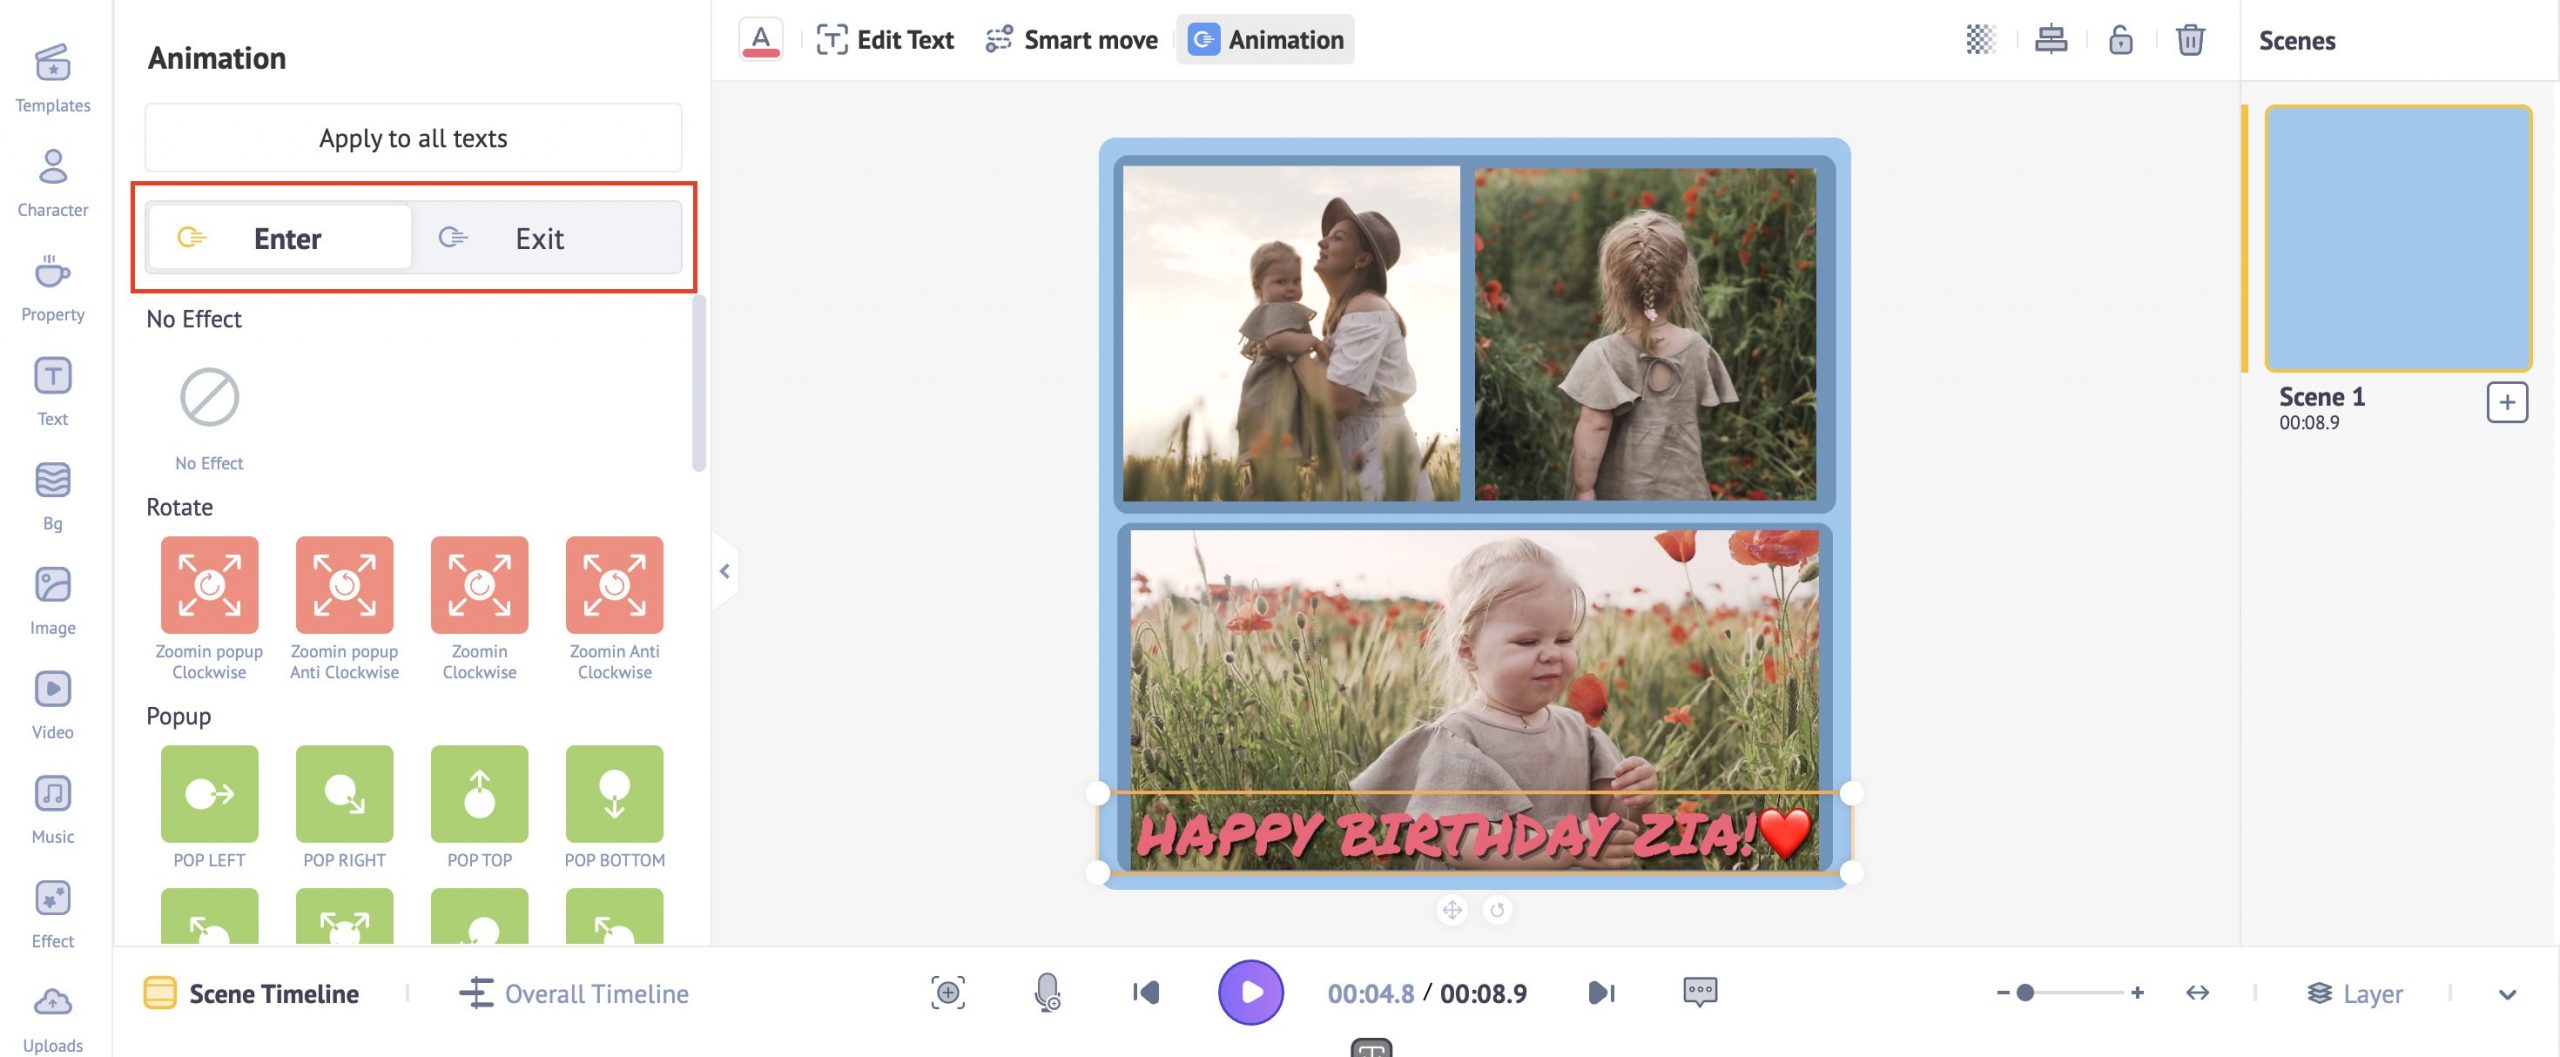
So, what is the main difference between them? It’s pretty simple.
“Entry Effects” are the animation effects that you add at the beginning of the asset, and “Exit Effects” are the animation effects that you can add at the end.
Just tap on an effect to add and preview it!
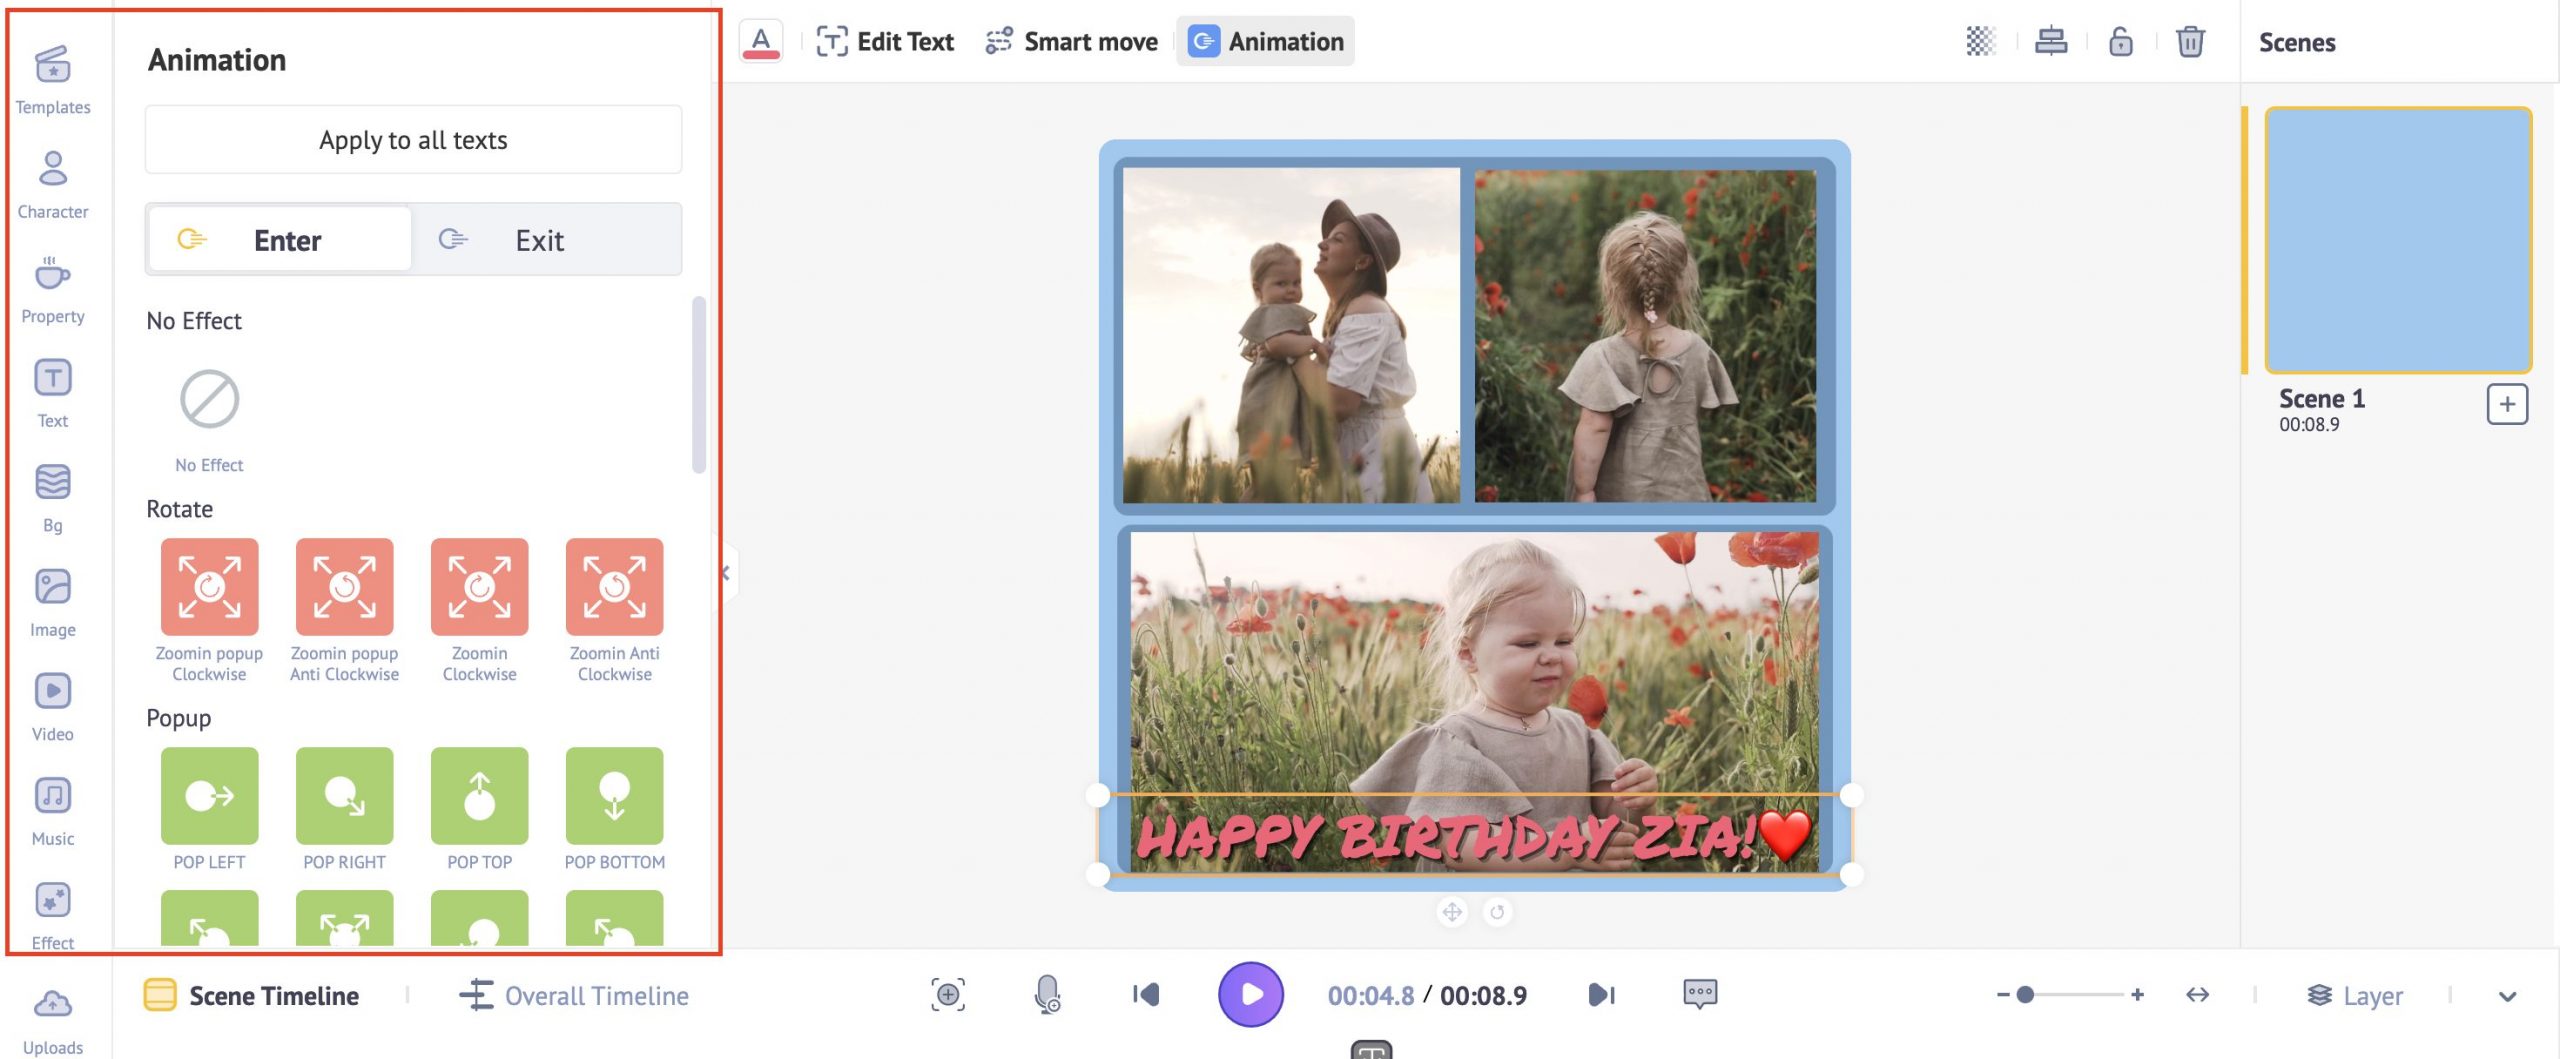
And that’s it! It’s that easy.
Tip: Similarly, just repeat the same steps to add animation to the videos (or images) you add in the video collage.
Now that we have added all important assets, such as our videos and the text, and also animated them - it's time to place the icing on the cake!
It’s time to add our music track!
Step 4: Choosing and adjusting background music
Animaker has a massive collection of 30k+ trendy music tracks that you can choose from. All these are collectively available across different genres, such as Rock, Pop, etc.
It’s really easy to add one. All you have to do is,
i) Go to the Music Section.
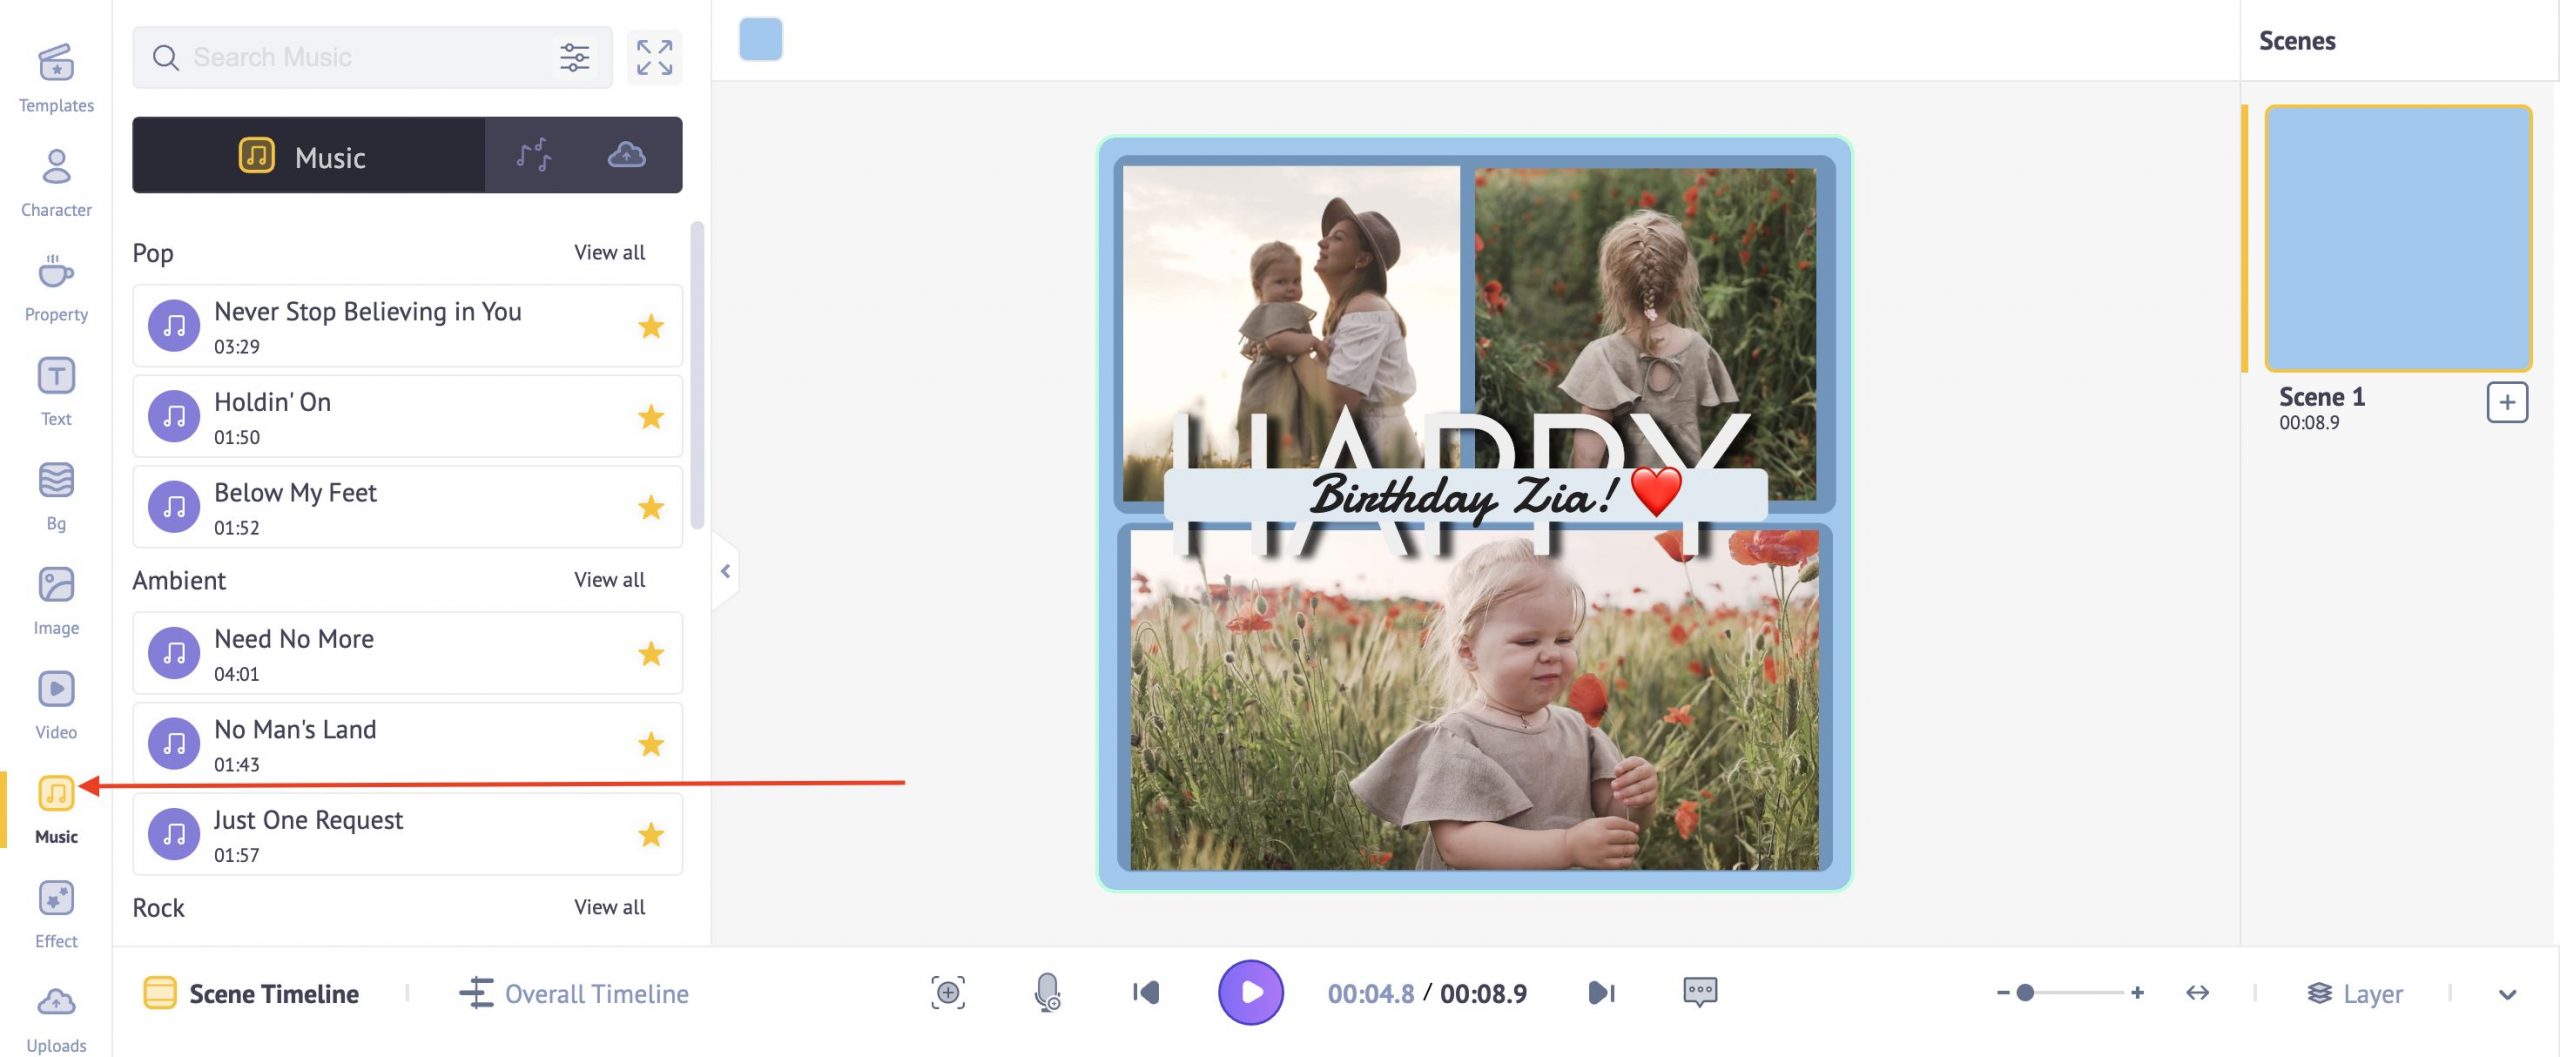
ii) You can pick a music track either by browsing through the genres or by searching for a specific type.

Alternatively, you can upload your own music track as well. Just hop over to the “Uploads” section and upload your music track right into the collage video.
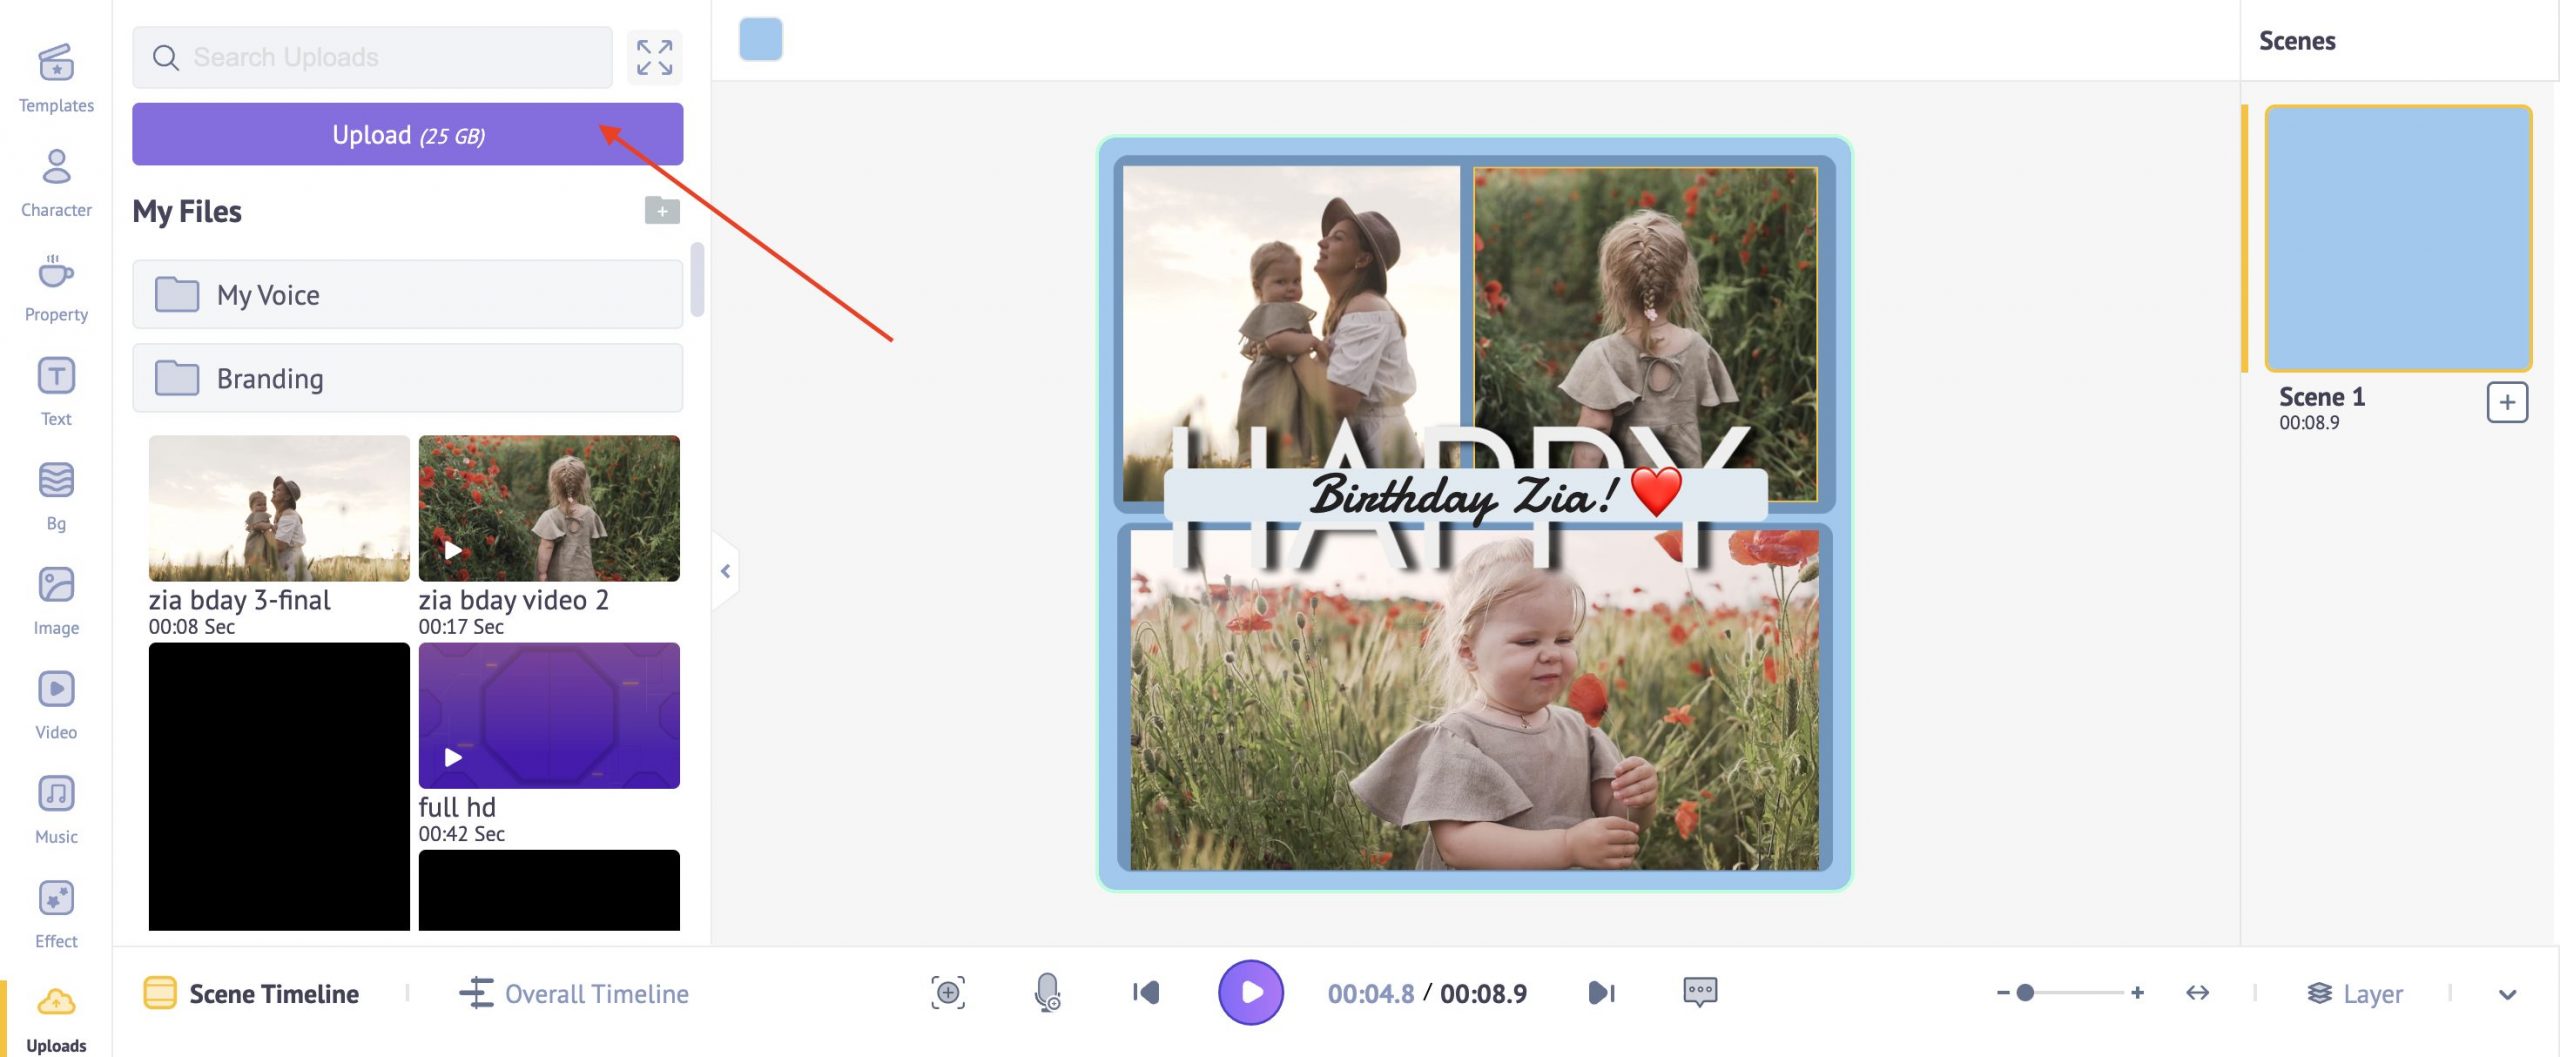
Step 5: Previewing and downloading your completed video collage
Once you’re done editing your video collage, click on the “preview” button on top to view the collage video.
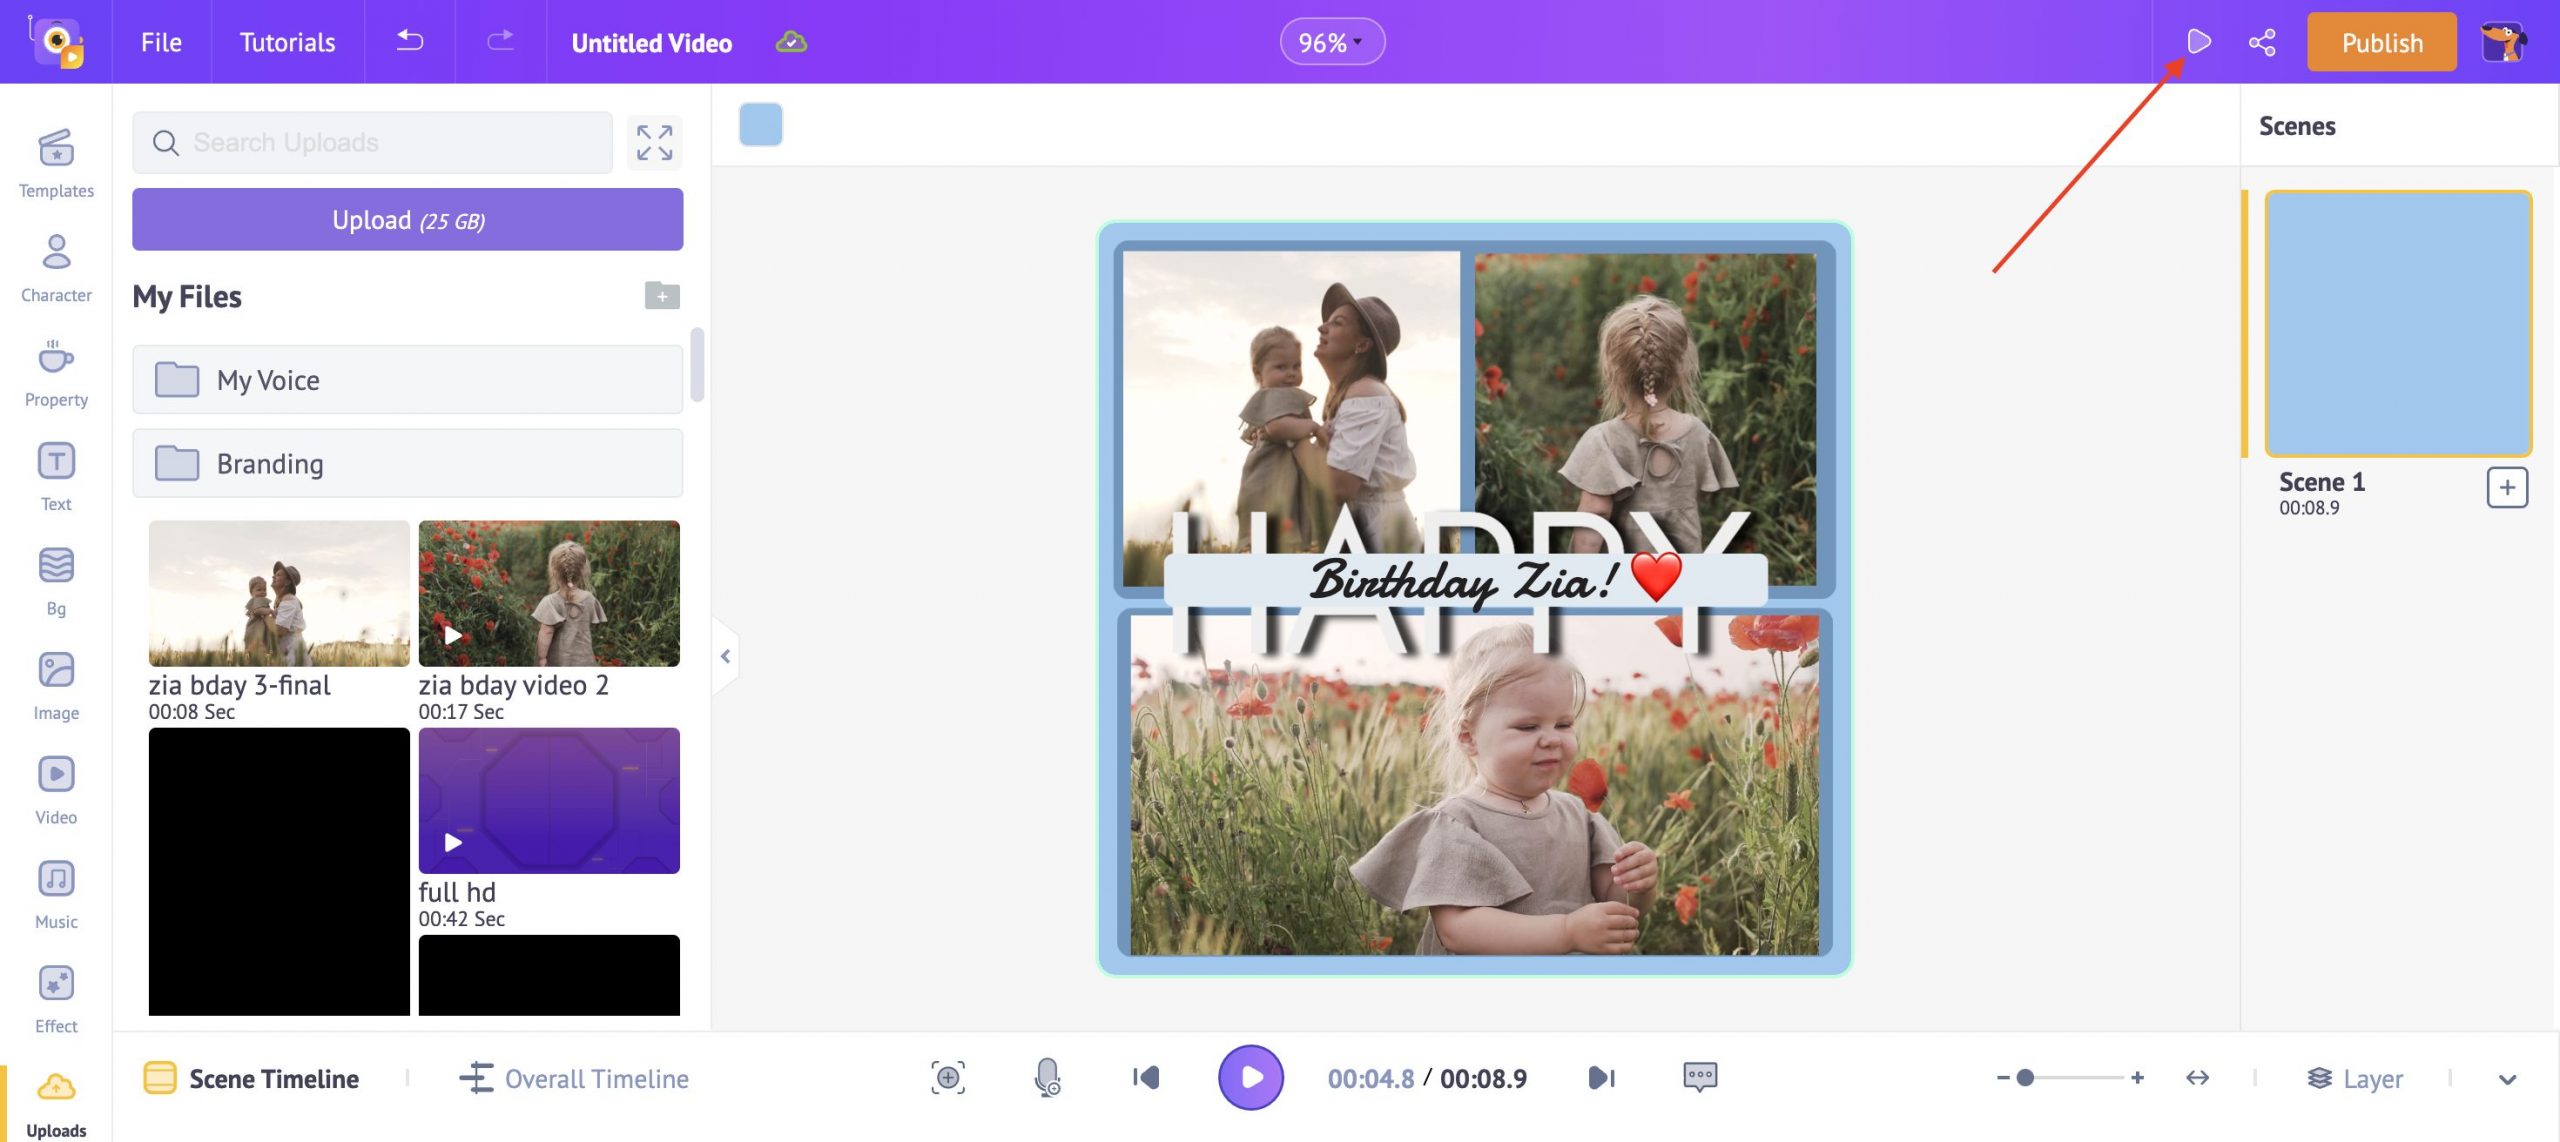
If you’re happy with the results, here’s how you can download your video!
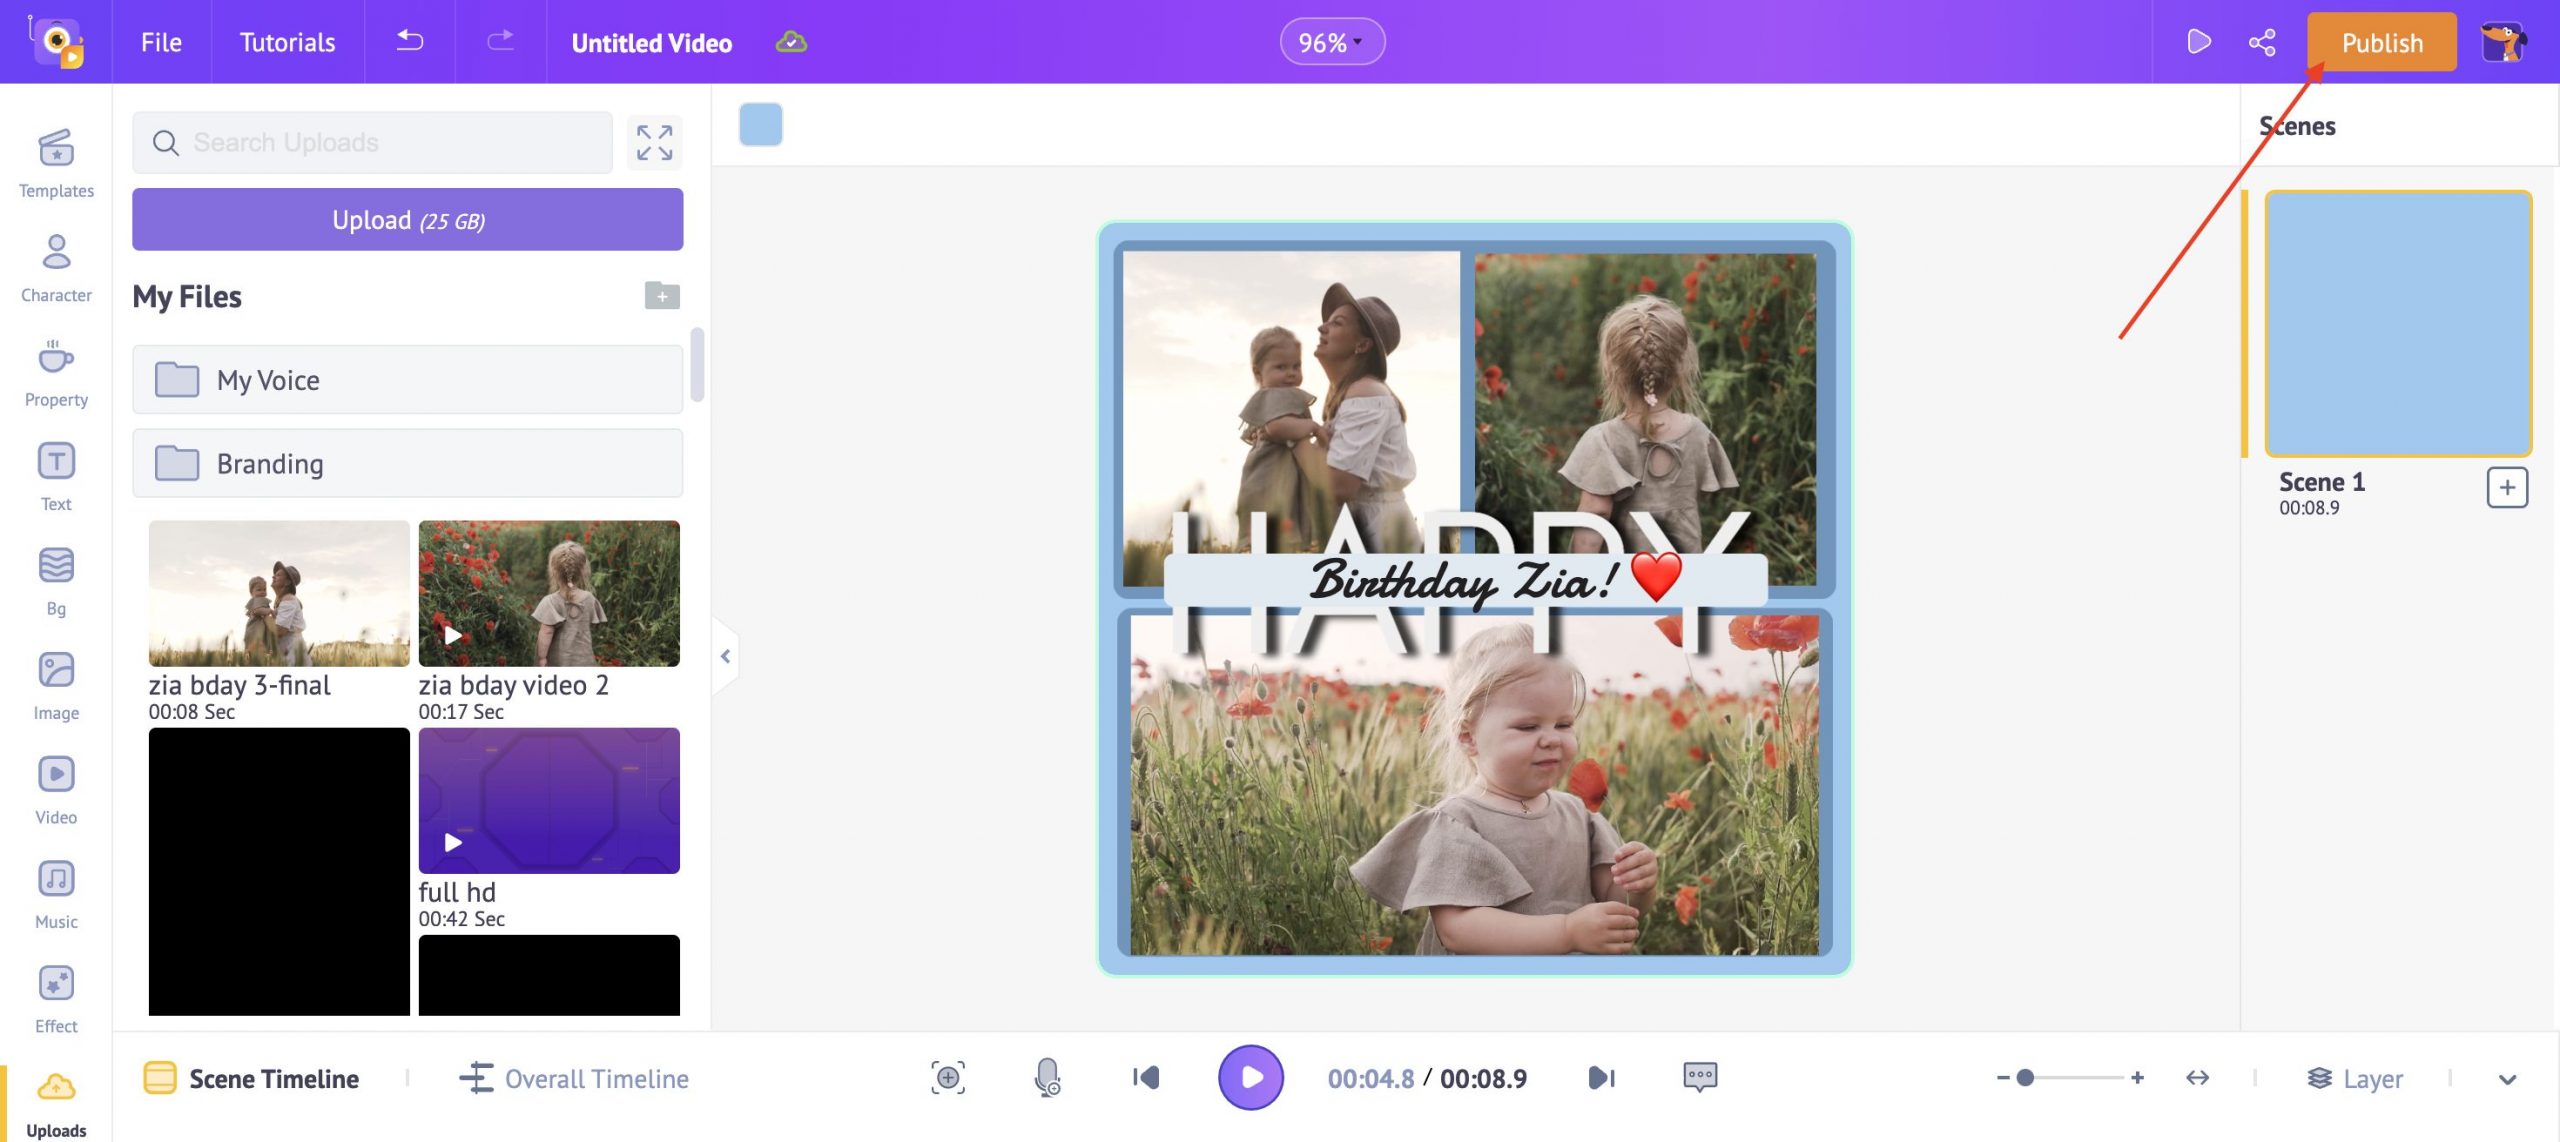
i) Go to “Publish”
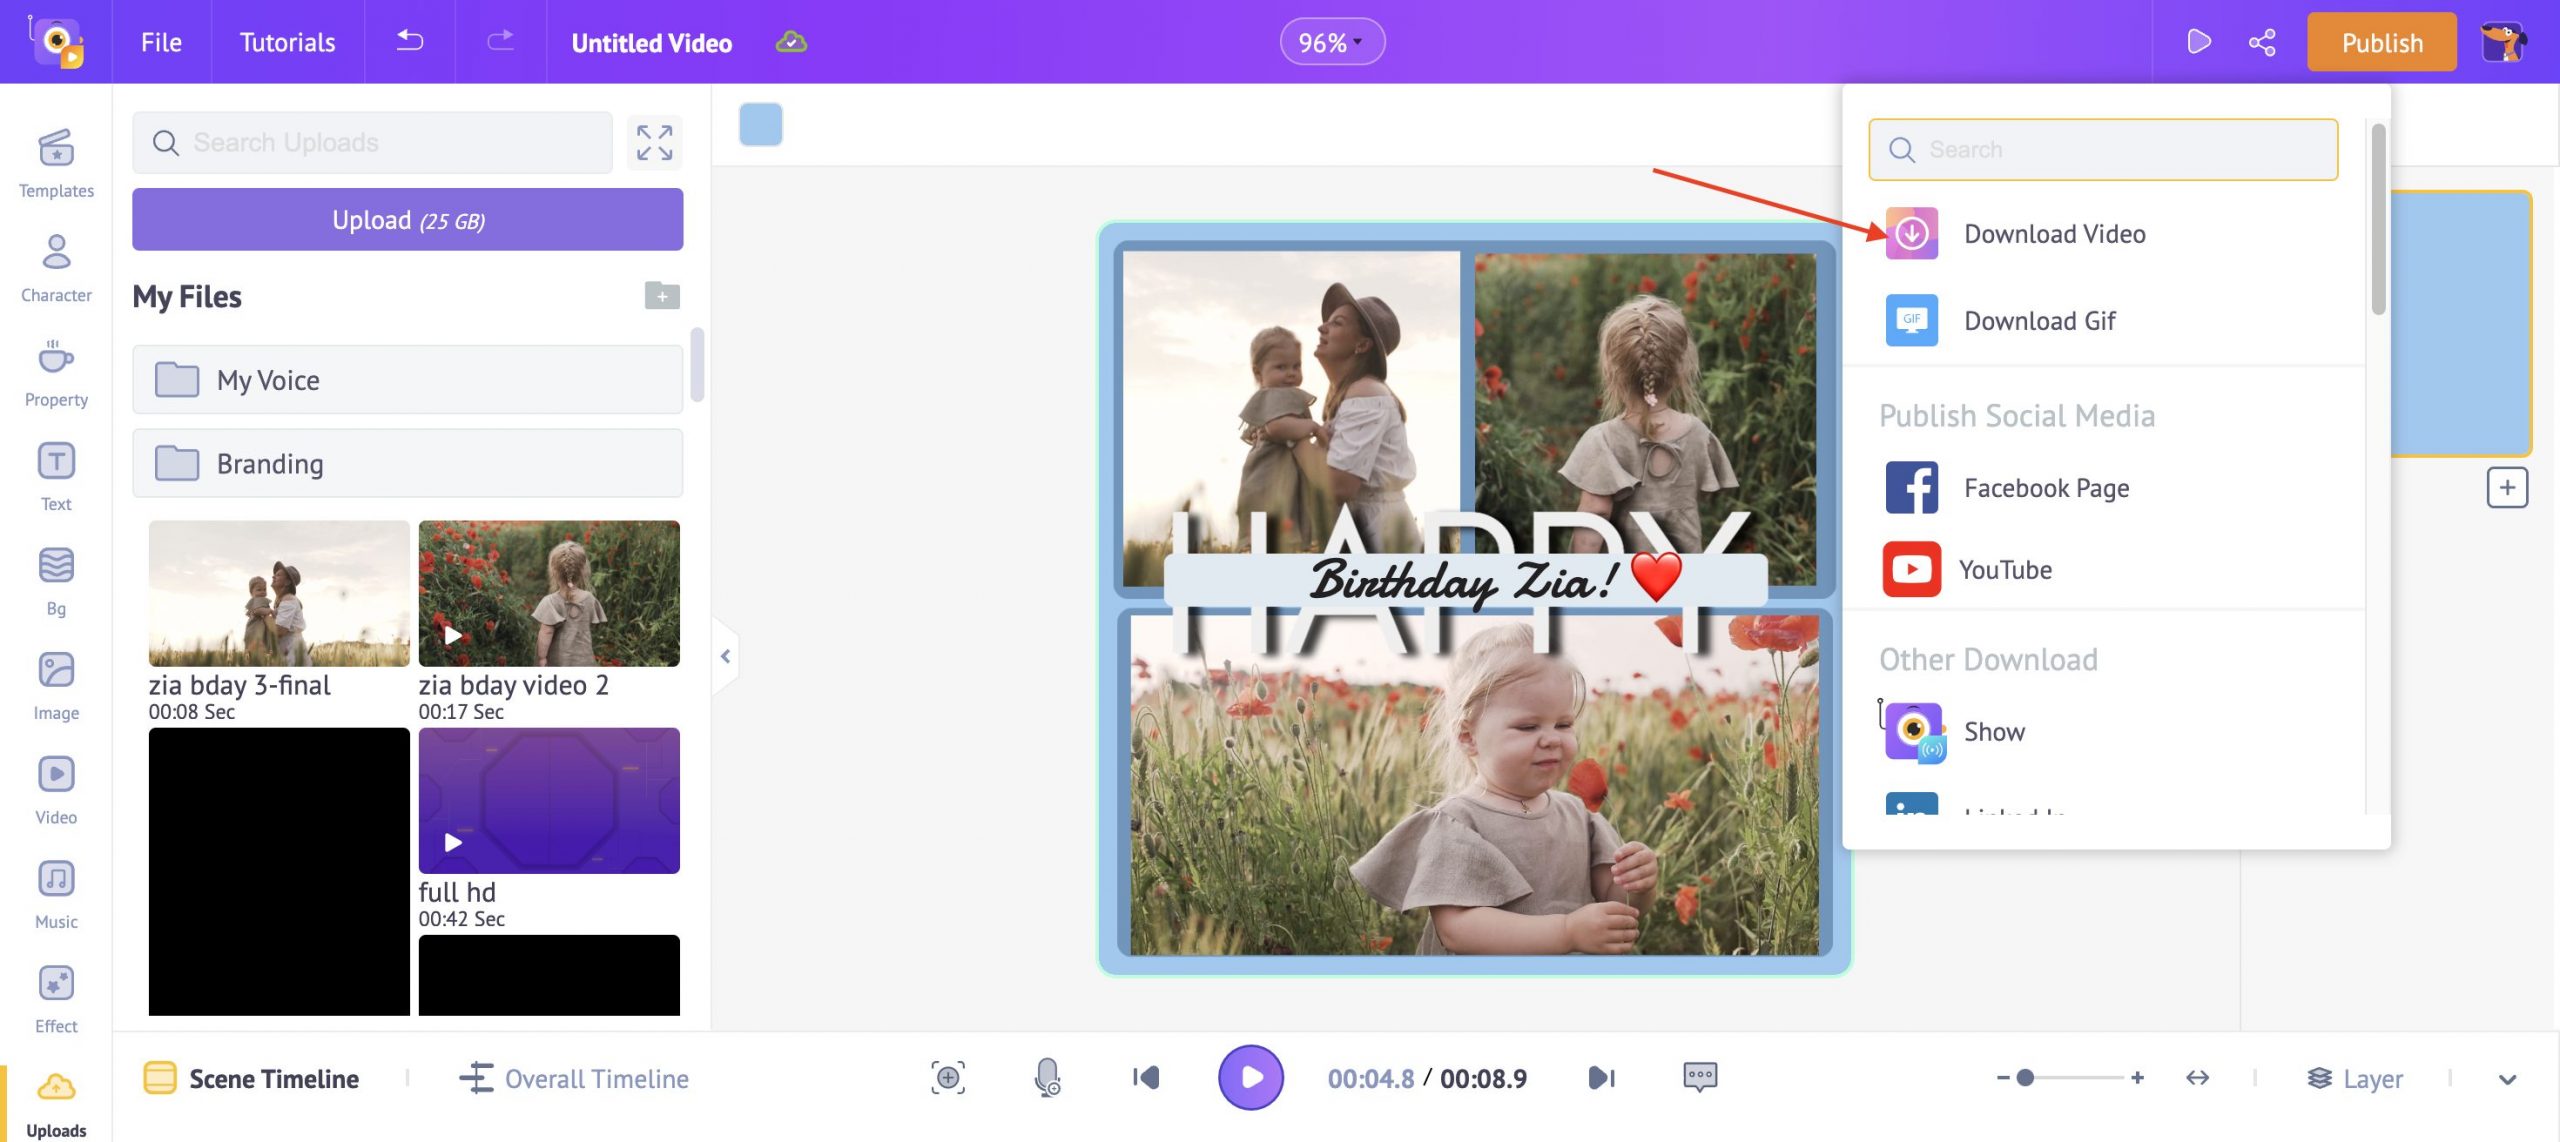
ii) Click on “Download Video”
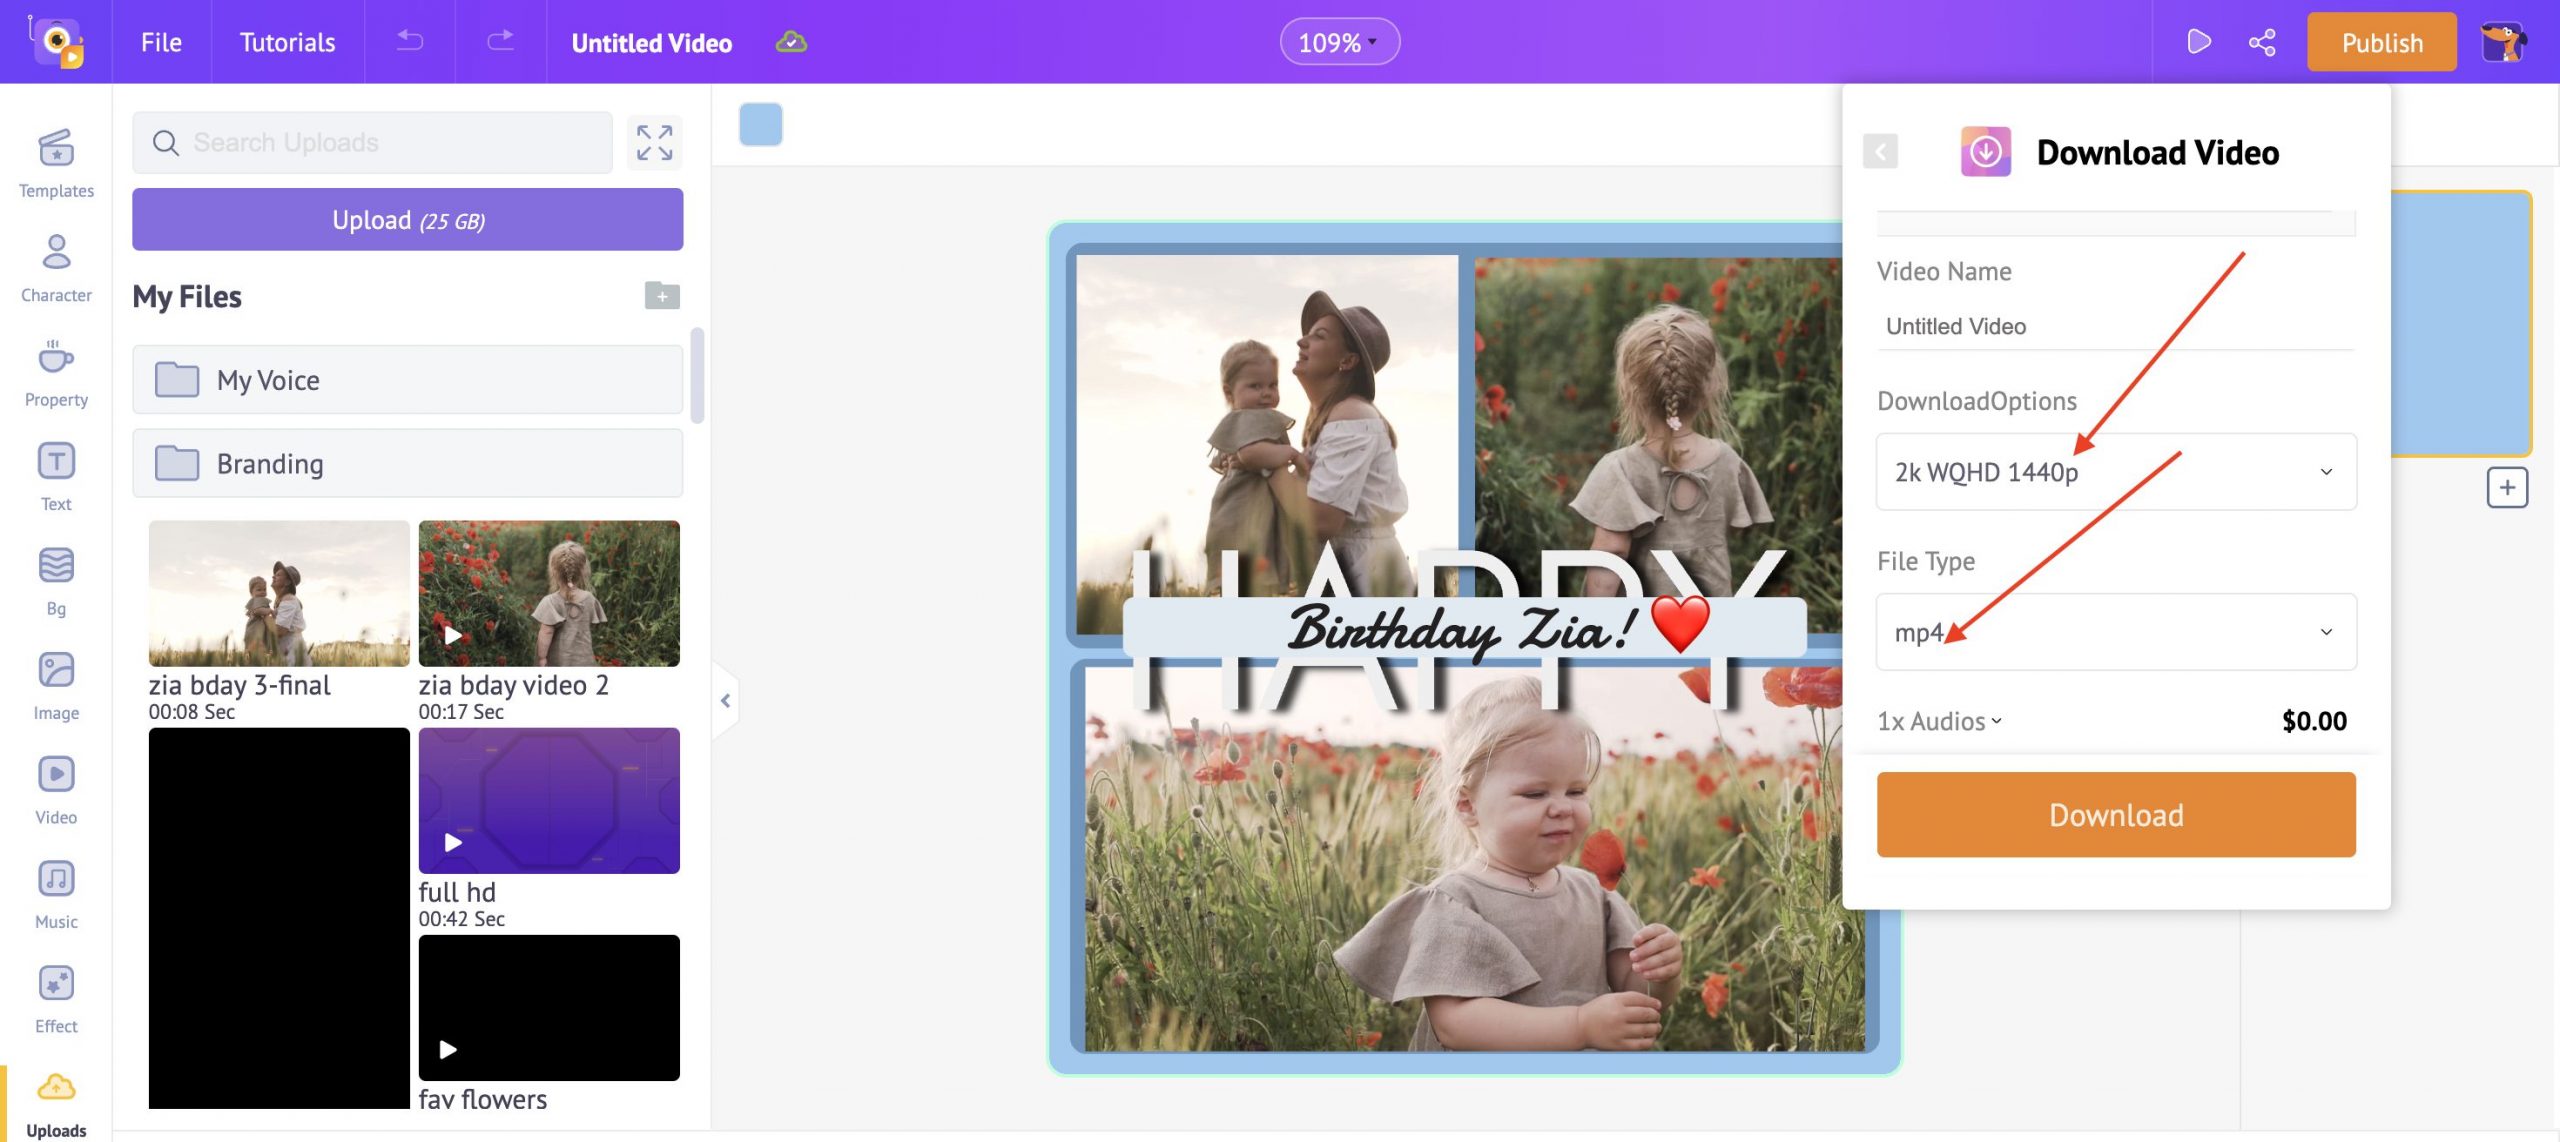
iii) Choose the Video quality you prefer (HD, FULL HD, 2K or higher.) and the file type (MP4, MOV, etc.)
Once the rendering is completed, you will get an email with the download link to download your collage video.
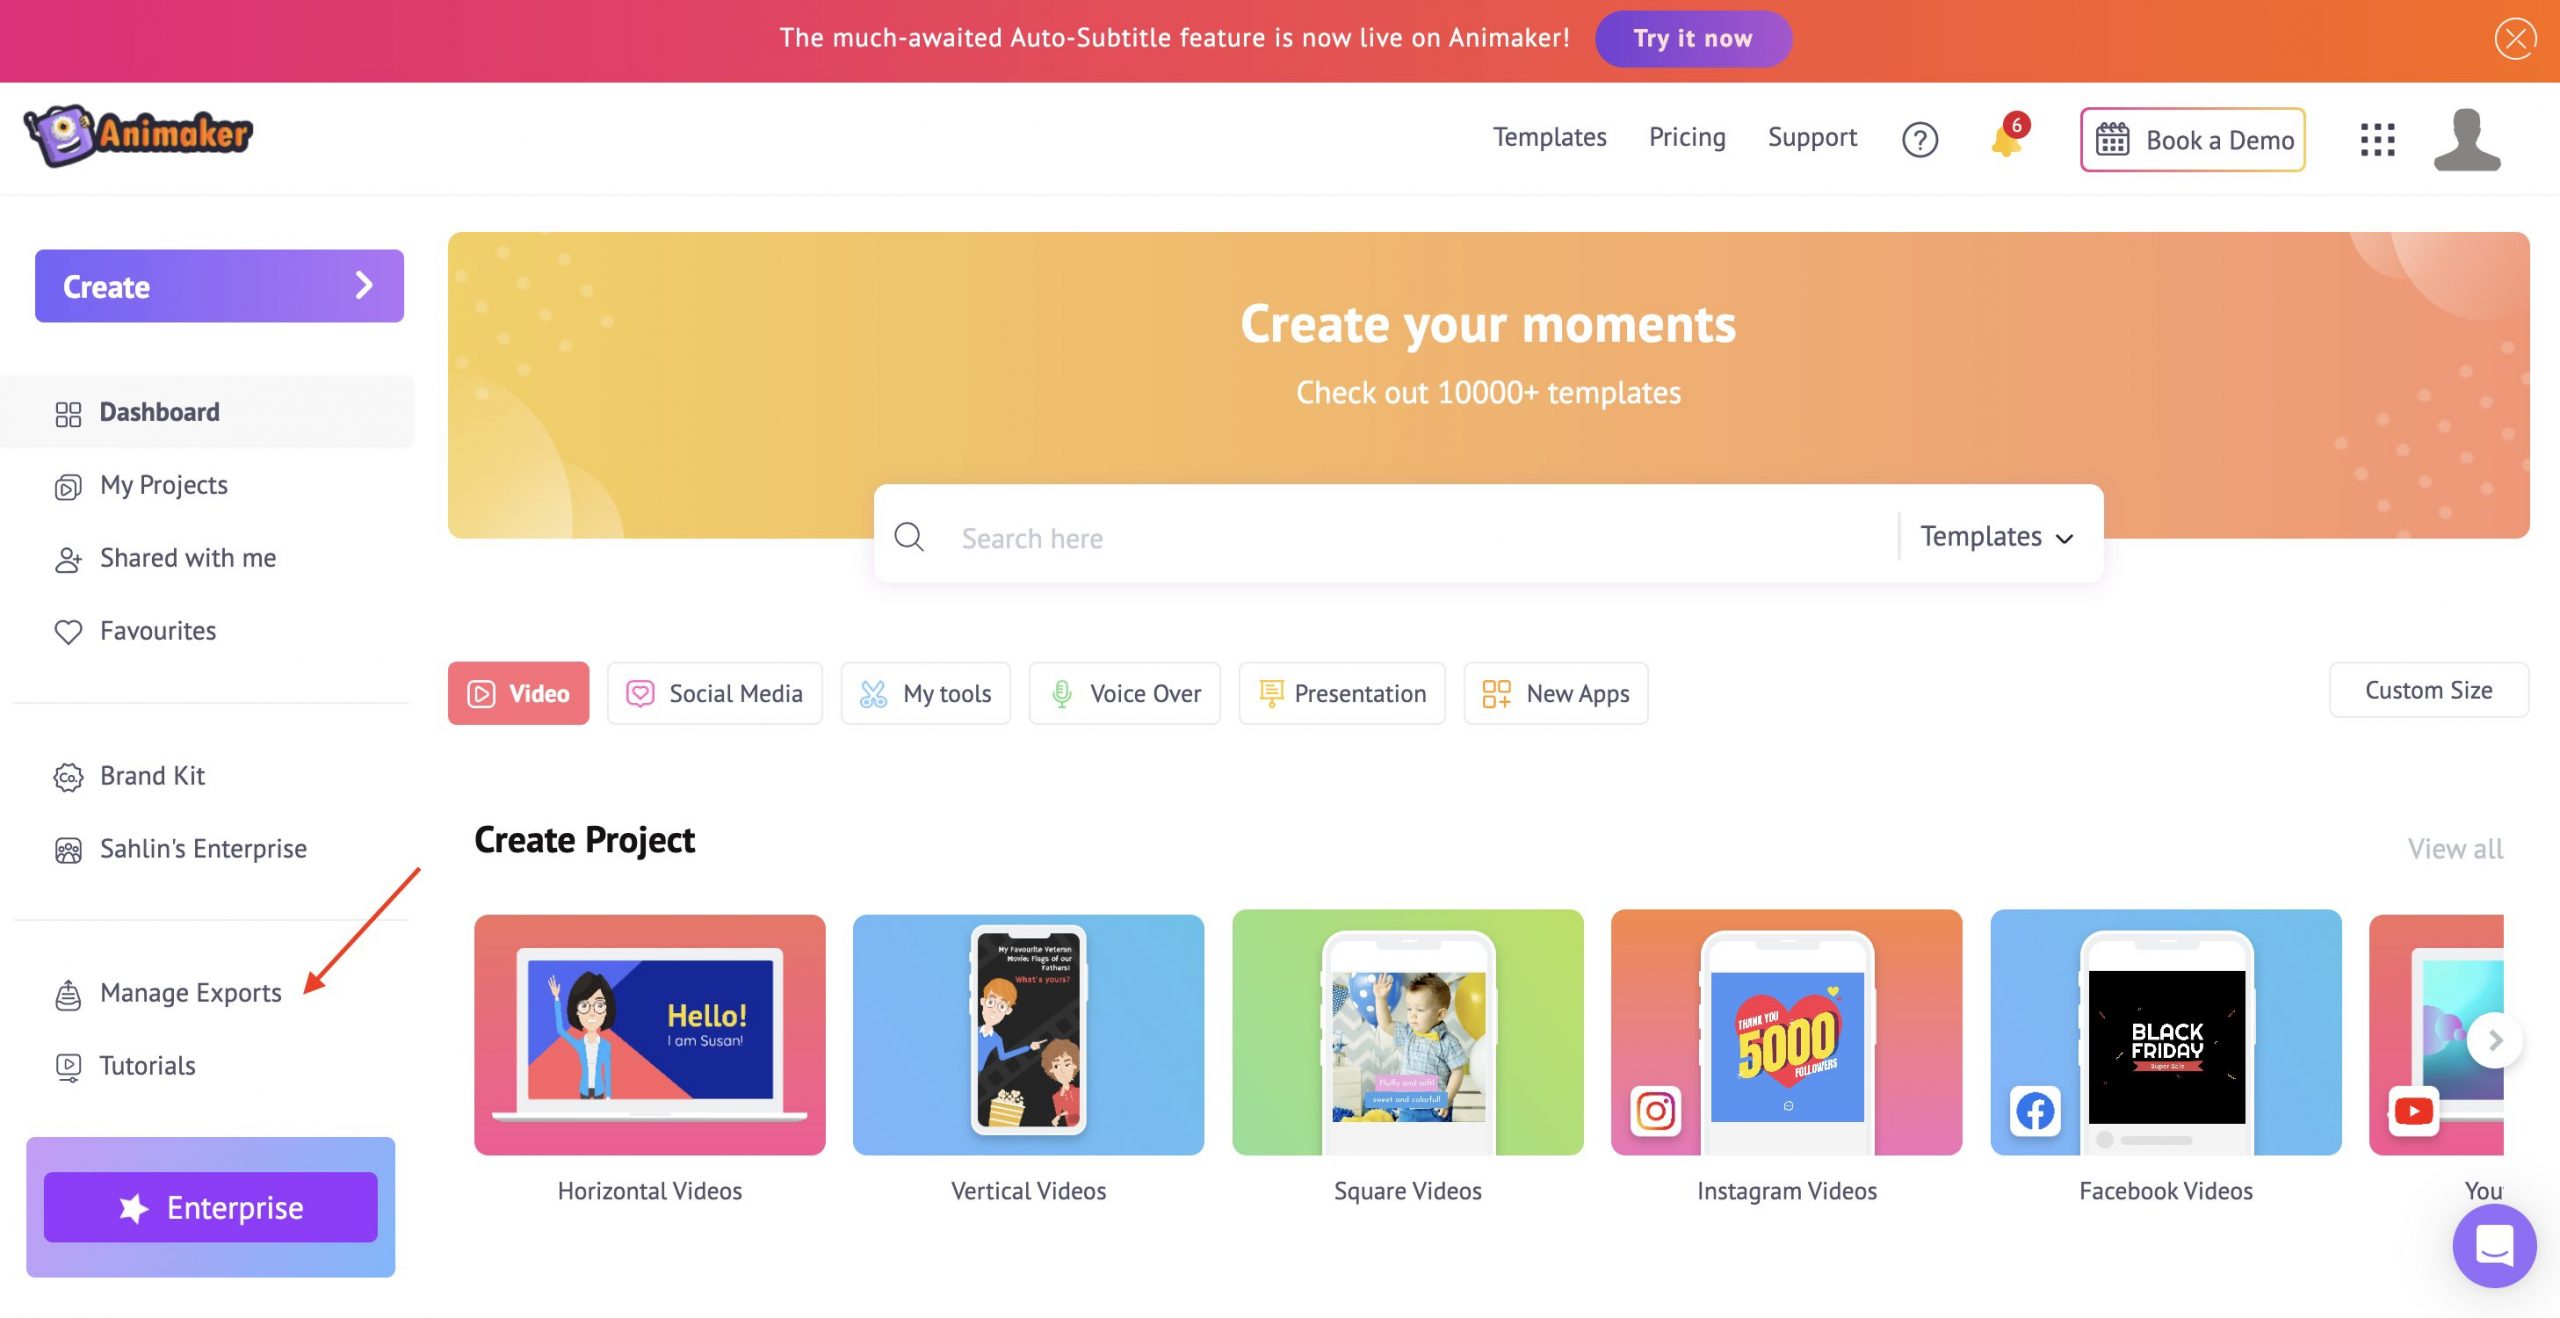
Alternatively, you can also download your video from Manage Exports Section, accessible right on your Dashboard.
Happy Collage Making! 😀
Bonus: Tips for making your video collage even more memorable!
Bonus 1: Adding Special Effects
Are you looking to make your video collage even more stunning?
I got just the thing!
You can add amazing pre-build special effects to your collage videos in just a couple of clicks.
Here’s how!
Step 1: Go to the “ Effects” section. You will find a wide range of various special effects ranging from celebrations in 2D to eyecatching 3D effects!
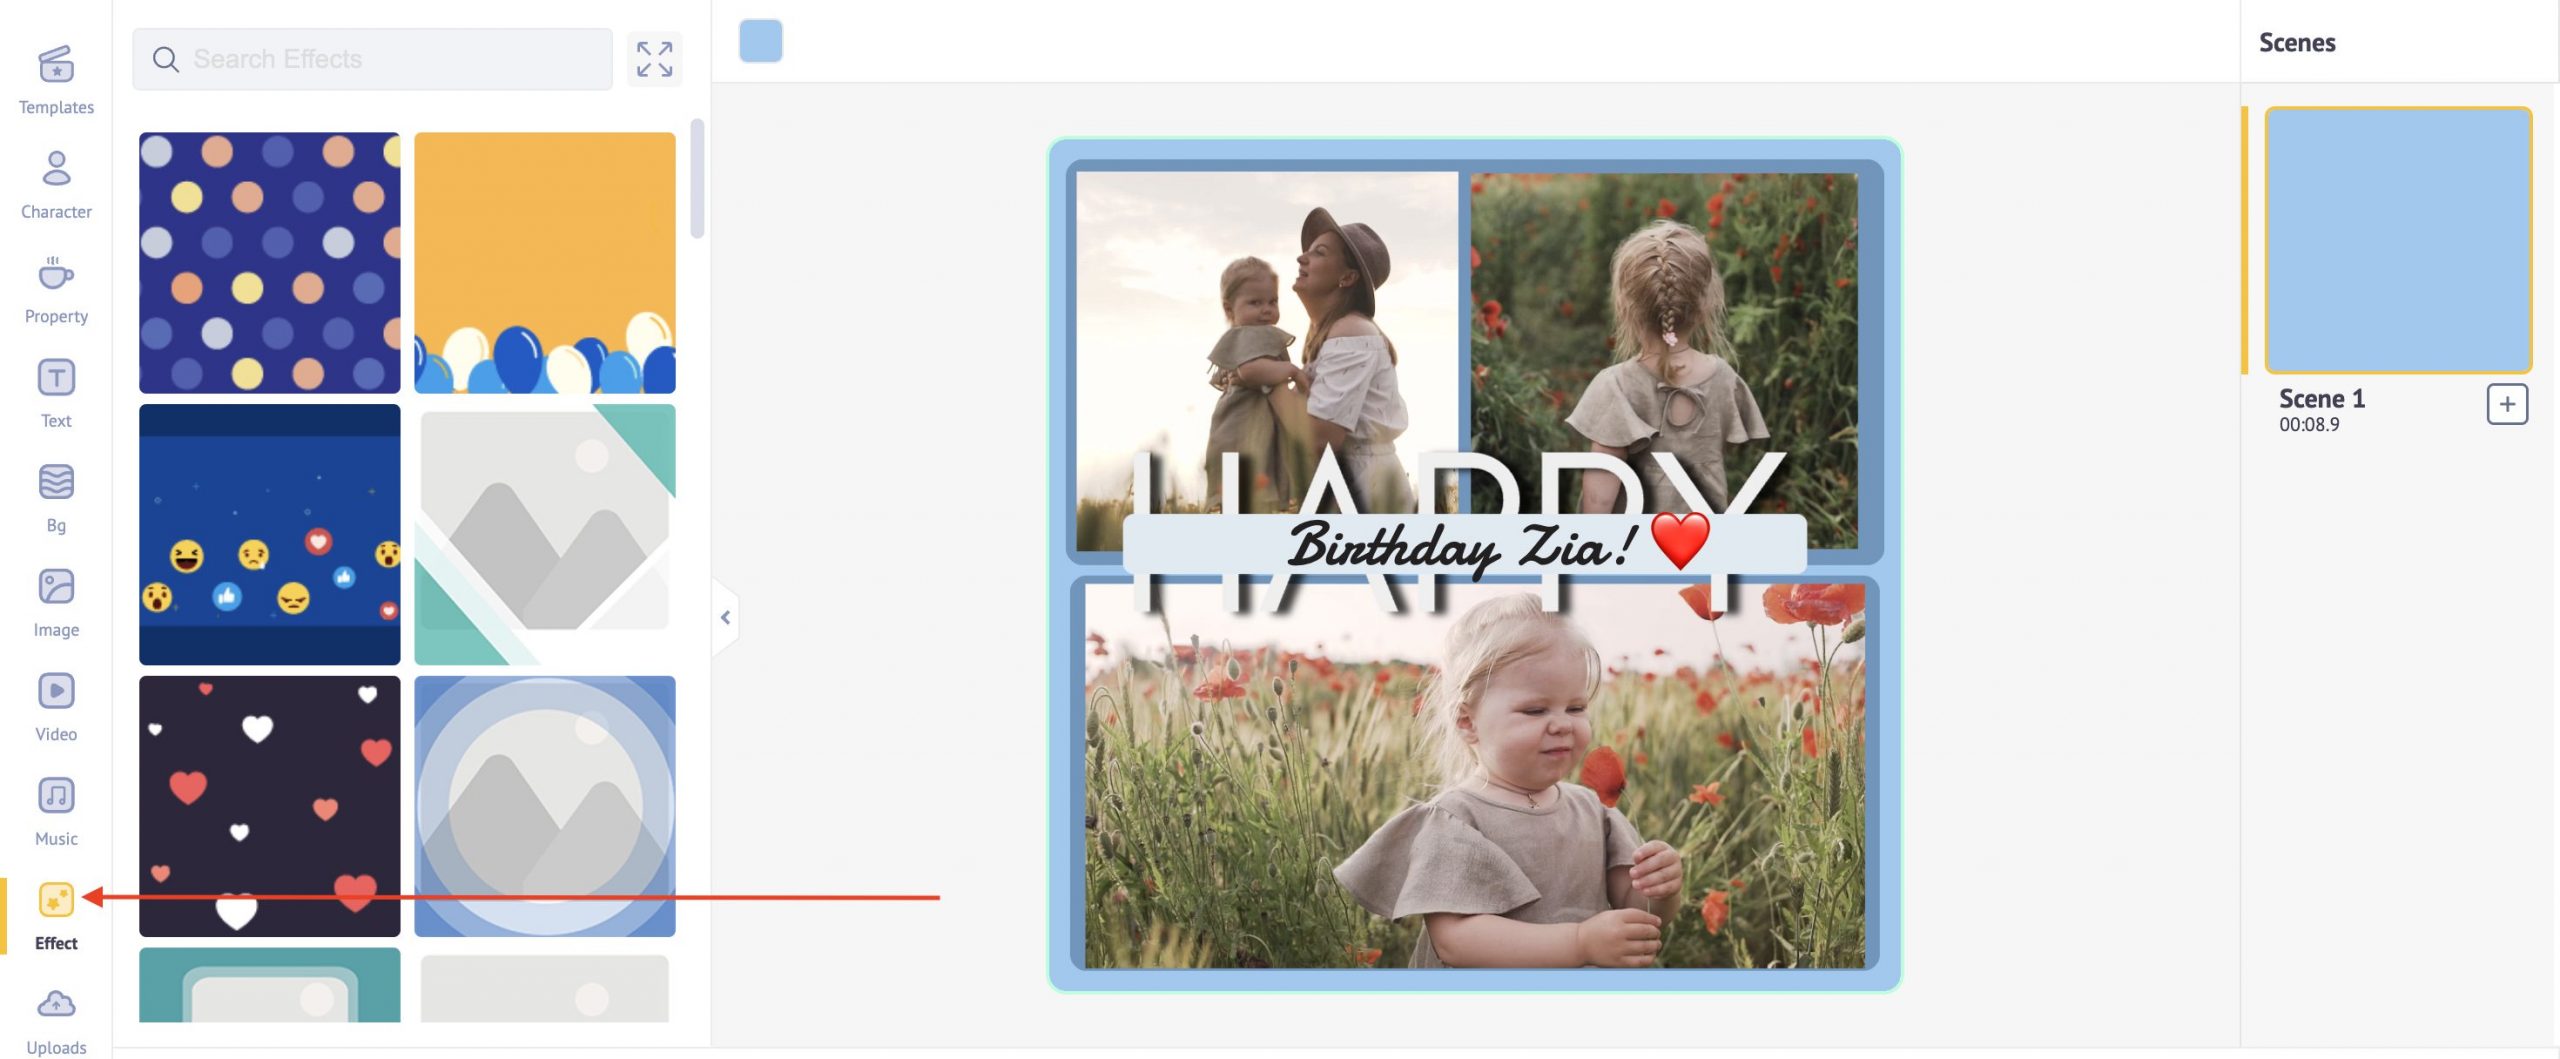
Step 2: Just tap on one to add and preview!
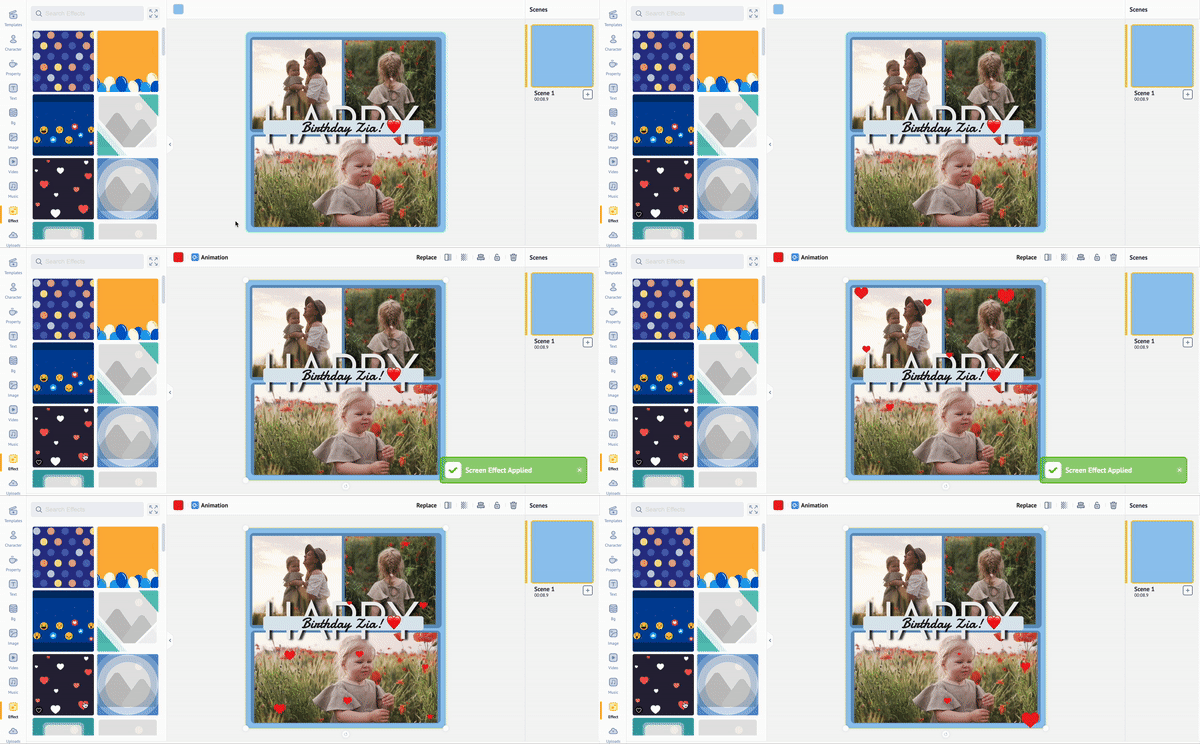
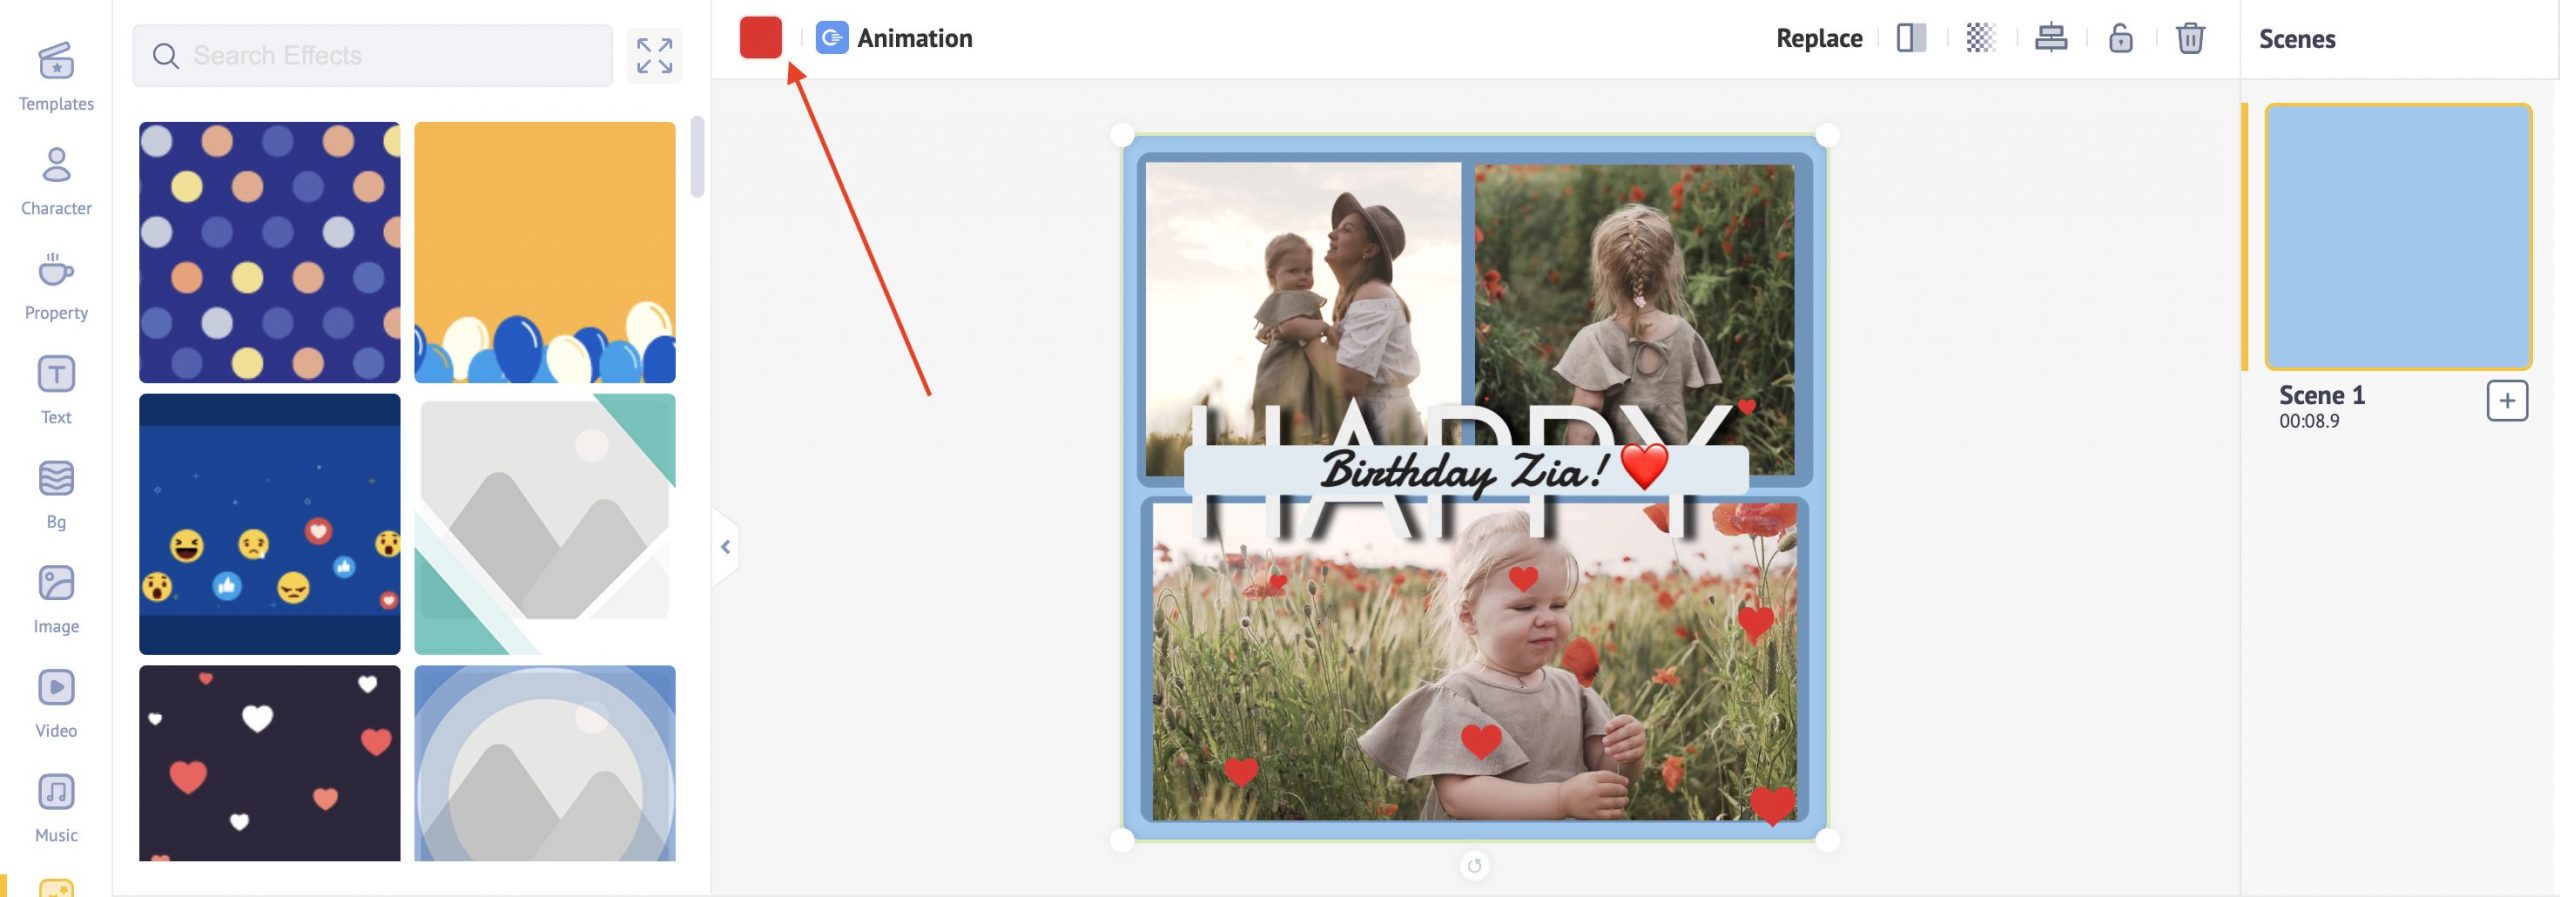
Tip: You can change the color of the effect as well by selecting “Change Colour” from the toolbar.
Bonus 2: Adding Stunning Filters!
You can make your videos and photos look even more captivating by adding filters or by making color adjustments (brightness, contrast, etc.)
Here’s how!
Select the video (or image) you would like to edit & tap on the “Edit Video” (or “Edit Image”) button present right above it.
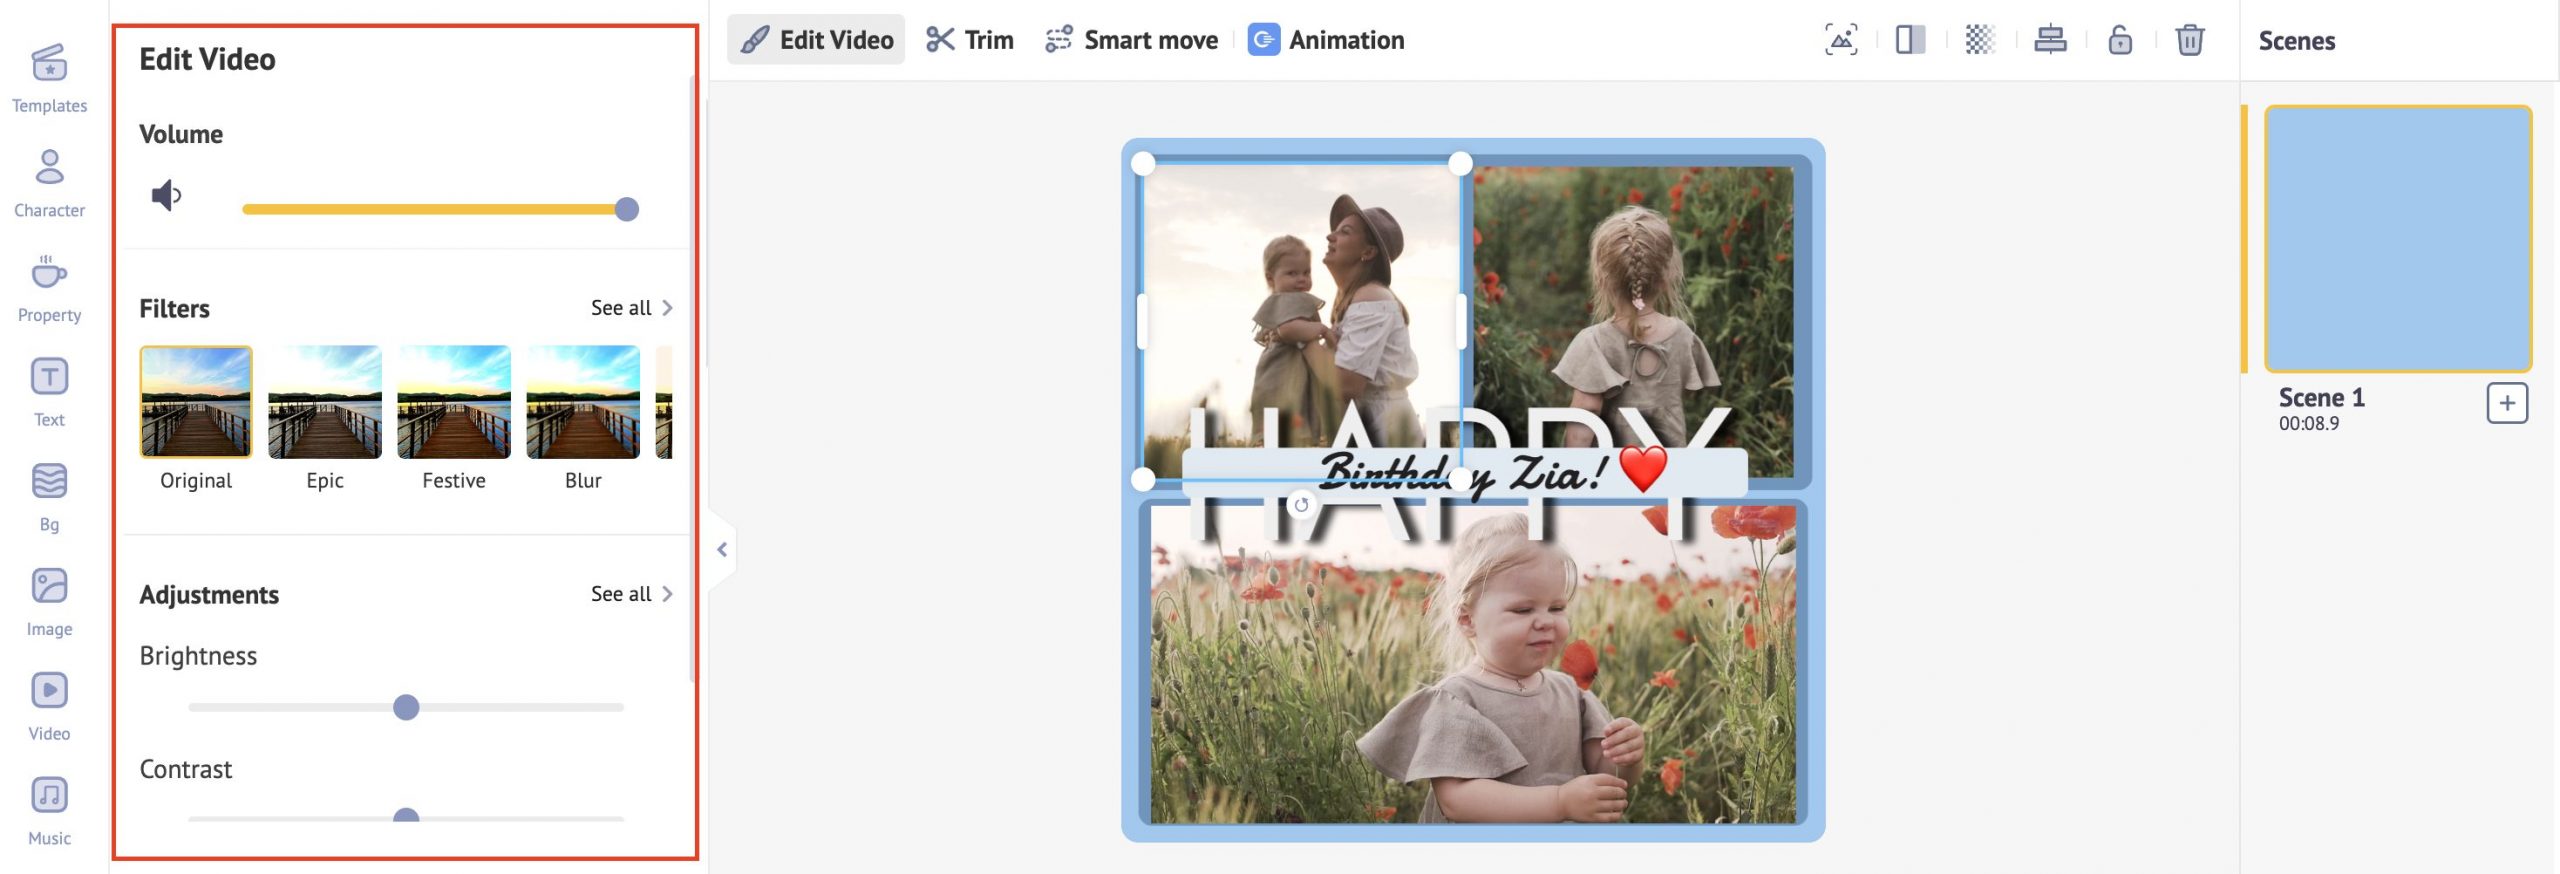
The Editing Tools will open on your left. Here, you will find various editing tools such as Filters, Colour Adjustments, etc.

To add a filter, just tap on “View All.” Here, you can choose from a variety of visually elevating filters for your video collages with just a click.
Just tap on one to try! 😄
Further, if you would like to make colour adjustments to the videos (or images), you will find the “Adjustments” section right below the filter section.
The most frequently used colour adjustment settings are listed (such as brightness, contrast, and saturation) in it.

In case you would like to make more detailed adjustments, just tap on the “See All” button, in which you can adjust the hue, tint, etc.

So that’s how you can make your video collages stand out from the crowd!
In case you would like to try to create one on the go, here’s how you can create a video collage using an iPhone!
ii) How to make a video collage on iPhone?
If you’re an iPhone/ iPad user, you have a big advantage over computer/laptop users. You can create, edit and publish amazing video collages right from your iPhones.
Just download the Animaker Animation Video Maker from the Appstore. It’s one of the best video collage apps on the market today!
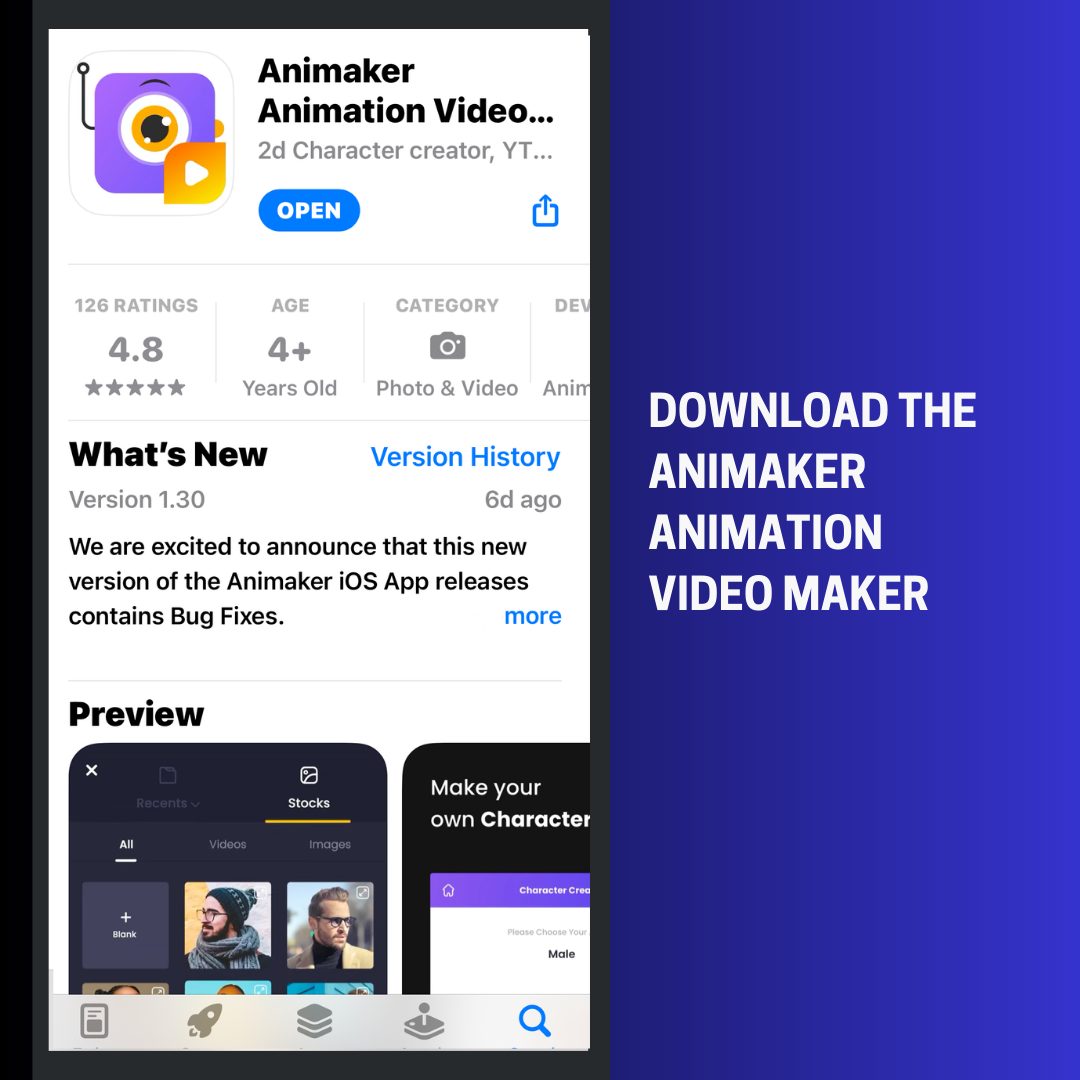
It’s not just for video collage making, you can also use it as a side-by-side video app (that is, split-screen videos) or even make collages with video and pictures combined!
It is going to solve all your collage making needs! 😀
Even if this is your first video collage, you don’t have to break a sweat! You can create a stunning collage video in under 5 minutes! And it just takes 5 simple steps!
Step 1: Choosing The Right Template
Step 2: Adding Videos To Your Collage
Step 3: Styling Your Text
Step 4: Adding Background Music!
Step 5: Previewing and Downloading Your Video Collage
Bonus: Tips For Making Your Video Collage Even More Memorable!
So let’s get started.
Step 1: Choosing the right template
Before you select a collage template, here’s an important tip that you need to consider.
Think about how many videos & photos you want in your collage. 🤔
If you are planning to create a collage with many videos (and pictures), make sure you opt for a template with multiple frames (aka Grids).

On the other hand, if you are planning to create one with just a few videos (and pictures), use a simple and straightforward collage template instead.
Now that we have decided on the assets (videos & pictures) we need in our collage. It’s time to open the Animaker Animation Video Maker app & create our video collage!
First important step. Register or log in to the Animaker app and search for the term "Collage".

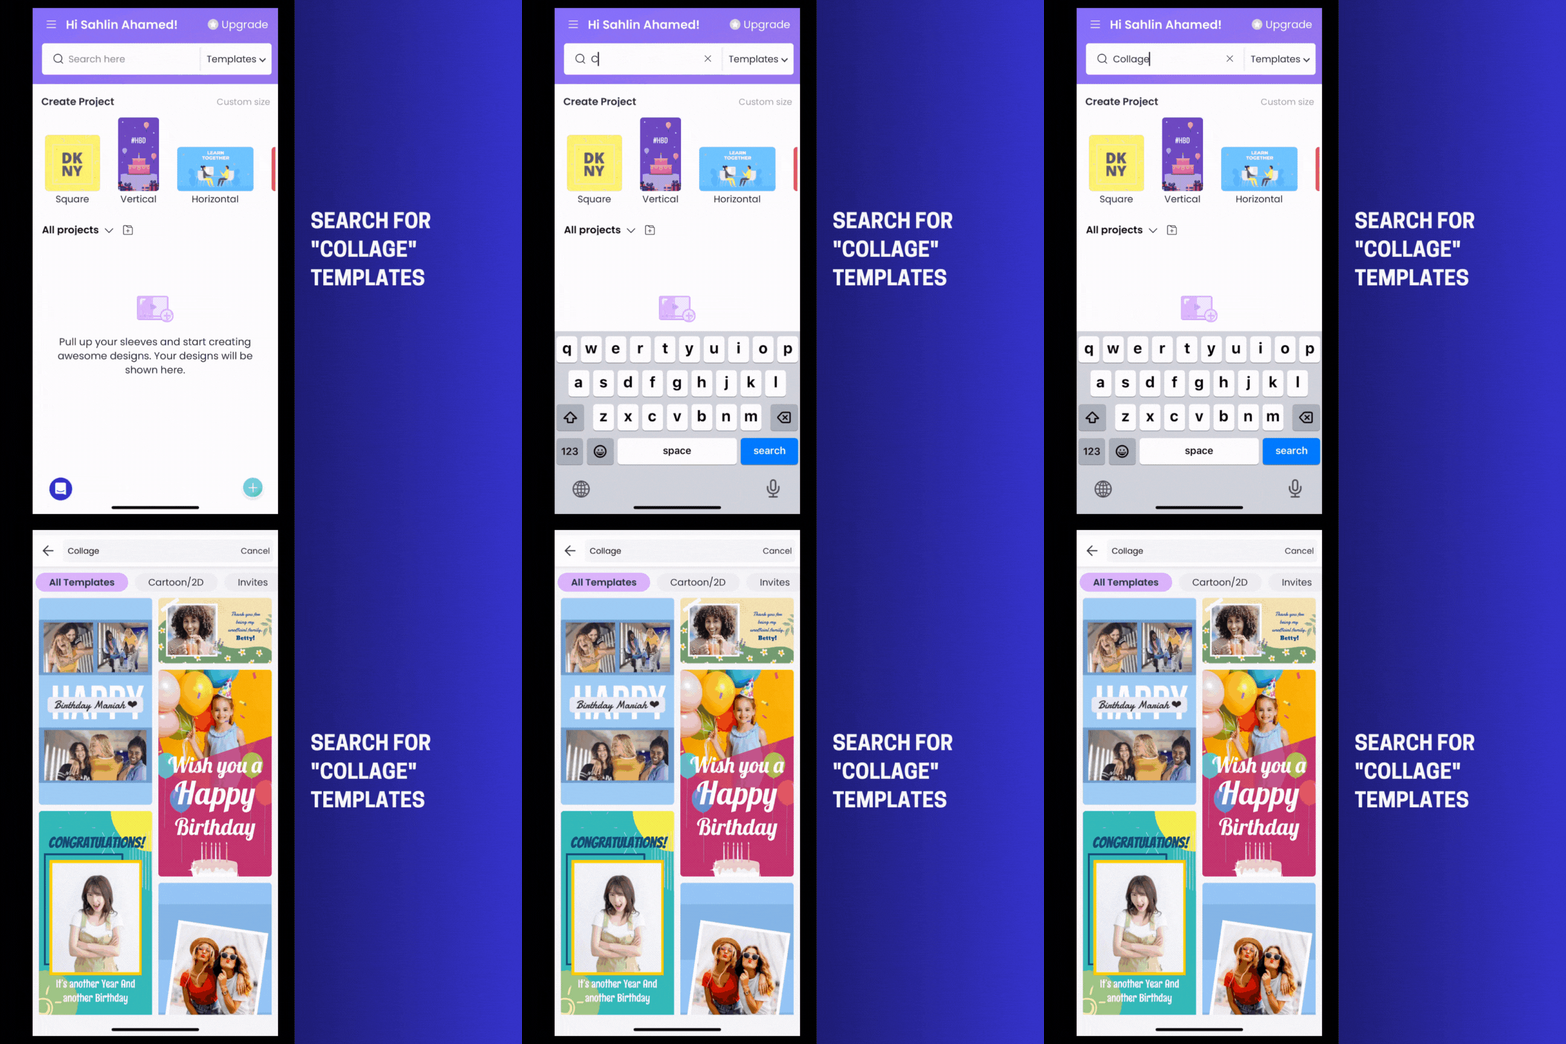
The entire collection of collage templates will be displayed. Choose the video collage template that you like best and click on “Use Now.”
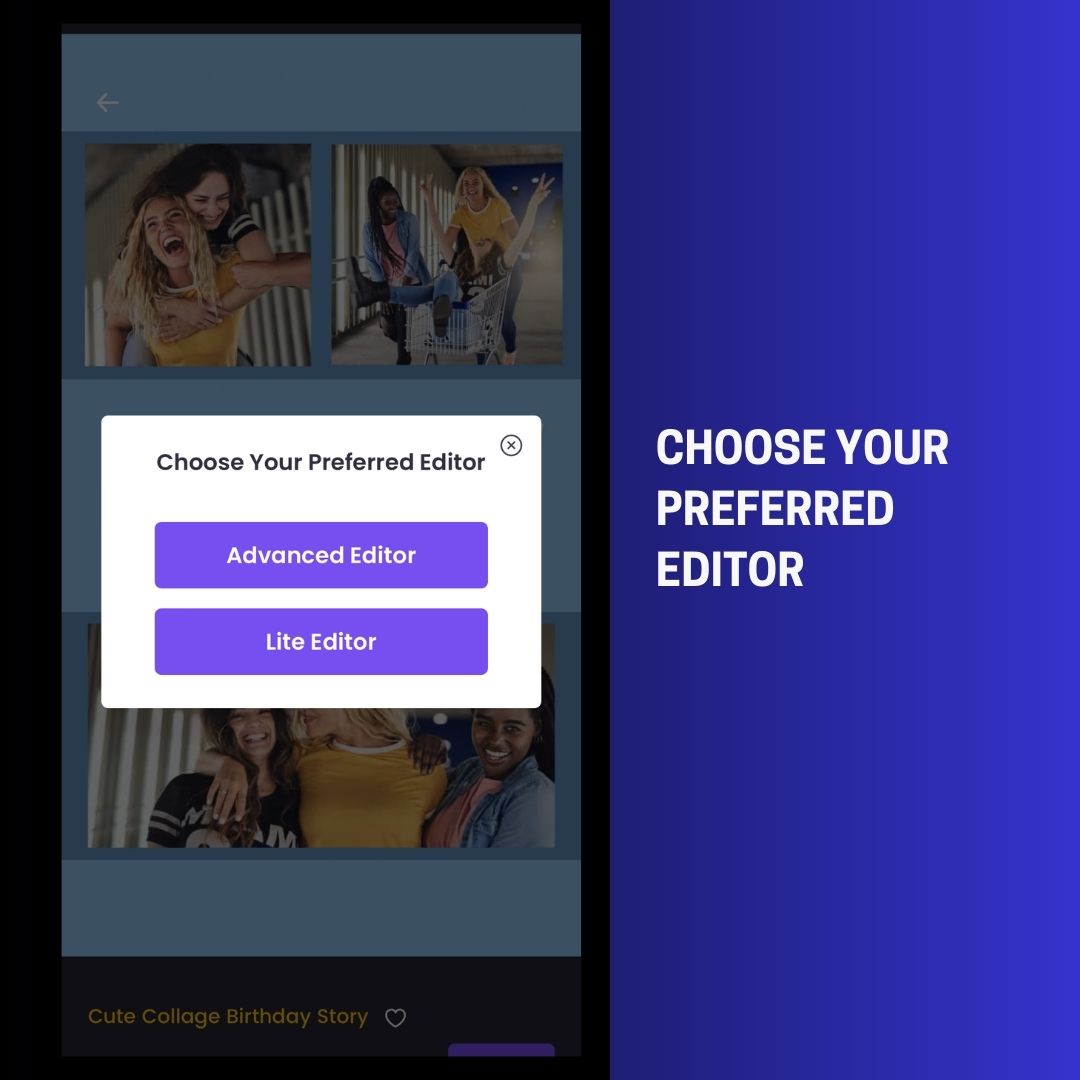
Once you select the collage template, you will be provided with two editor options - Advanced Editor & Lite Editor.
For this guide on how to create a video collage, it’s best to opt for “Advanced Editor.”
Once you select it, your video collage template will now open with all the necessary collage-making tools!
Step 2: Adding Videos To Your Collage
Now it’s time for us to bring our videos into our collage template!
And guess what? It’s really easy!
With just 4 simple steps, you can add videos to the collage template. Here’s how!
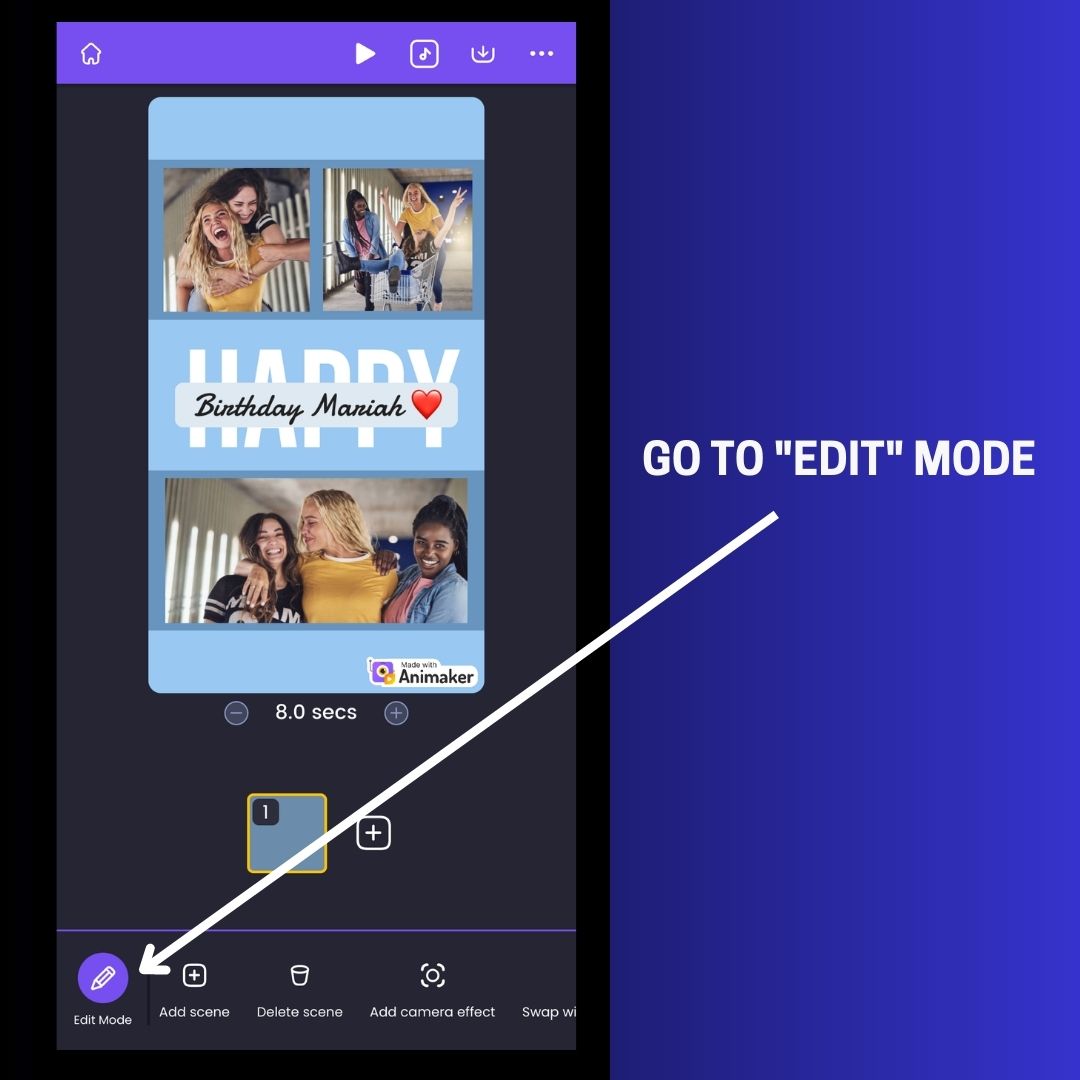
1. Switch to the “Edit” Mode.
2. Select “Add Items” from the toolbar.
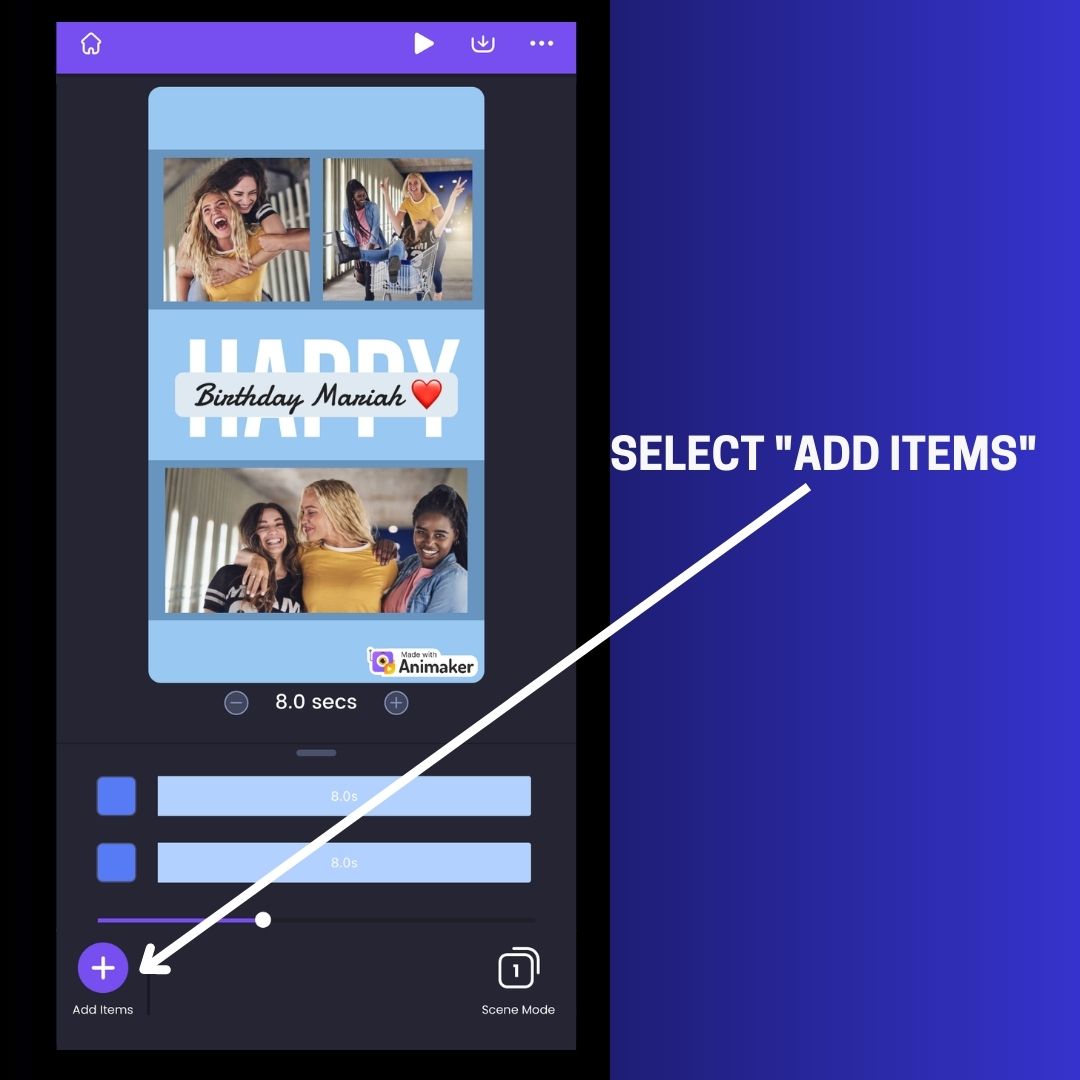
3. The “My Upload” section will open on your screen by default. Just select the video you want to add to your collage.

4. Once the video is added, it gets uploaded as a background by default. Please don’t worry, you can change it into an asset just by selecting the video and clicking on the “Remove Bg” feature in the toolbar. Refer to the screenshot below.
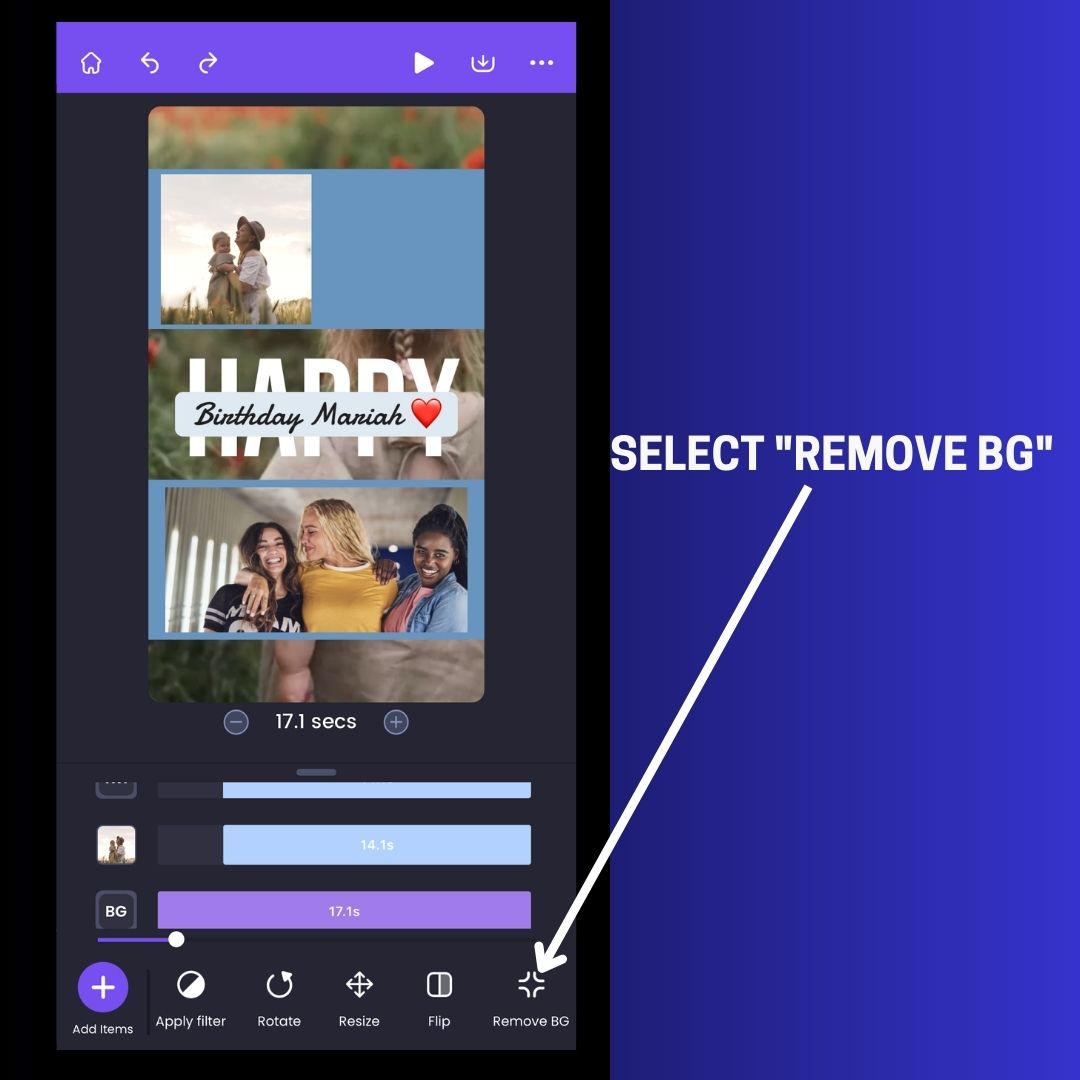
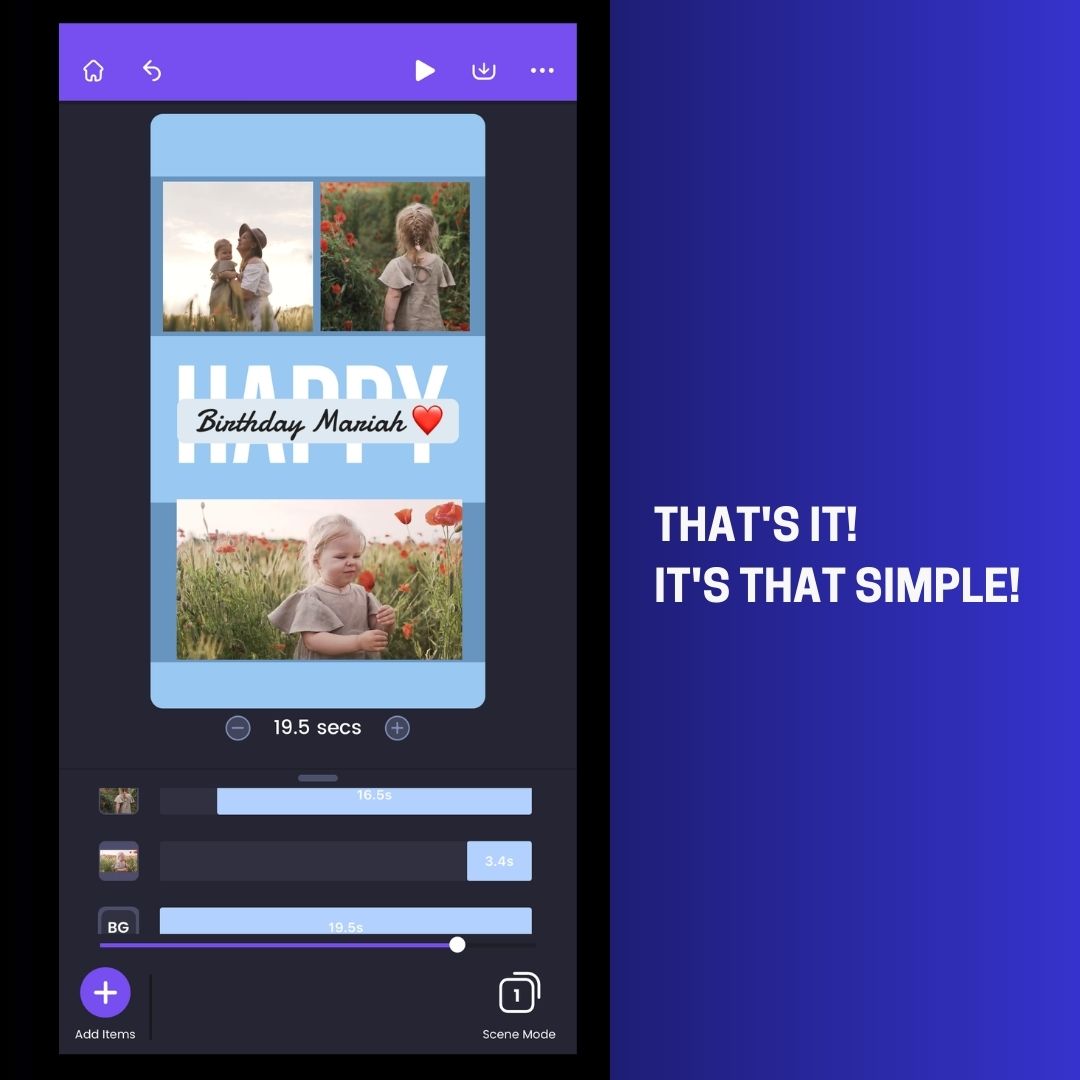
Once that’s done, scale it and place it in the required position. It’s that simple!
That’s how you can upload a video into your collage. Repeat this step for all of the videos you want to add to your collage video.
Step 3: Styling your text
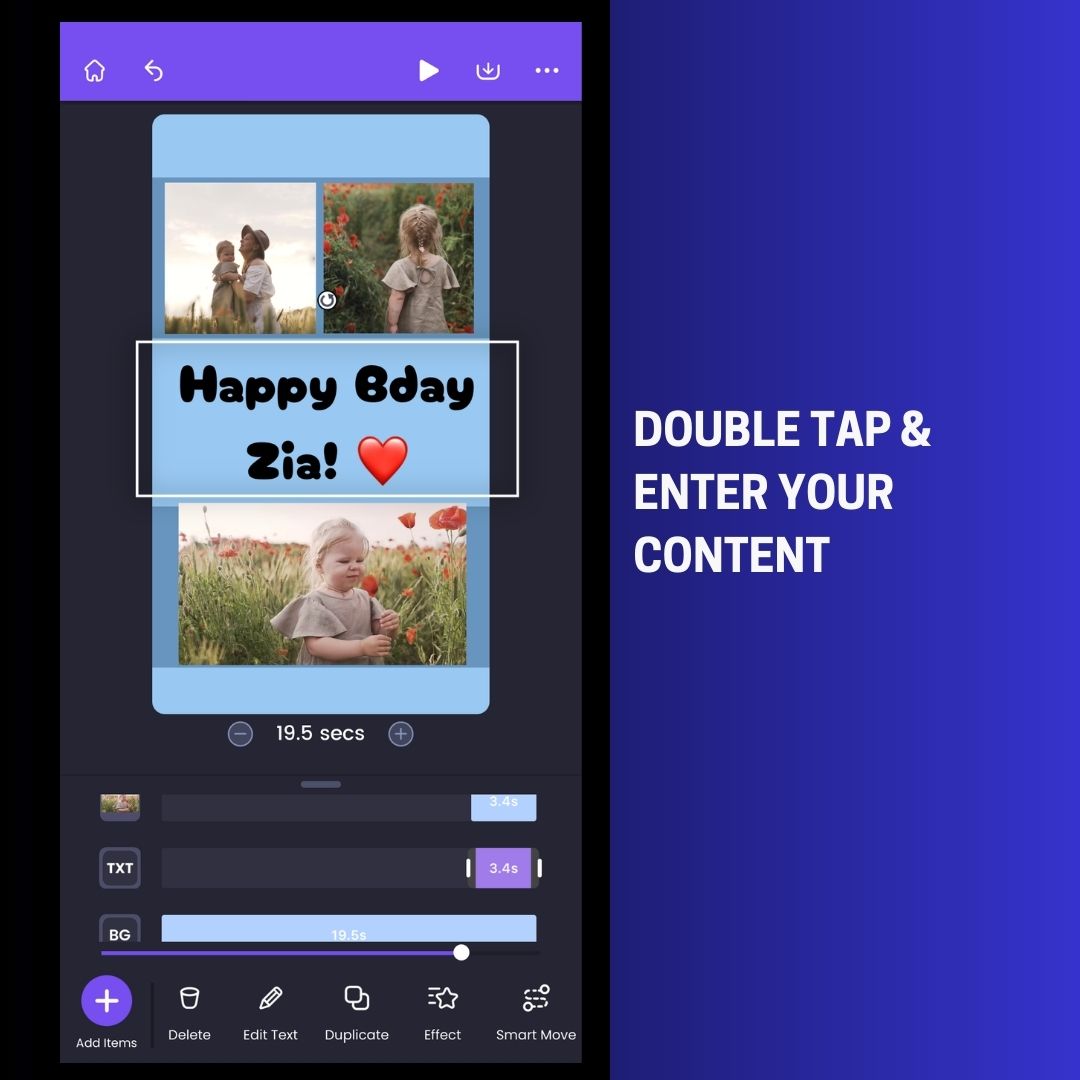
Adding content to your collage is really simple – just double-tap on the textbox and enter your message!
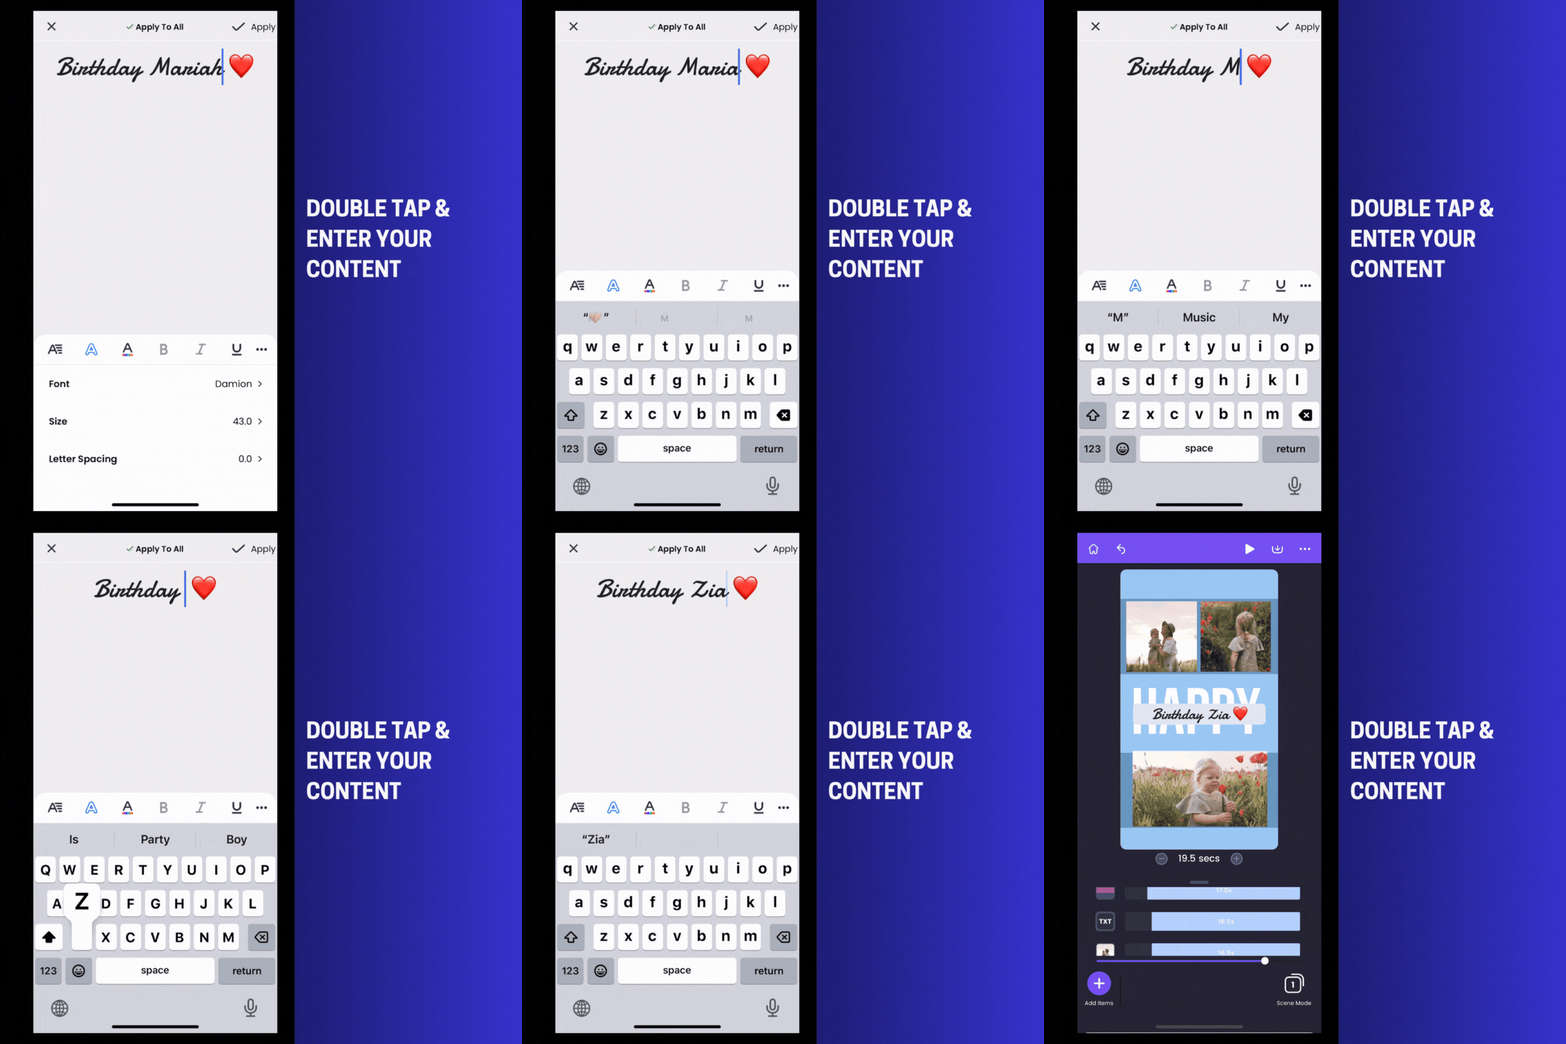
In case you would like to replace (or add) a new textbox, you have plenty of alternatives to choose from. Just browse through the text section.
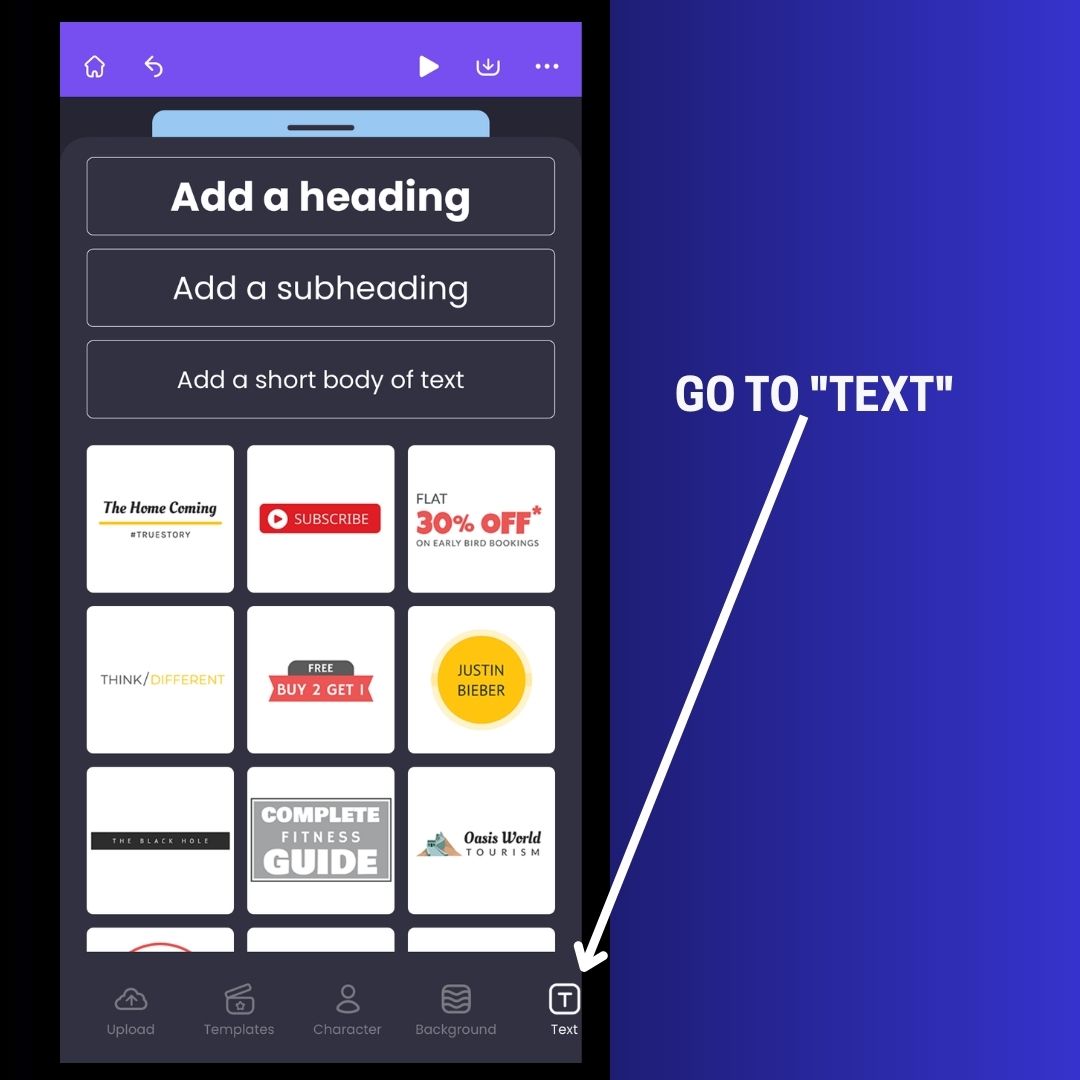
You can choose from two types of texts.
a) Text Prebuilds that contain text animation
b) Textboxes that do not contain text animation.
Here’s how to use both!
a) Adding Text Prebuilds
The Animaker App has over 200 stylish text pre-builds with built-in animation. You can easily enhance the visual appeal of your video by incorporating the text pre-builds.
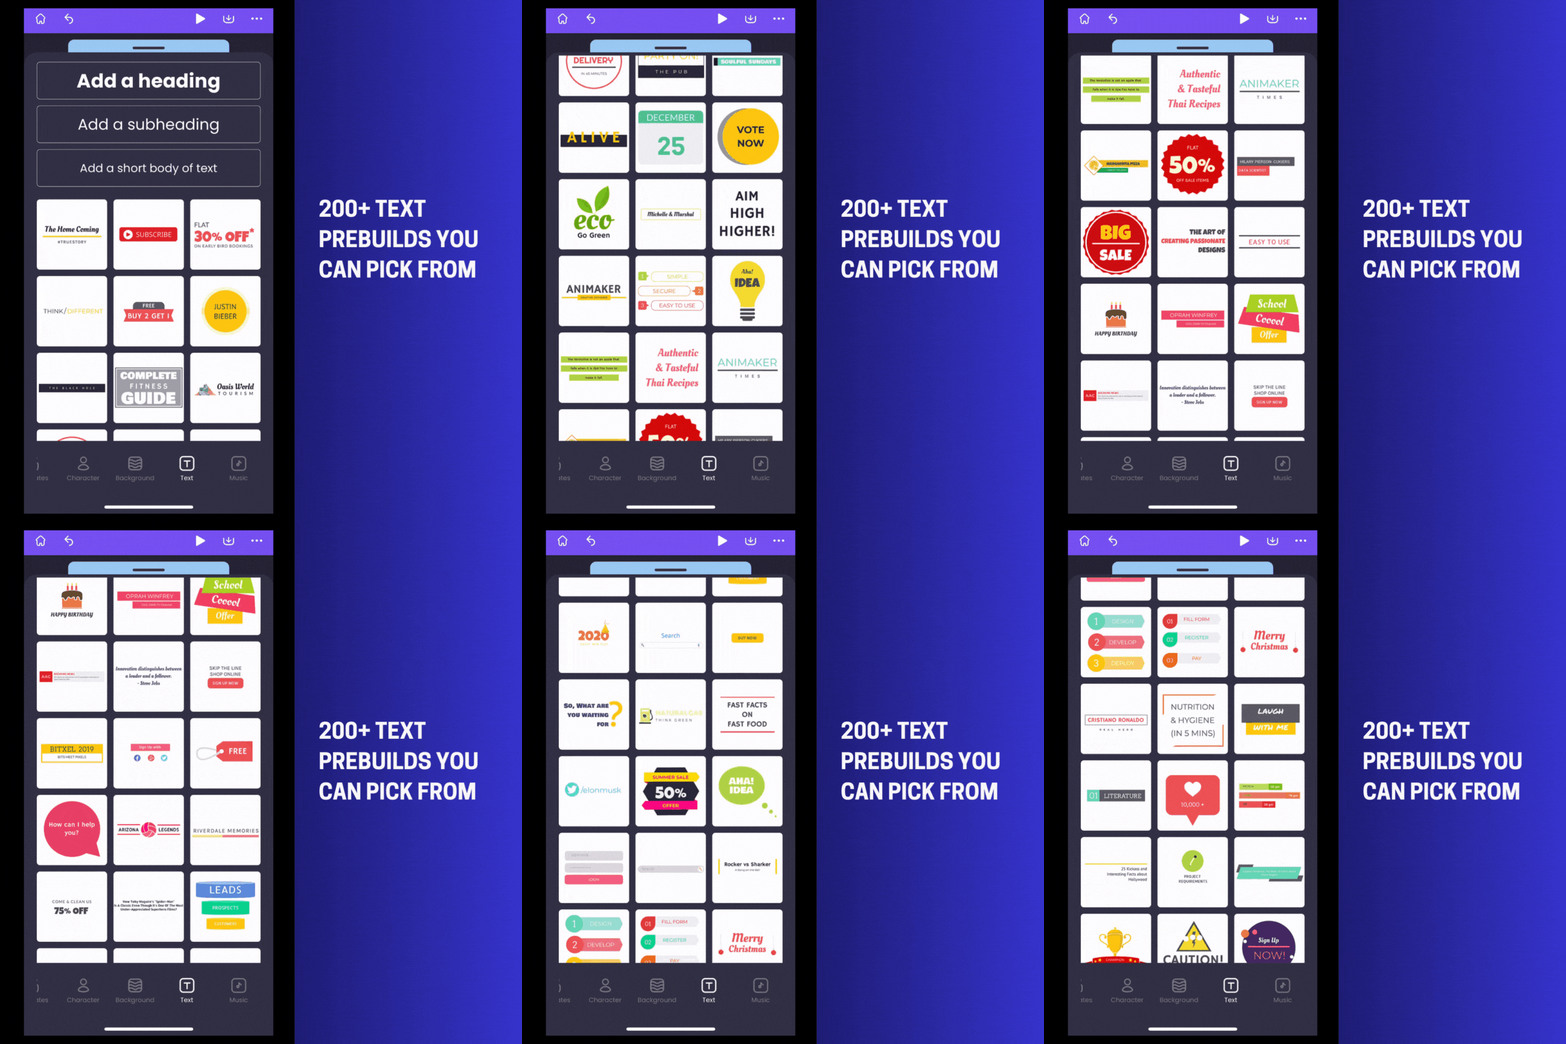
Just tap on one to add it to your scene and double-tap to change the content.

b) Adding a Textbox
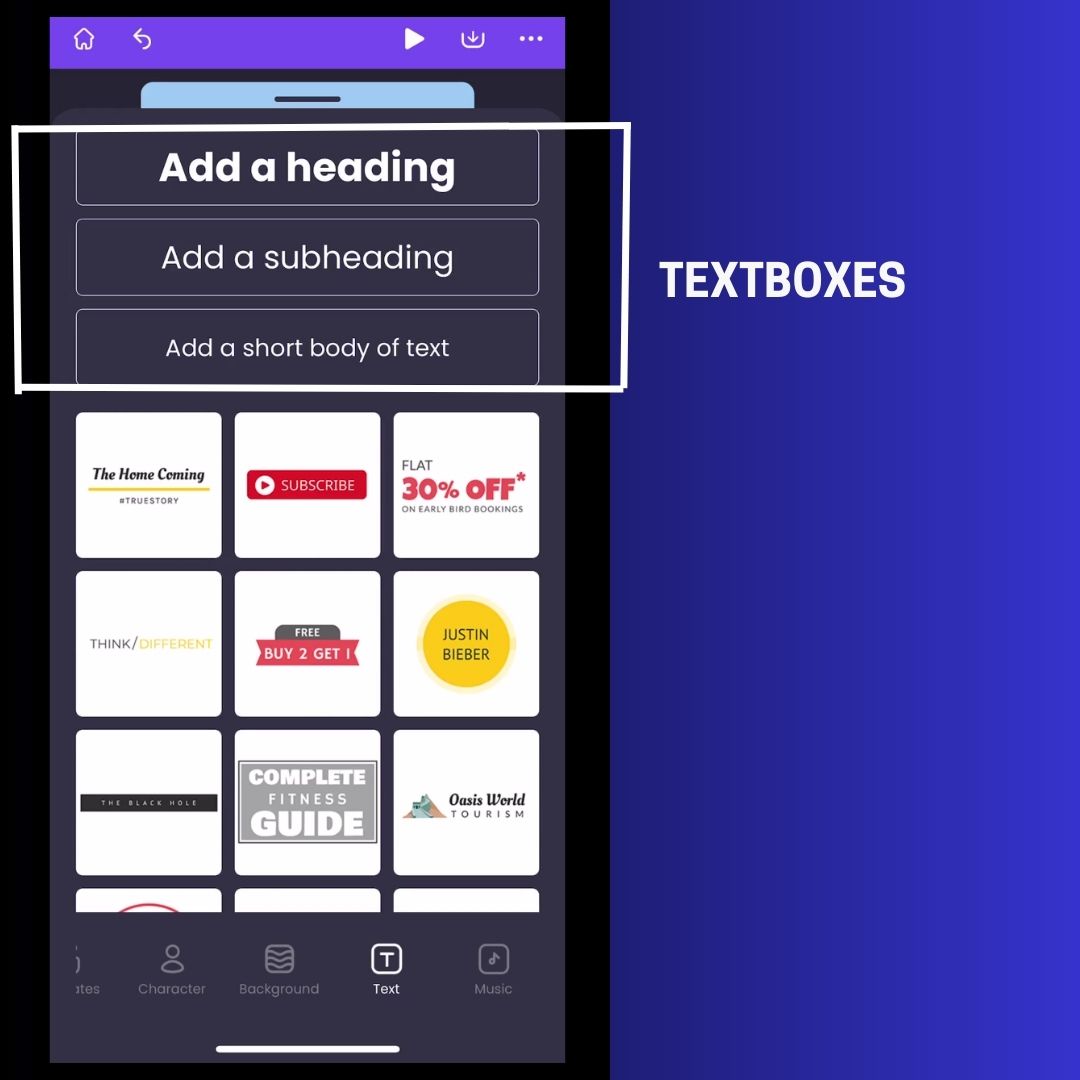
In case you opt for a textbox, here’s how you can add your content and add animation to it!
Double-tap on the textbox and enter your content.
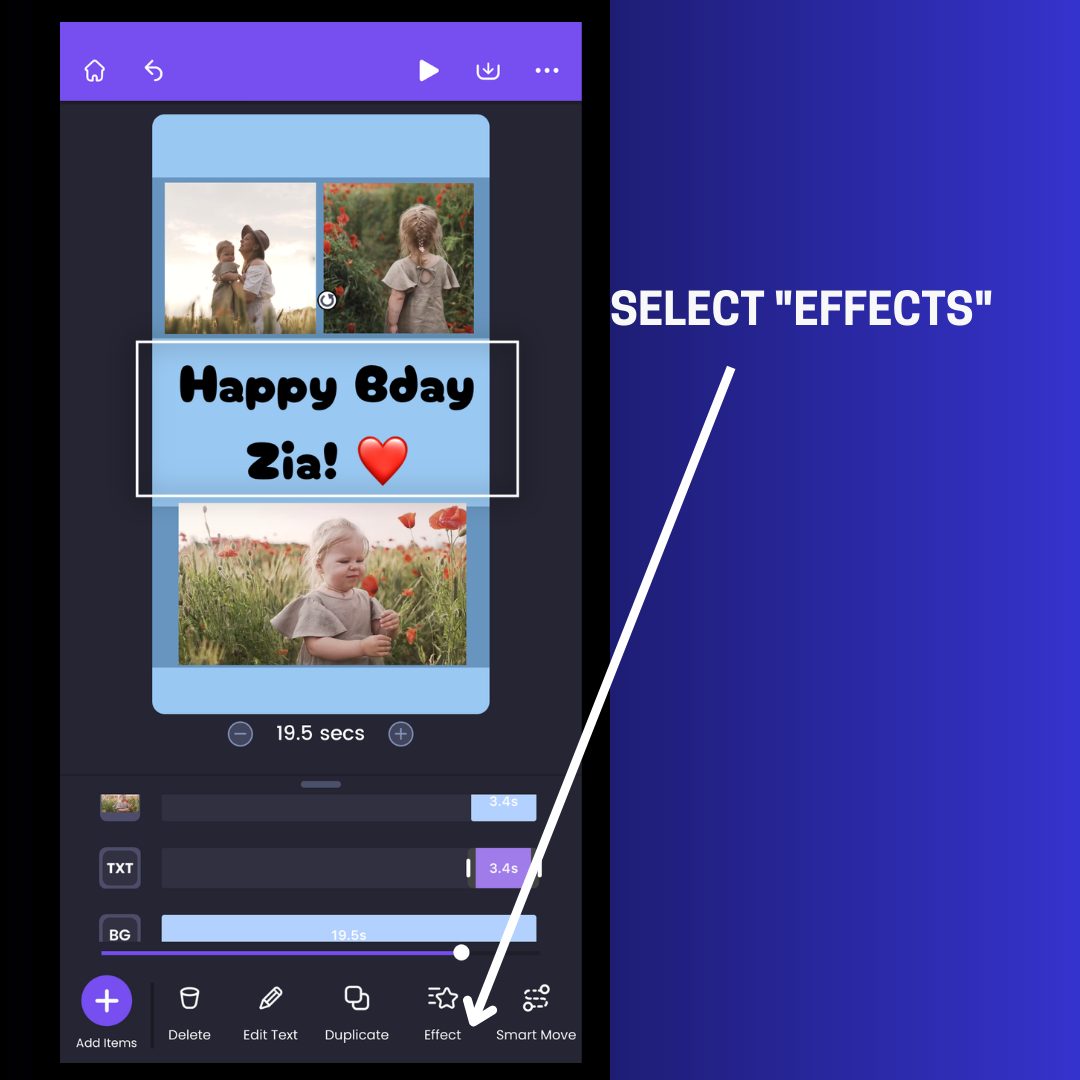
Choose the textbox and select "Effect" from the toolbar.
There are two types of animation effects that you can apply to your assets (images and videos).
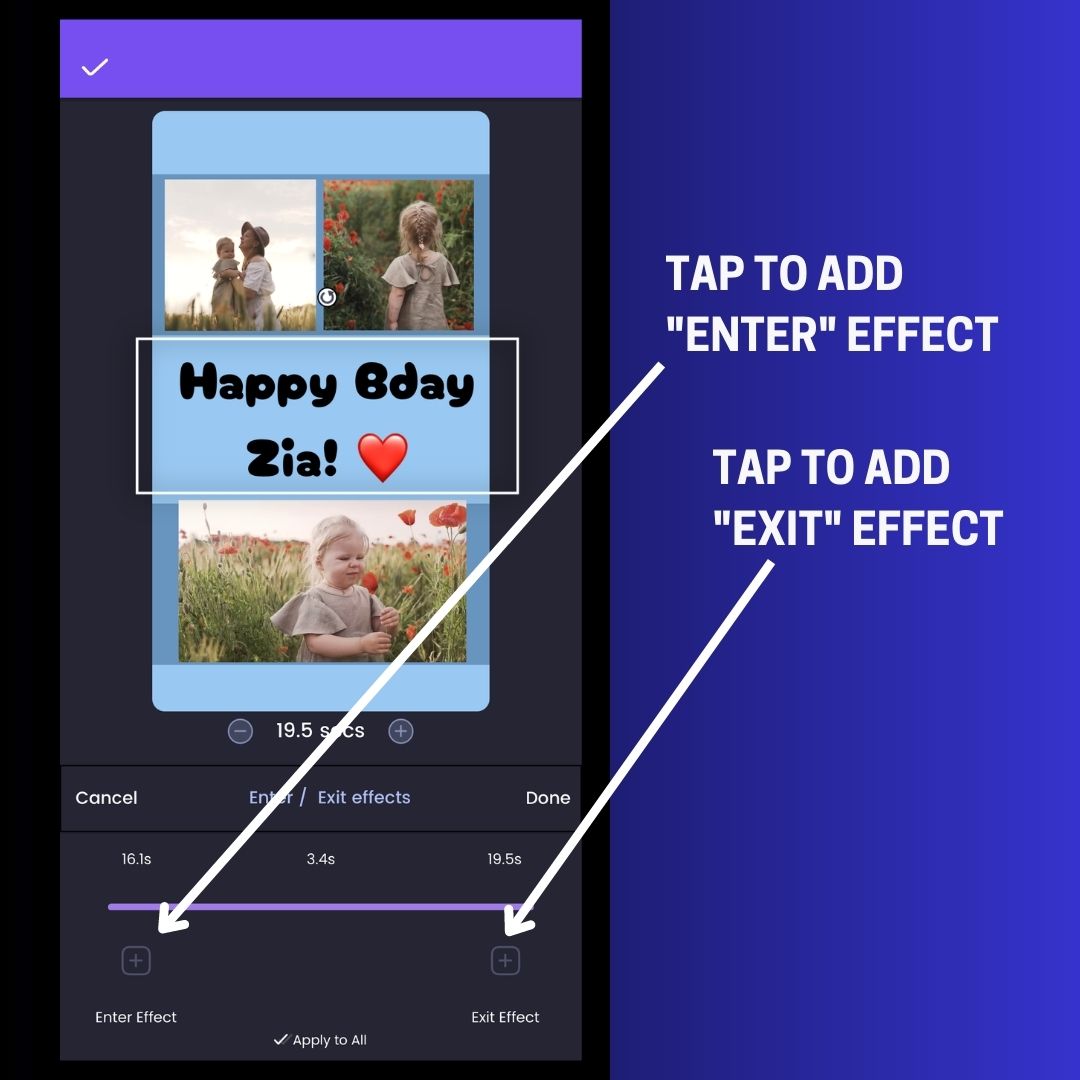
a) Entry effect and
b) Exit effect
Here’s the difference. The "Entry Effects" are animation effects that you may add at the beginning of an asset, and the "Exit Effects" are animation effects that you can add at the end.
Just tap to add and preview an effect.
Your video collage is almost ready! Just one final ingredient is needed to make it stunning!
Step 4. Adding Background Music!
Animaker provides a huge collection of 30k+ trendy music across various genres, such as Rock, Pop, and so on.
It's really simple to add one. All you need to do is
i) Go to the Music Section.
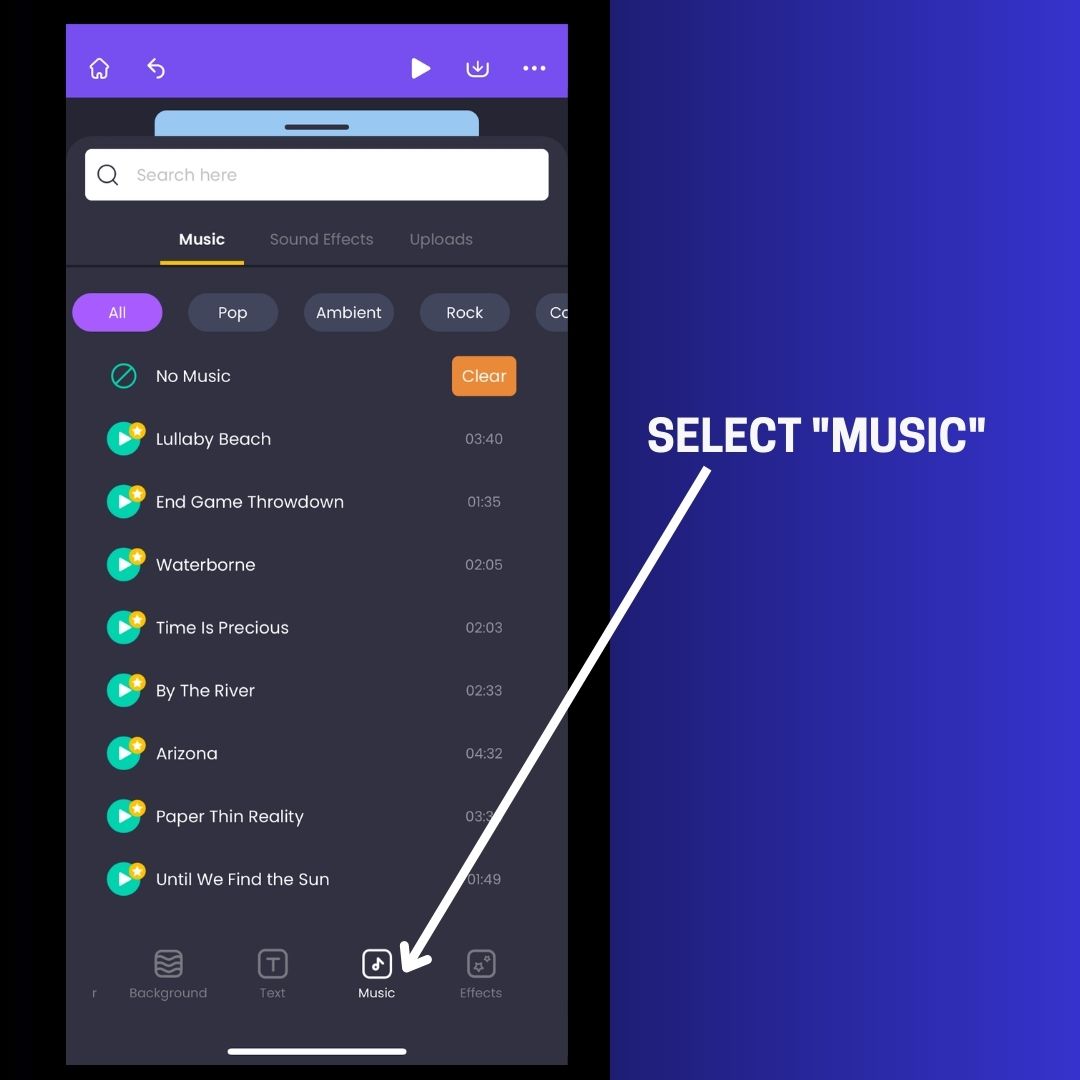
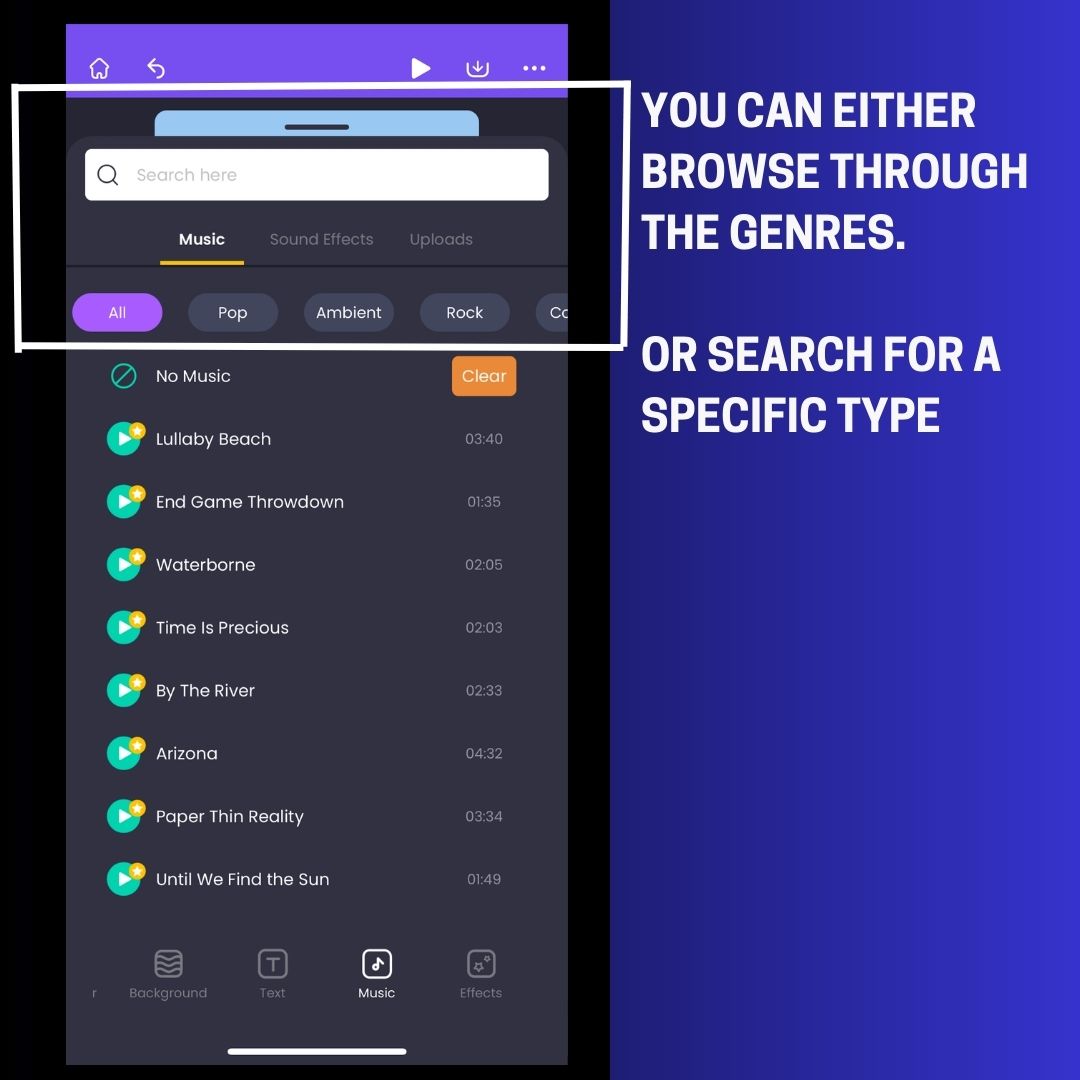
ii) Choose from the different music categories or search for a specific type.
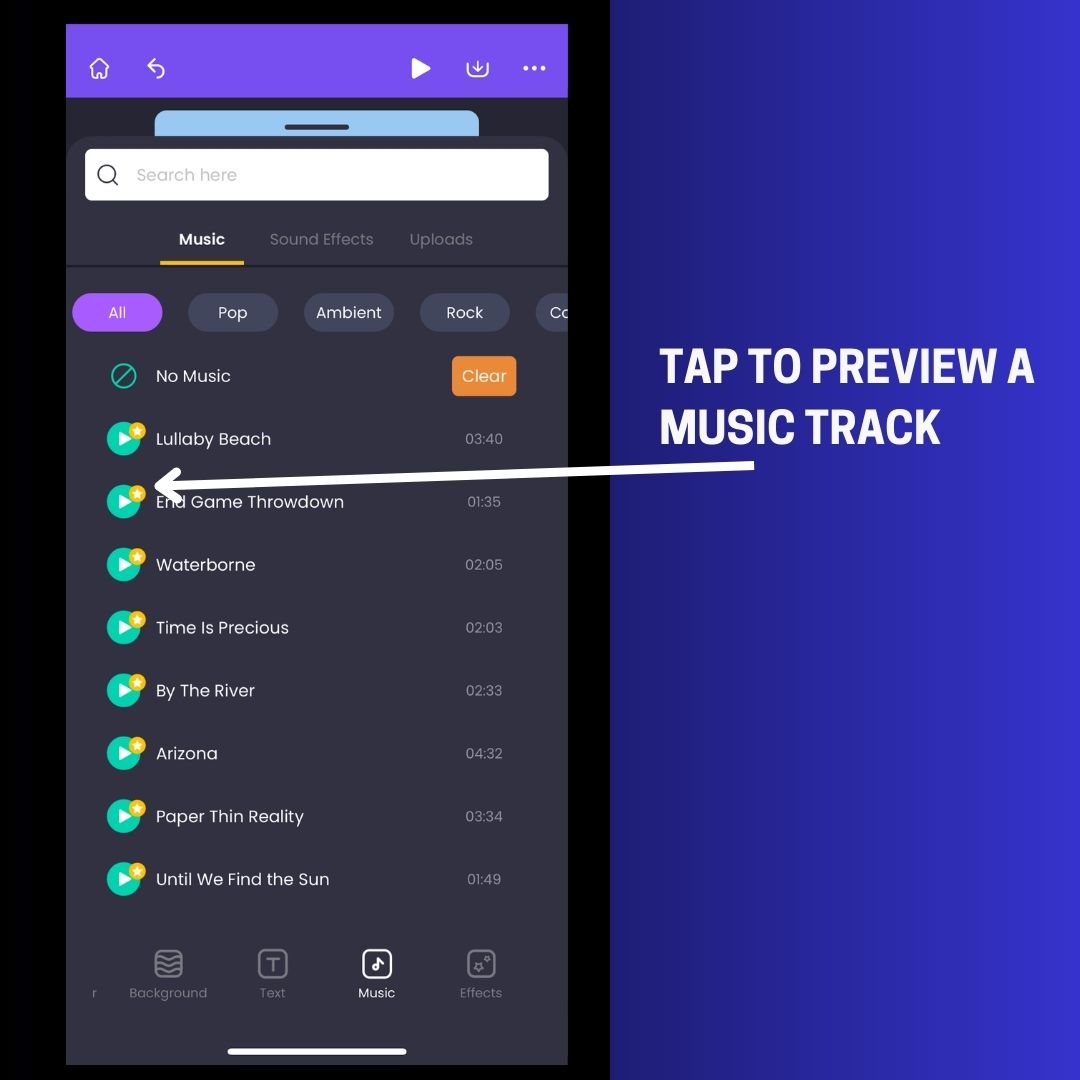
iii) Tap on the play button to preview the music track. If you like how it sounds, tap on it to add it.
You can also add your own music track if you choose. Simply navigate to the "My Uploads" section and upload your music track into the video project.

Step 5. Previewing and downloading your video collage
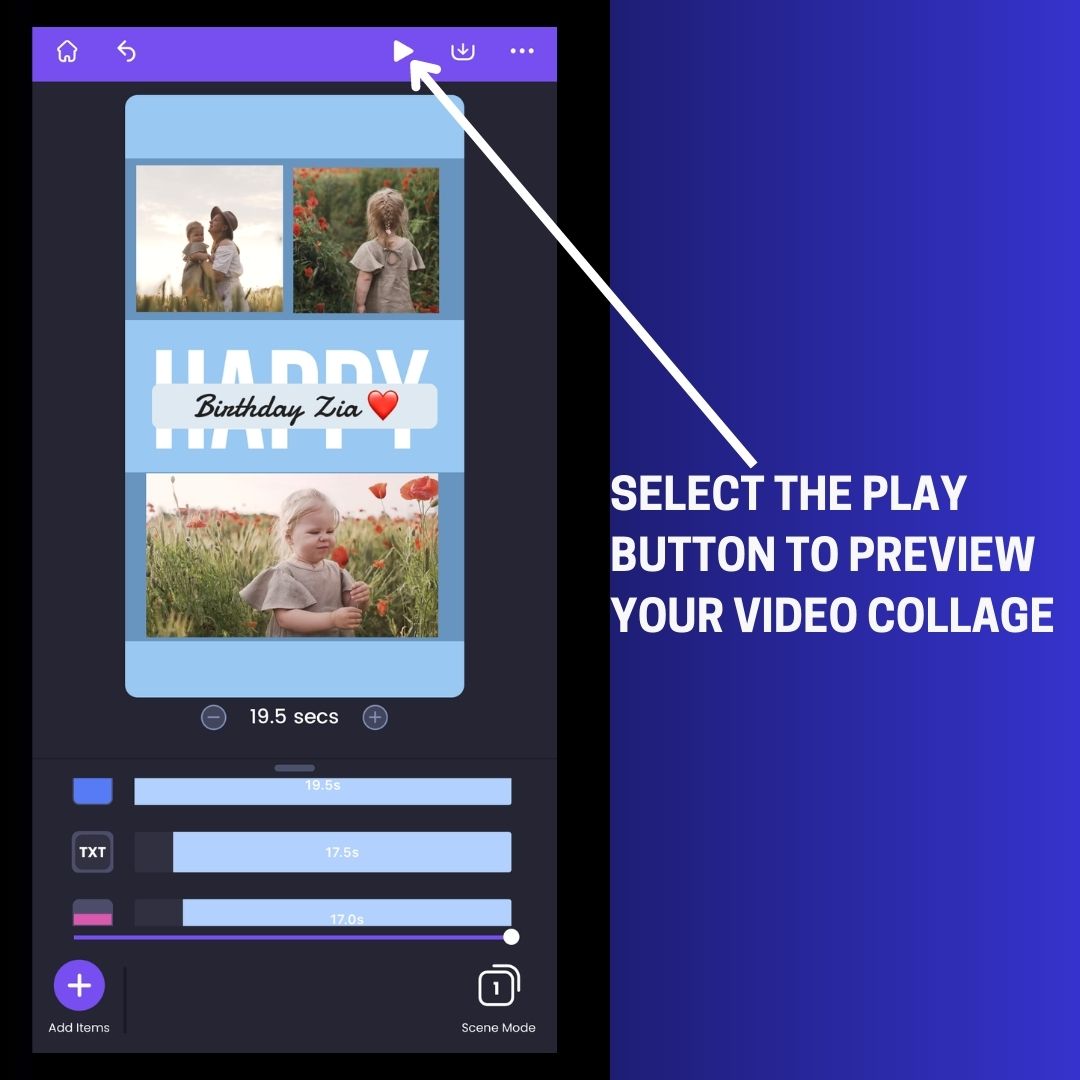
Once you’re done editing your video collage, click on the “preview” icon on top to take the final preview.
If you’re happy with the results, just click on the download icon to download your video!
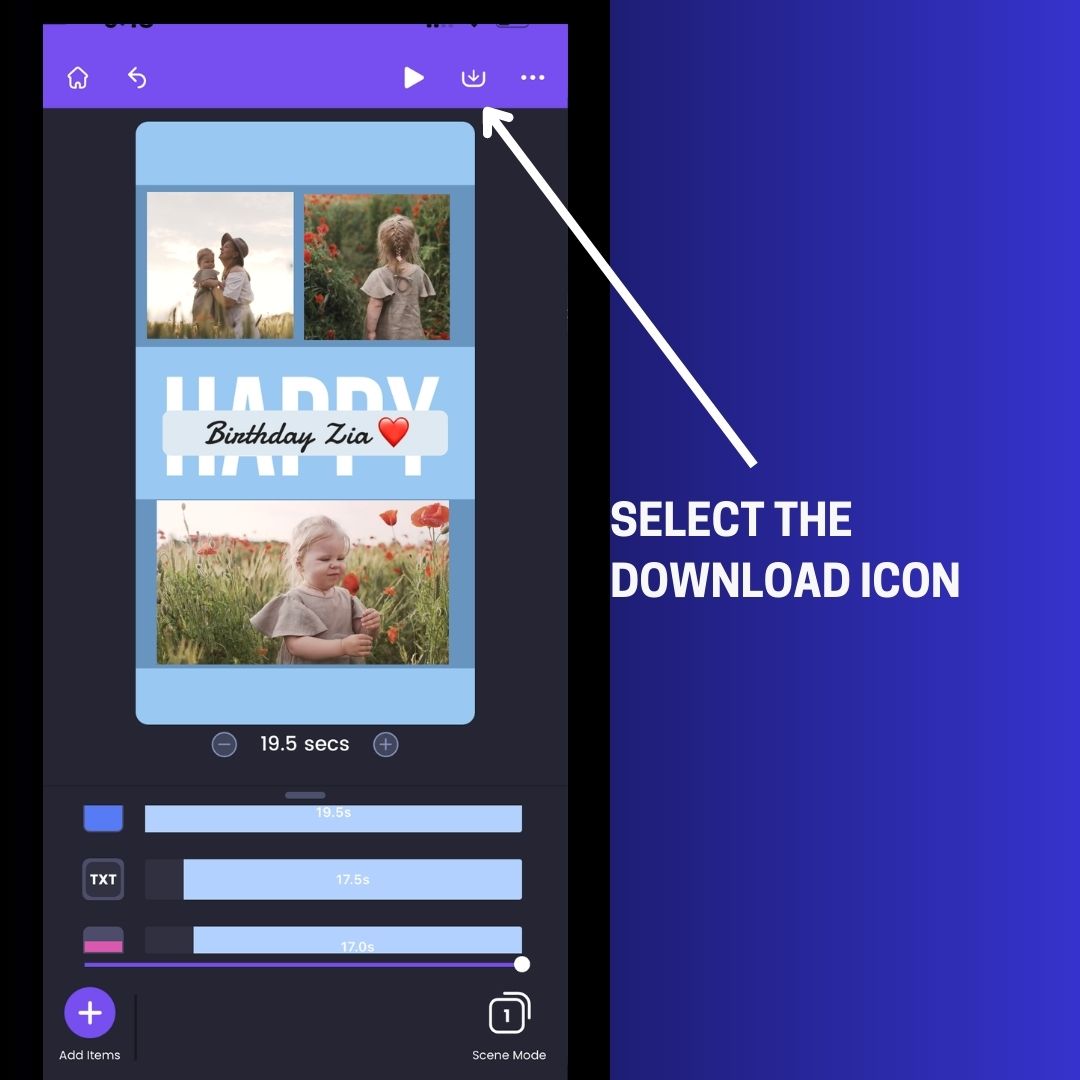
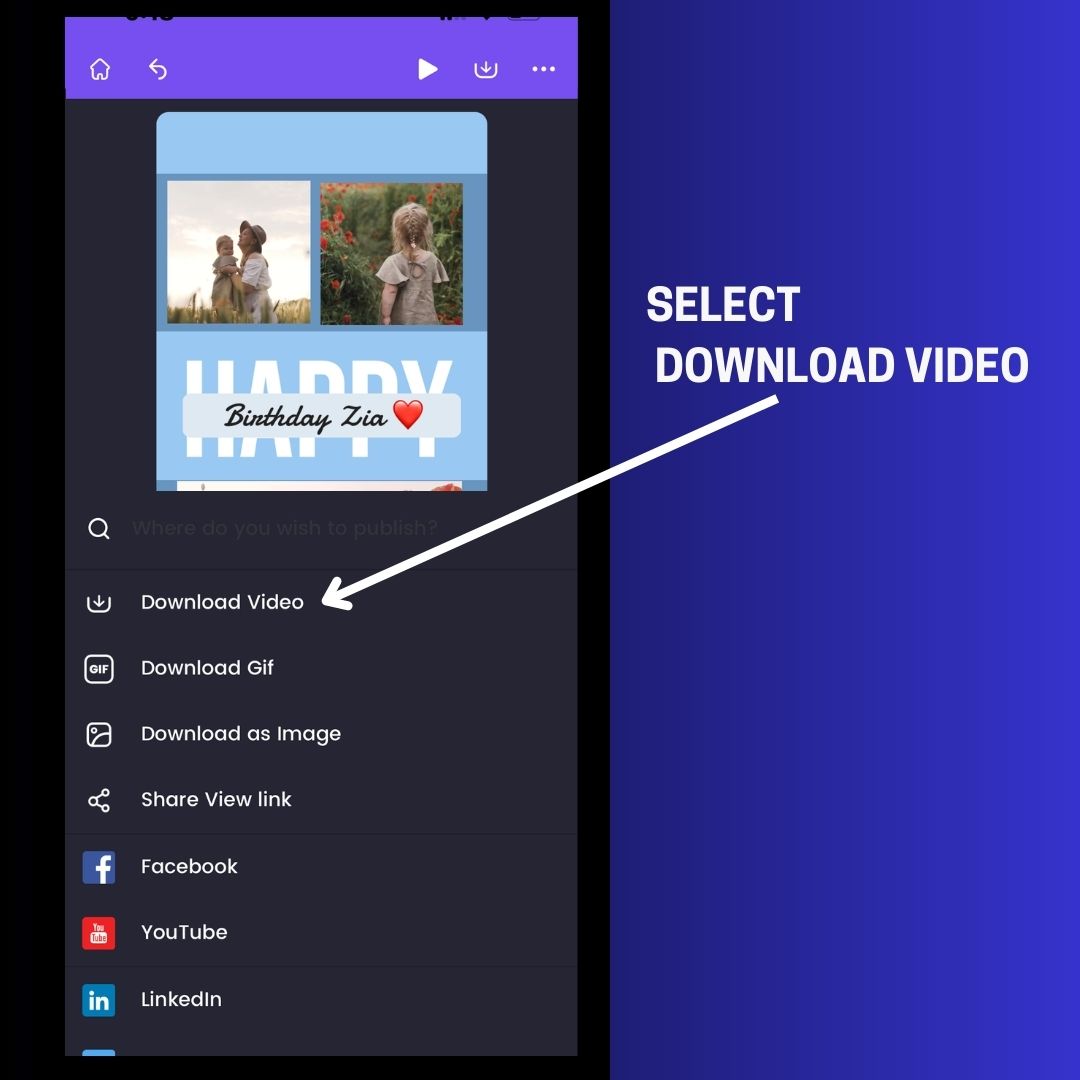
That’s it! Your collage with videos and pictures is ready for you to publish!
You will receive an email with the download link as soon as the rendering is completed!
Happy Making! 😀
Bonus: Tip for making your video collage even more memorable!
Bonus 1: Adding Special Effects
Looking to make your video collage even more stunning?
Well, I have the perfect solution for you!
In just a few clicks, you can instantly add stunning Special Effects (FXs) to your college videos.
It’s really easy and simple!
Here’s how!
i) Choose "Effects" from the menu. A variety of special effects, ranging from stunning 2D effects to striking 3D effects, will be shown.
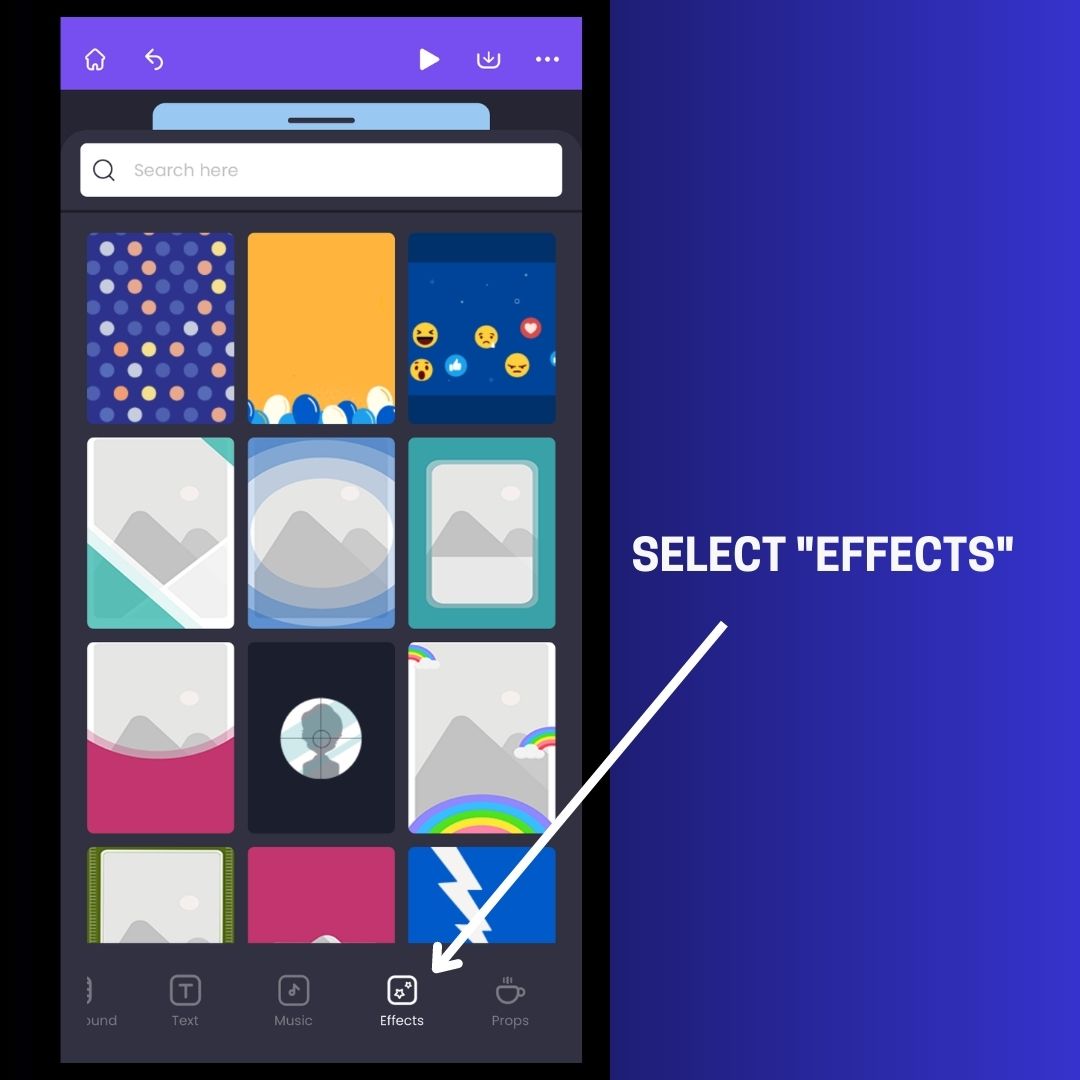
ii) Simply tap on one to preview and add!

Bonus 2: Editing Your Uploaded Videos and Images
You can further enhance your videos and images by adding filters or by making color modifications (such as contrast, brightness, etc.) in just a couple of clicks.
Here’s how!
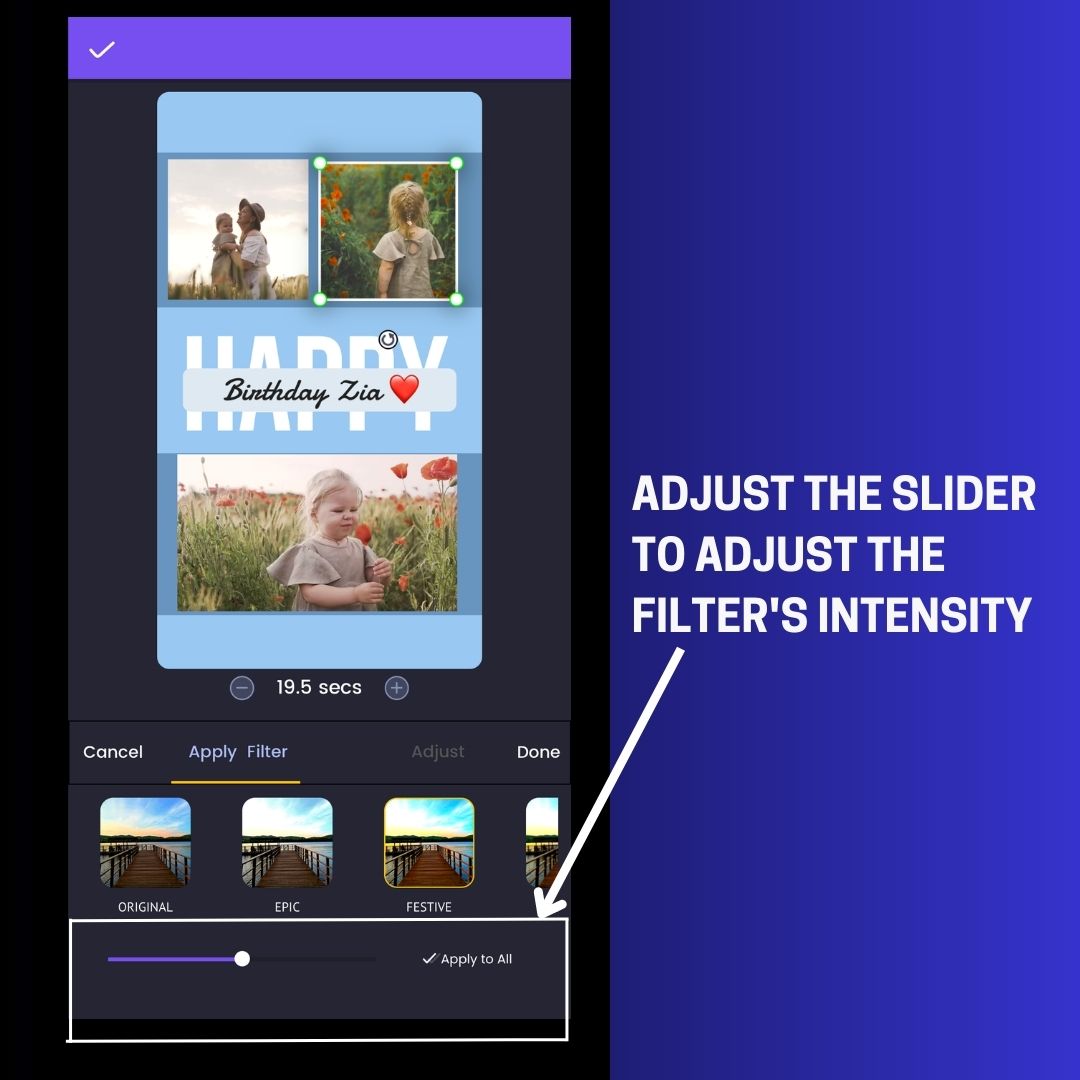
i) Select the video (or image) and choose "Apply Filter” from the toolbar displayed below.
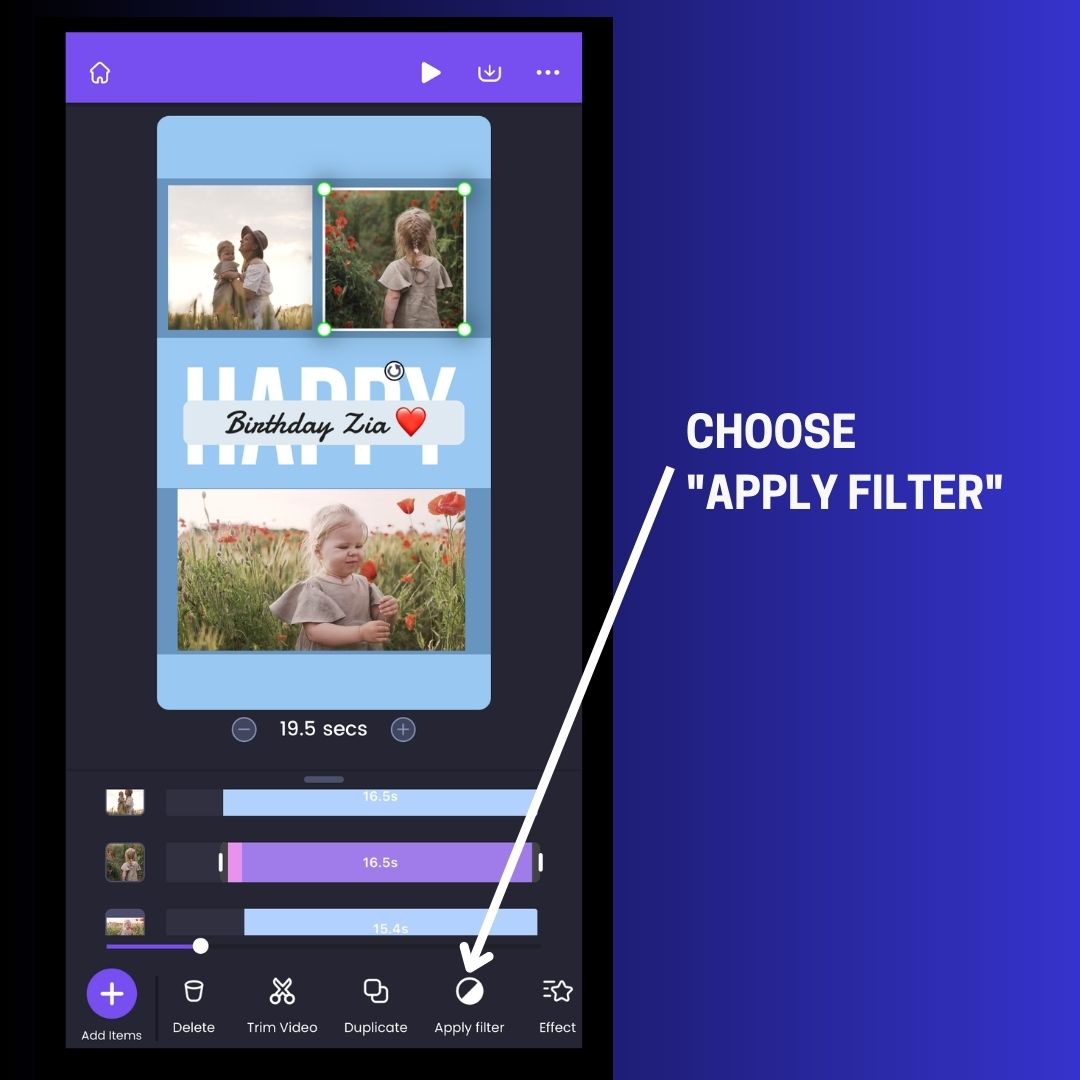
A variety of trendy social media-like filters will be shown. Just tap on one to try it!
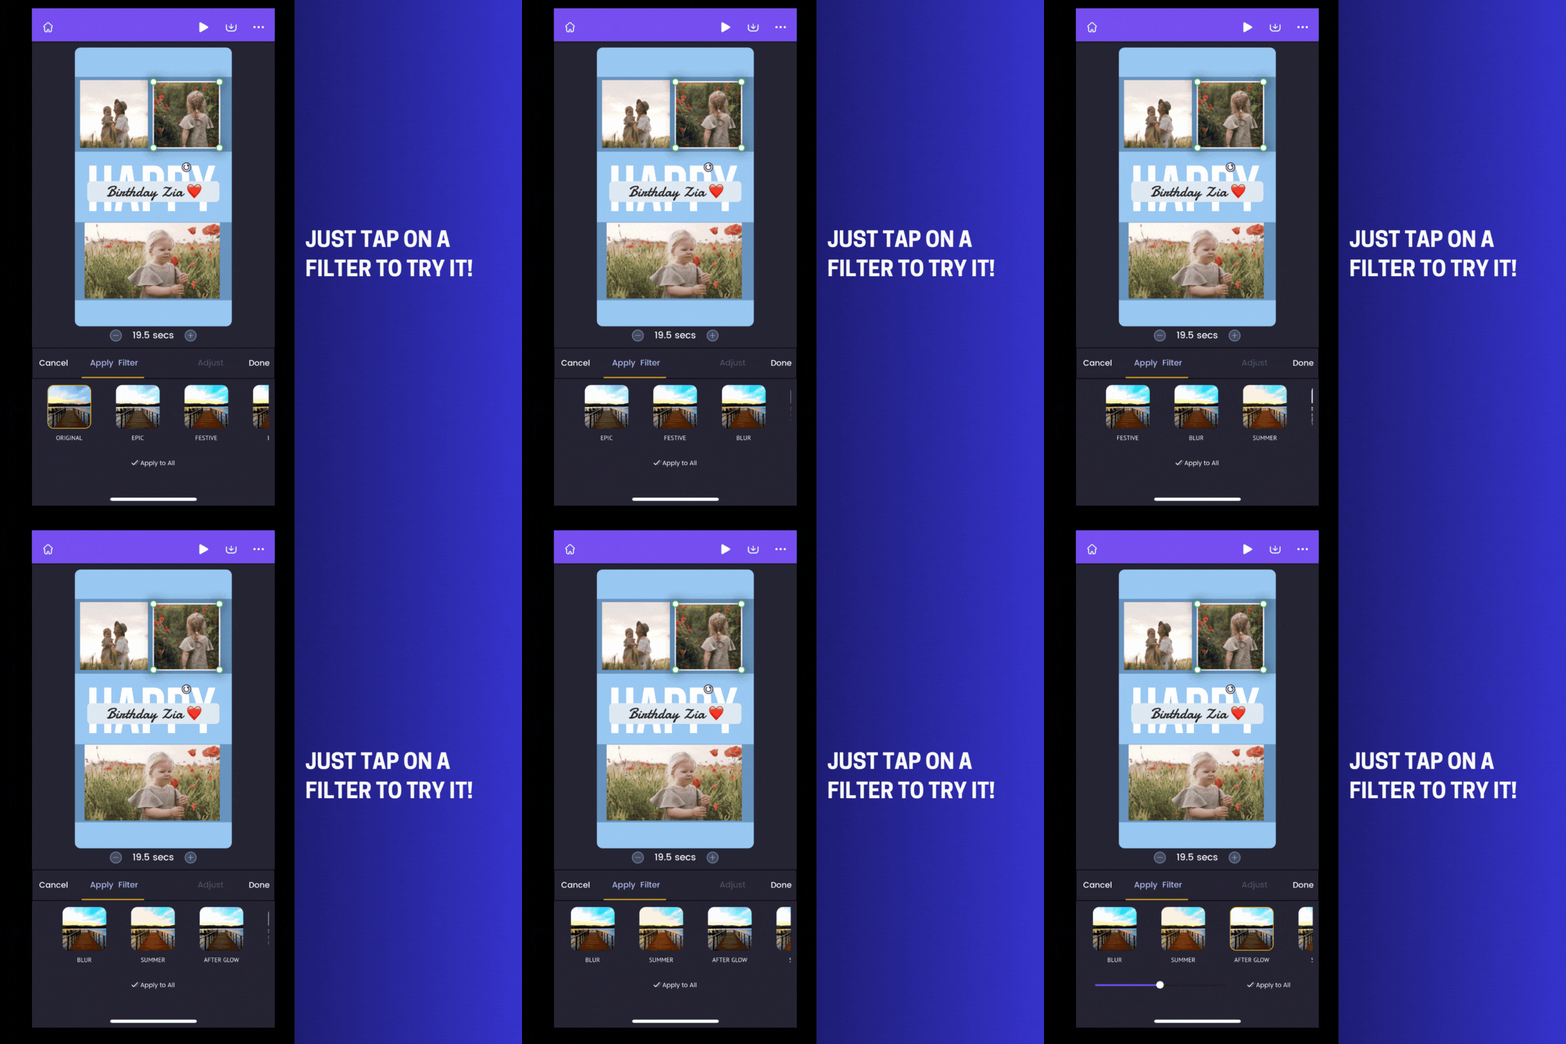
ii) You can further adjust the intensity of the filter by adjusting the slider.
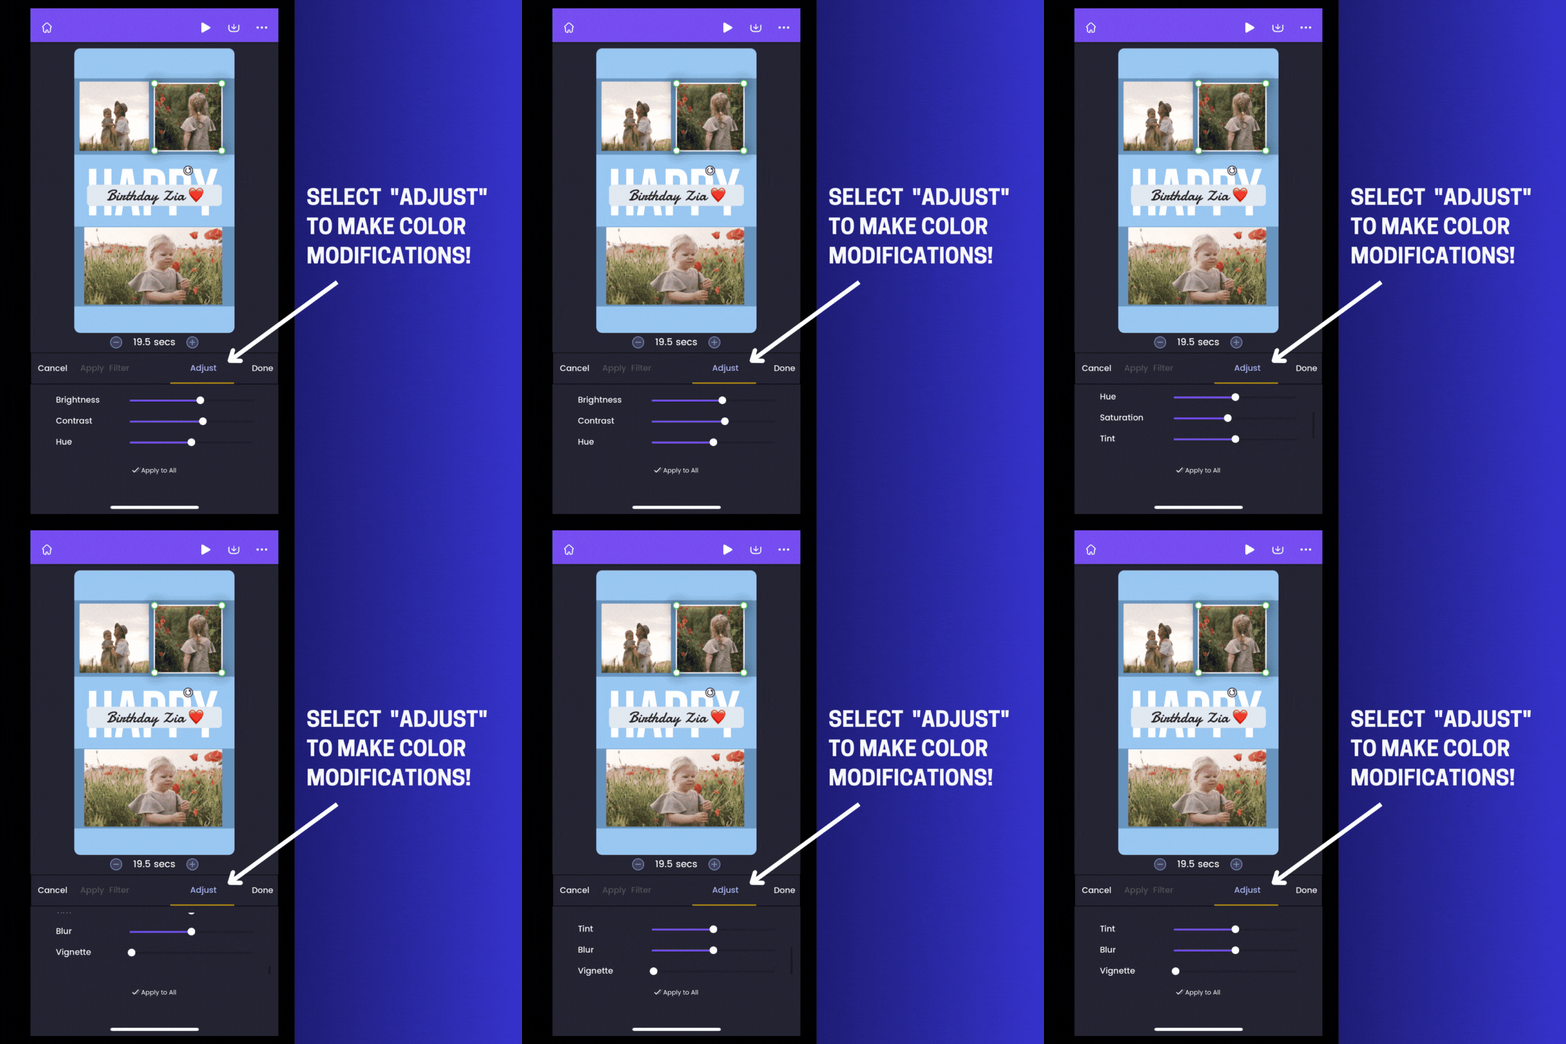
iii) You can also further make color adjustments (such as adjusting brightness, increasing contrast, etc.) to the videos and images you added by switching to “Adjust” on the toolbar.
So that's how you can enhance your video collage and make it look stunning! :D
So what are you waiting for? Make your video collage now!
If you have any questions, feel free to let me know in the comment box below! I would love to answer them!
