How to make a Logo Animation for your brand like a Pro
What is important when it comes to a brand?
Great Products? Sure.
A Good Vision? Definitely.
Positive referrals? Yup!
But for your brand to get registered in people’s minds, they need to be able to visualize it.
And that’s where the Logo comes into the picture.
Logos are all about brand representation. It has the power to communicate what your brand is without words.
Whether you spread a message about your brand, advertise your product, or just make an announcement, the logo is what people see first.
Many companies make the grave mistake of not concentrating on designing their logos properly.
Don’t be them!

Asking why?
Well, as we all know, first impressions are the best! So, having an attractive logo that catches people’s attention is very important.
Some companies create a perfect logo in the first shot and simply keep evolving it as times change! Like Google…
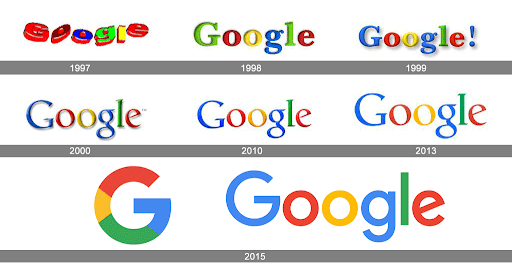
Source: https://bit.ly/3tRNqXU
Other companies redesign their logos completely due to various reasons. Like Apple,

Source: https://www.tailorbrands.com/blog/apple-logo
Instead of realizing it too late and making changes after years down the line, it is better if you get it right the first time.
That’s why investing in good software to design and animate your logo is very important.
Not sure which would be the right design software to make a logo animation for your brand?
Here’s Animaker for you, a DIY video-making software used by over 15M users globally for creating animated and live videos online.
Within minutes, you can make a logo animation from scratch in Animaker.
For this example, we will see how to create and animate the logo of the popular audio streaming platform, Spotify.
Spotify stands as one of the largest audio streaming providers in the world. Millions of people (including me) use Spotify to create custom playlists and discover songs and podcasts from their favorite artists.
Here, we will be creating a logo animation like this…

How cool is that?!
Without further ado, let’s check out the steps to make Spotify’s logo animation.
- Creating a Project
- Adding the Background
- Creating the Spotify Logo using Animaker assets
- Animating the Spotify Logo
- Downloading the Animated Logo
- Bonus Tip
Step 1 - Creating a Project
Visit Animaker. Login if you’ve already created an account. If not, create a new account and log in.
Once you log in, you will be taken to the Dashboard.
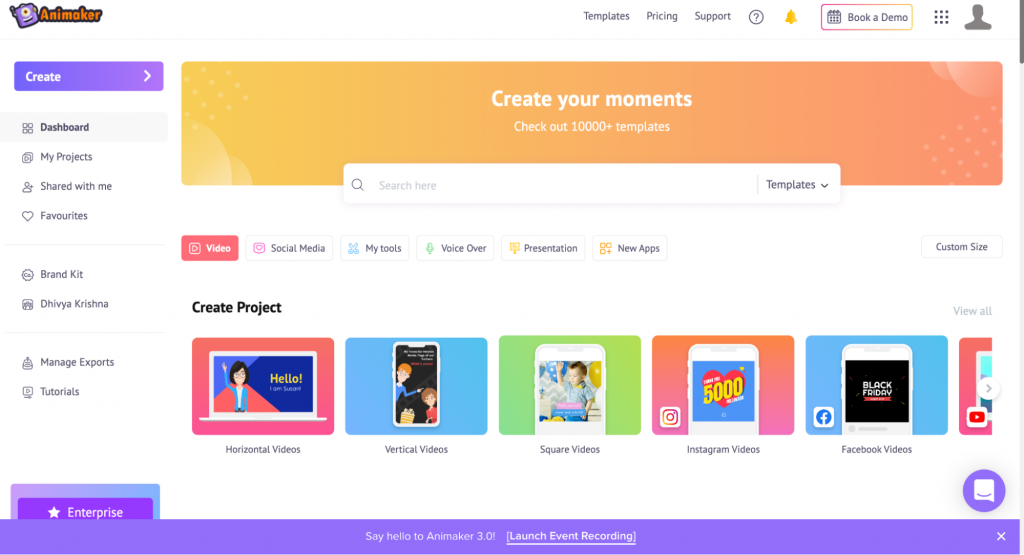
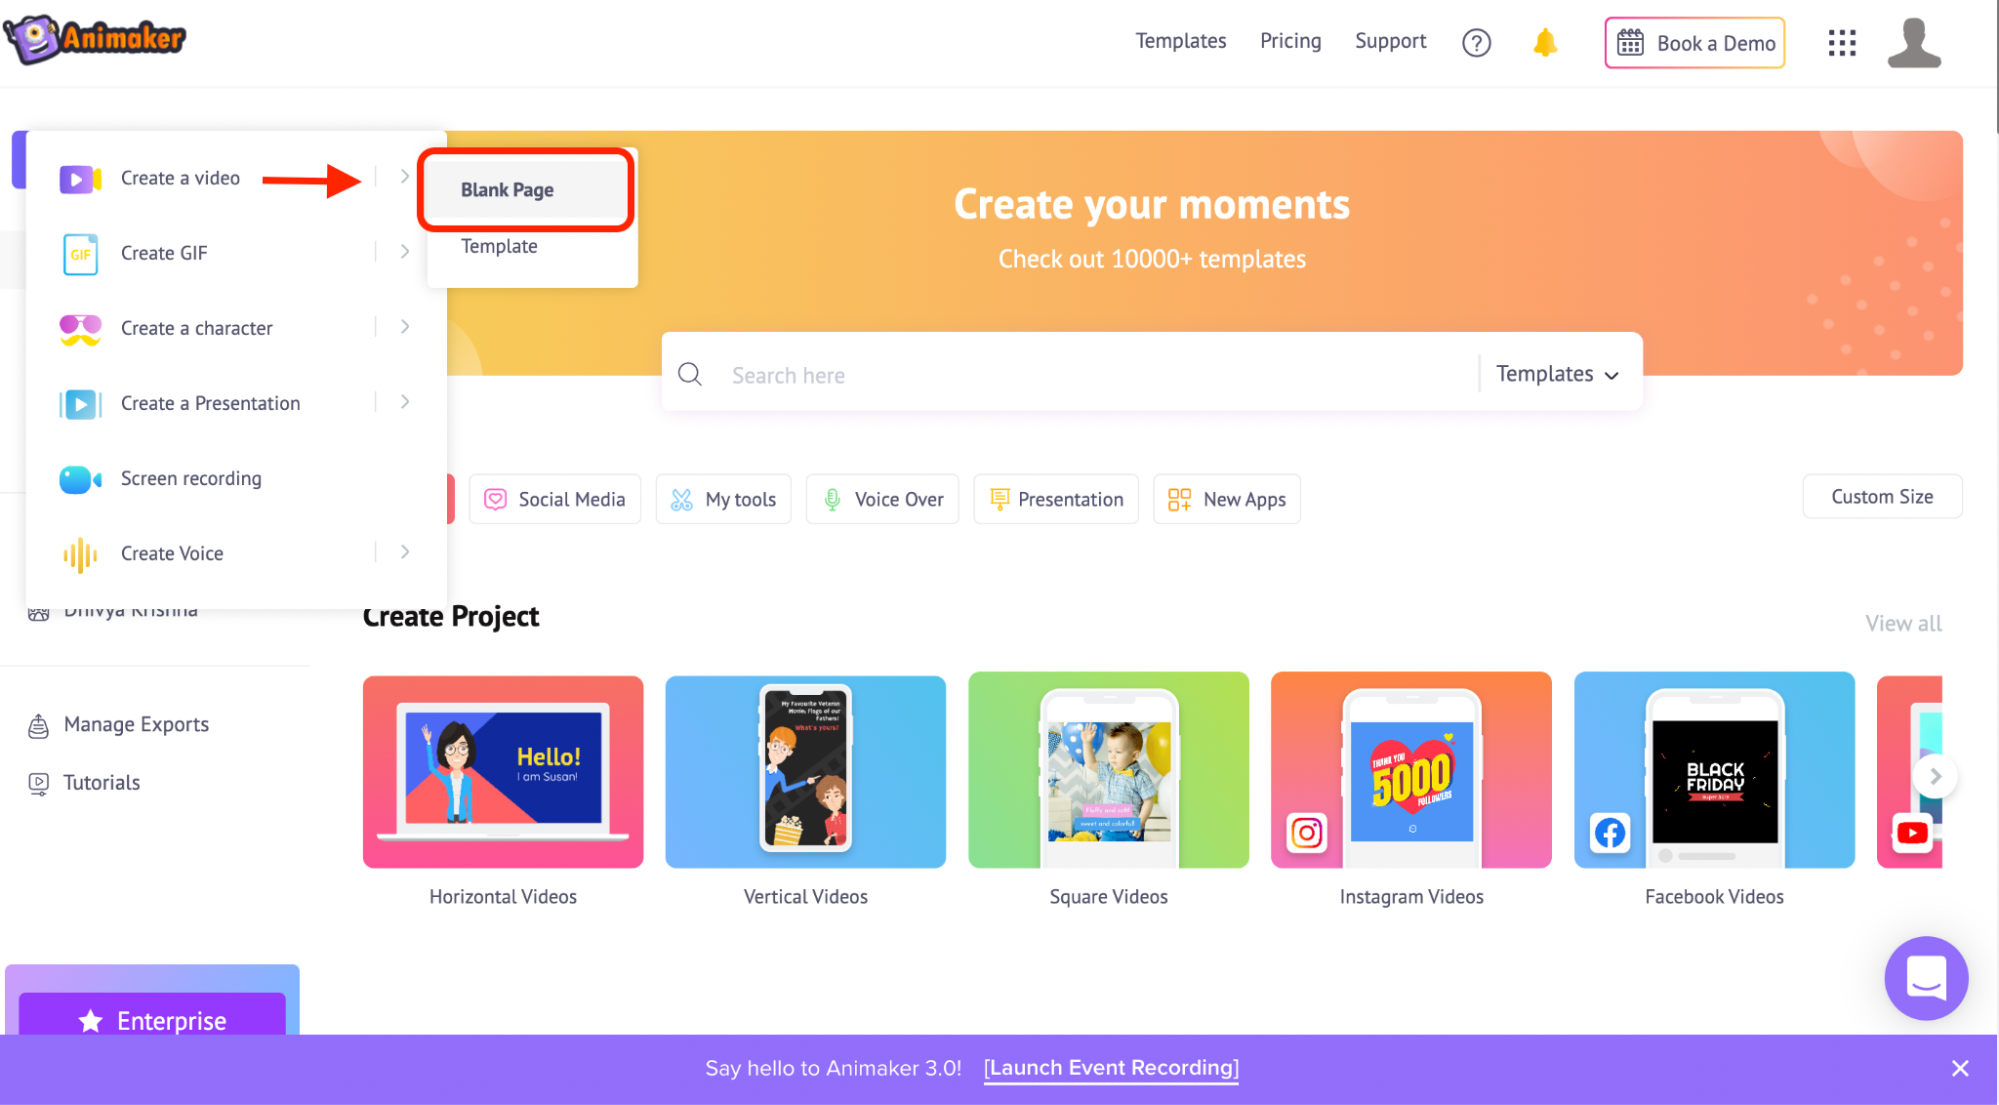
To create a new project, click on the ‘Create’ option from the left and follow as instructed in the image below.
Before jumping into creating a logo animation, let us get you accustomed to the Animaker interface.
There are five sections in the app:
- Library
- Workspace
- Scenes
- Menu bar
- Timeline
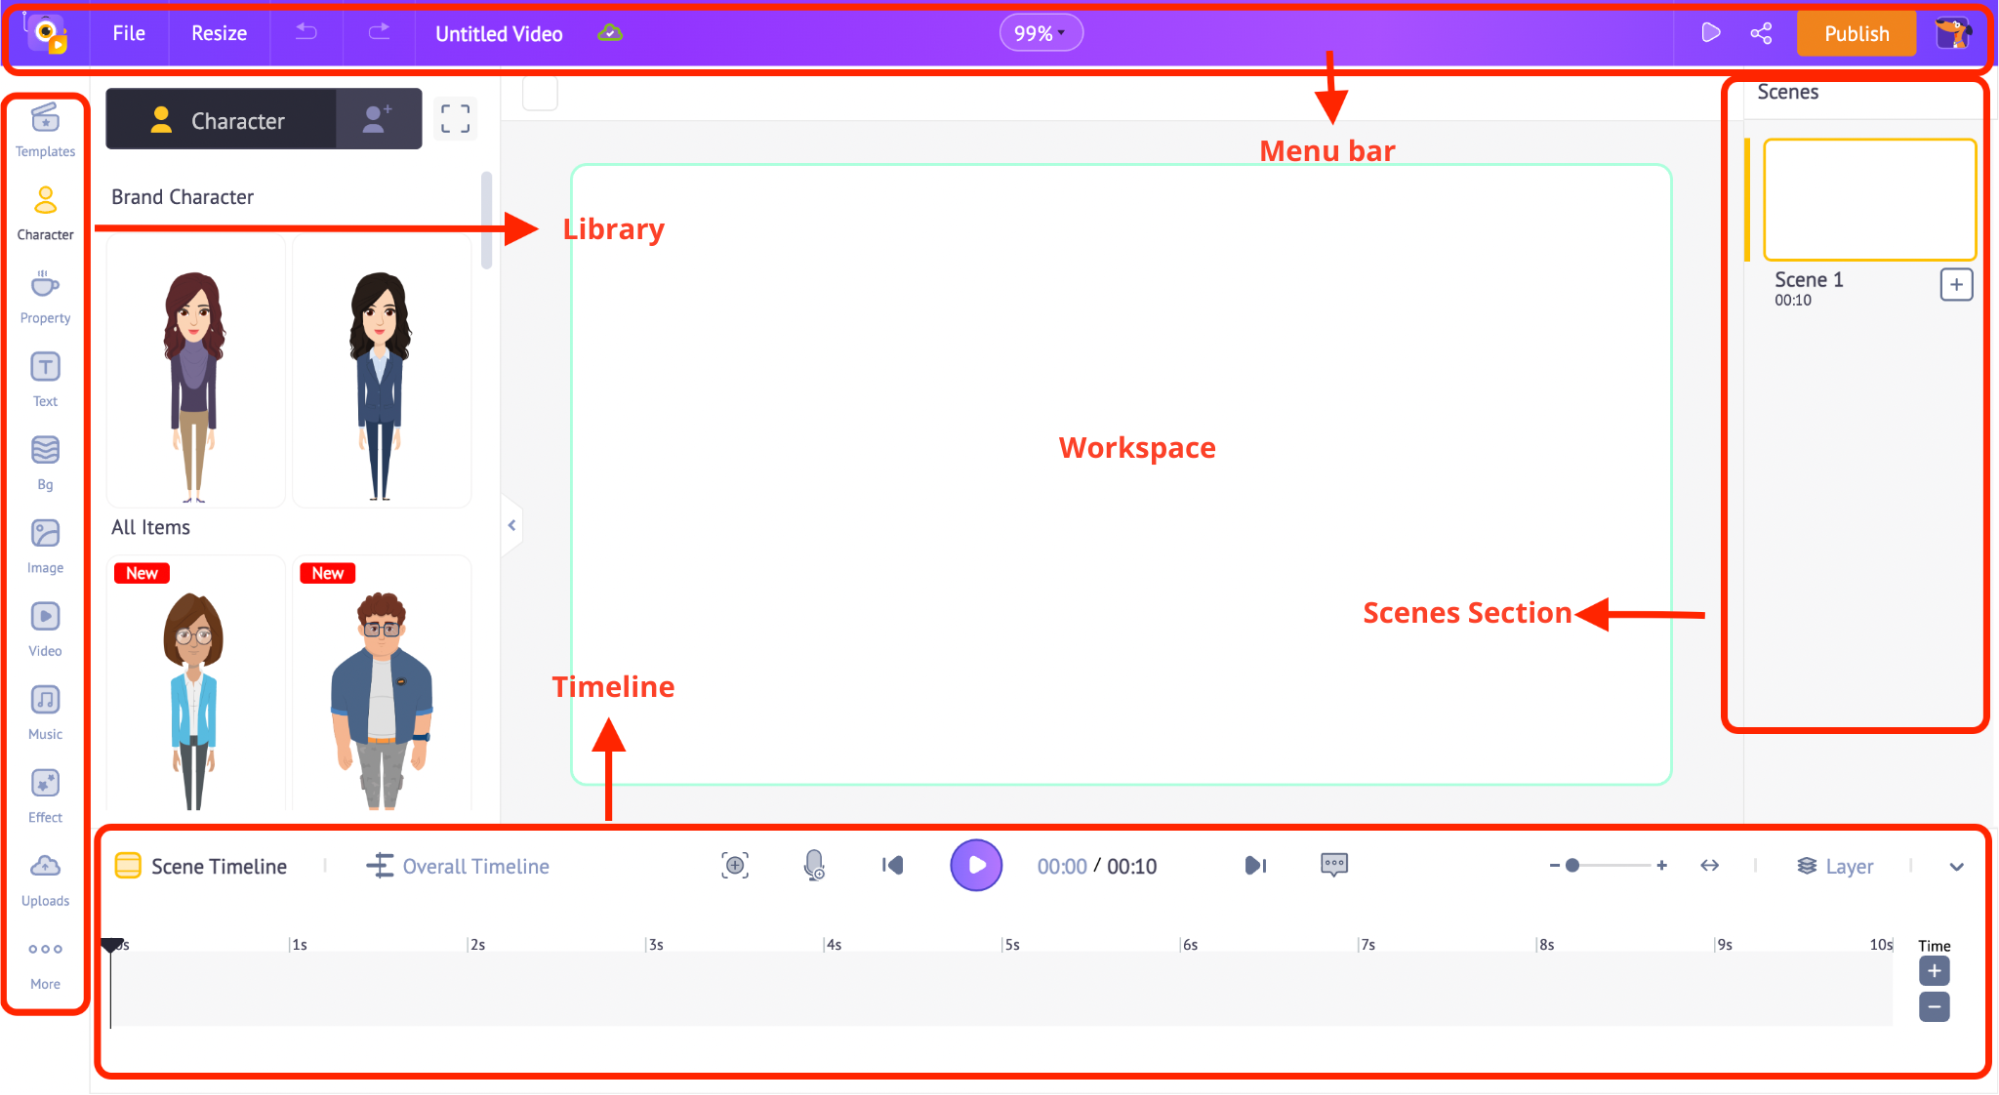
Library – The Library of the Animaker app is where you will find all the assets needed for your video, including characters, props, icons, stock assets, music files, and more.
Workspace – The whitespace at the center is called the workspace. This is where your animated educational video will come to life.
Scenes – This section houses all the scenes of the video. Just like how many slides come together to form a presentation, the scenes come together to form your awesome video.
Menu bar – You can preview the video, change its title, and share and publish the video from the menu.
Timeline – At the bottom of the screen is the timeline. The timeline helps you monitor the time limits and effects of the assets you have added to the scenes.
Step 2 - Adding The Background
Let’s start by adding the background to the scene. Animaker’s library is filled with different types of backgrounds, such as solid color BGs, gradient color BGs, Image/Video BGs, and animated BGs.
All you have to do is, go to the Background section in the library, enter the search term for the BG you need, and apply it to the scene by clicking on it.
For this example, I will add a solid Black Background to the scene. To do this, simply click anywhere on the workspace.
You will be able to see the background color option on the left side.
Now, click on the white color on the left. This opens the color palette.
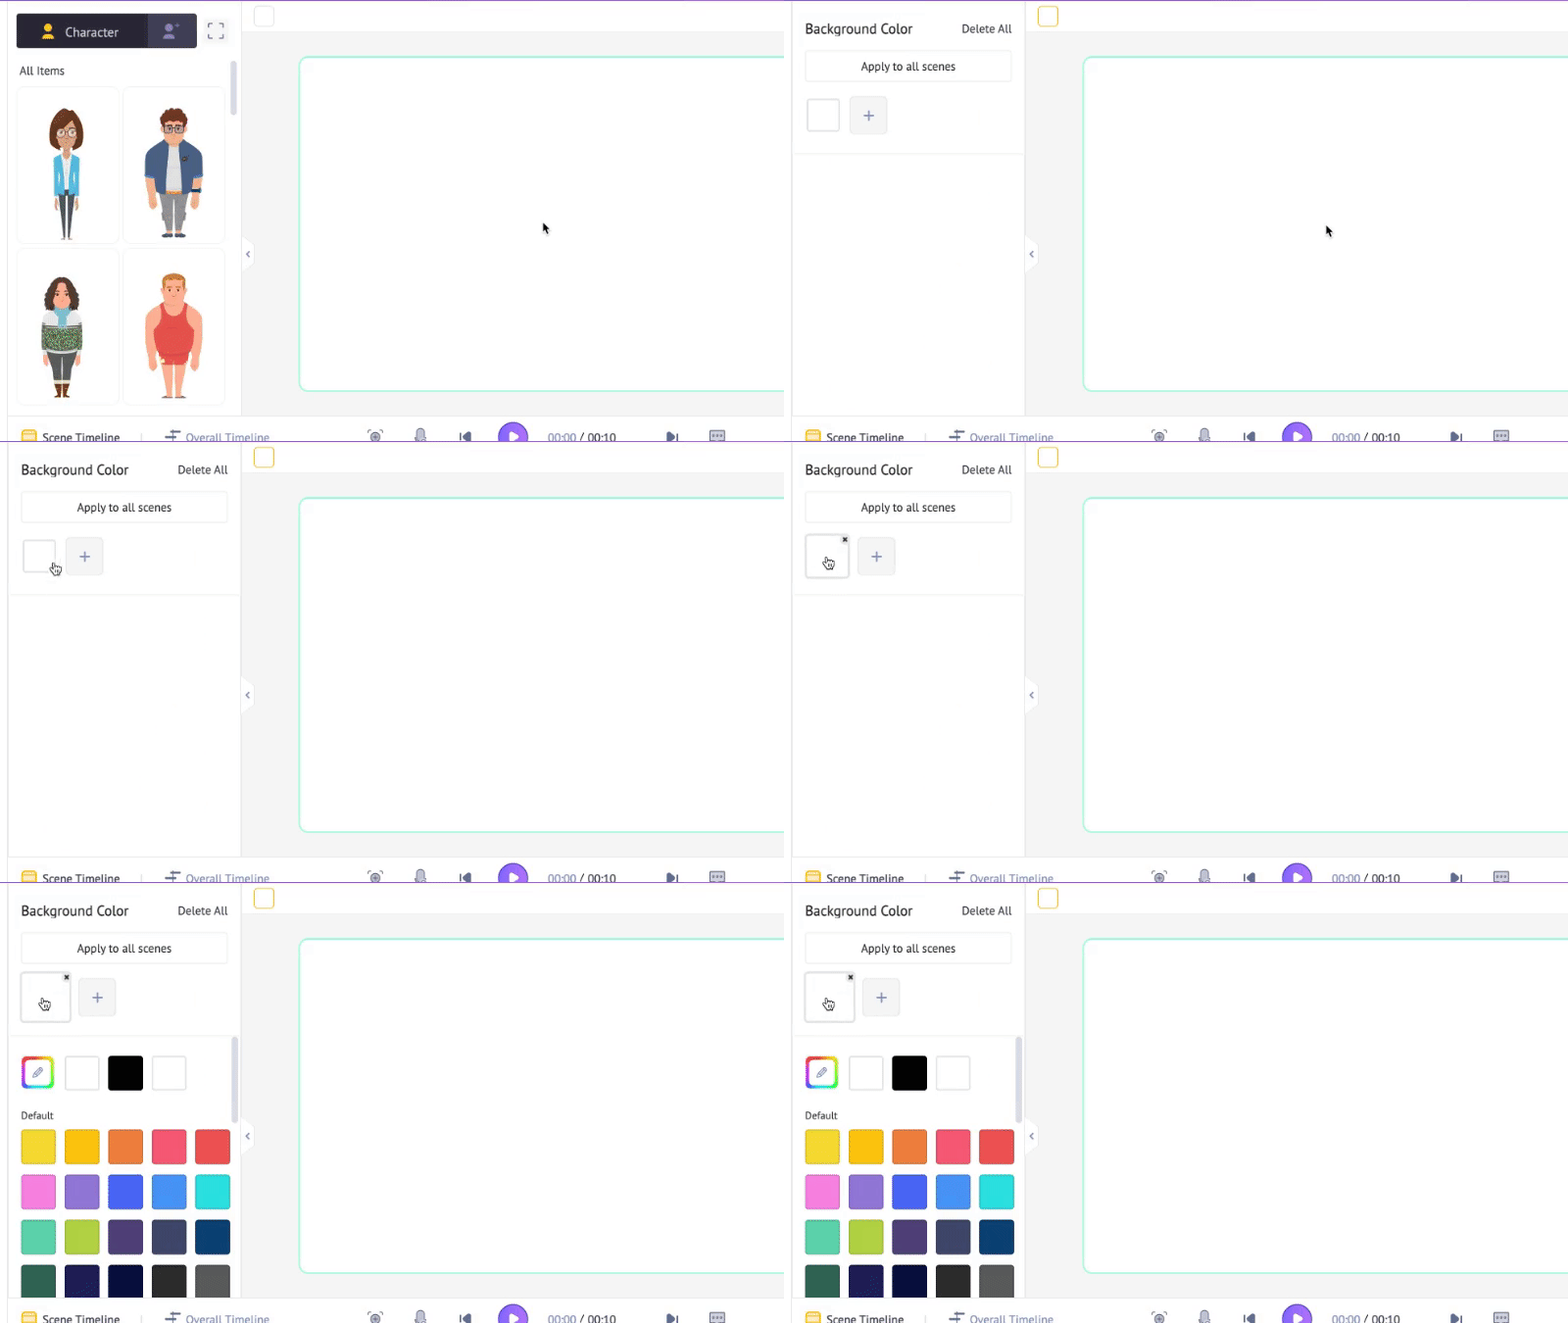
You can either select Black from the colors listed below or use the “Change color” option [pencil icon] to manually select the color from the palette.
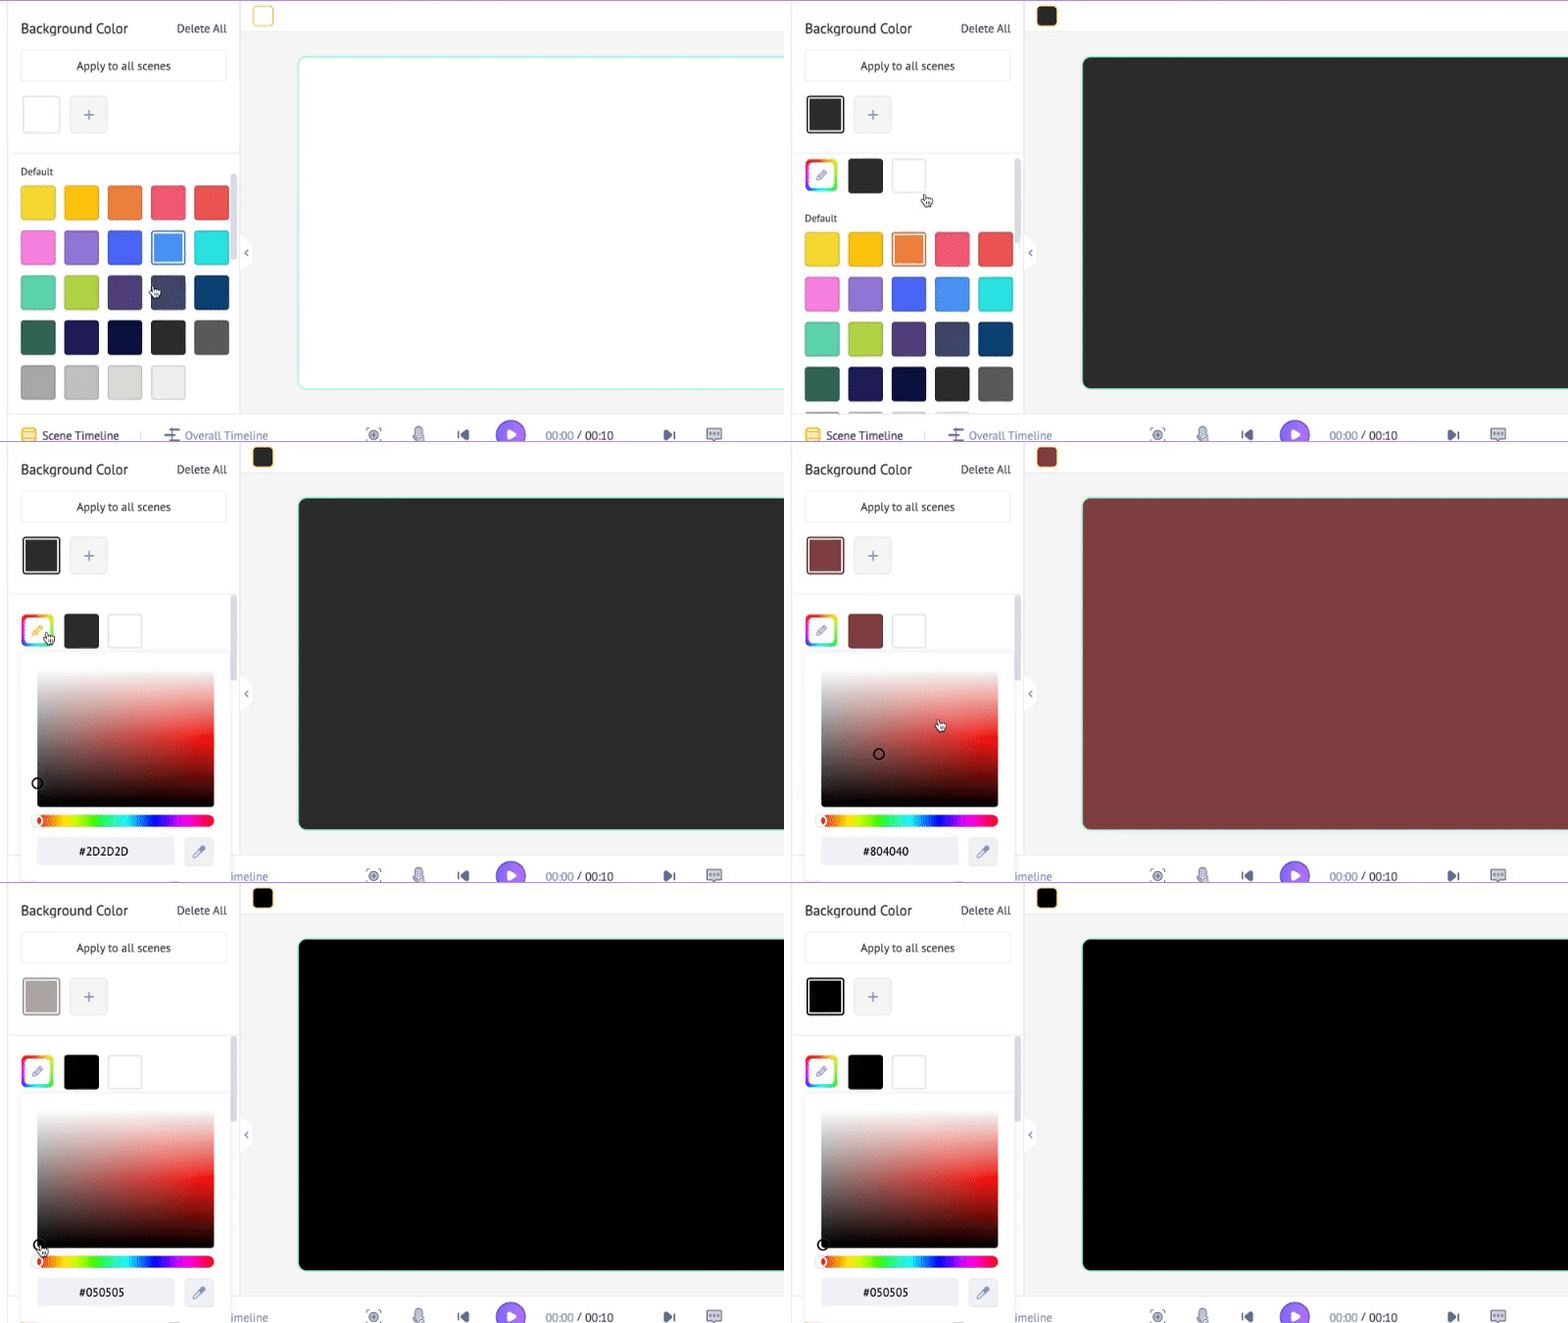
Tip: If you wish to add some interesting gradient backgrounds, you can click on the ‘+’ button and add up to 5 colors to bring in a gradient background.
Step 3 - Creating the Spotify Logo using Animaker assets
The Spotify logo has a green circle with 3 curved lines in the middle of the circle. The circle represents a sense of community and inclusivity. The three curved lines denote sound waves, beautifully expressing that Spotify is a music app.
Let’s start recreating this awesome logo with Animaker’s assets.
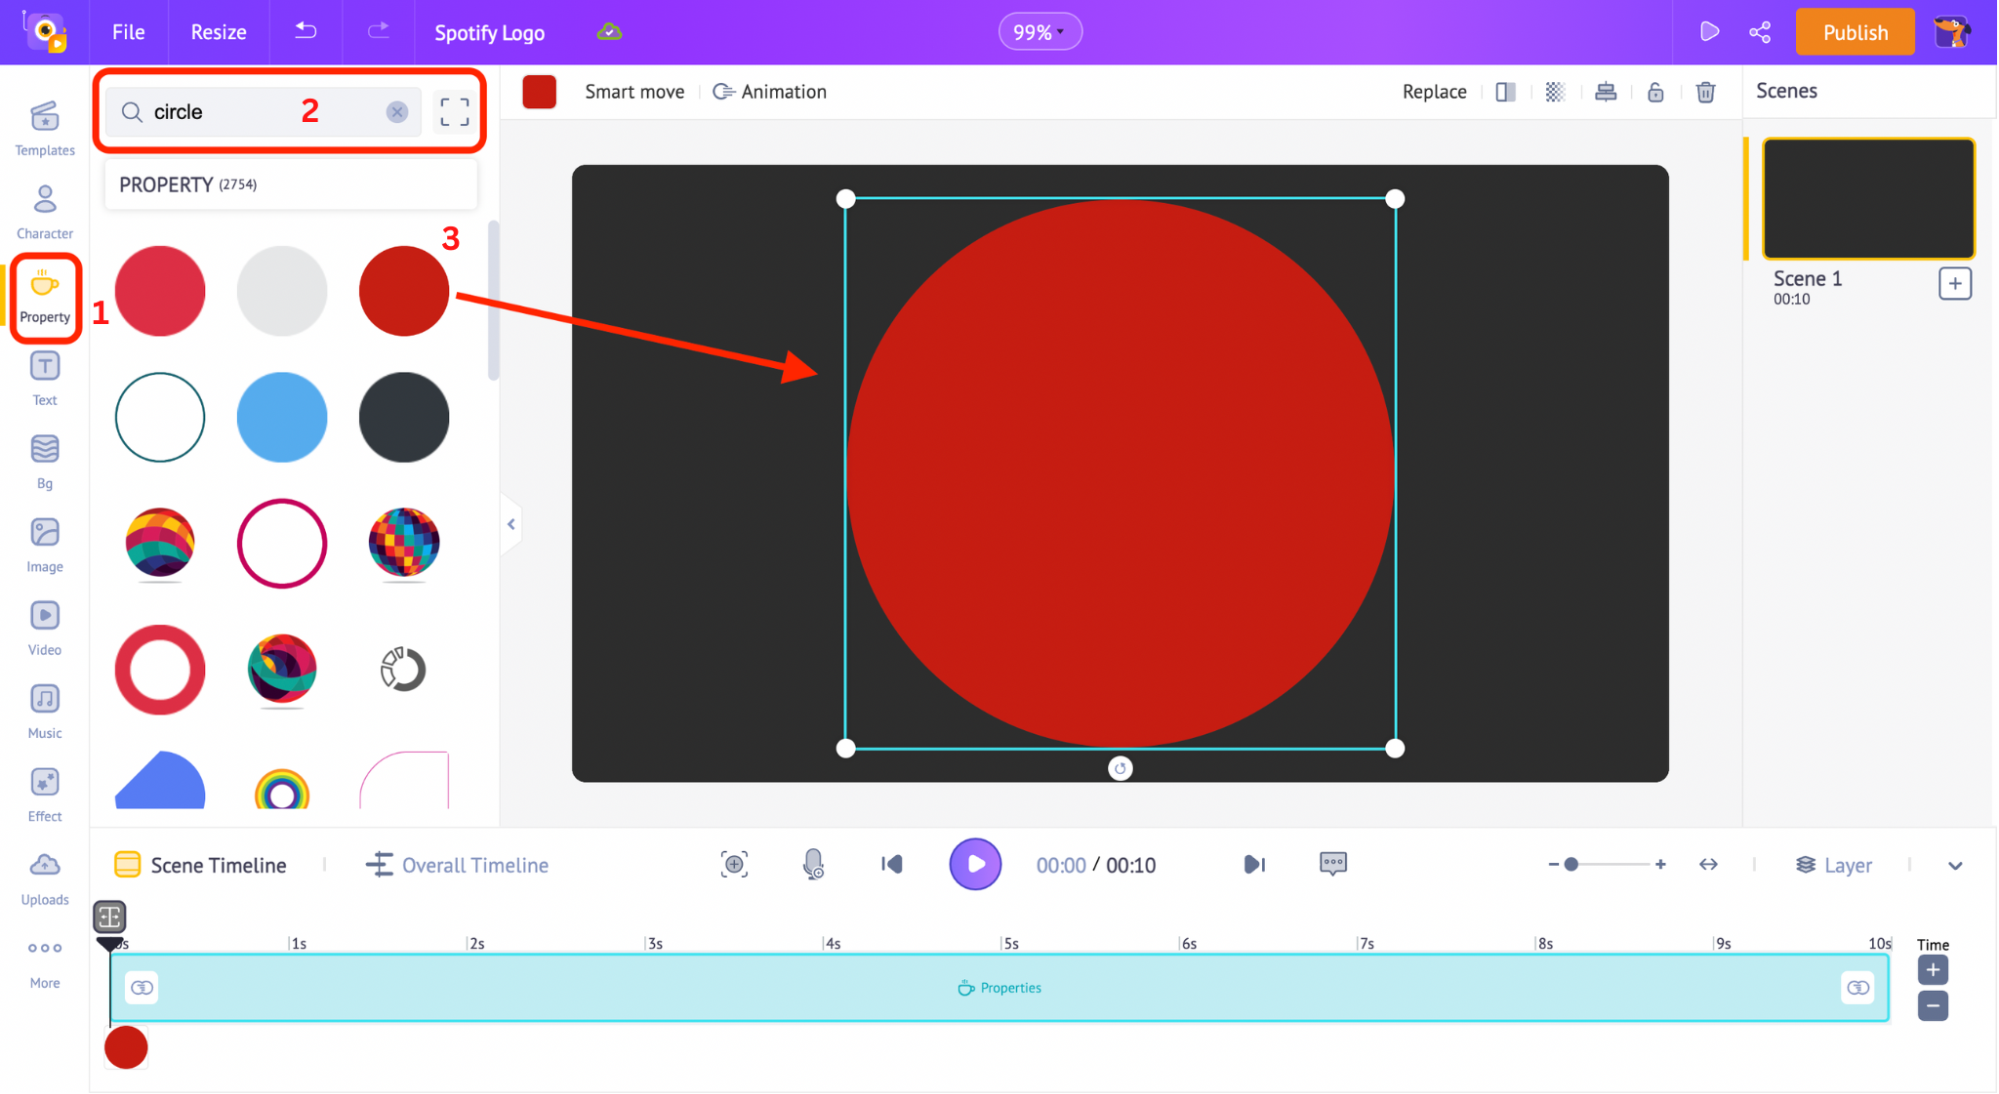
First, let’s add the green circle. For that, Click on the ‘Properties’ section on the left. Search for the term ‘circle.’ Choose any circle-shaped property. For instance, I have taken a red-colored shape.
Now, let’s change the circle’s color to green. Click on the ‘change color’ option on the top and choose the customizable color palette, as shown below.
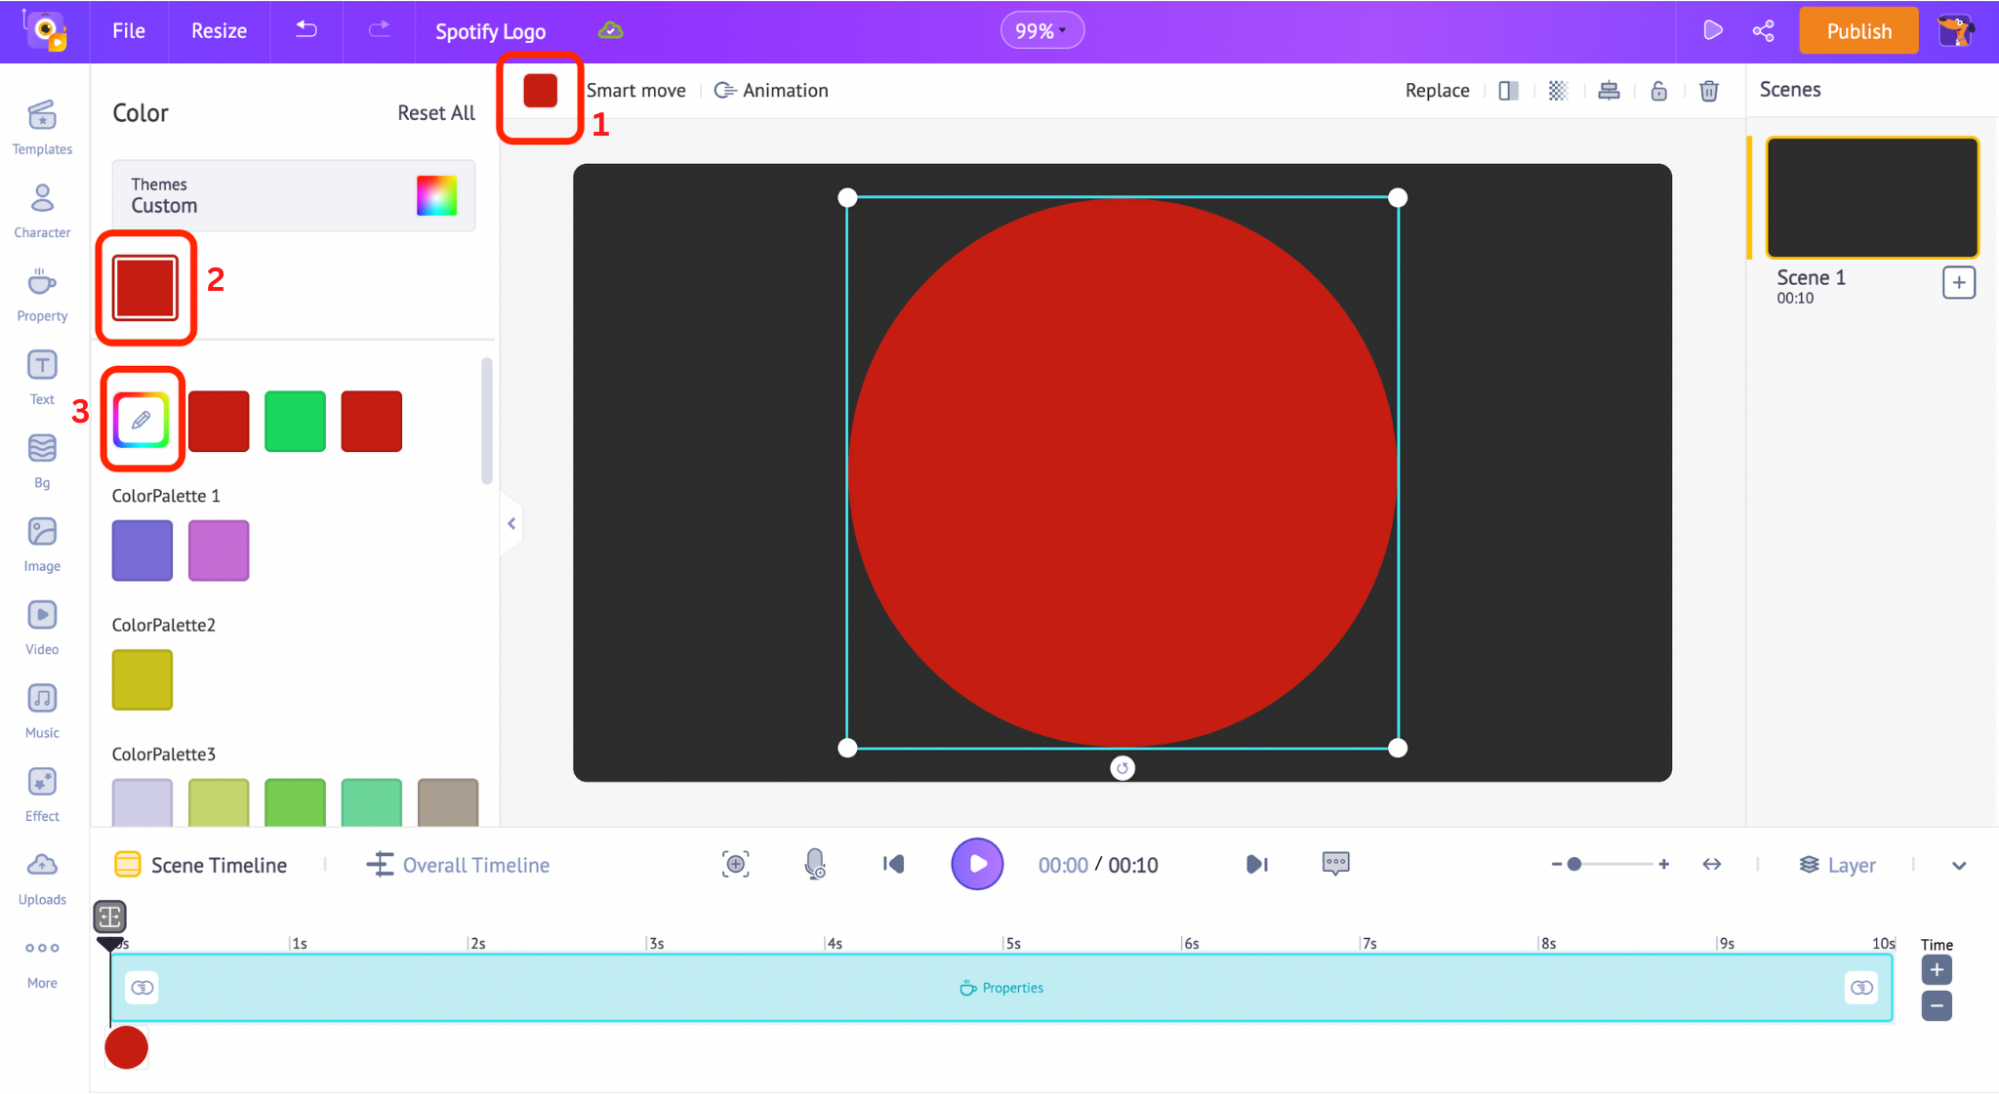
Click on the color code option and paste Spotify green color code, #1DB954.
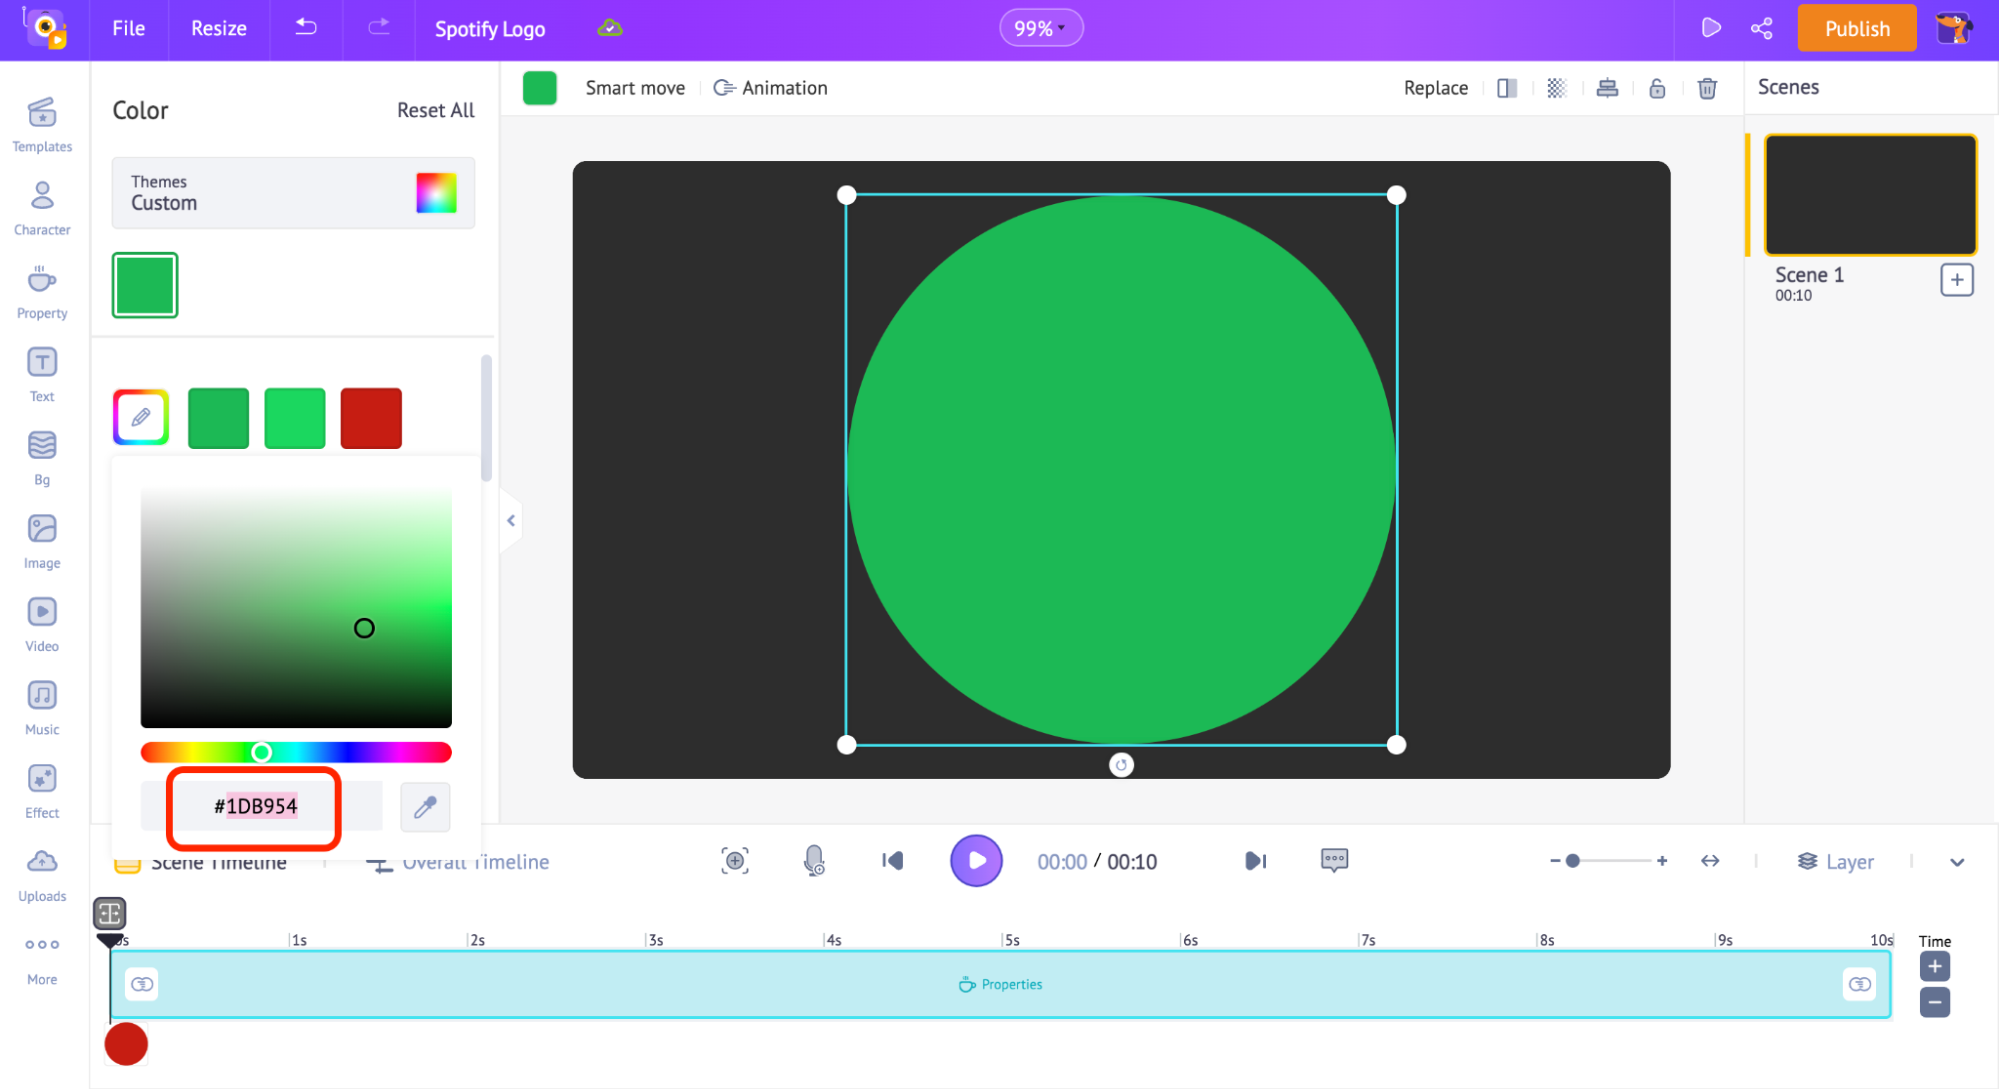
Here you go! Easy, right?
Now, let’s add the three curved lines inside the green circle. These lines are usually white or black in color.
For our design, let’s choose black for the inner lines.
For this, go to ‘Properties’ from the library section.
Animaker’s library had 70K+ icons and shapes. In short, you are spoilt for choice.
There are so many versions of curved lines available in the library. Since the lines in the Spotify logo resemble the wifi symbol, let’s narrow down our search and enter ‘wifi’ in the search bar.
Click on the first wifi symbol (or if you find any other relevant property, you can pick that up too). In this symbol, we need only the curved lines and not the big orange dot. Let’s choose the colors accordingly to omit the orange dot.
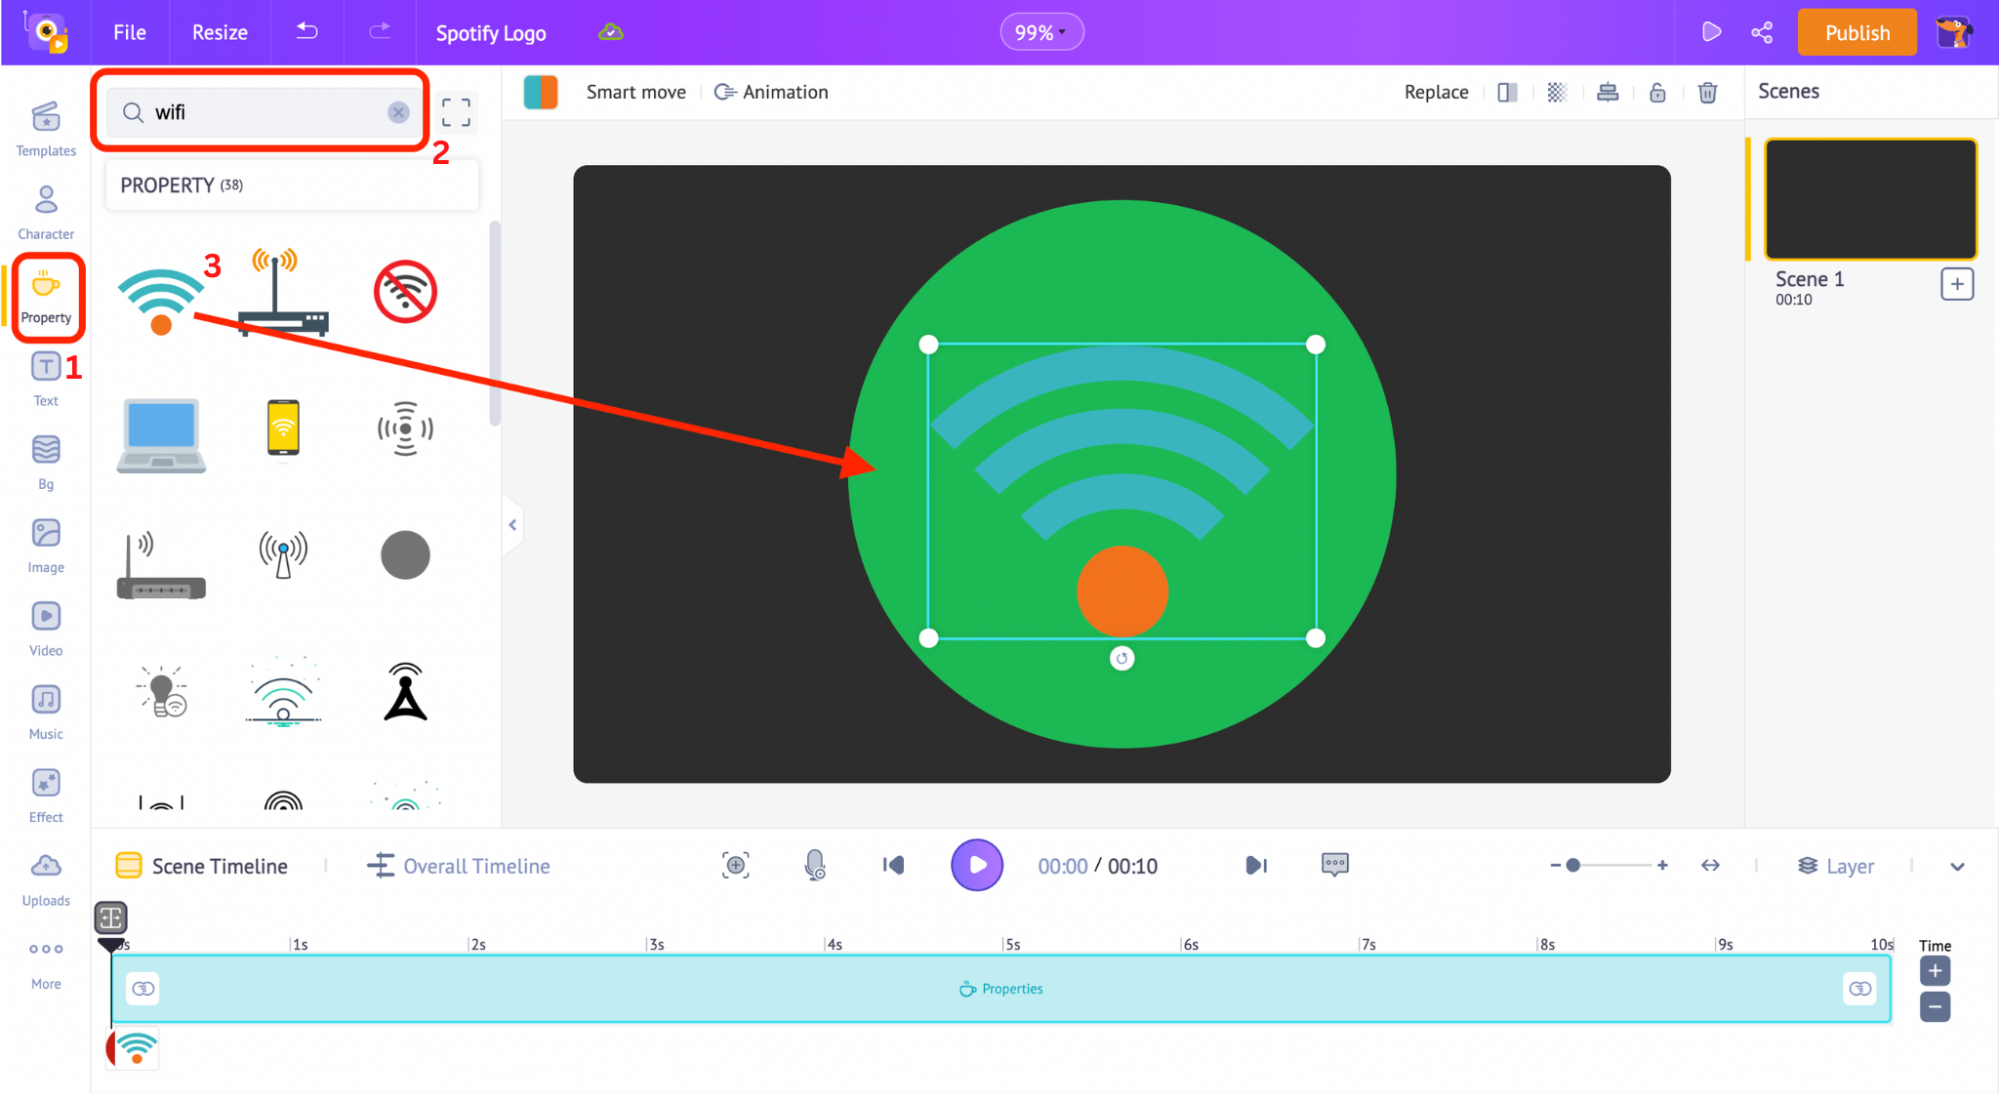
Click on the property and select the ‘change color’ option. You can choose two colors for this property - one for the curved lines and another for the orange circle.
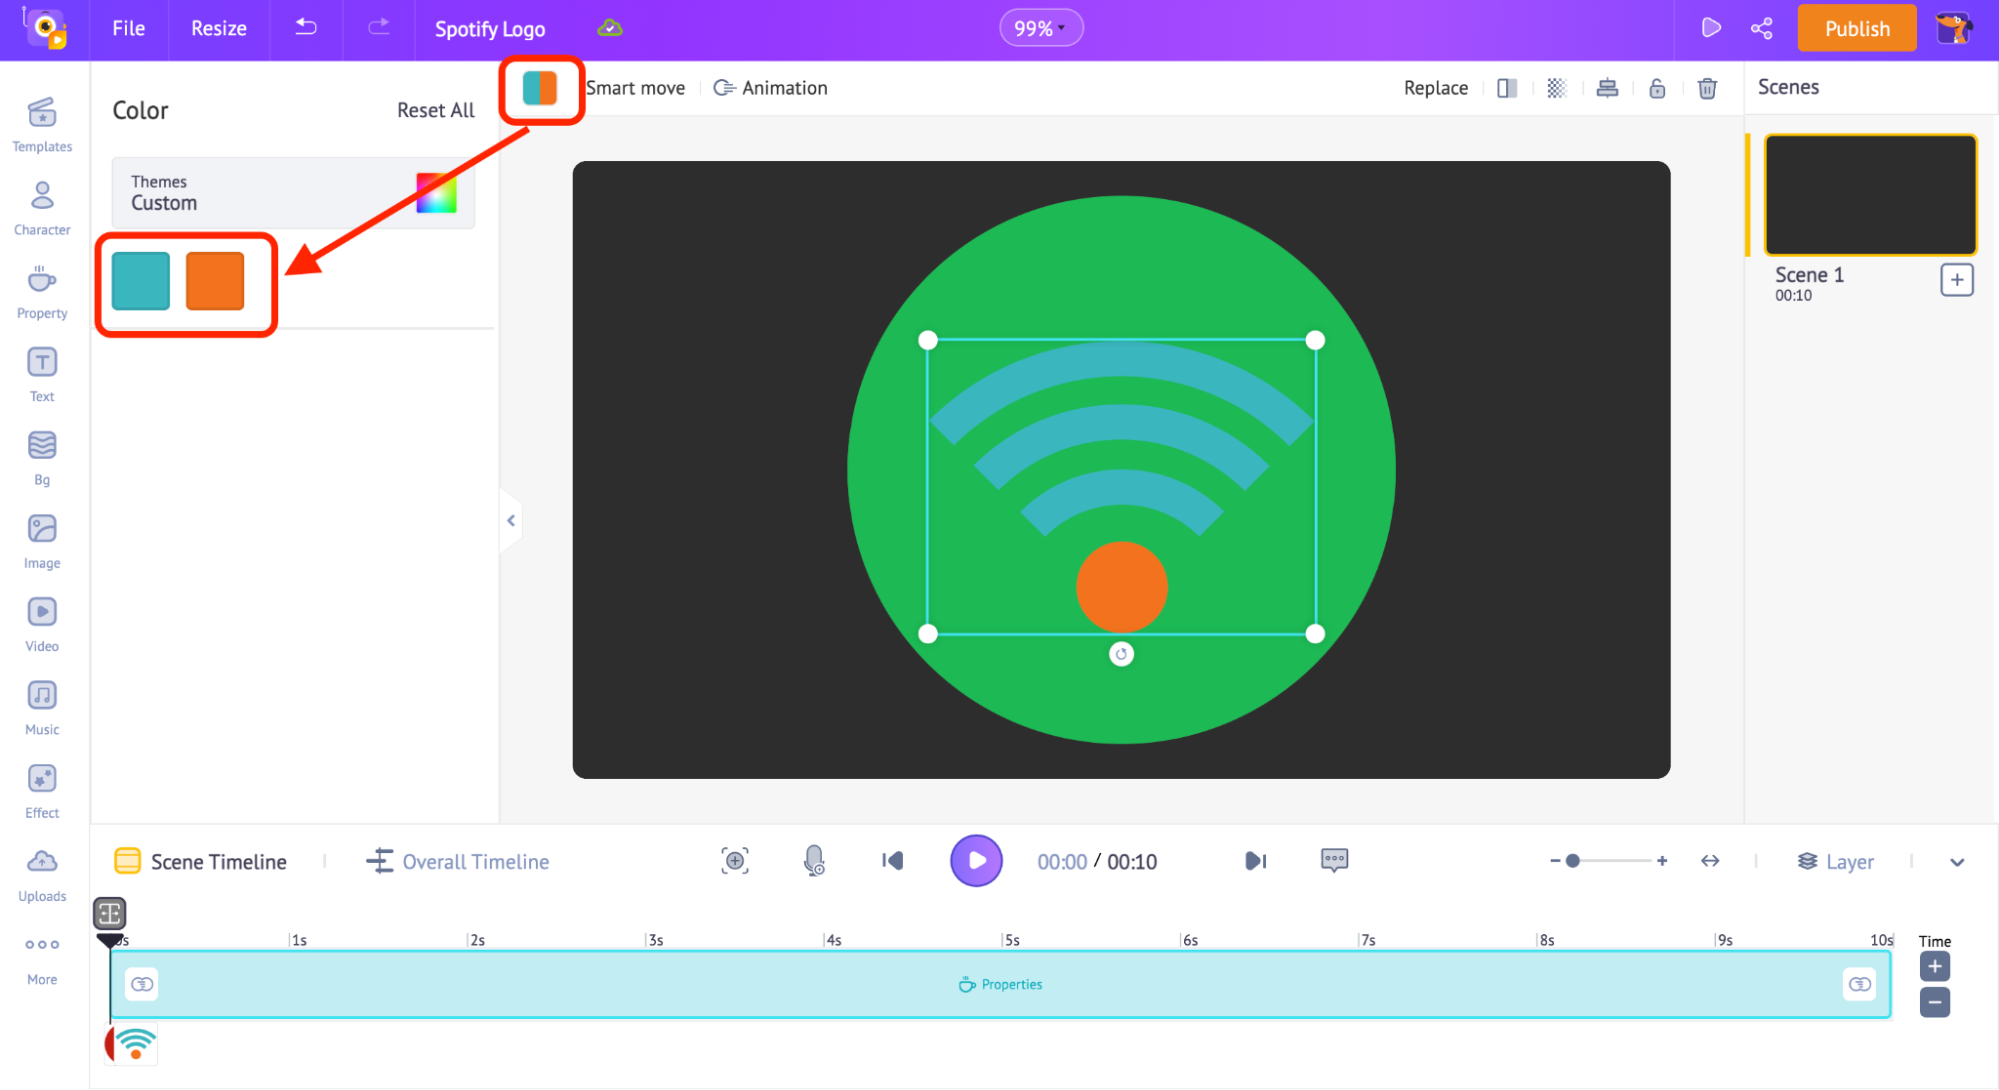
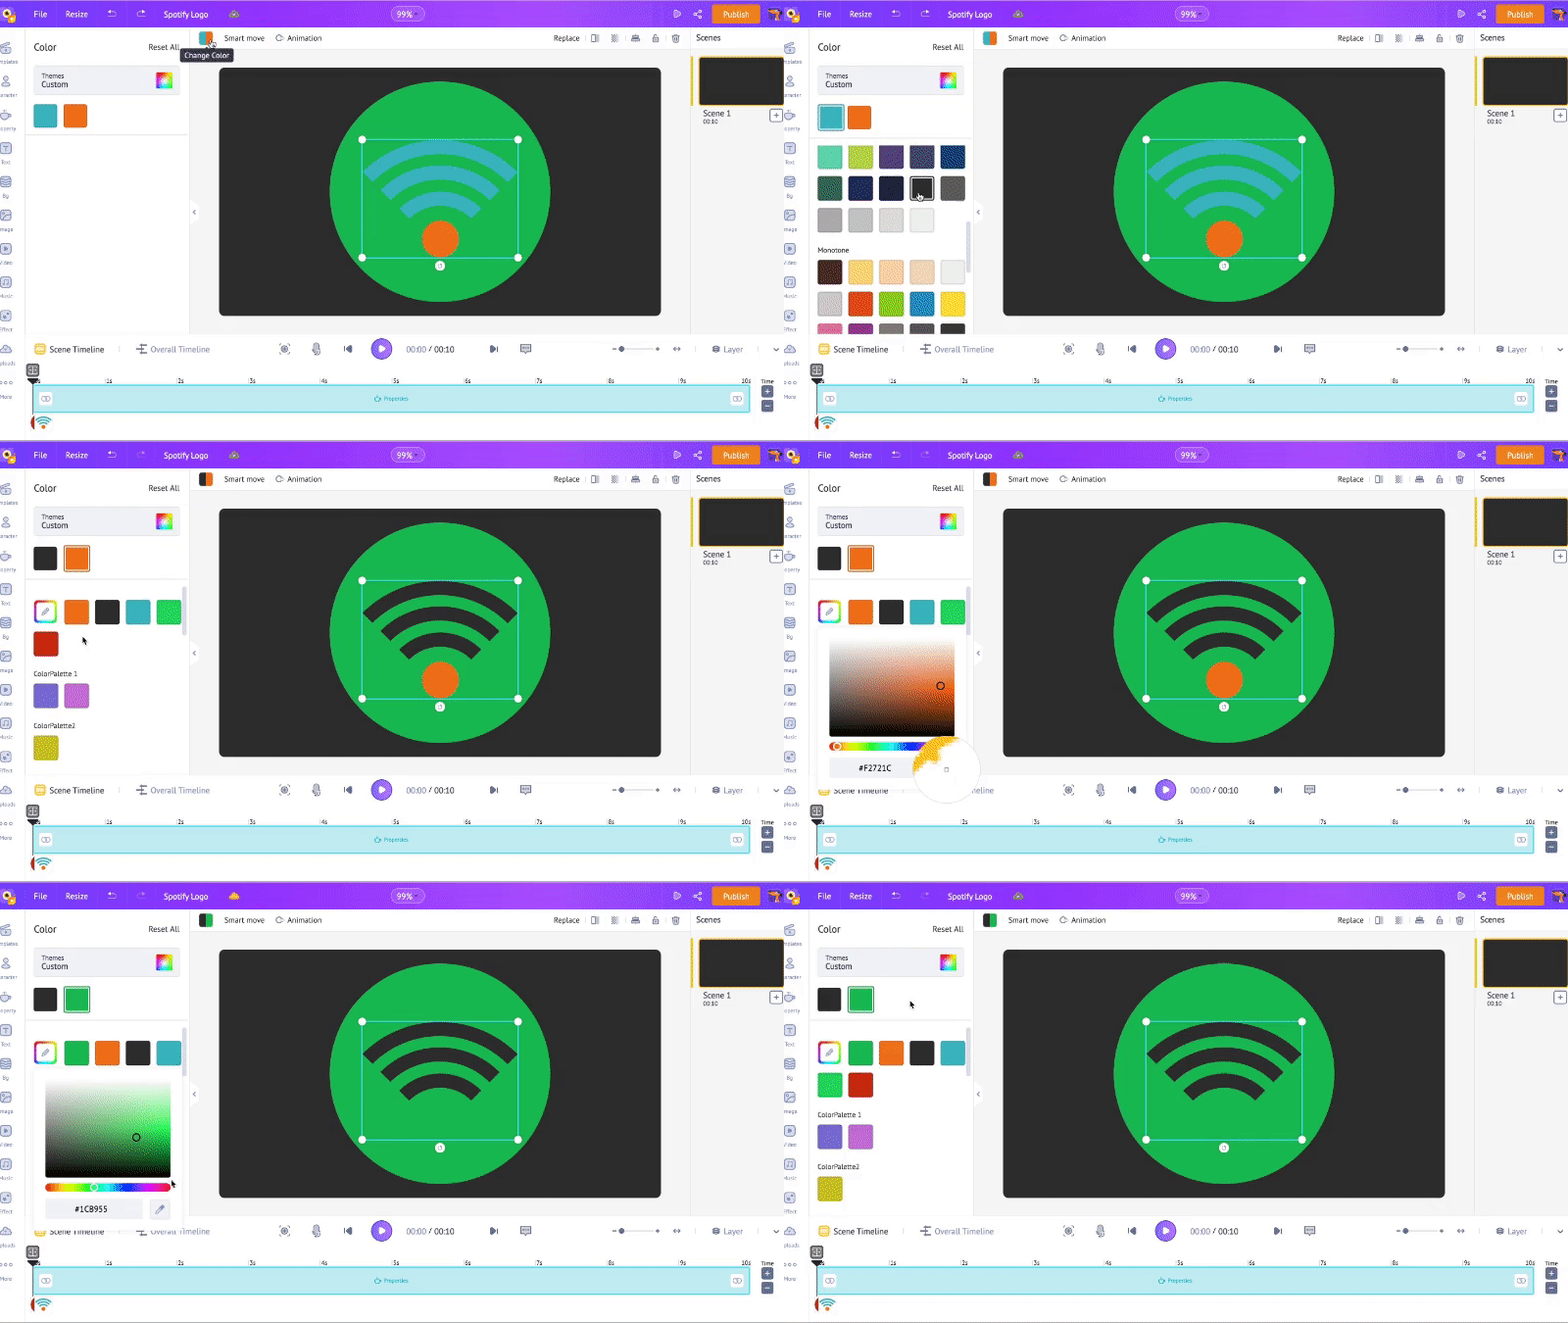
Let’s pick black for the three lines and Spotify’s green for the orange dot. This merges the dot with the background green circle, highlighting only the lines.
Since we know the color code of the Spotify green already, we can directly enter the code in the color palette for the dot. Otherwise, you can select the color by using the color pick-up brush under the color palette.
Check the below GIF for a better understanding, where I apply the black color directly from the colors listed and the green color using the color pick-up brush.
Now, reduce the size of the green circle and, consequently, the wifi symbol. Then, Rotate the wifi symbol to the right side slightly.
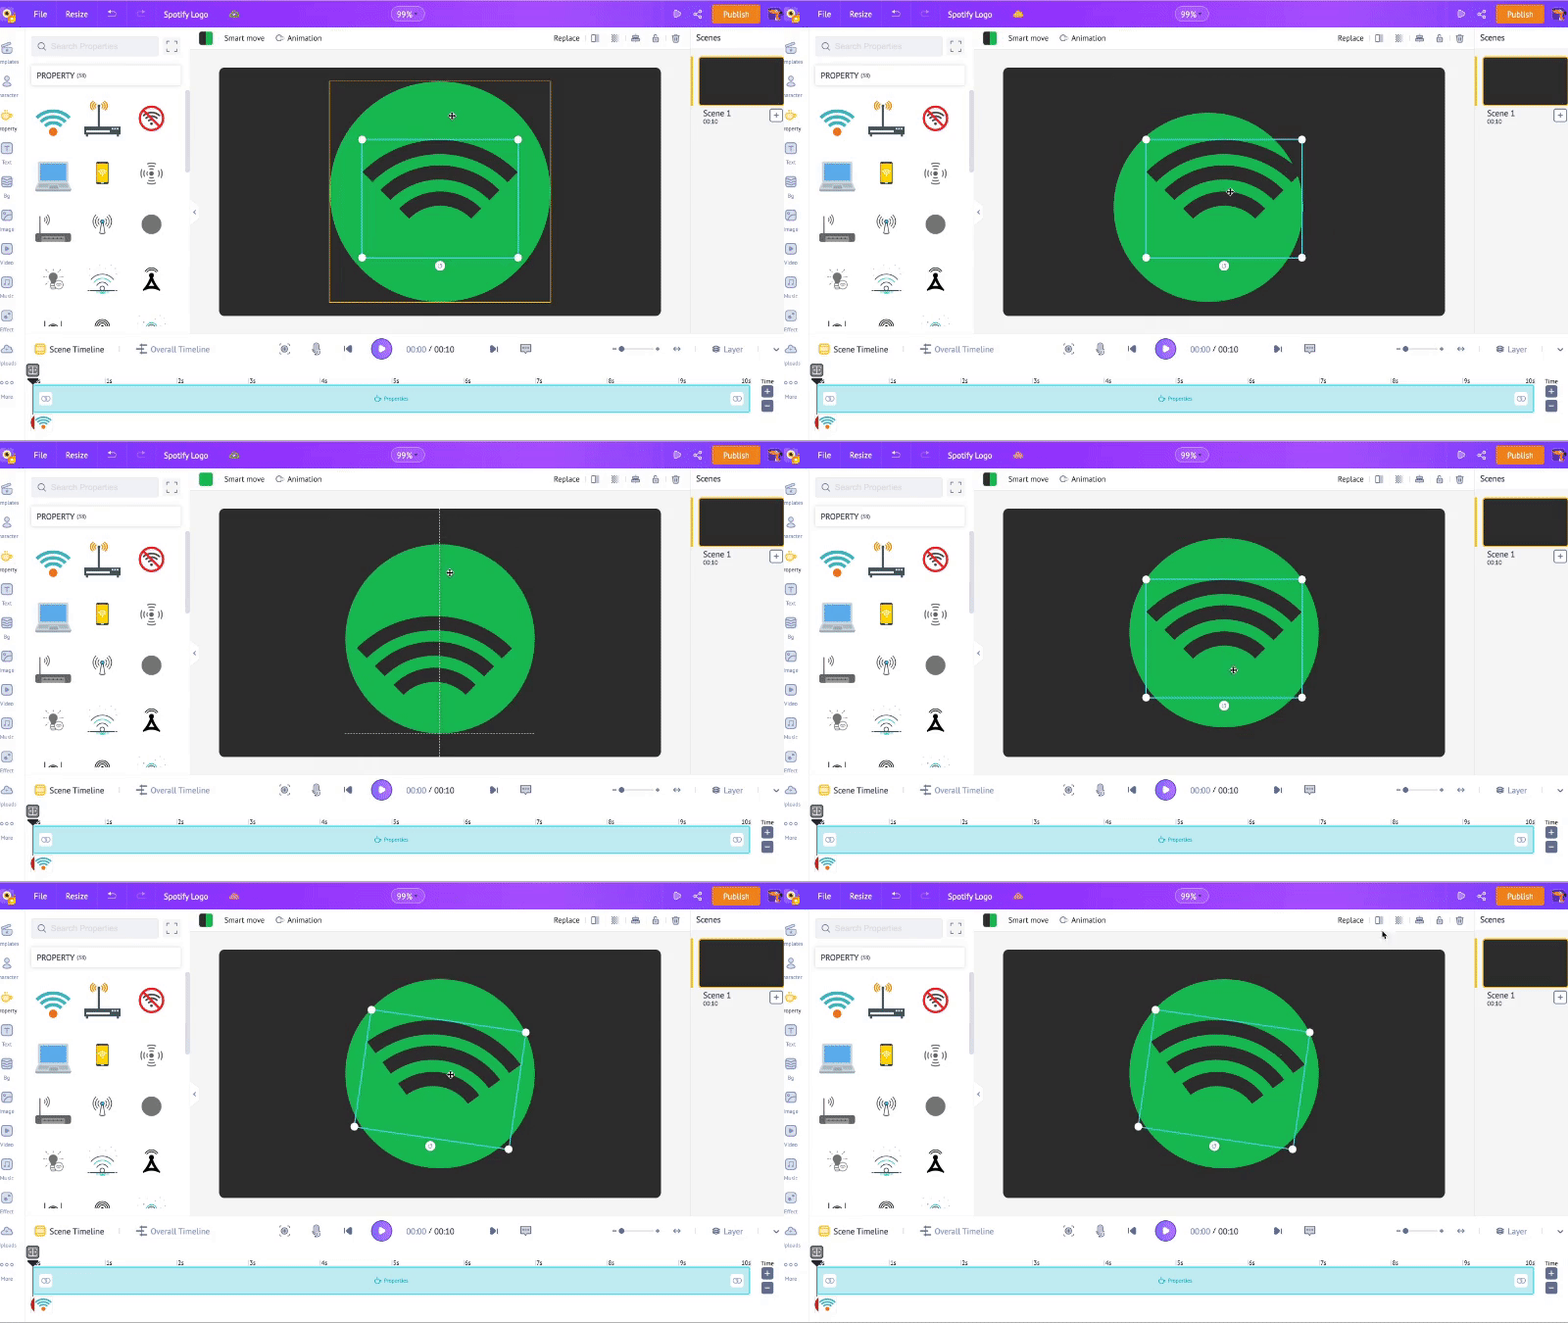
Bam, the Spotify logo is ready! But wait, let’s add some animations and make it more effective!
Step 4 - Animating the Spotify Logo
To add an animation effect to the entire logo, let’s group the two different symbols - the green circle and the black curved lines.
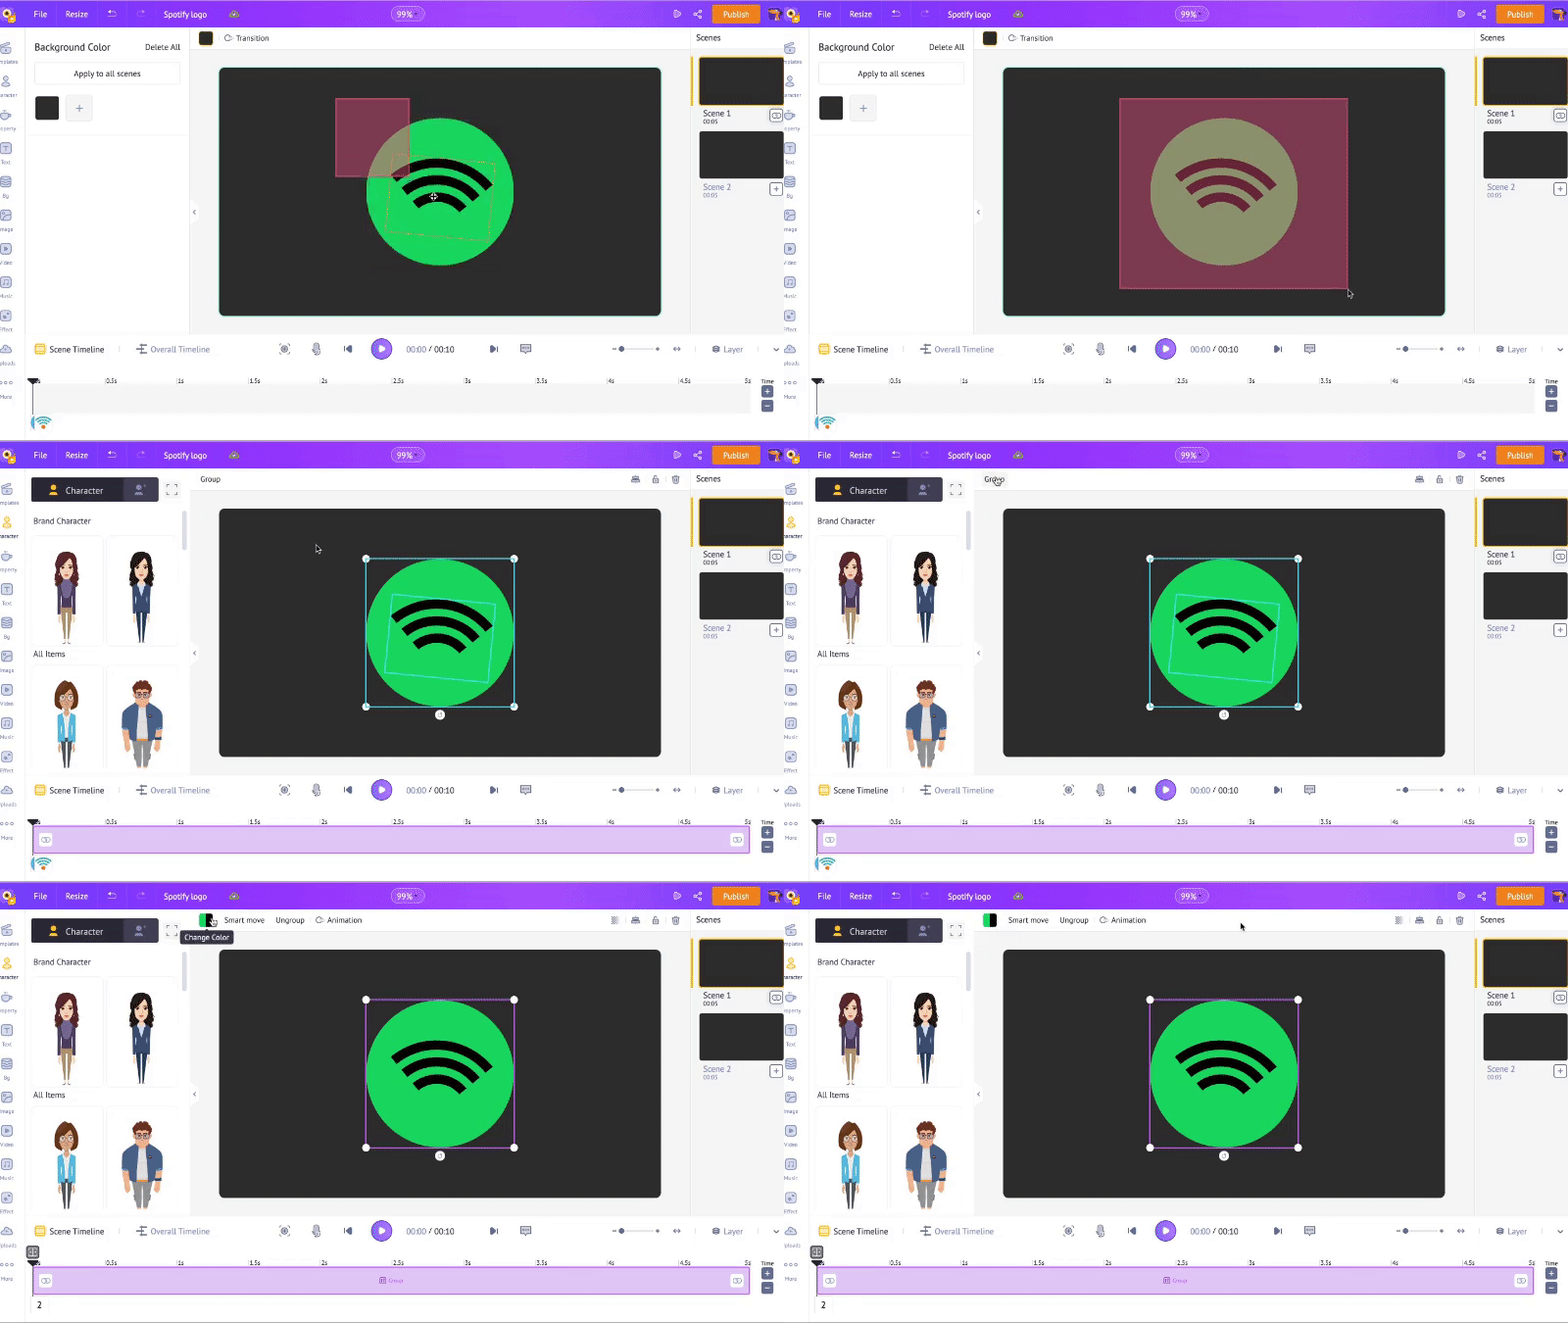
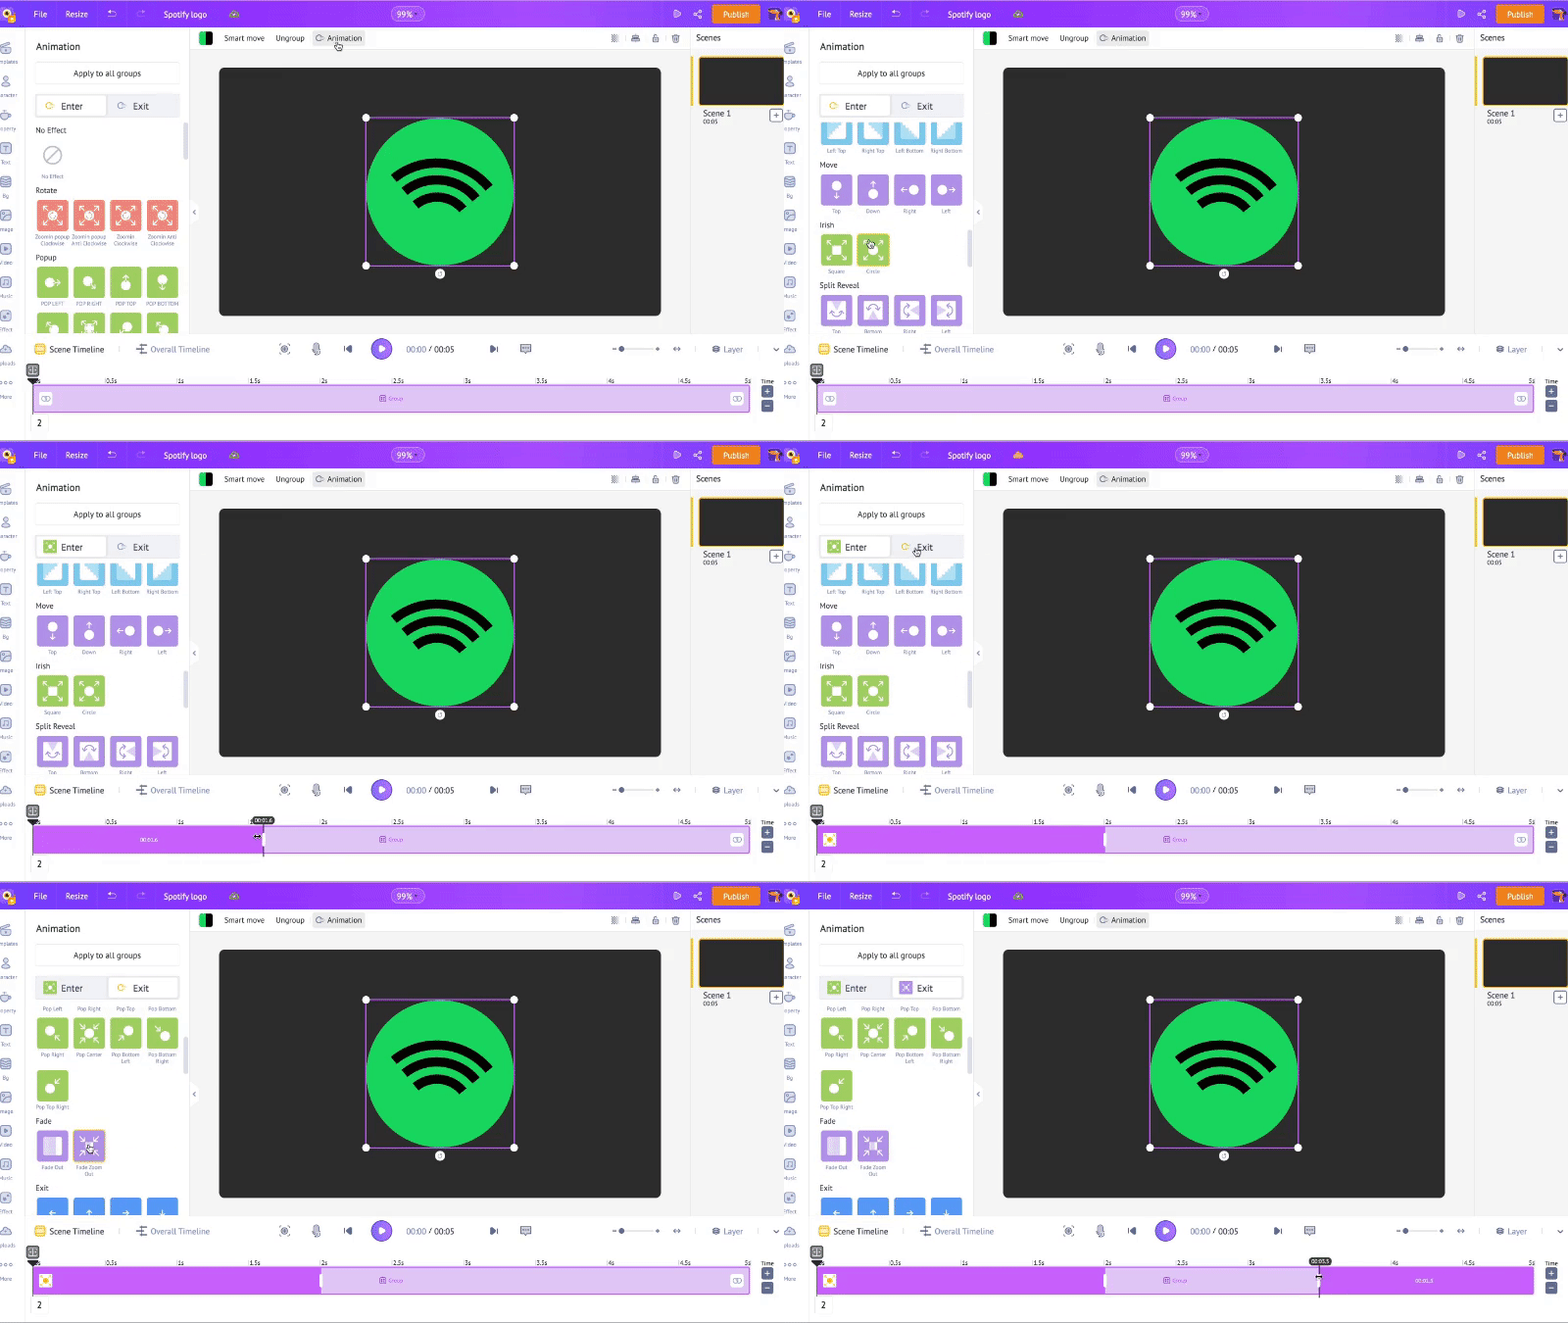
After grouping them, click on the groped object and click ‘Animation’ on top.
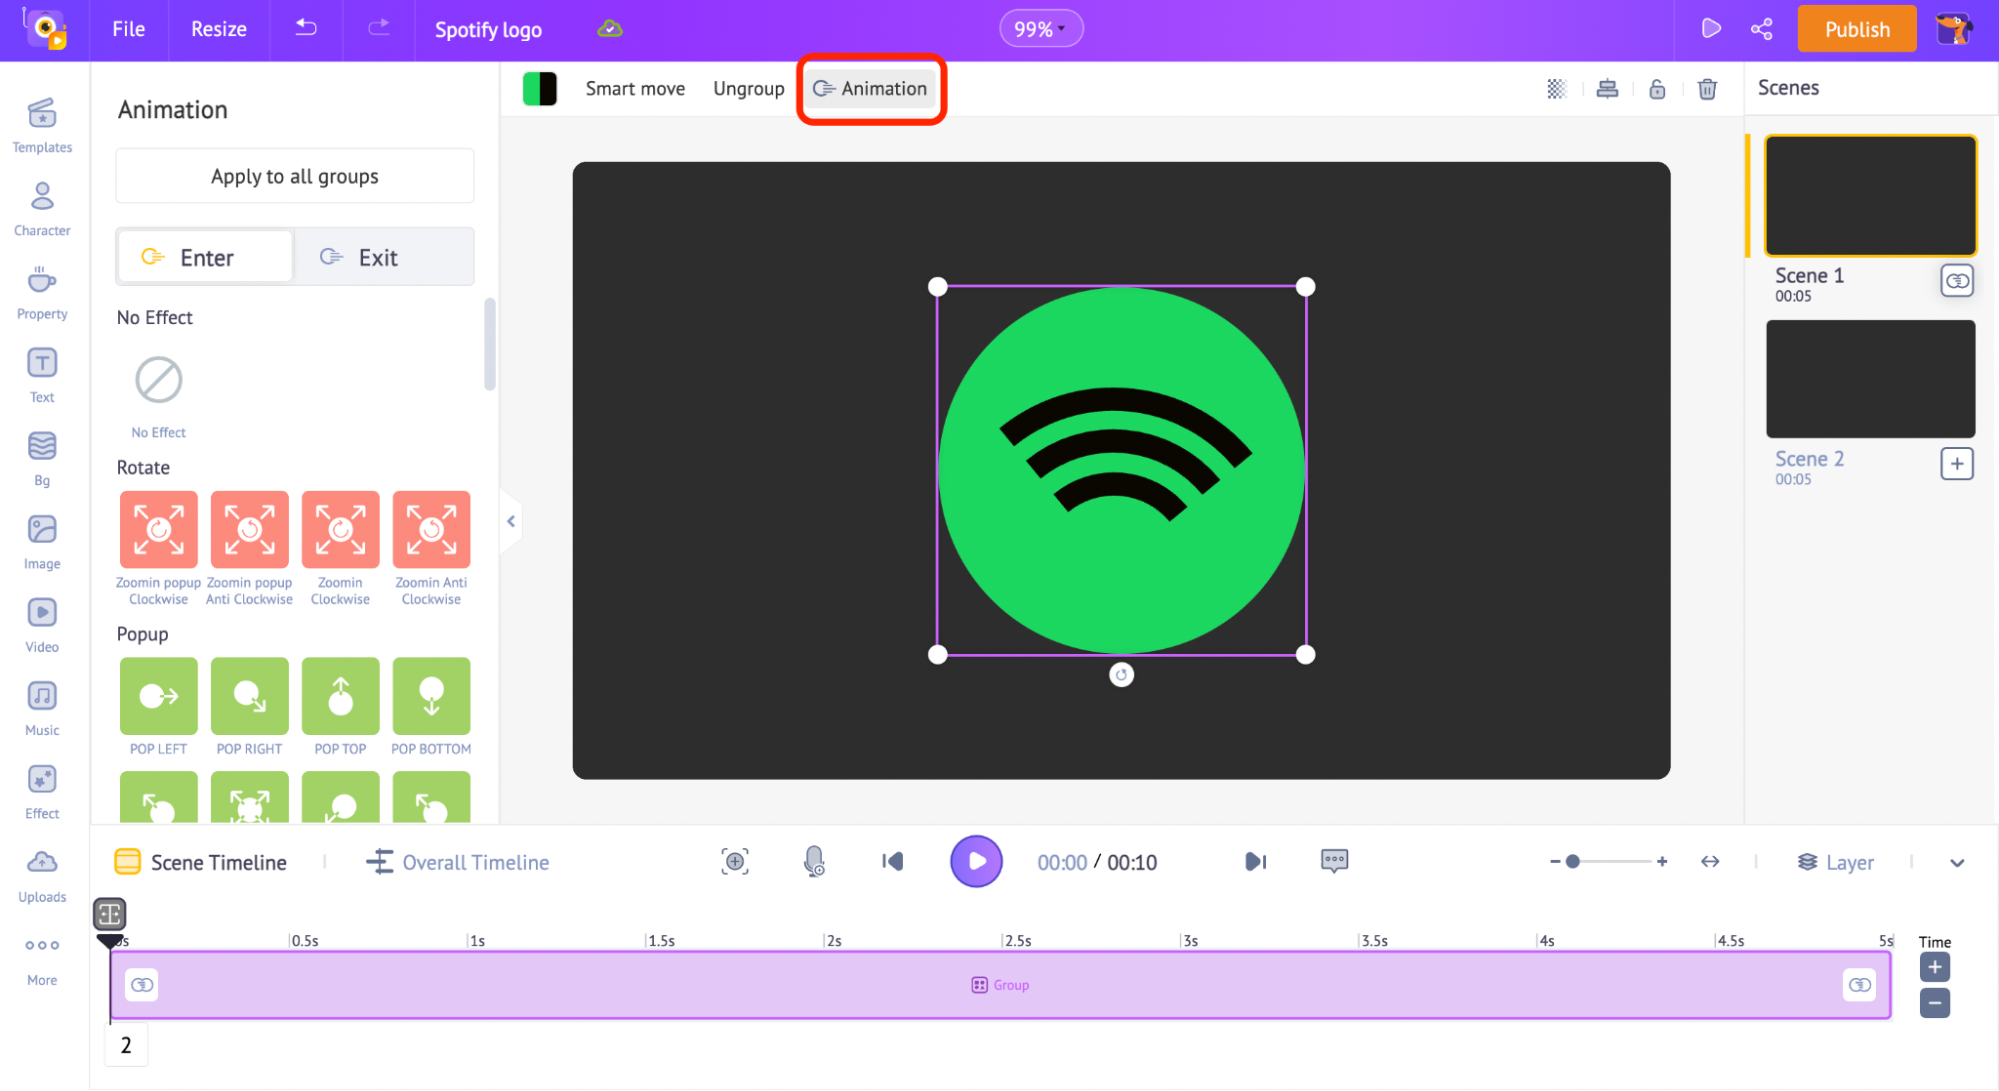
This opens the Animation window. Using this window, you can apply any kind of entry and exit animations to the asset selected.
You can make the asset pop from the left, bounce into the screen, fade in or out slowly… Just like magic!
The Animation window has two tabs, ‘Enter’ and ‘Exit’. As you can guess, these tabs are to choose the entry and exit effects for the assets.
Click on any entry and exit effect for the Spotify Logo.
While clicking on the effect, you will be able to see a dark violet-colored bar getting added to the timeline. This bar illustrates the duration of the entry/exit effect applied.
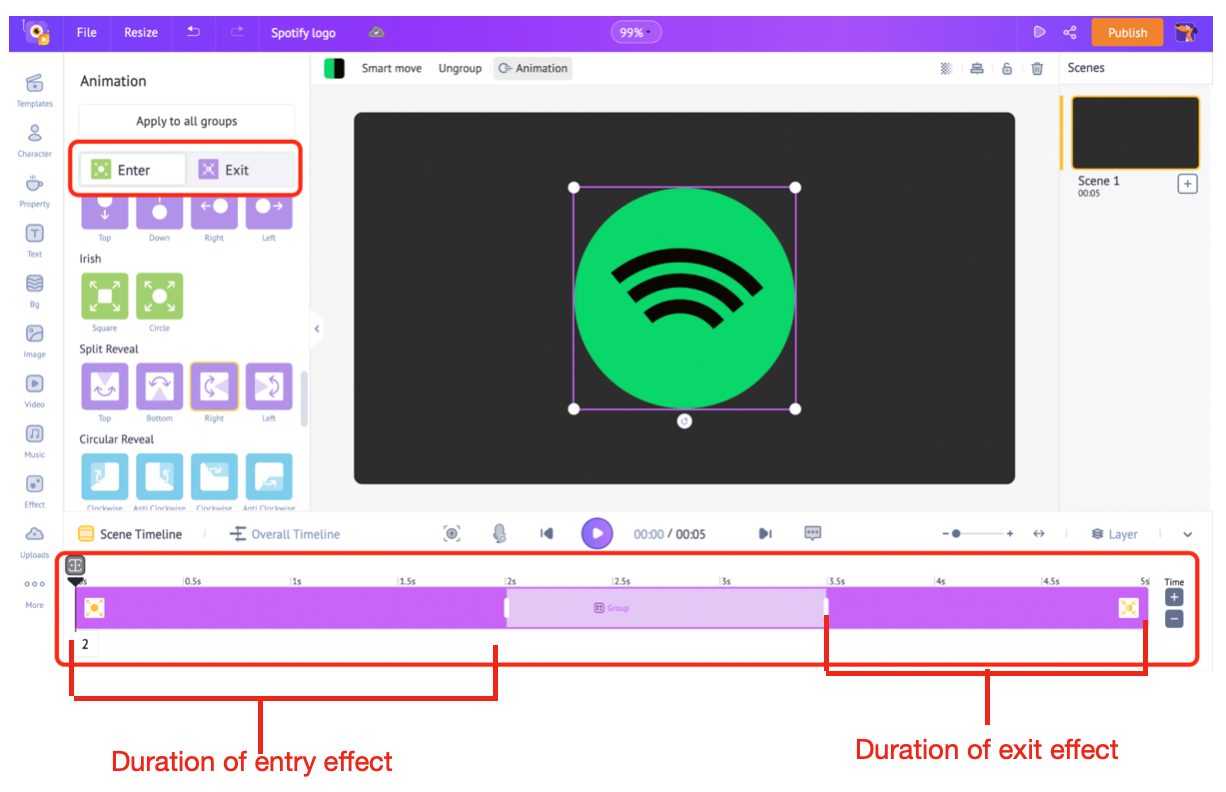
You can control the duration of the effect by dragging the violet bar to either side. Refer to the below GIF for a better understanding.
And tadaaaa, here’s the outcome 🤩

Step 5: Downloading the Animated Logo
Once your logo animation is ready, it’s time to showcase your work to the world.
To download your work as a video or in a GIF format, click on the ‘Publish’ button on the top right.
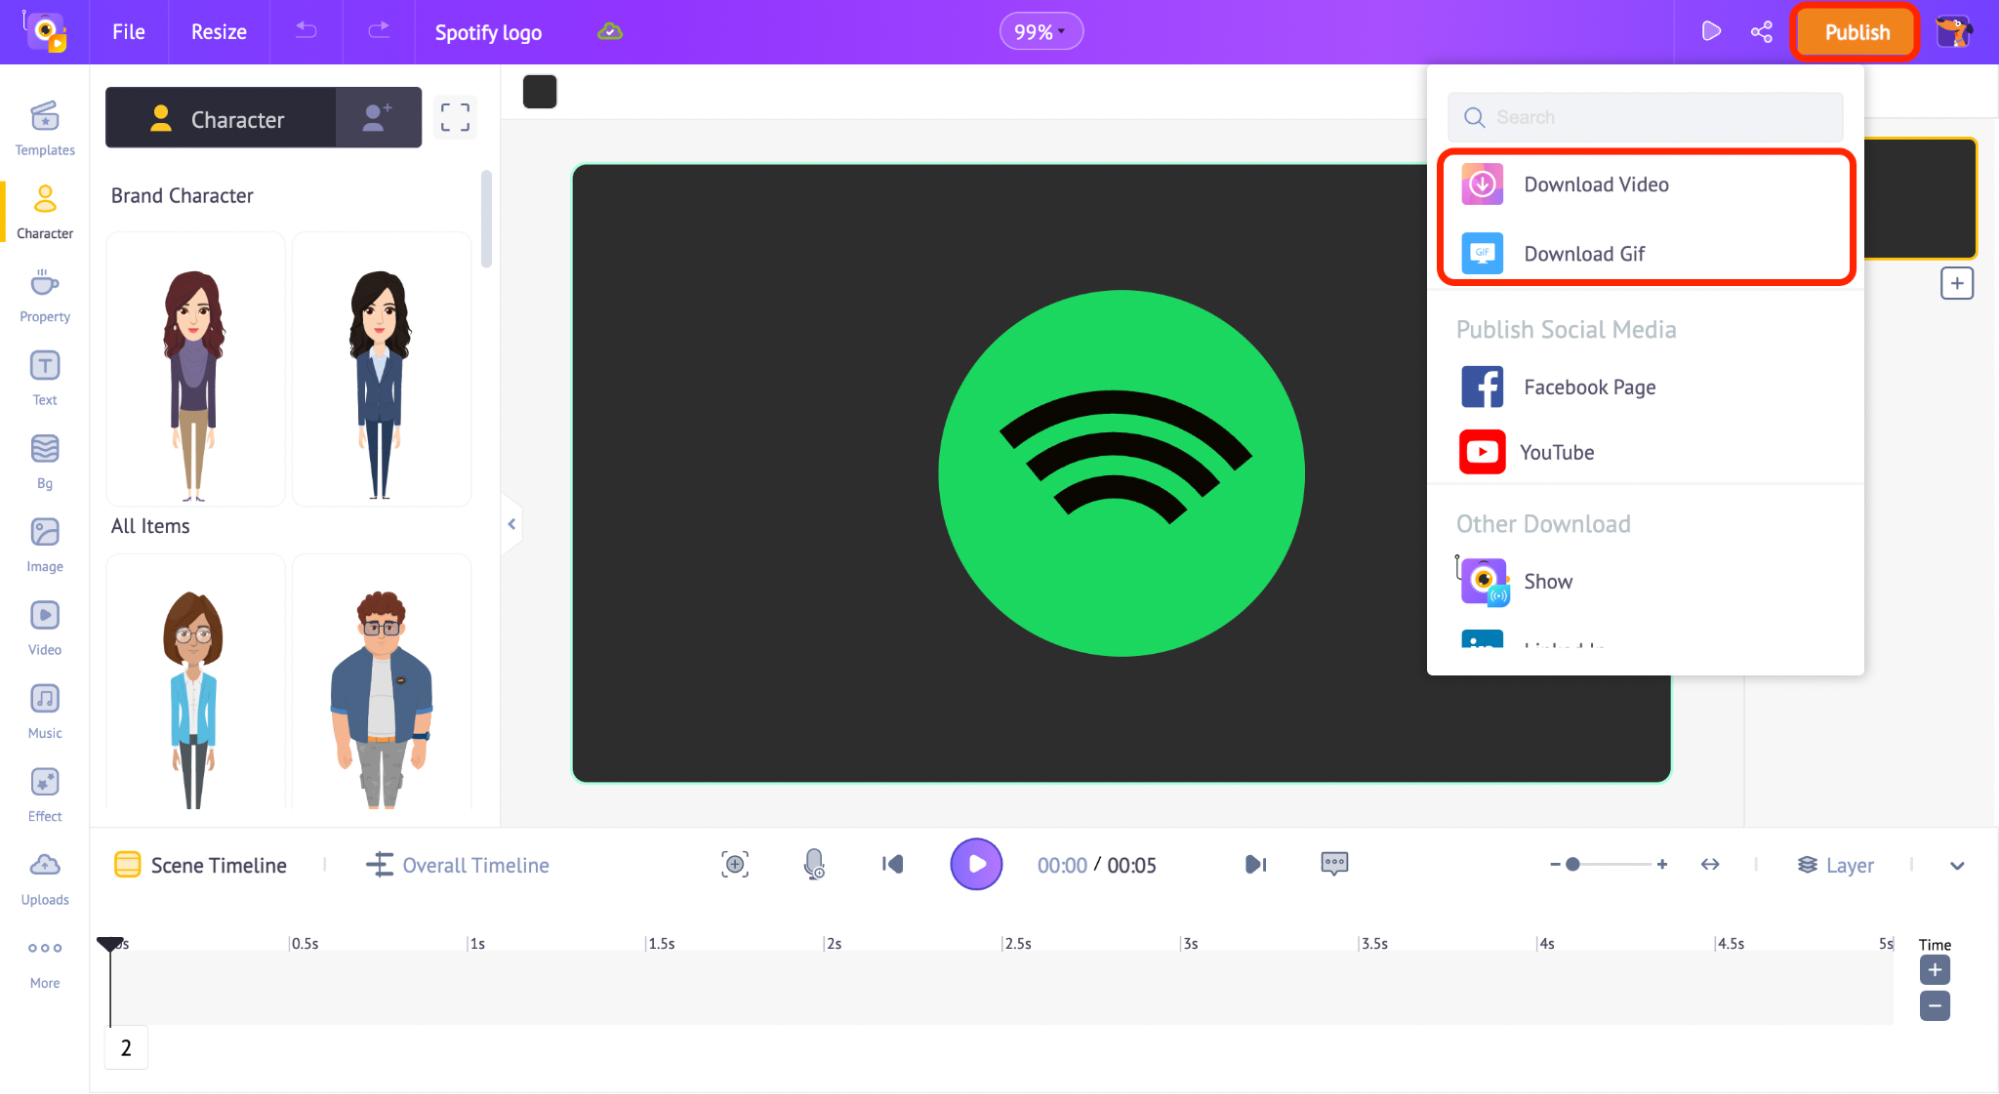
You can also share it to Social Media platforms directly by selecting the different options under the ‘Publish’ button.
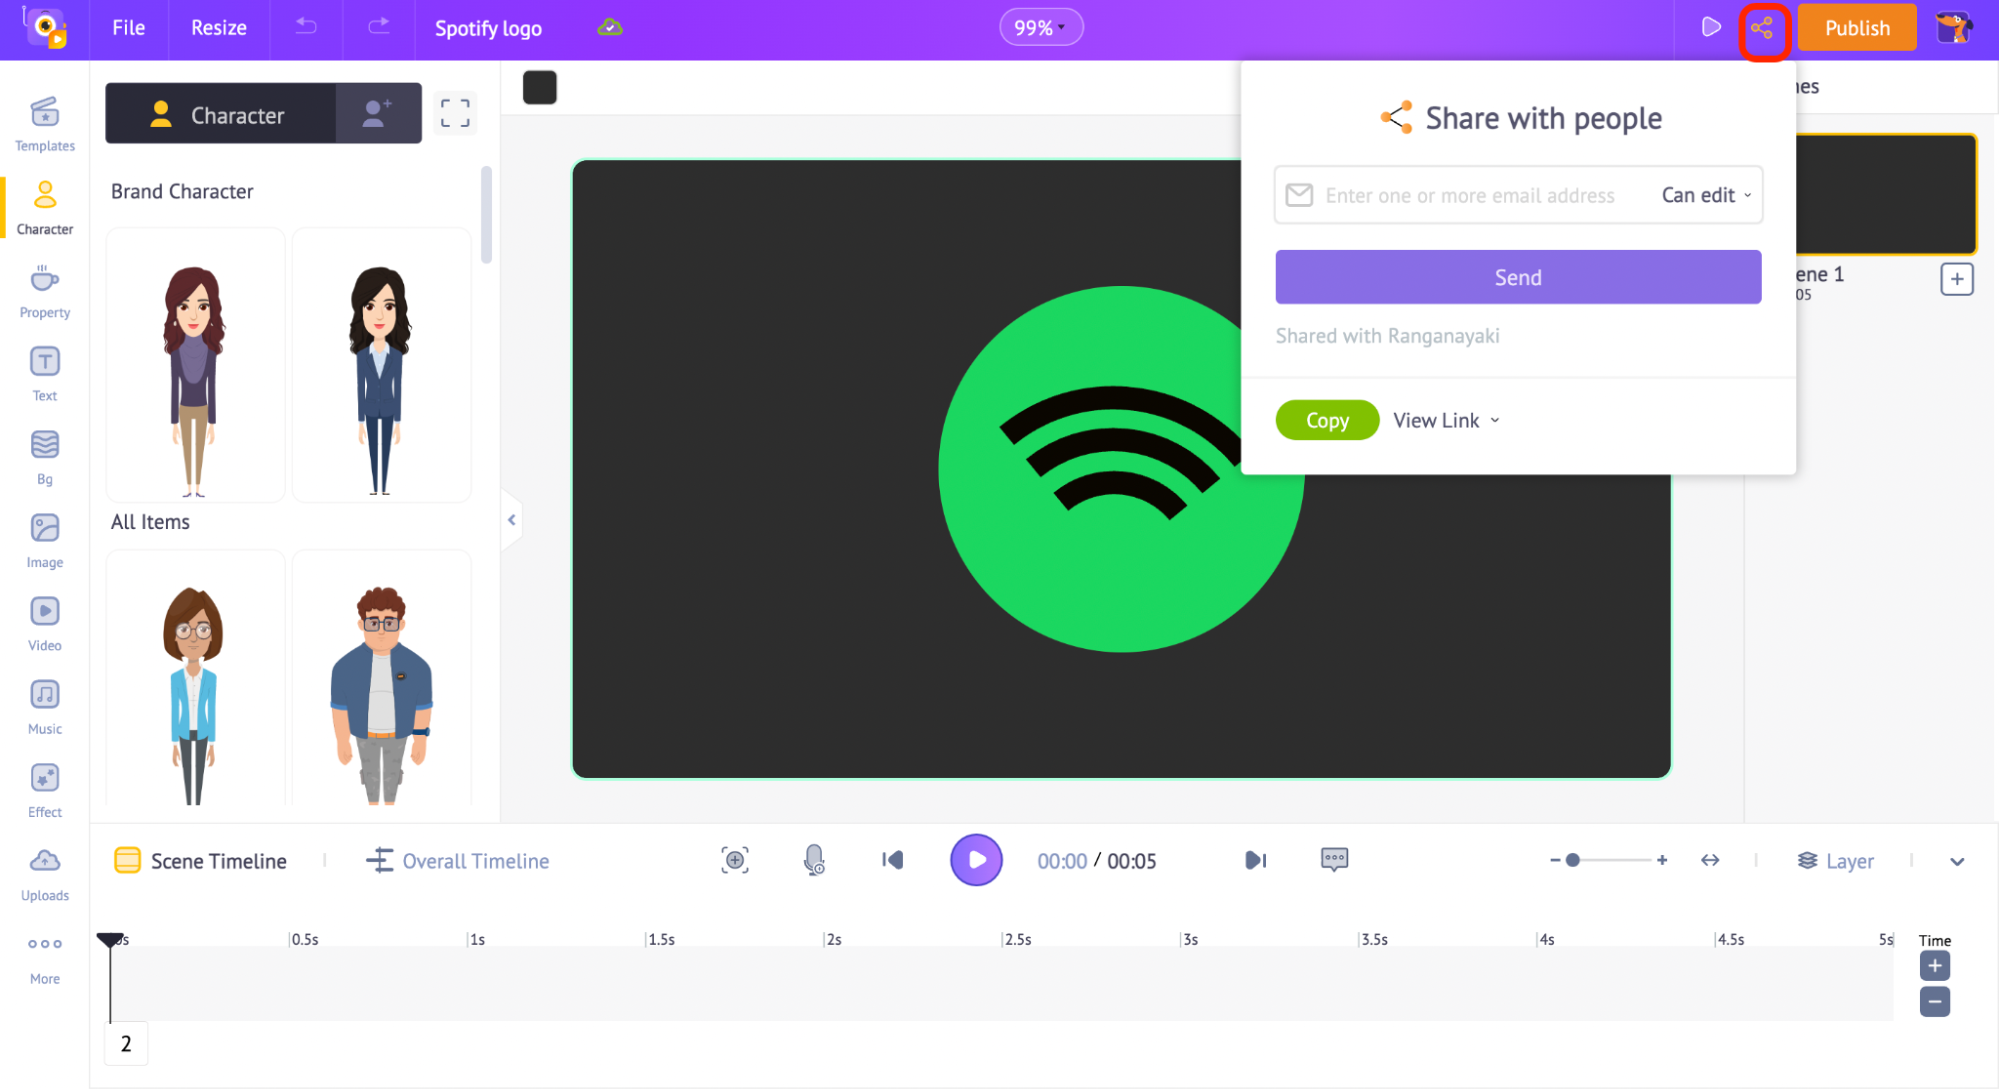
To share it with your friends or colleagues, click on the share icon on the top (near the Publish button).
How simple was that! Wasn’t that quick and fun?
Step 6: Bonus Tip
Now that your logo animation is done, the next logical step would be to use it in your own intro or outro and feature it in your awesome Youtube Video!
To make things easy for you, we’ve already piled up our dashboard with intro templates and outro templates.
Simply type ‘intro’ or ‘outro’ in the search bar on our dashboard, explore the templates, and start editing a template in which you can feature your logo!
Here’s how you search for the intro/outro templates.
Here are the steps to use your logo in one of your favorite intro/outro templates:
- Upload your logo in the ‘Upload’ section.
- Customize the entire theme (background, music, properties, colors, fonts, etc.) of the template.
- Preview the video.
- Download it as a video/GIF.
Here’s a video to guide you on editing an Animaker template:
And that’s it! Your very own intro/outro video is set and ready to be added to your Youtube video!
If you would like to create a mascot/ animated character for your brand, then check out this post on how to make an avatar to learn how you can create a stunning character without paying a penny!
Discover the best intro templates and outro templates from the links provided.
An animated logo is often applied as an effective promotional tool. It helps to increase memorability and brand awareness, improve storytelling, and create an original image for a brand.
Create your brand’s logo animation with Animaker and get super cool engagement from your followers!
If you have any questions, please feel free to add them to the comments section below. We will be more than happy to help you out!
