How to Make 2D Animation? [A Beginner-Friendly Walkthrough!]

Shreshtra - March 18, 2025 - Leave your thoughts. 10 min read
If you’ve ever found yourself lost in the magic of a 2D animated movie or show, you know how powerful animation can be.
Whether it’s the nostalgia of childhood cartoons or the slick, modern animations in today’s viral videos, 2D animation has a special way of capturing our attention and stirring our emotions.
But have you ever wondered how to make 2D animation yourself?
Gone are the days when making a 2D animation required expensive studios and professional expertise.
With the right tools, you can bring your creative ideas to life from the comfort of your own space.
In this guide, we’ll walk you through everything you need to know to start making your own 2D animations.
From conceptualizing your idea to mastering the basics of animation software, you’ll be ready to create professional-quality animations that stand out!
Ready to make your animated dreams come true? Let’s dive in to see how to make 2D animation!
How to make 2D animation?
Making your 2D animation video is much easier than you might think!
With just a few simple steps, you can transform your idea into a fully animated video.
Here, we will show you how to make 2D animation with Animaker!
If you’re new to Animaker, here’s a quick intro - it’s an online animation platform packed with over 150M+ assets, including diverse characters, actions, 2D backgrounds, and royalty-free music.
Its AI-powered features include AI voice-overs with more than 2,000+ voices in over 200+ languages and instant subtitle generation in 130+ languages.
Now, let’s dive in and see how to make 2D animation using Animaker!
When you sign up to Animaker’s 2D animation Software, you will be taken directly to the AI-powered video creation window.
With Animaker’s new AI-powered workflow, creating a video has never been this fast and effortless!
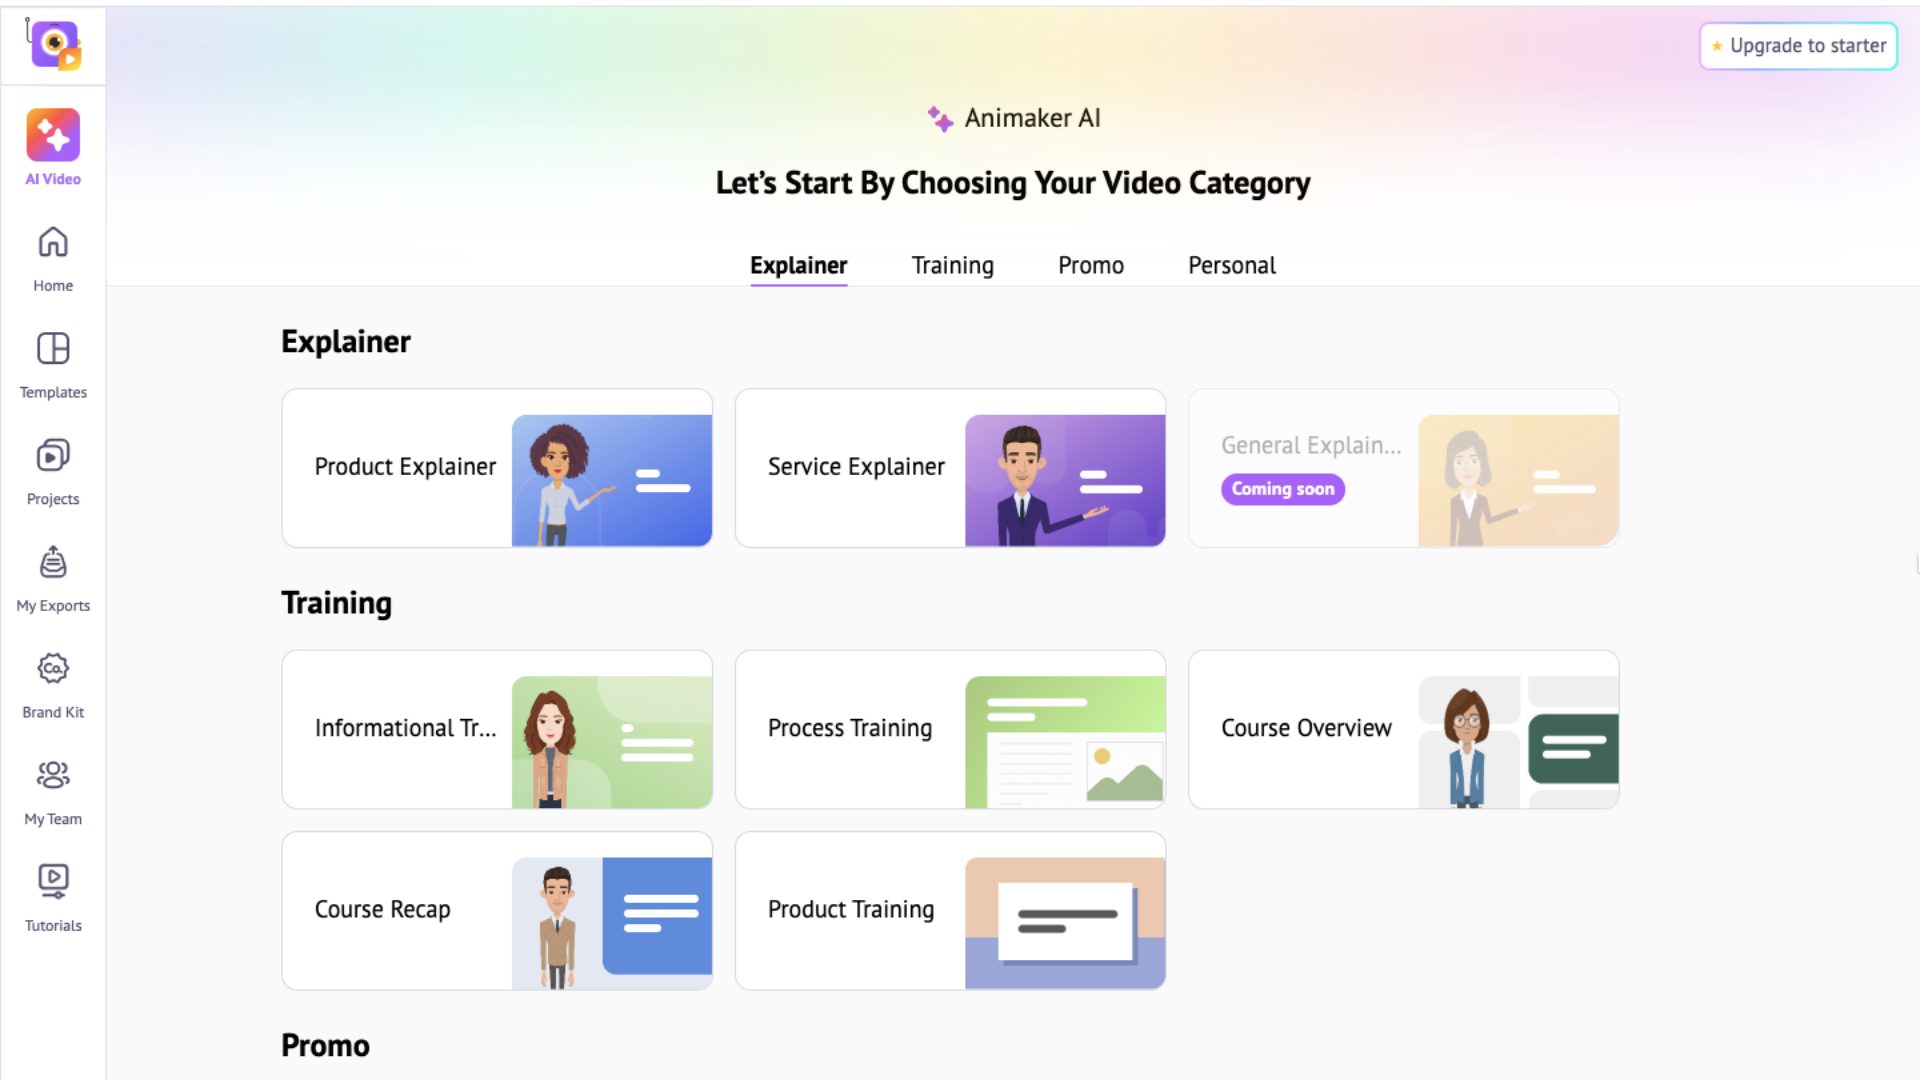
Step 1: Enter the Video Prompt
Let’s get started!
Step 1: Enter the Video Prompt
Start by selecting your video category. For this example, I’ll be creating a course recap video!
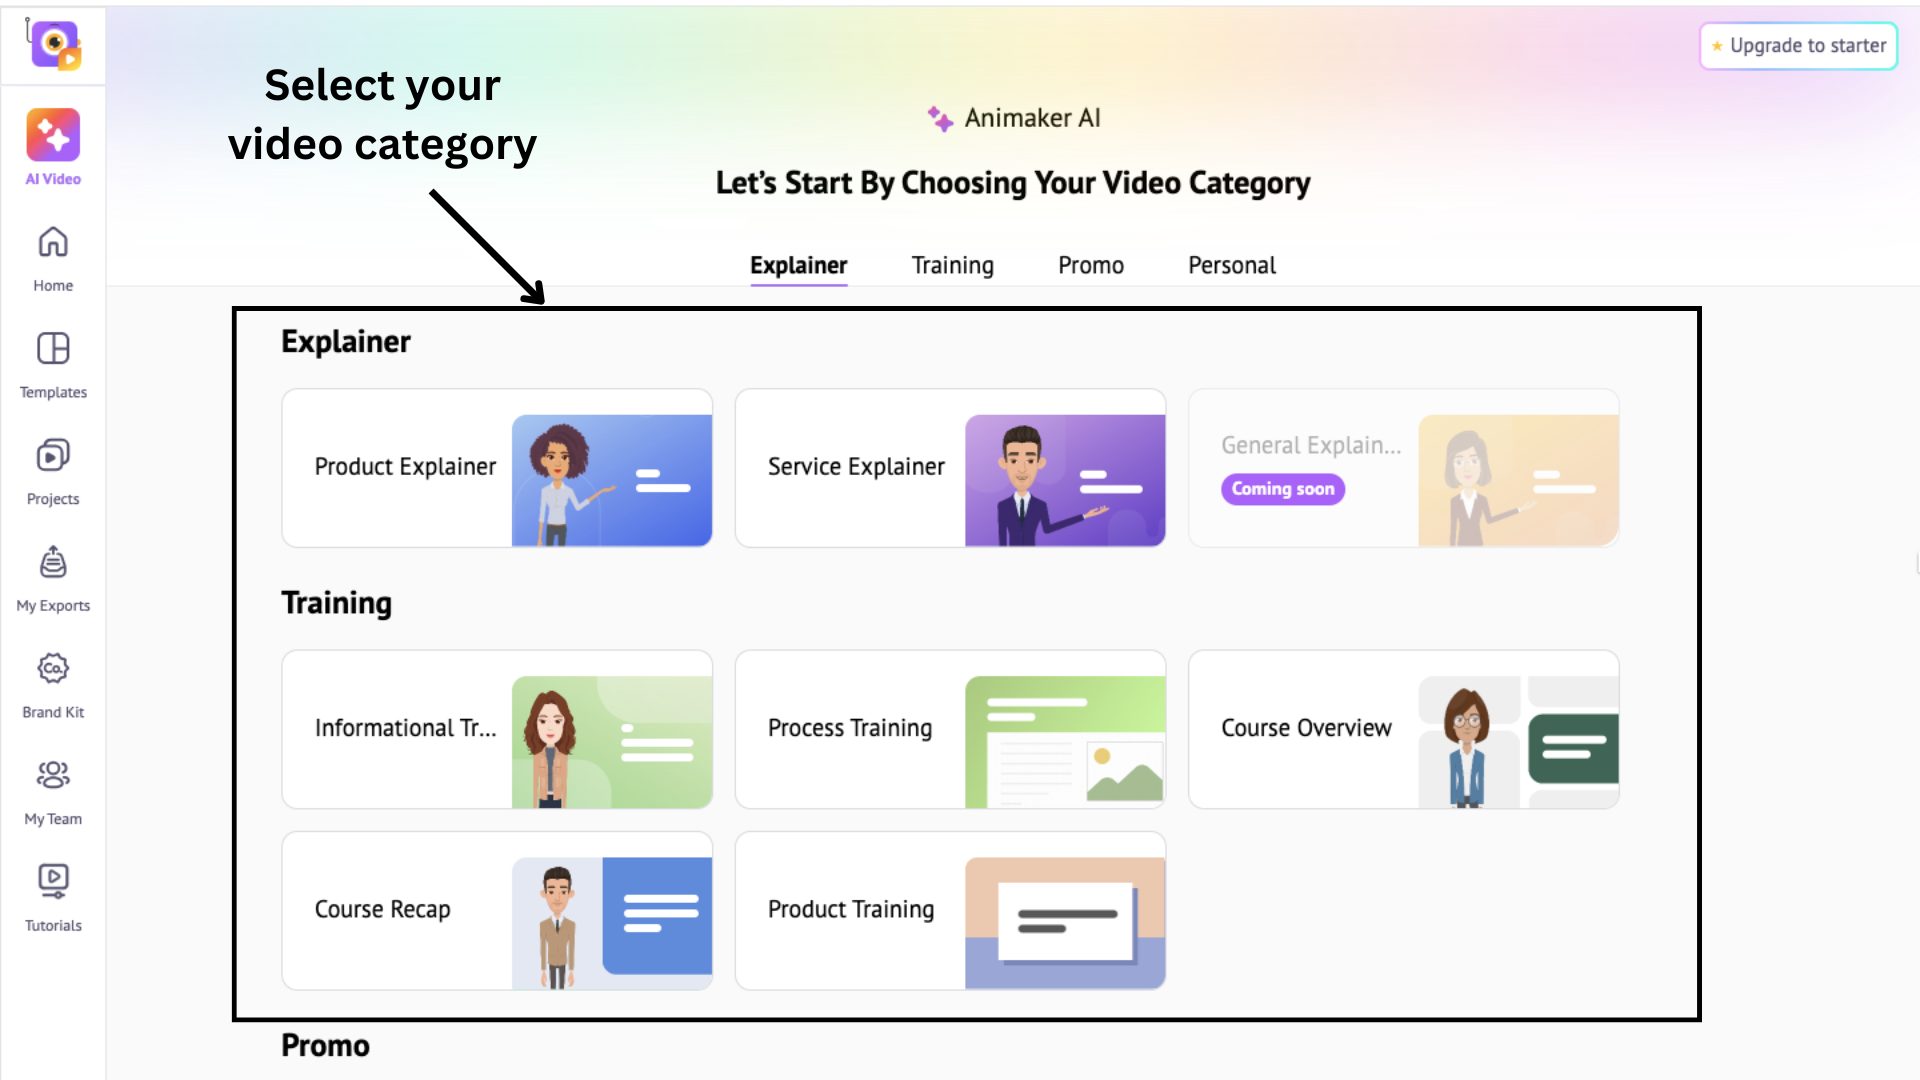
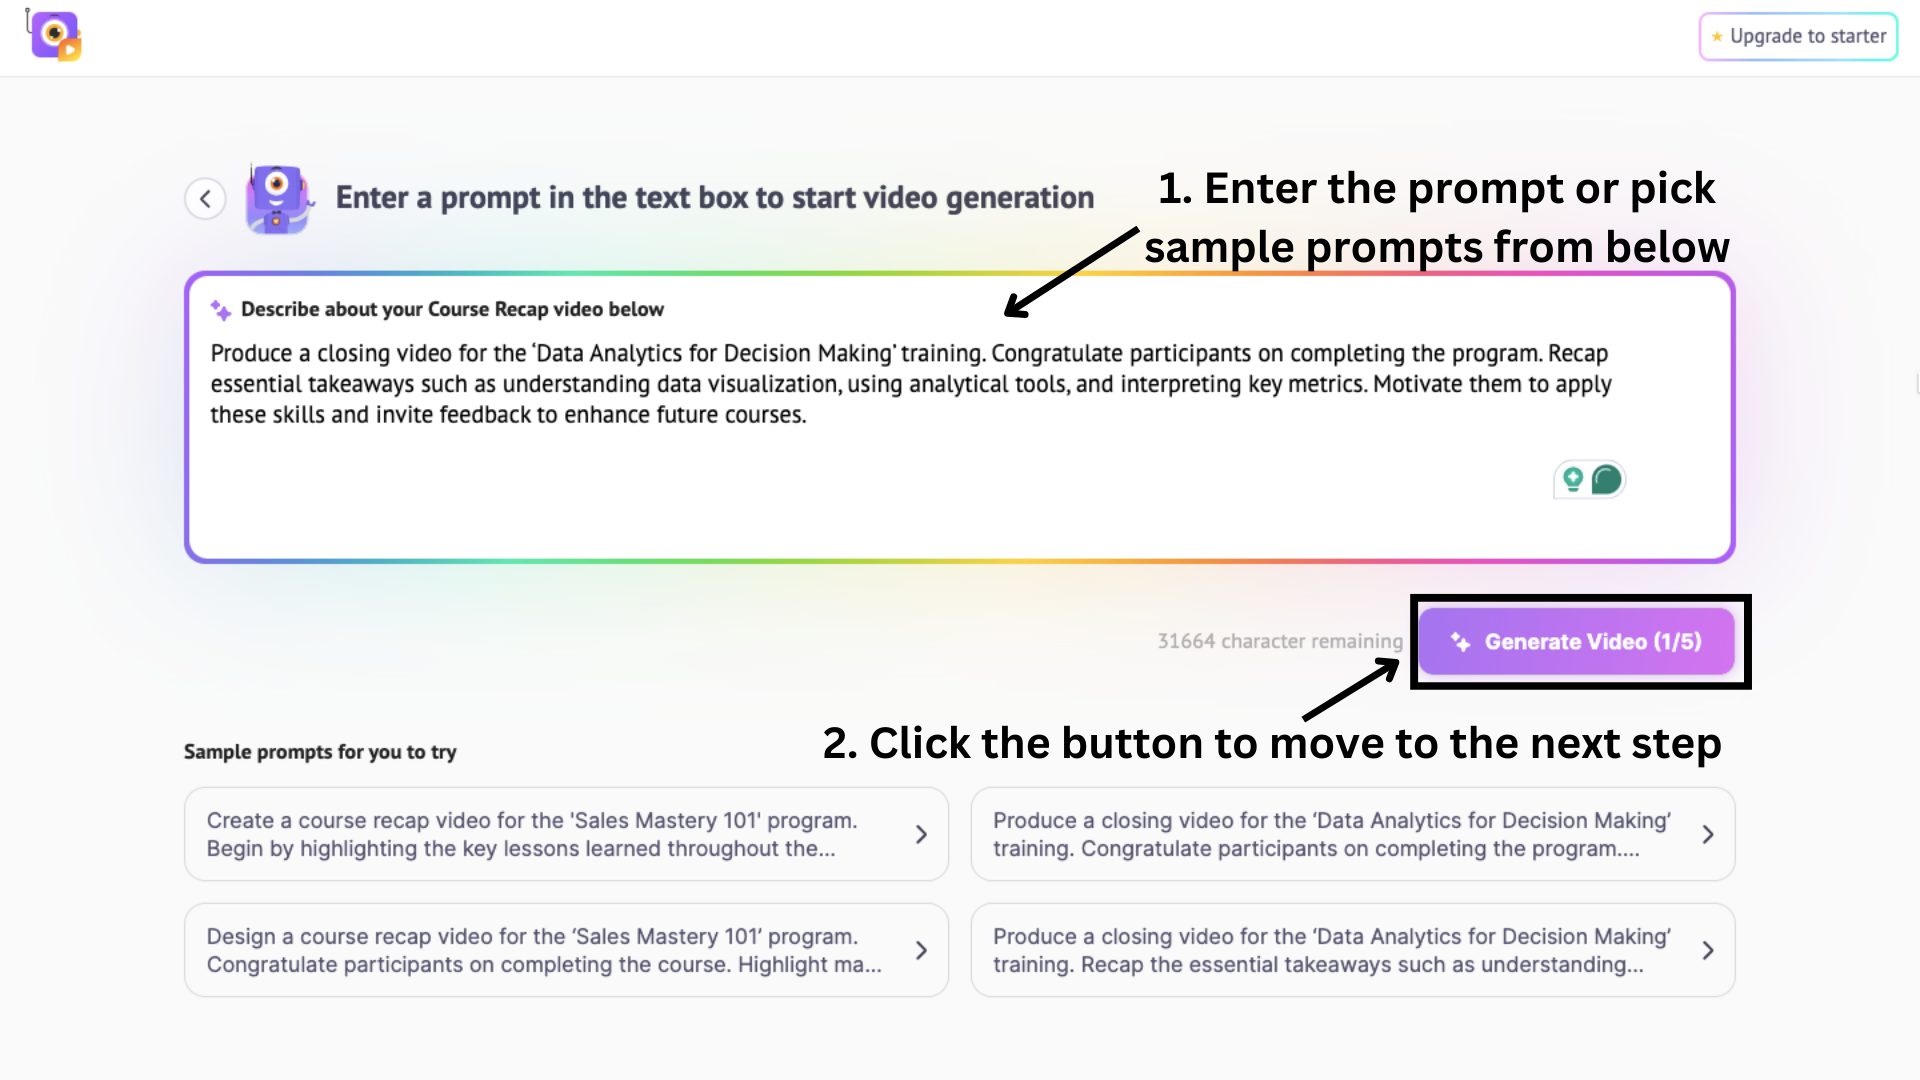
Once you've chosen the category, enter your video prompt or pick one from the sample prompts provided.
Then, click the Generate Video button to move to the next step.
Step 2: Answer AI’s questions
Animaker AI will now ask key questions to better understand your video’s intent and refine its content. For my example, the AI asked questions regarding the intent of the video.
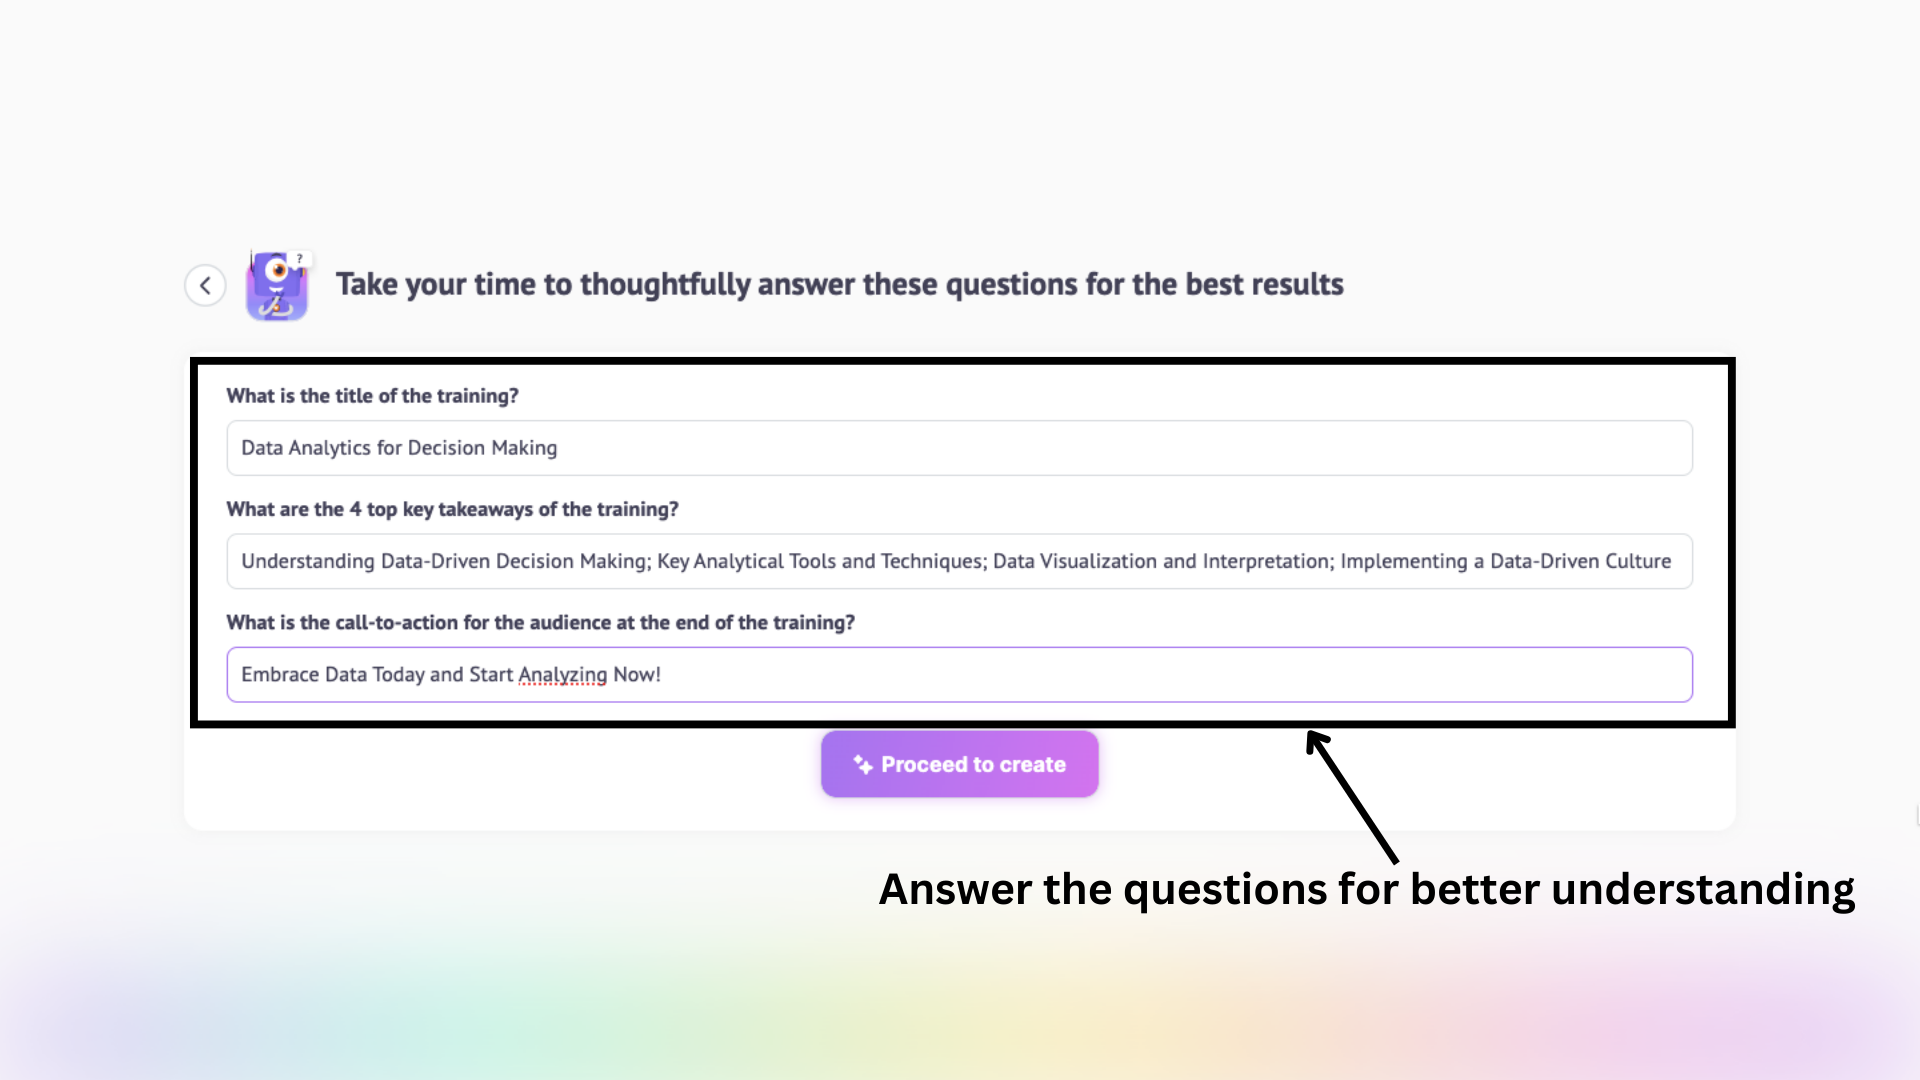
Depending on the category you select, AI may ask additional questions to ensure your video is tailored perfectly.
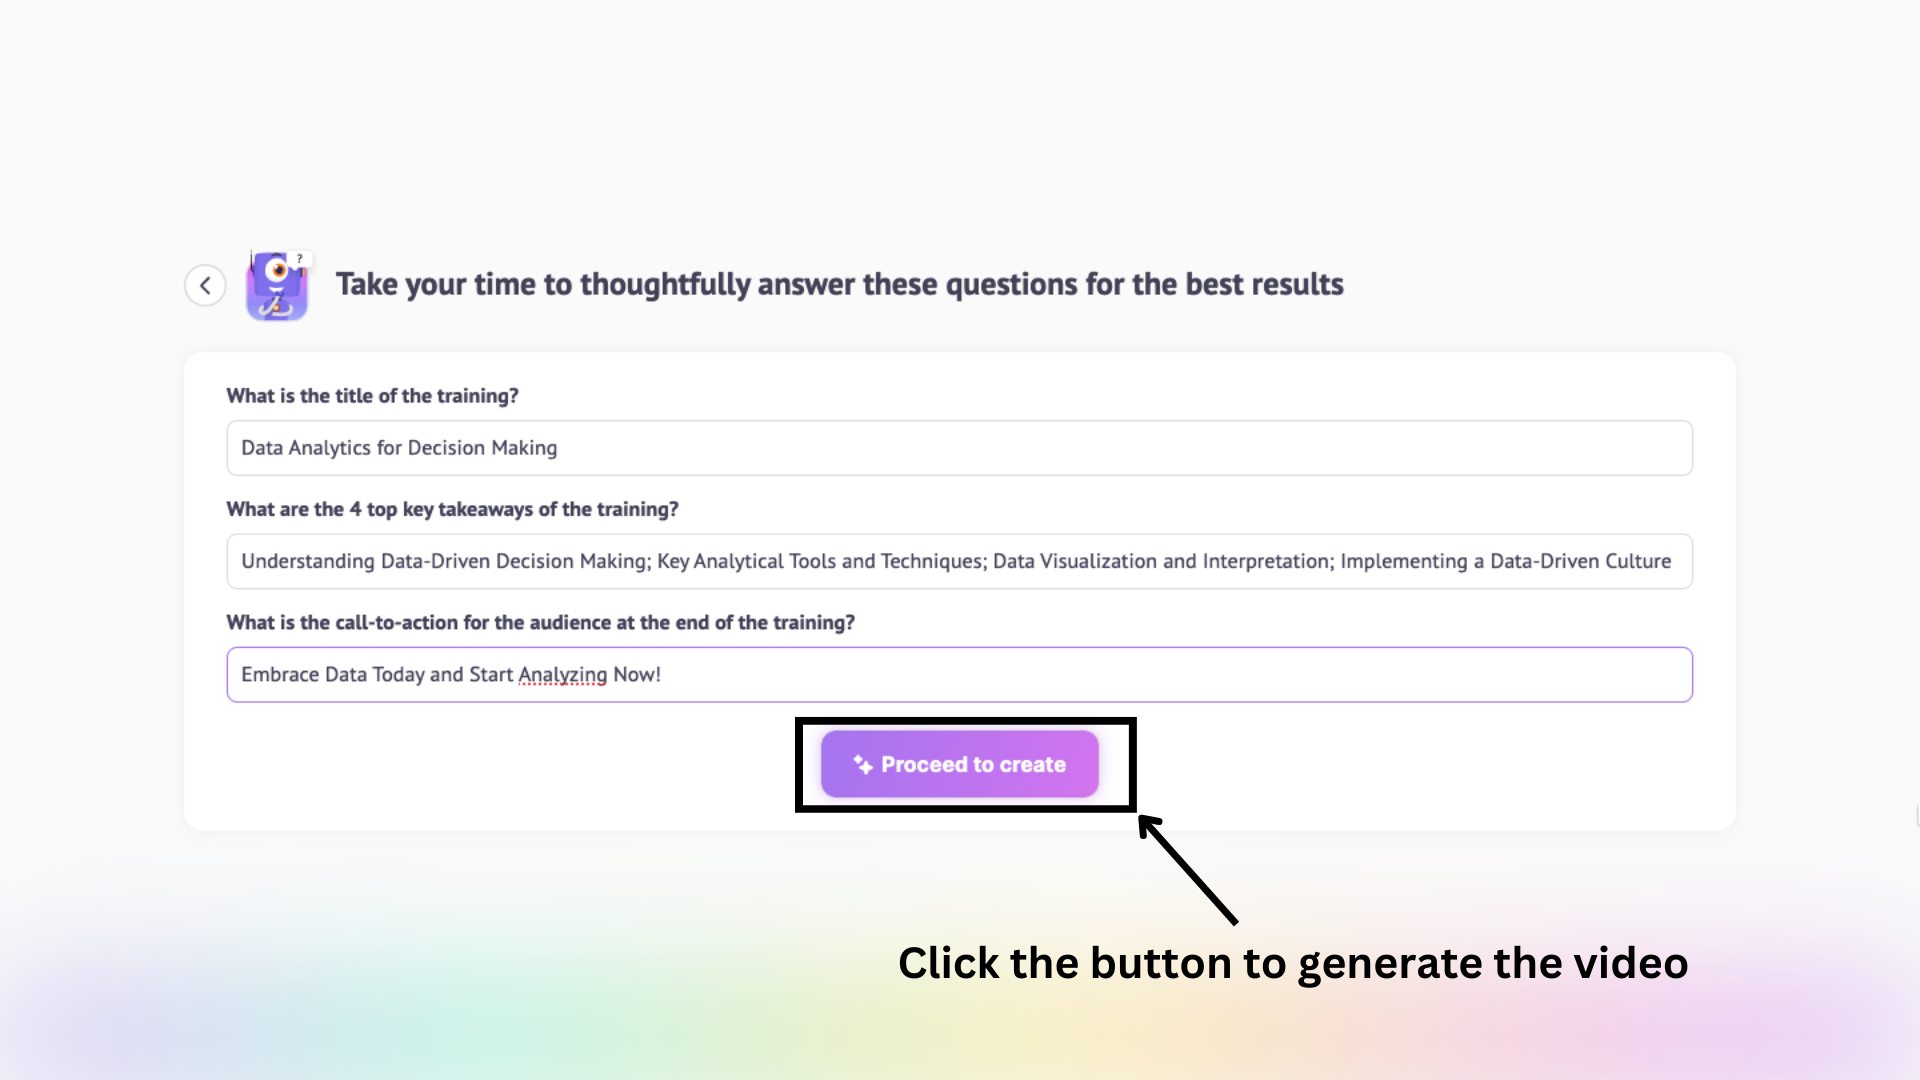
Once you've answered all the questions, click Proceed to Create.
Step 3: Generate & Edit
Now, let Animaker AI work its magic! In just a minute, your video will be generated. Click the Play button to preview your creation!
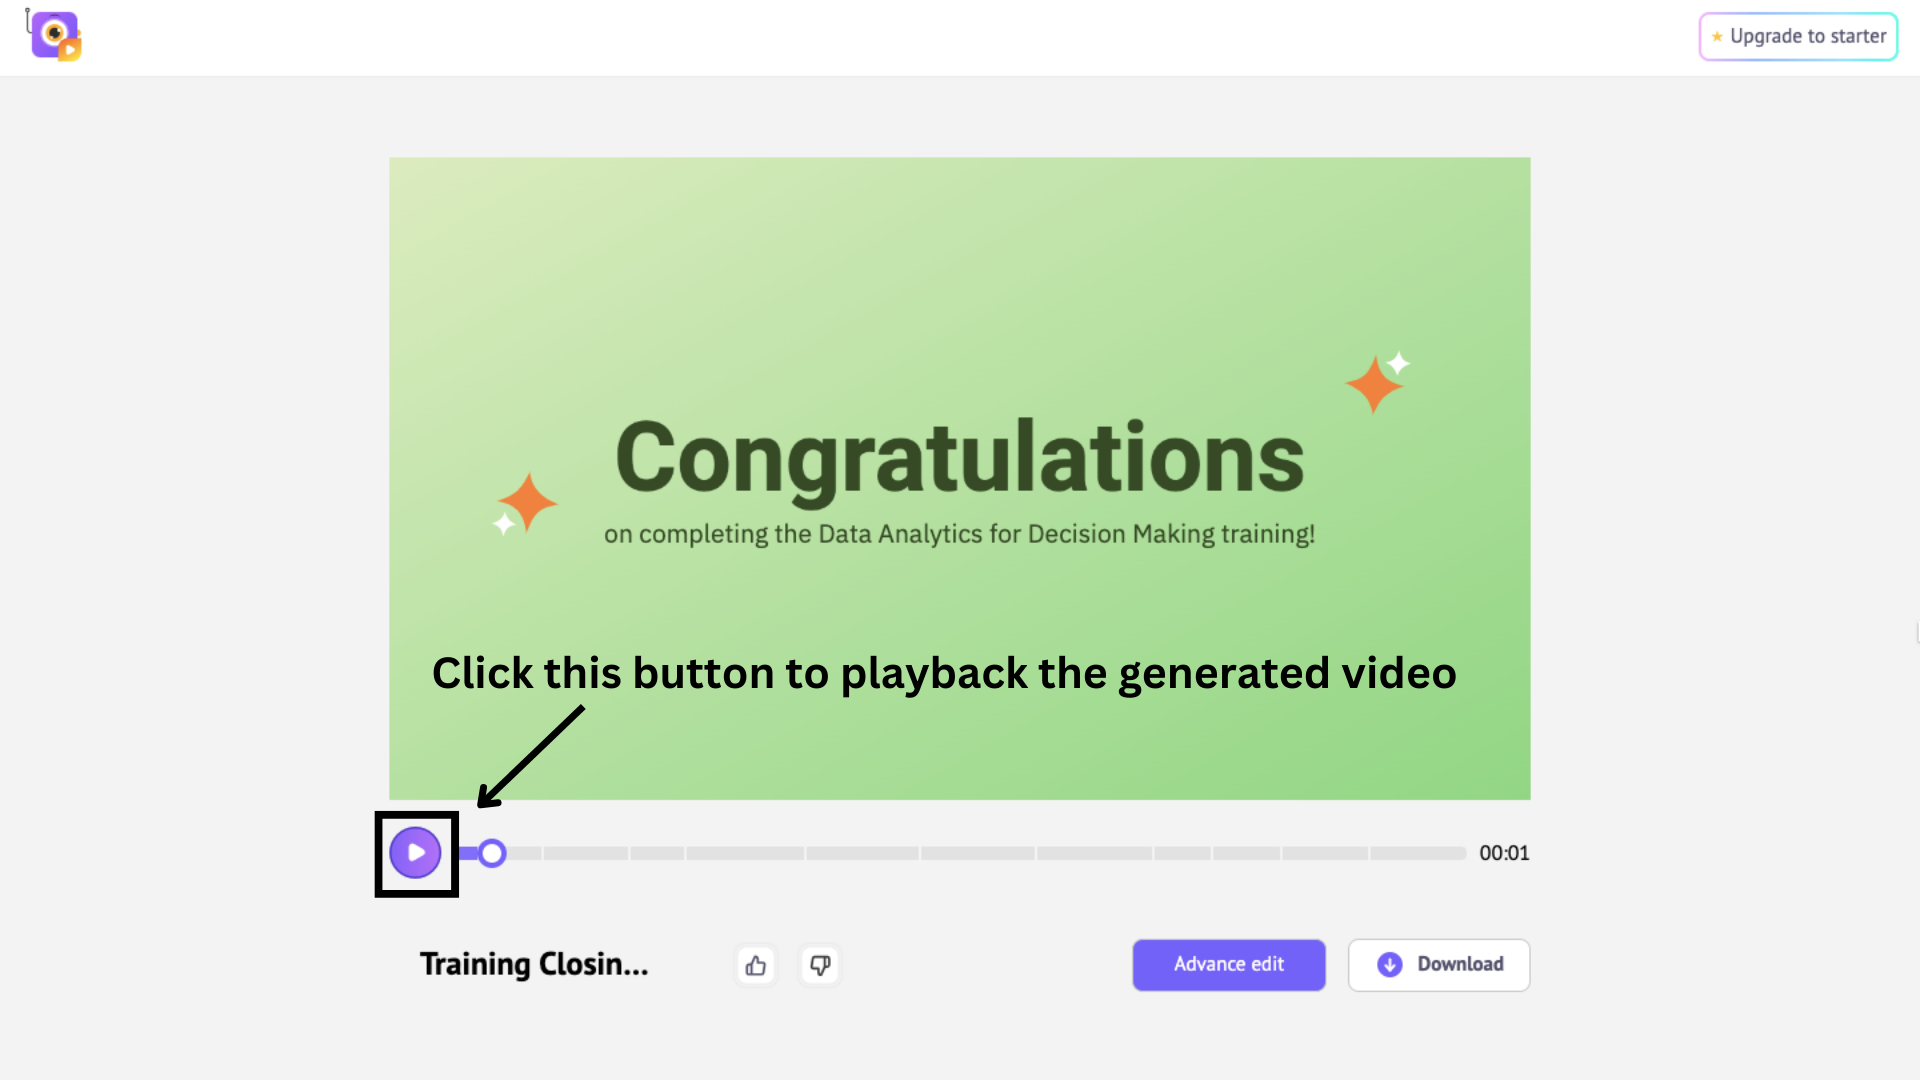
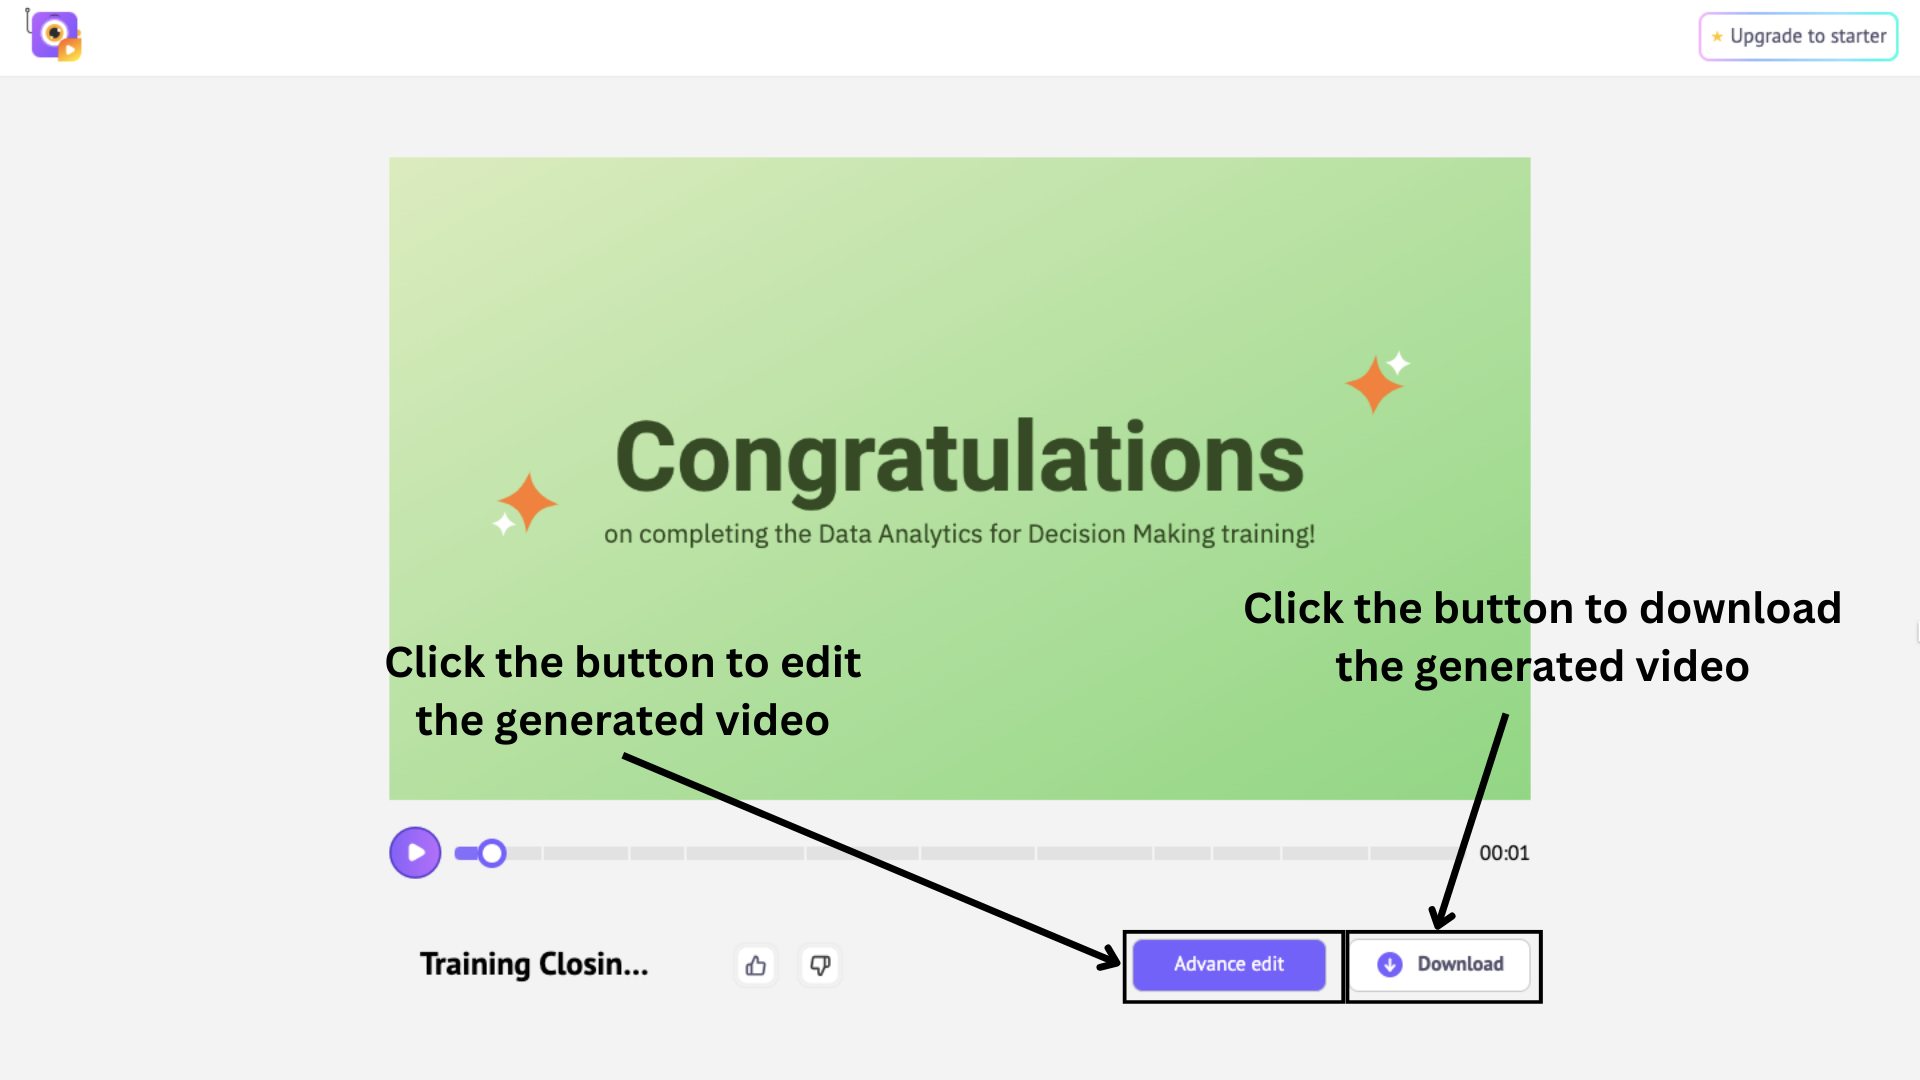
If you like the video as it is, click on Download to download it from the exports page. Or, if you need to do a little bit of alteration, click on the Advanced Edit option.
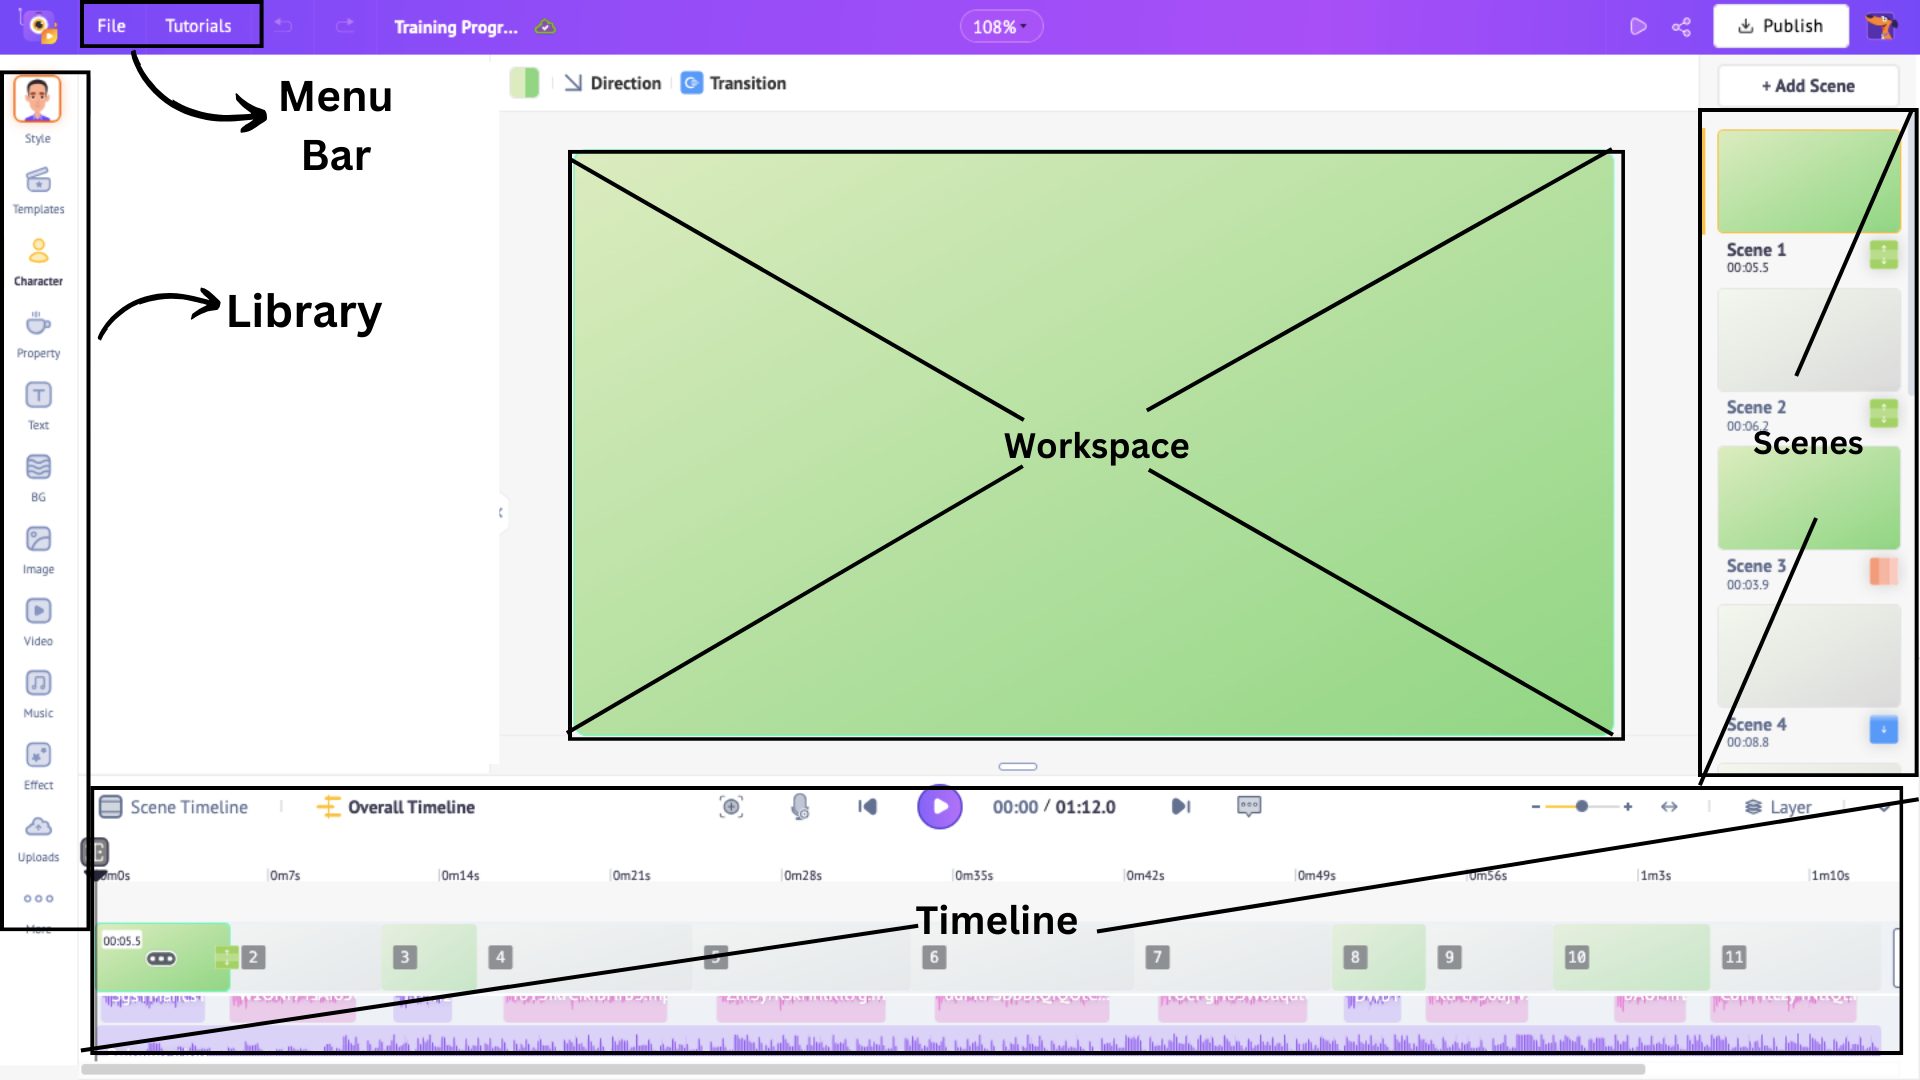
This will take you to the editing interface, where you can fine-tune your video. Here’s a quick tour of the interface for easy navigation.
The workspace at the center is where you design and edit your video. On the left, the library offers millions of assets, while the scenes panel on the right helps you organize them.
Above, the menu bar provides tools and options, and the timeline below lets you fine-tune every detail.
Now, let’s dive into editing and adding new elements to enhance your video.
In this guide, we’ll focus on five key elements:
While Animaker offers a vast library of assets, we'll explore these essential elements and how to customize them in your video.
1. BG
Let’s start off with the background for this scene. Right now, it is a solid color. But, we can change it into a 2D background.
Click on BG in the library. This will open a huge collection of 2D backgrounds, from business and education to sports and celebrations.
Choose an appropriate background for the video and drag it to the workspace to get added.
That’s how easy it is to change the background.
2. Character
Characters add personality to your video. So, it is important that your video has the perfect characters in it.
In this generated video, there is a character with outstretched arms, and I want to change the action.
To change an existing character’s action, click on it to open the Actions & Expressions panel, then select from 1000+ options. Then, switch to the Expressions tab to match the right emotion.

I selected an explaining action for my character. Easy, right?
But what if you want a completely different character in the same pose? No problem!
Click on the character and hit Replace. This will open the character library with diverse characters of different types. Choose one and hit Apply.
Want to get even more creative? Try designing your own custom character! Watch the video below to learn how.
Now, let’s move on to the next element.
3. Property
Properties add depth and context to your video, making it more engaging. You can easily add or delete them from your scene with just a few clicks.
If you want to delete an existing property in the video, simply click on it and hit the bin icon.

Now, to add a property, simply click on the Property option in the library, which gives you access to over 90K+ options, including office furniture, shapes, buildings, and icons.
Click on a property to add it to the scene, then resize and position it as needed. I have added a data icon to the scene.
When you add a property, a blue section appears in the timeline, representing its duration. You can adjust when the property appears and disappears by dragging the edges of this section.
This helps control its visibility in the scene.
To make properties appear more dynamic in your video, you can add animation effects. Click on the property in the scene and select the Animation button to explore a variety of 35+ enter and exit effects.
Once applied, you can fine-tune the duration of the animation by adjusting the highlighted sections on the timeline.
This simple trick makes your properties stand out and enhances your video's overall impact. And just like that, you've mastered properties! Now, let’s move on to the next element.
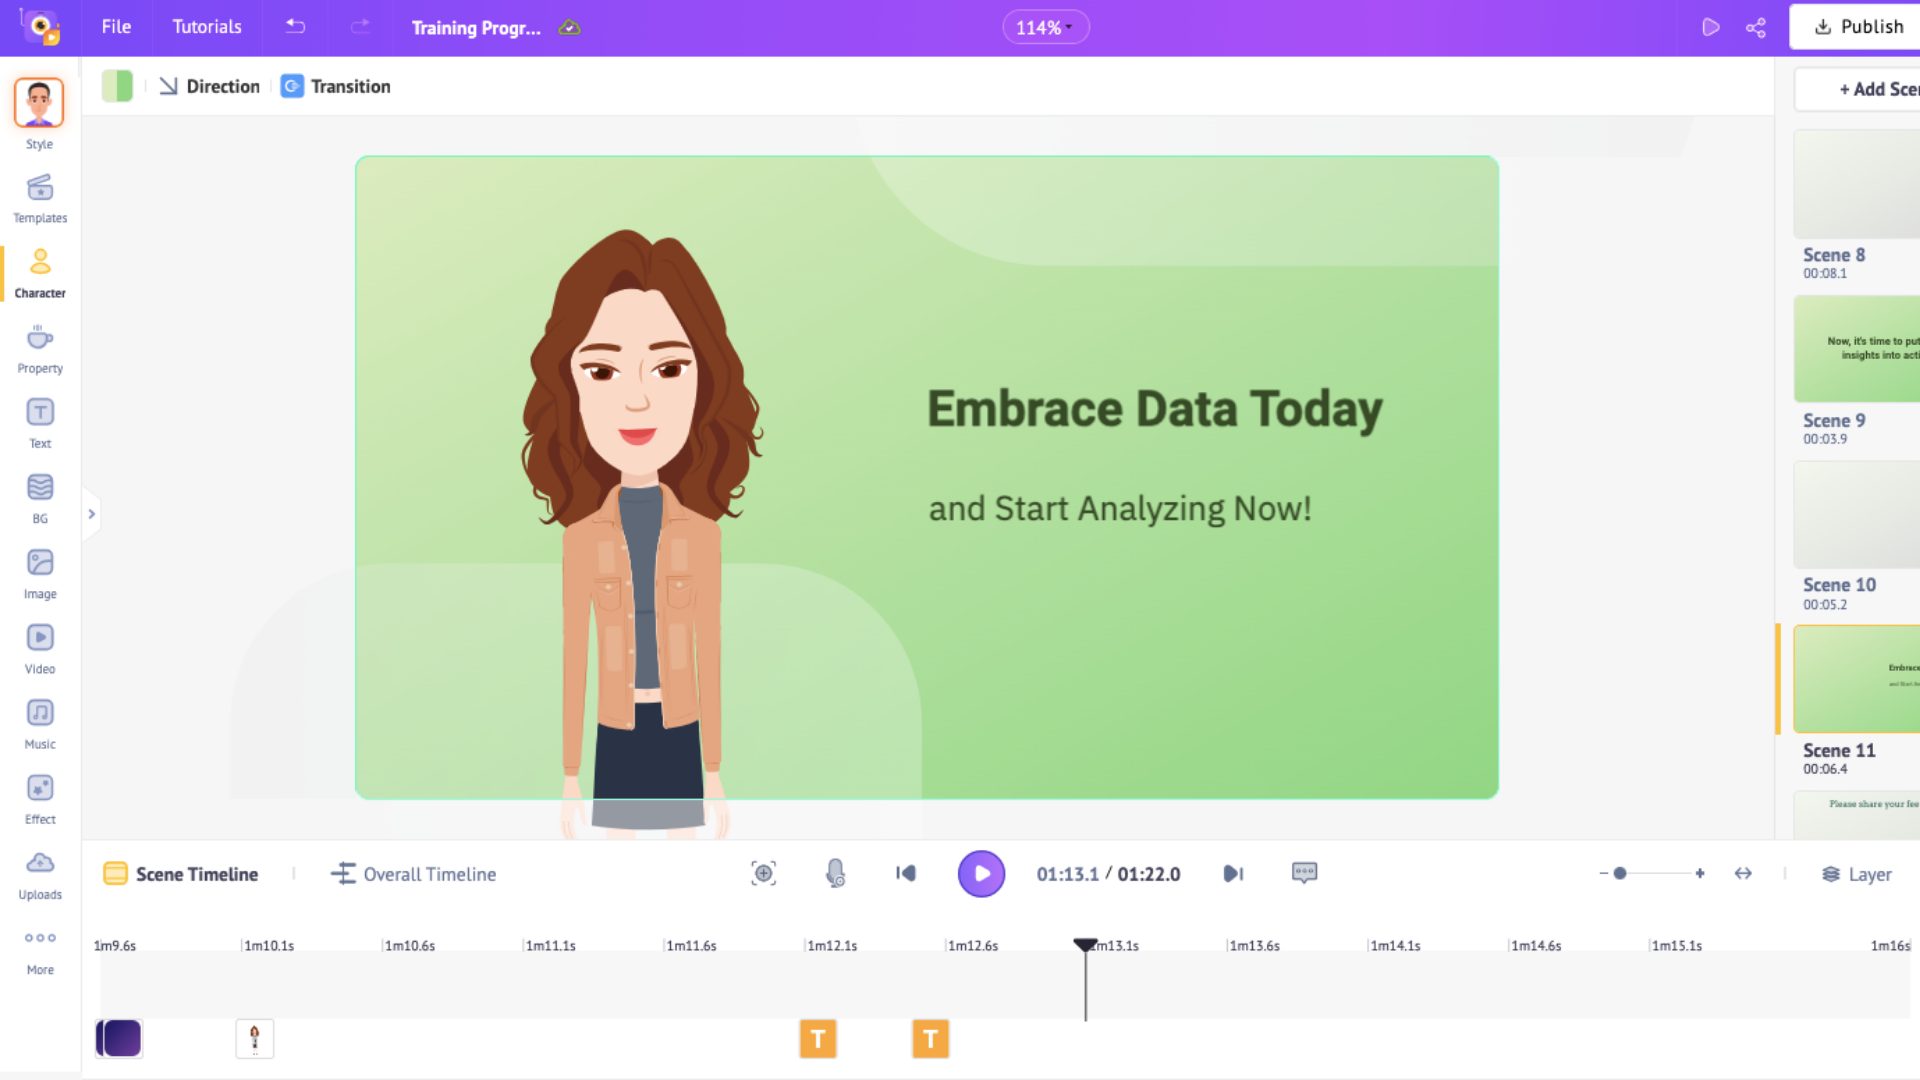
4. Text
Text plays a crucial role in videos, highlighting key messages while keeping viewers engaged. It’s important to use minimal text to avoid overwhelming the audience.
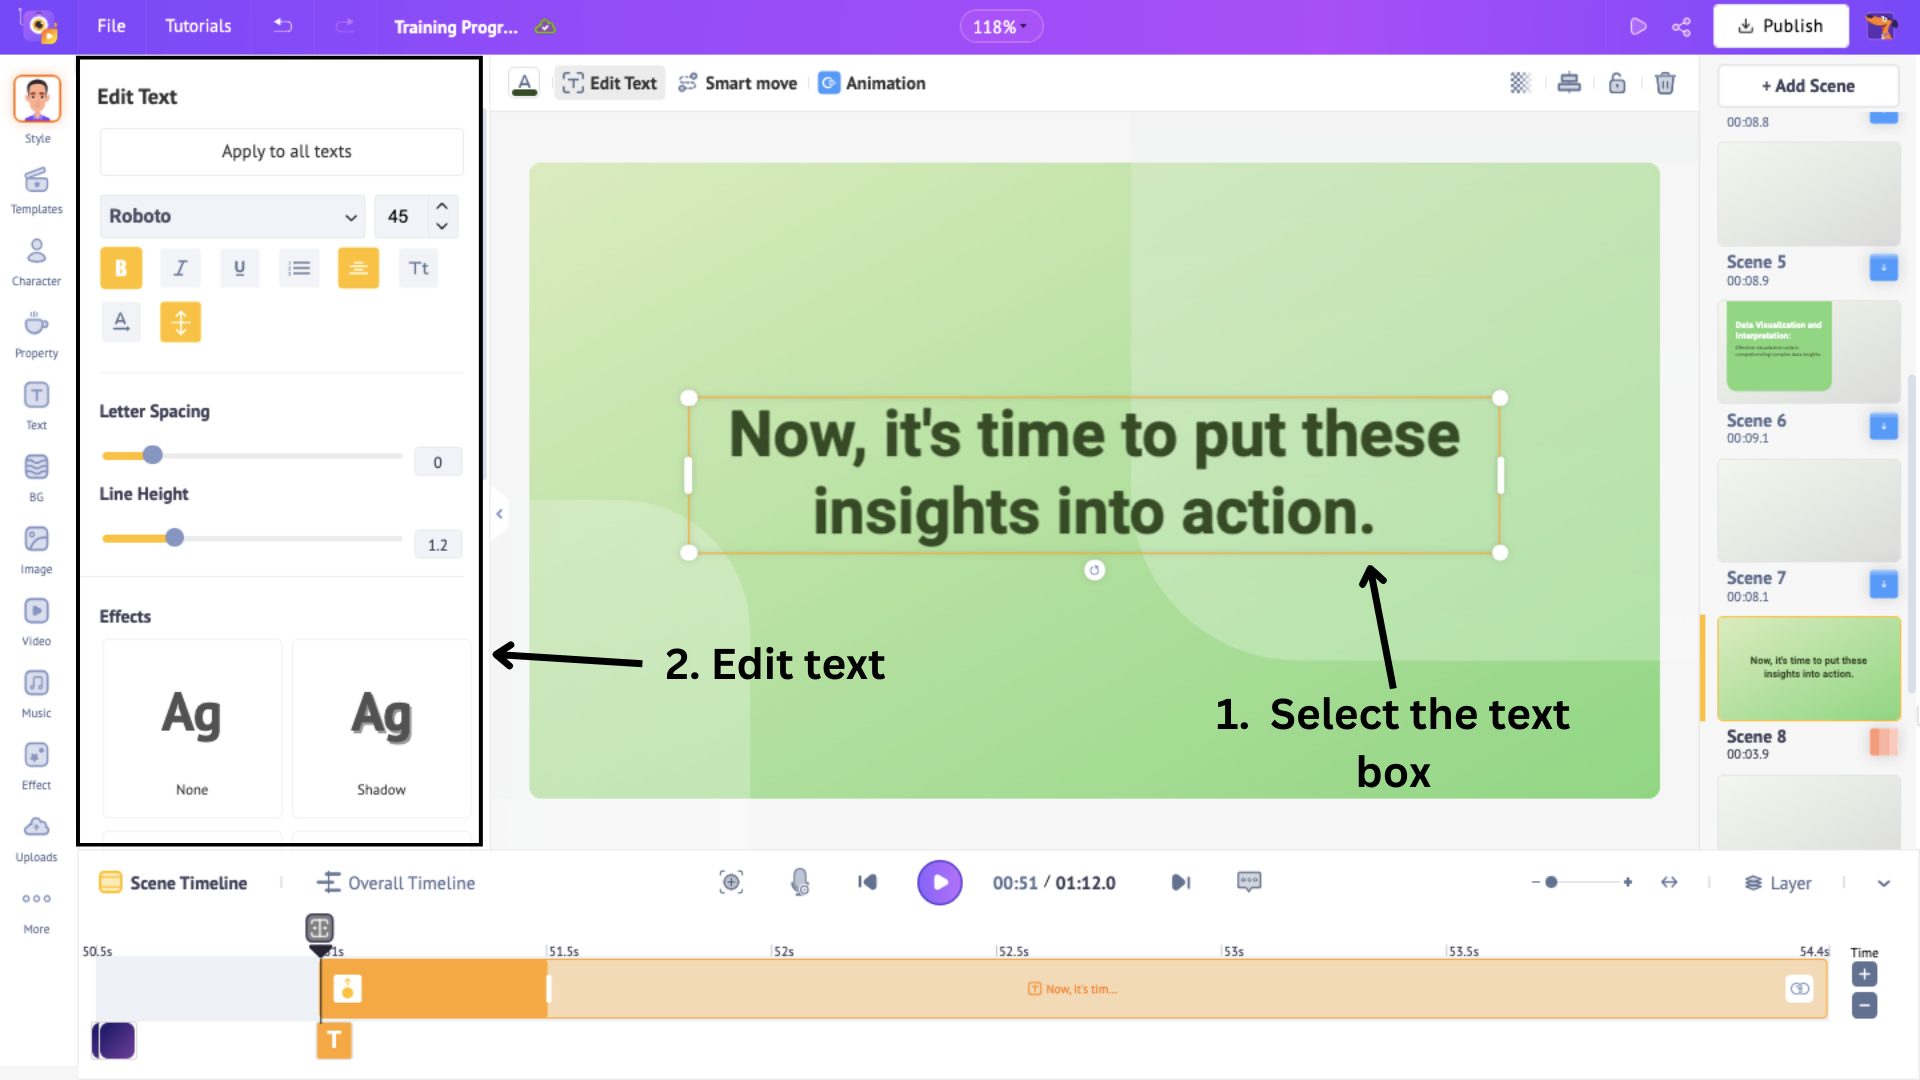
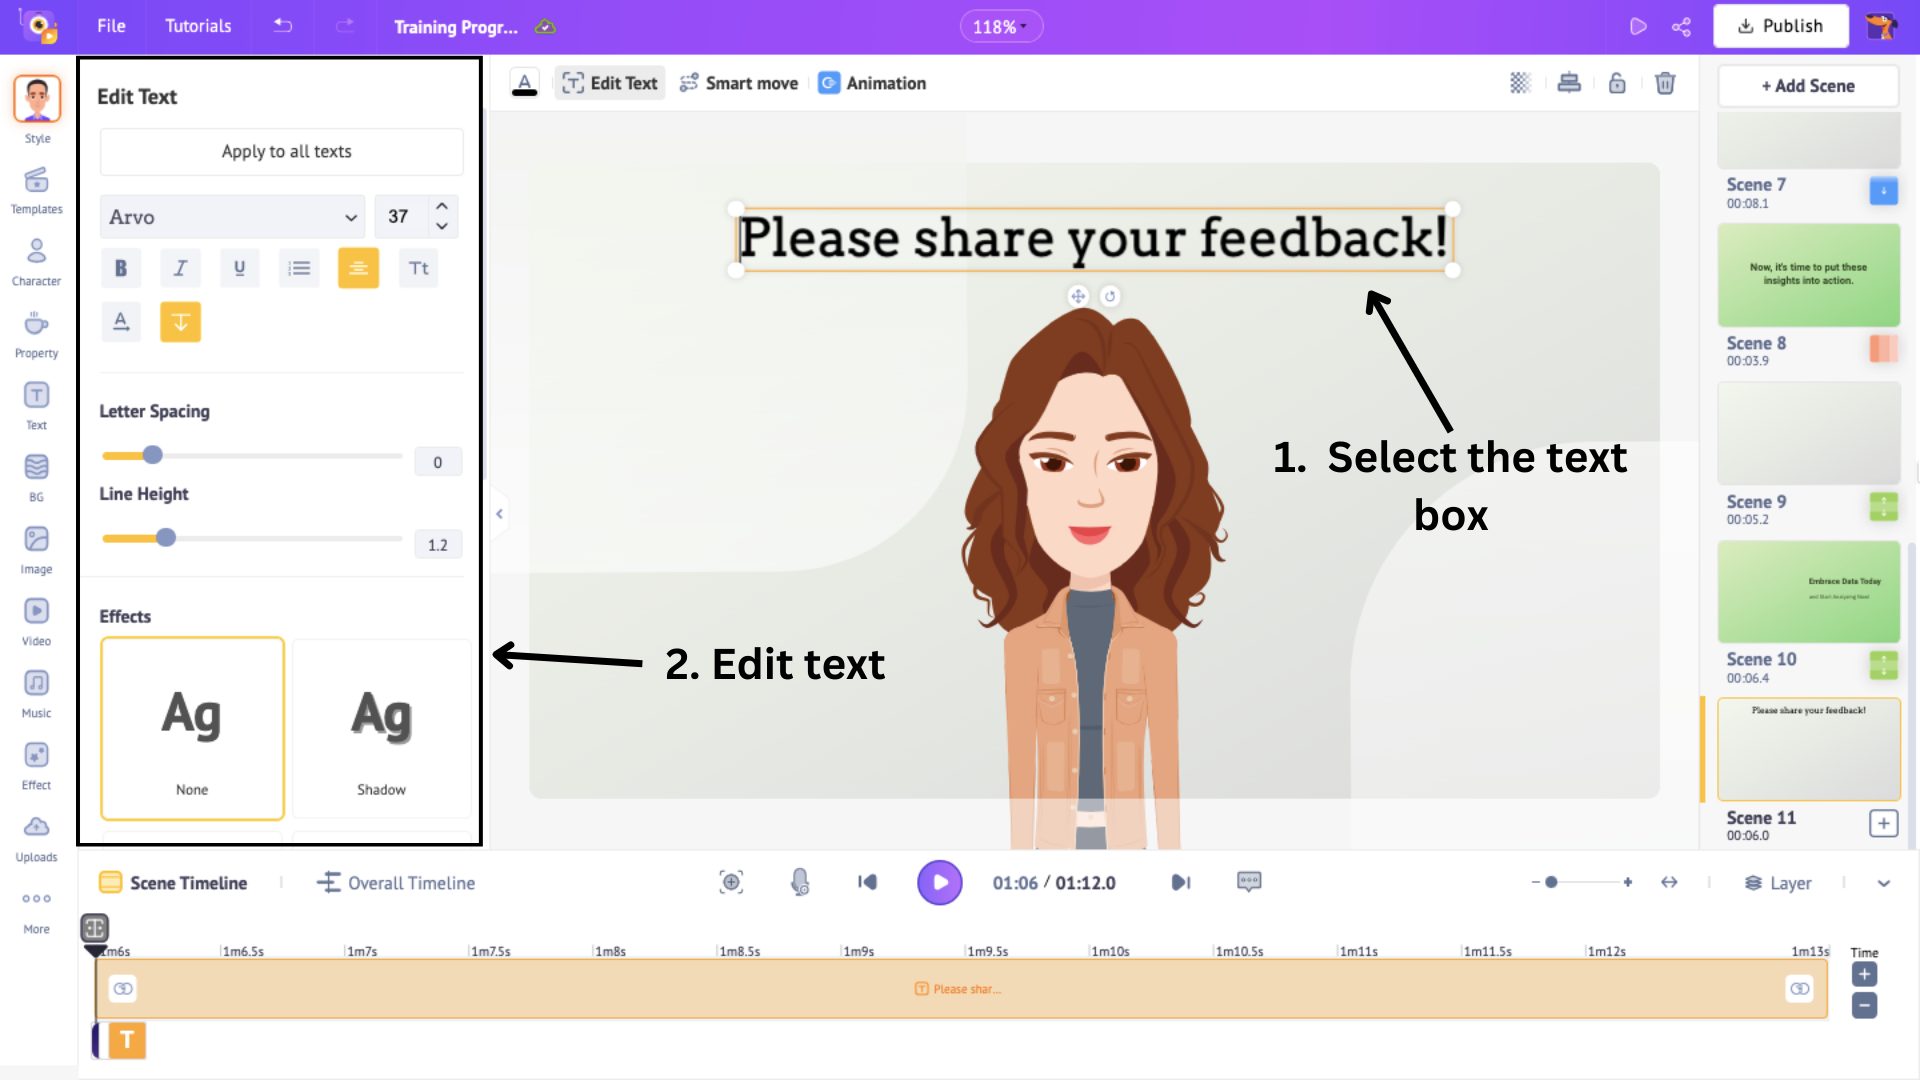
To replace existing text, click on the text box, delete the current text, and enter your desired text.
Editing panel appears on the side, allowing you to adjust the font, size, and other settings.
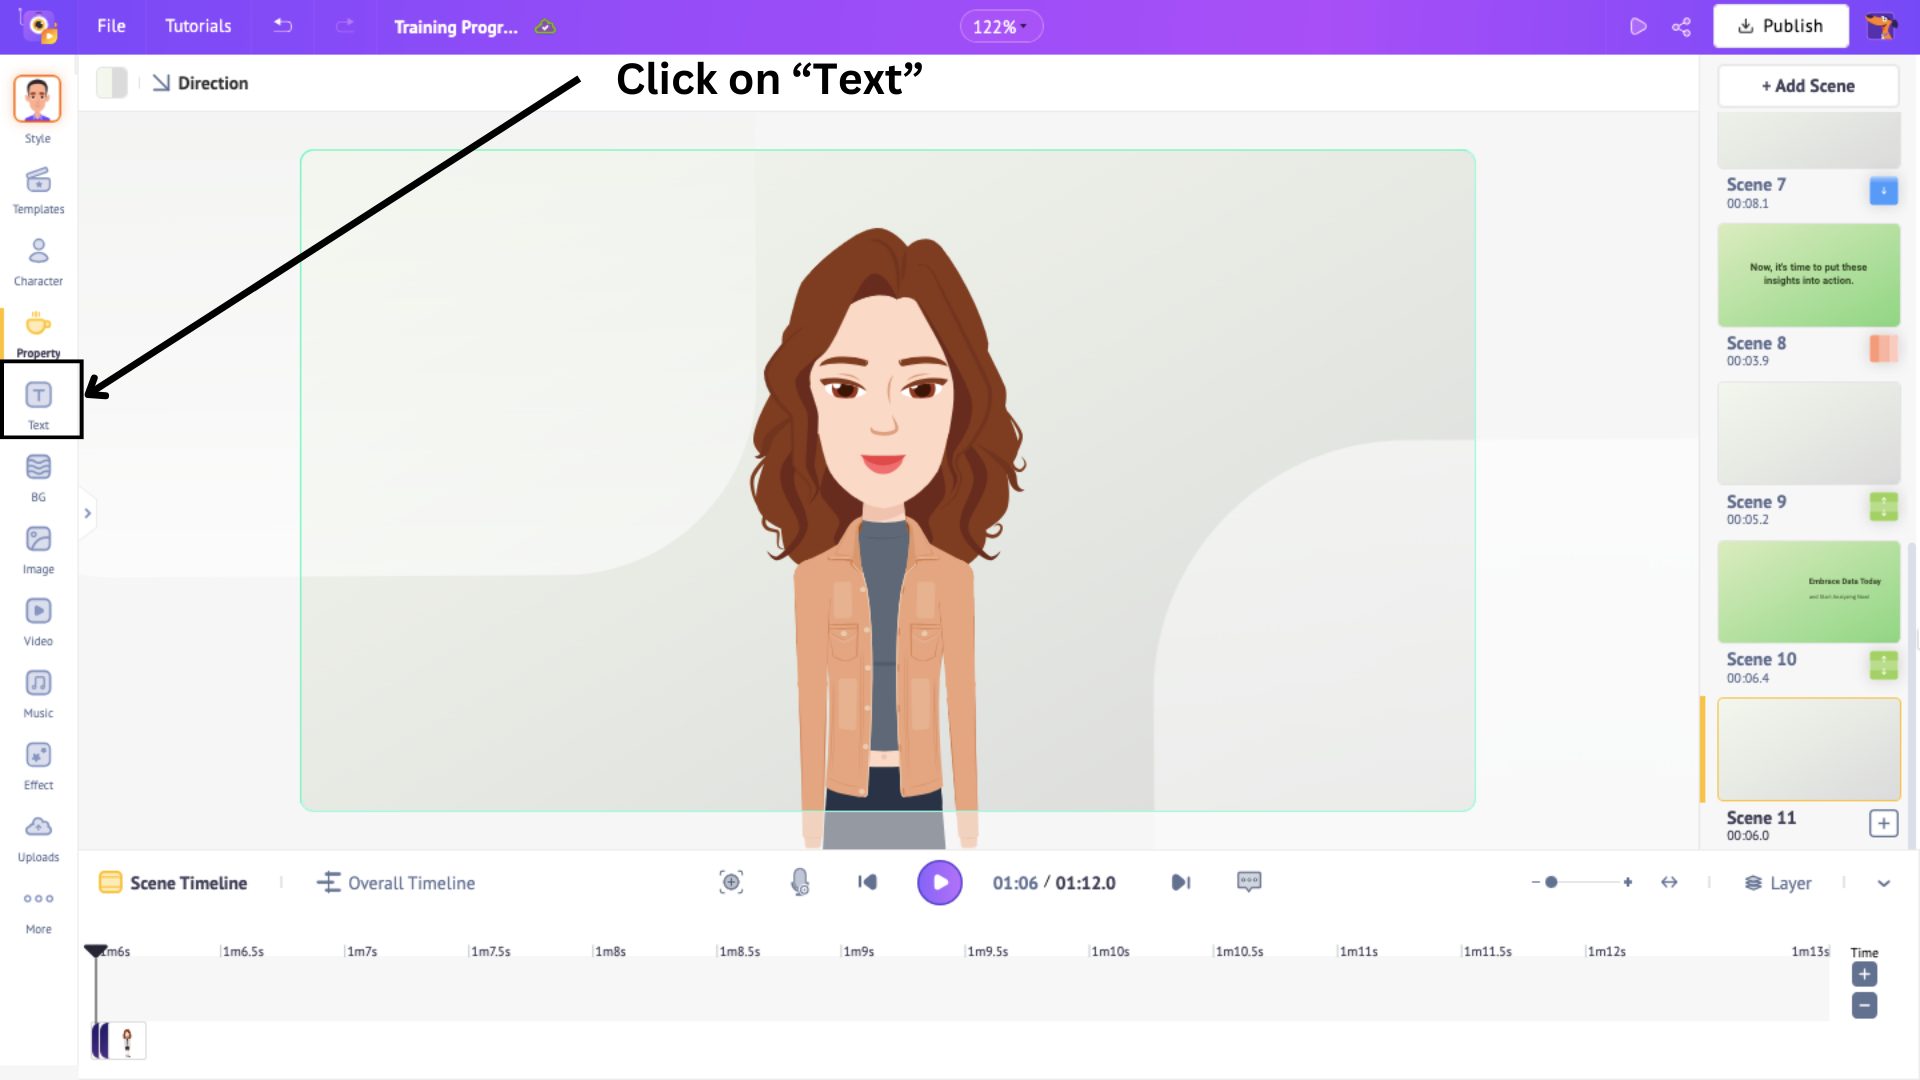
However, if you need a new text box, click on the Text option in the library.
You'll find two types - Plain and Pre-builds. Plain text requires custom styling, while Pre-builds come with ready-made fonts and animations.

Select your preferred option, position it in the scene, and type in your text.
You can further customize the text in the edit panel like we did before.
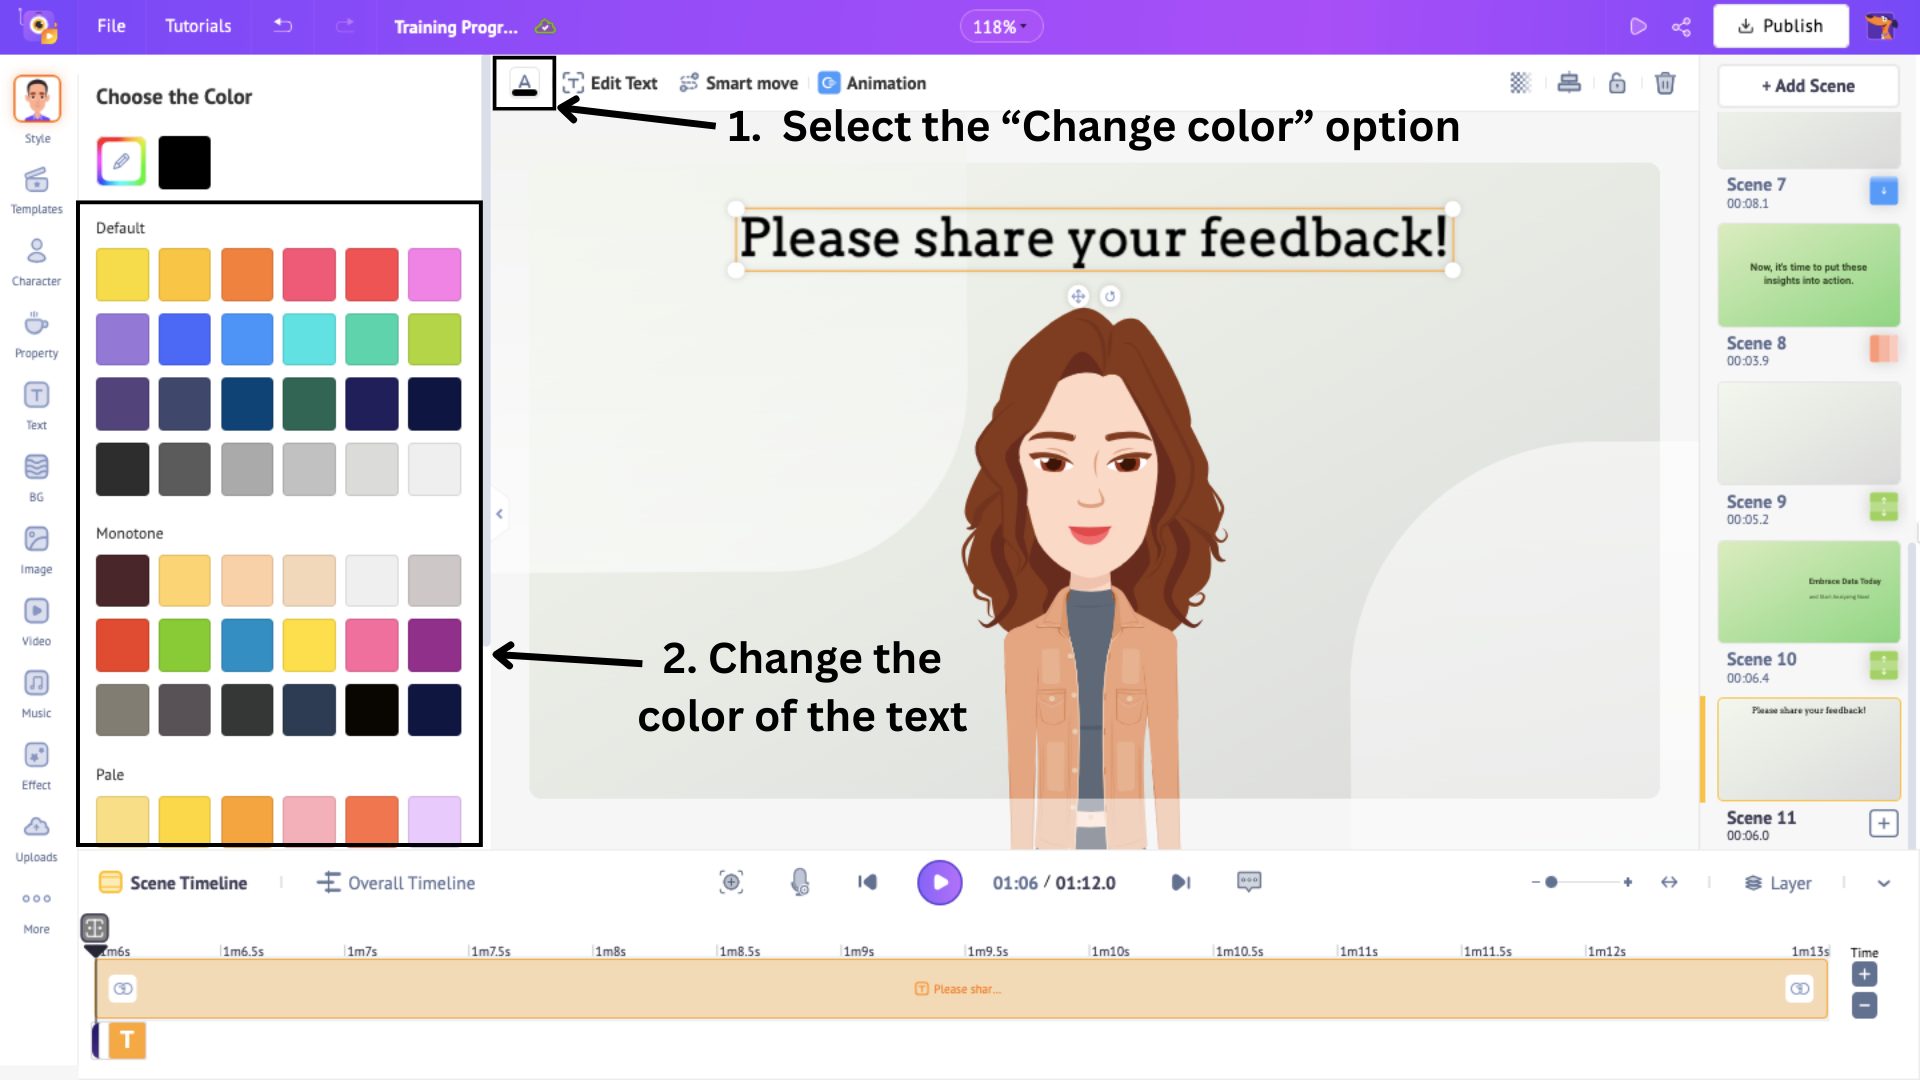
You can change the text color by clicking on the color box on top of the workspace.
Once added, you can adjust the text duration by adjusting the orange section on the timeline.
And just like we did with property, we can add animation to the text as well.
Click on the text box, select Animation, and choose an enter and exit effect.
Once applied, adjust the duration by dragging the inner edges to control the animation duration.
And that’s it! Now, let’s move on to the final key element.
5. Music
Music sets the tone for your video, making it essential to choose the right track.
The generated video already includes a music track. If you're happy with it, you can skip to the final part. However, if you'd like to change it, it's a simple process.
First, go to the Overall Timeline, click on the existing track, and select Delete to remove it.
Next, open the Music section in the library and expand the window by clicking on Expand Library.
Animaker offers 30,000+ music tracks categorized by genre. You can browse through these genres or search by mood and emotion to find the perfect track.
Hover over a track to preview it, and click to add it to the timeline.
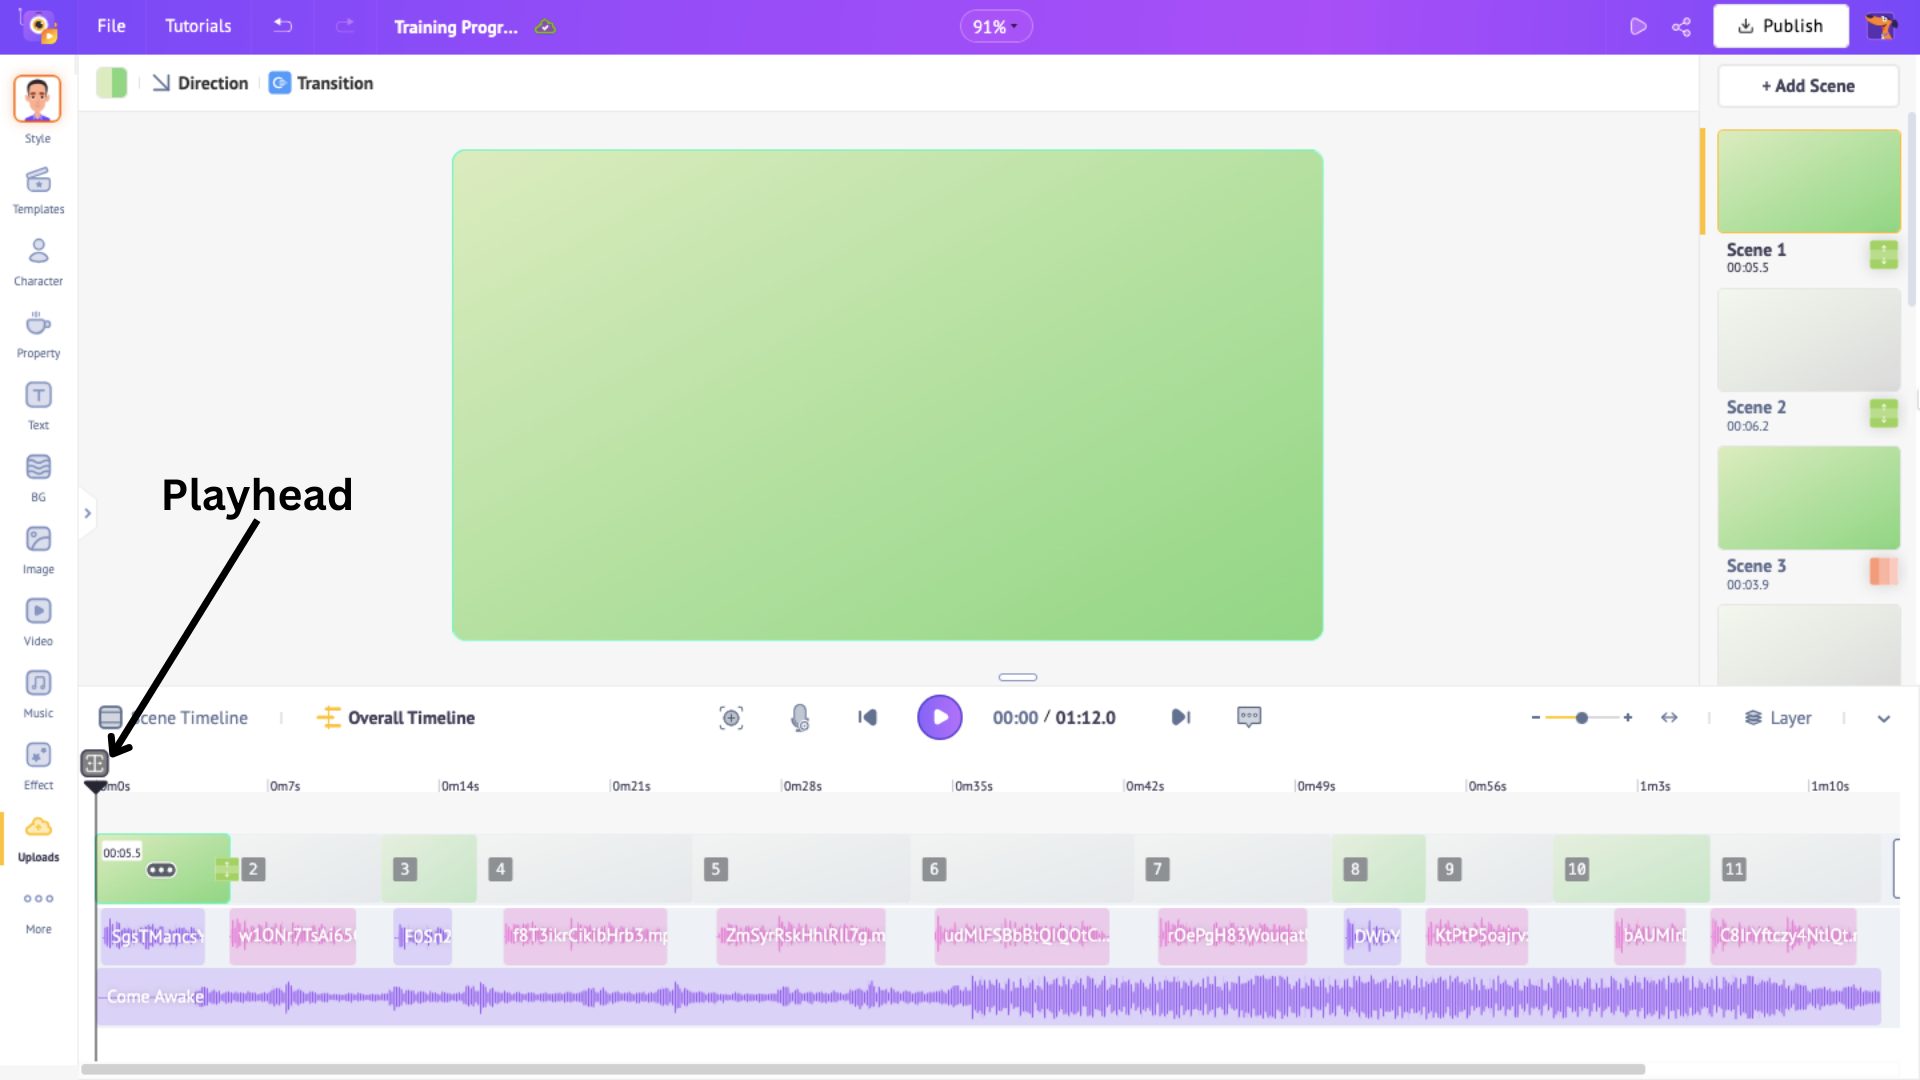
Keep in mind that music is added from the playhead's position on the timeline. If you want the track to start at the beginning, make sure the playhead is at the start before adding the music.
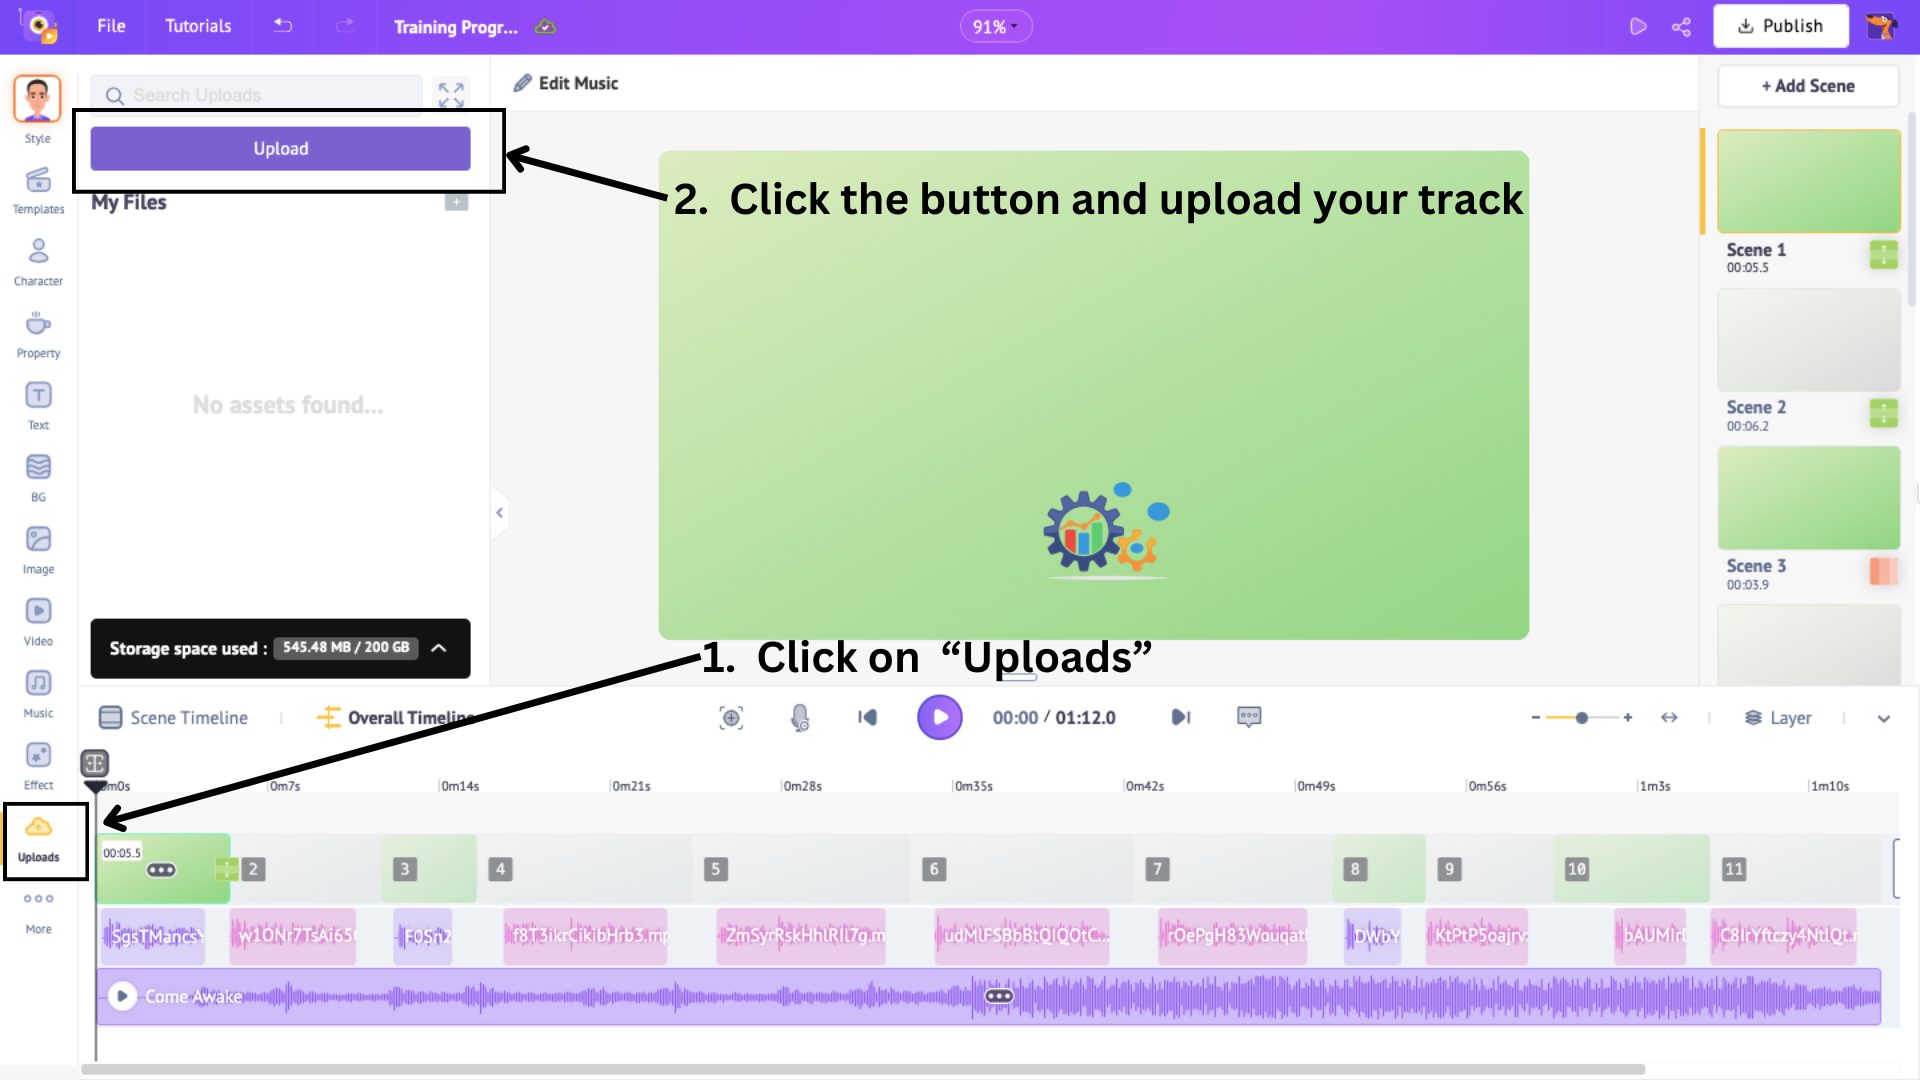
If you prefer to use your own music, go to Uploads, click Upload, and select a track from your device.
The uploaded track will be stored in the Uploads library—simply click on it to add it to your video.
And that's how you add a new music track to your video.
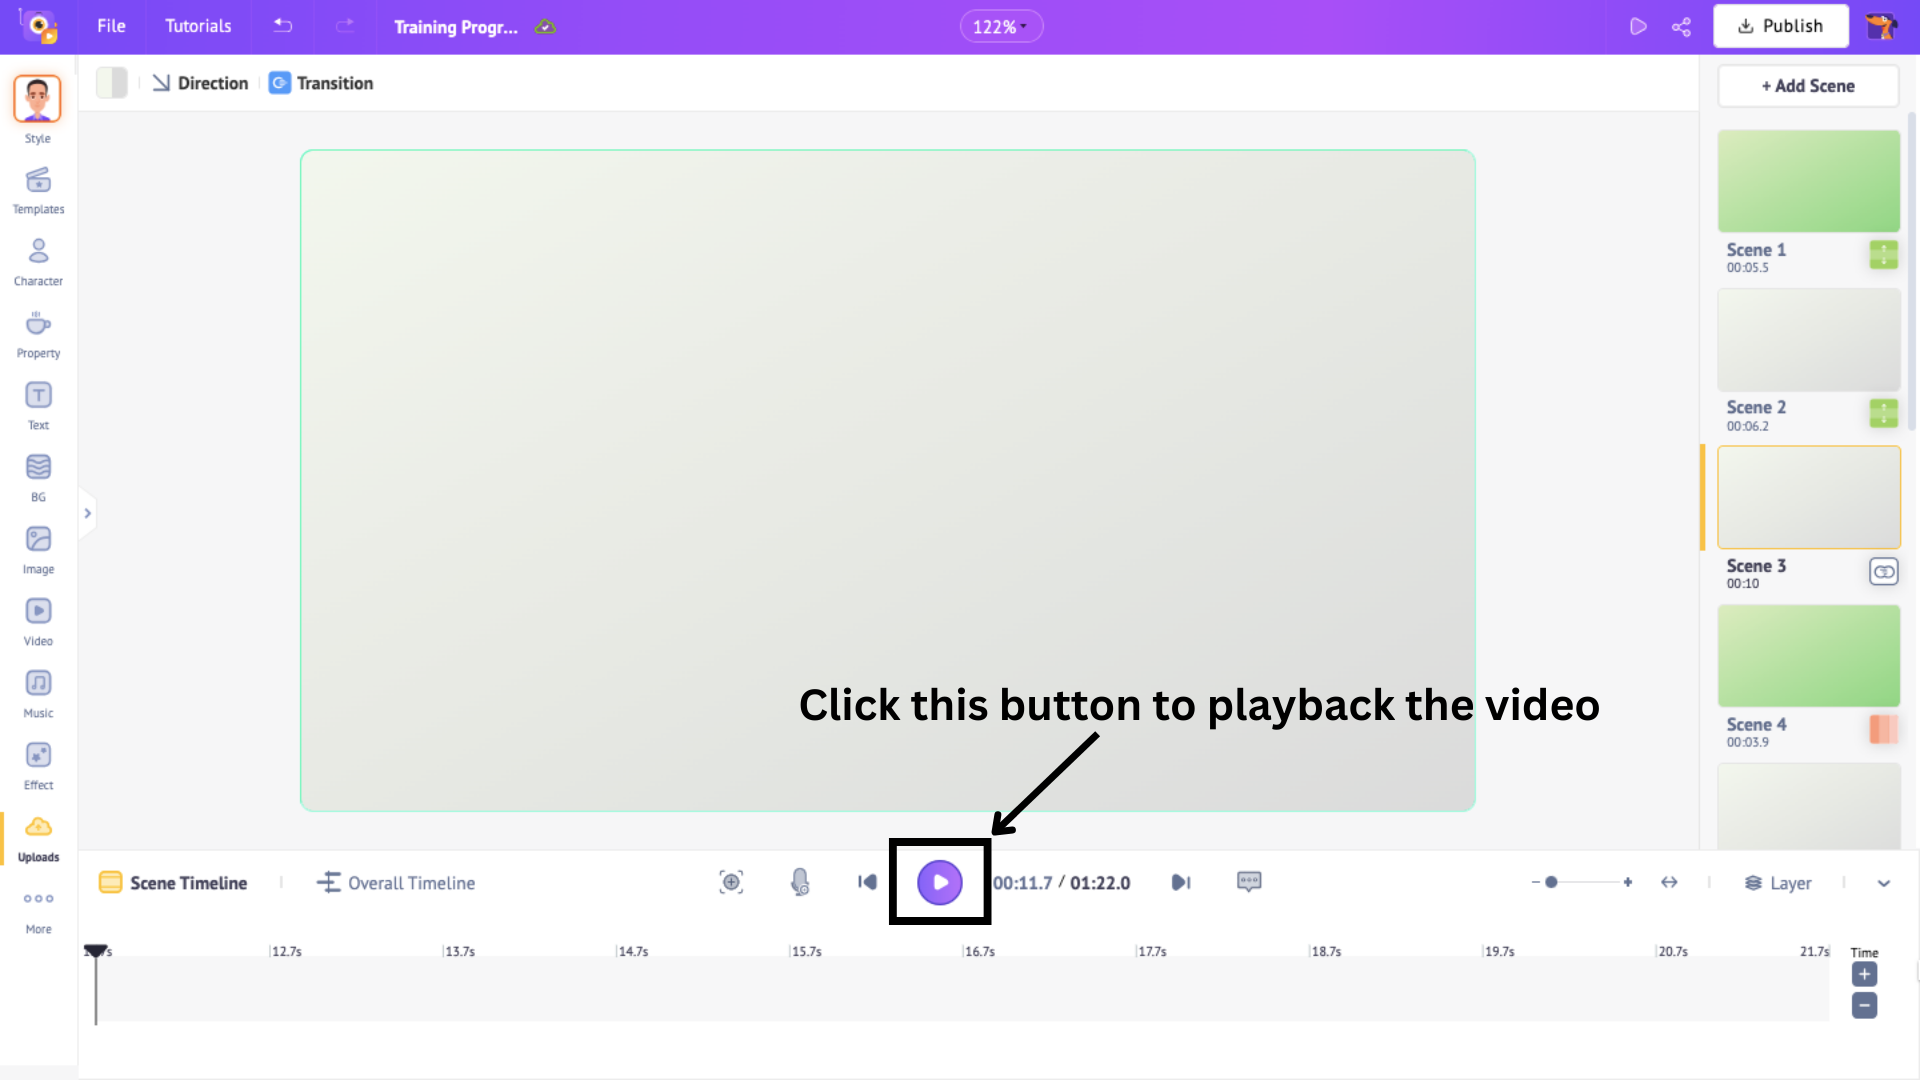
Once the track is added, hit Play to preview how it blends with your video.
Need to adjust the volume? It's simple!
Click on the track in the Overall Timeline, and click on the three dots on it and the volume slider will appear. Slide it to set the perfect balance.
And that’s it - music done effortlessly!
Now that we've covered the four key elements, let’s talk about the scenes. The video already contains plenty of scenes, but what if you want to add a new scene from scratch?
That’s possible and very simple as well!
Go to the scene after which you want to add a new one and click on the three dots. For example, I want to add a new scene in between scene 2 and 3.
This will bring up three options: Add, Duplicate, and Delete.
- Add: Inserts a blank scene so you can design from scratch.
- Duplicate: Creates a copy of an existing scene for easy modifications.
- Delete: Removes the selected scene from your video.
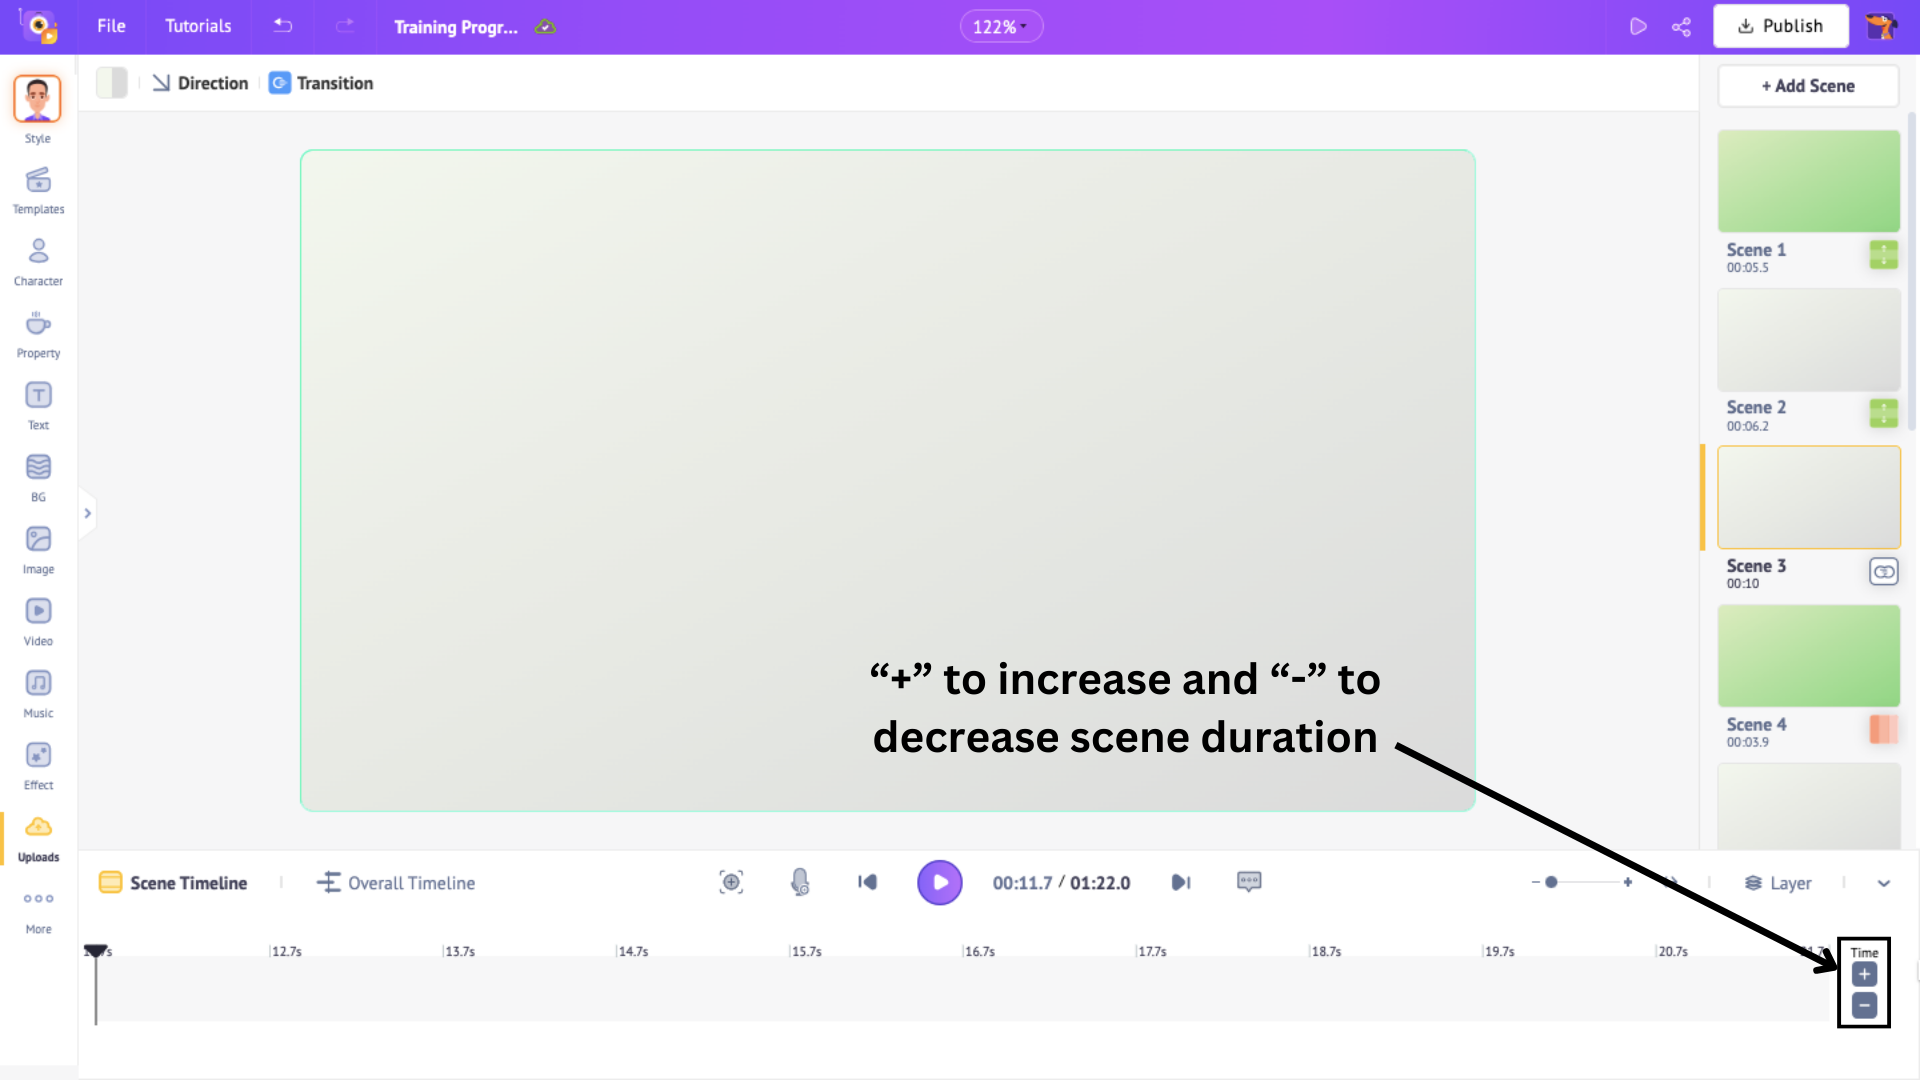
If you add a blank scene, it will have a default duration of 10 seconds, but you can adjust it using the "+" or "-" buttons on the scene timeline.
Now that we have seen how to edit and add elements and scenes to the video, let’s head to export our creation!
Step 4: Export & Share
Click on Preview to see how the entire video has turned out.

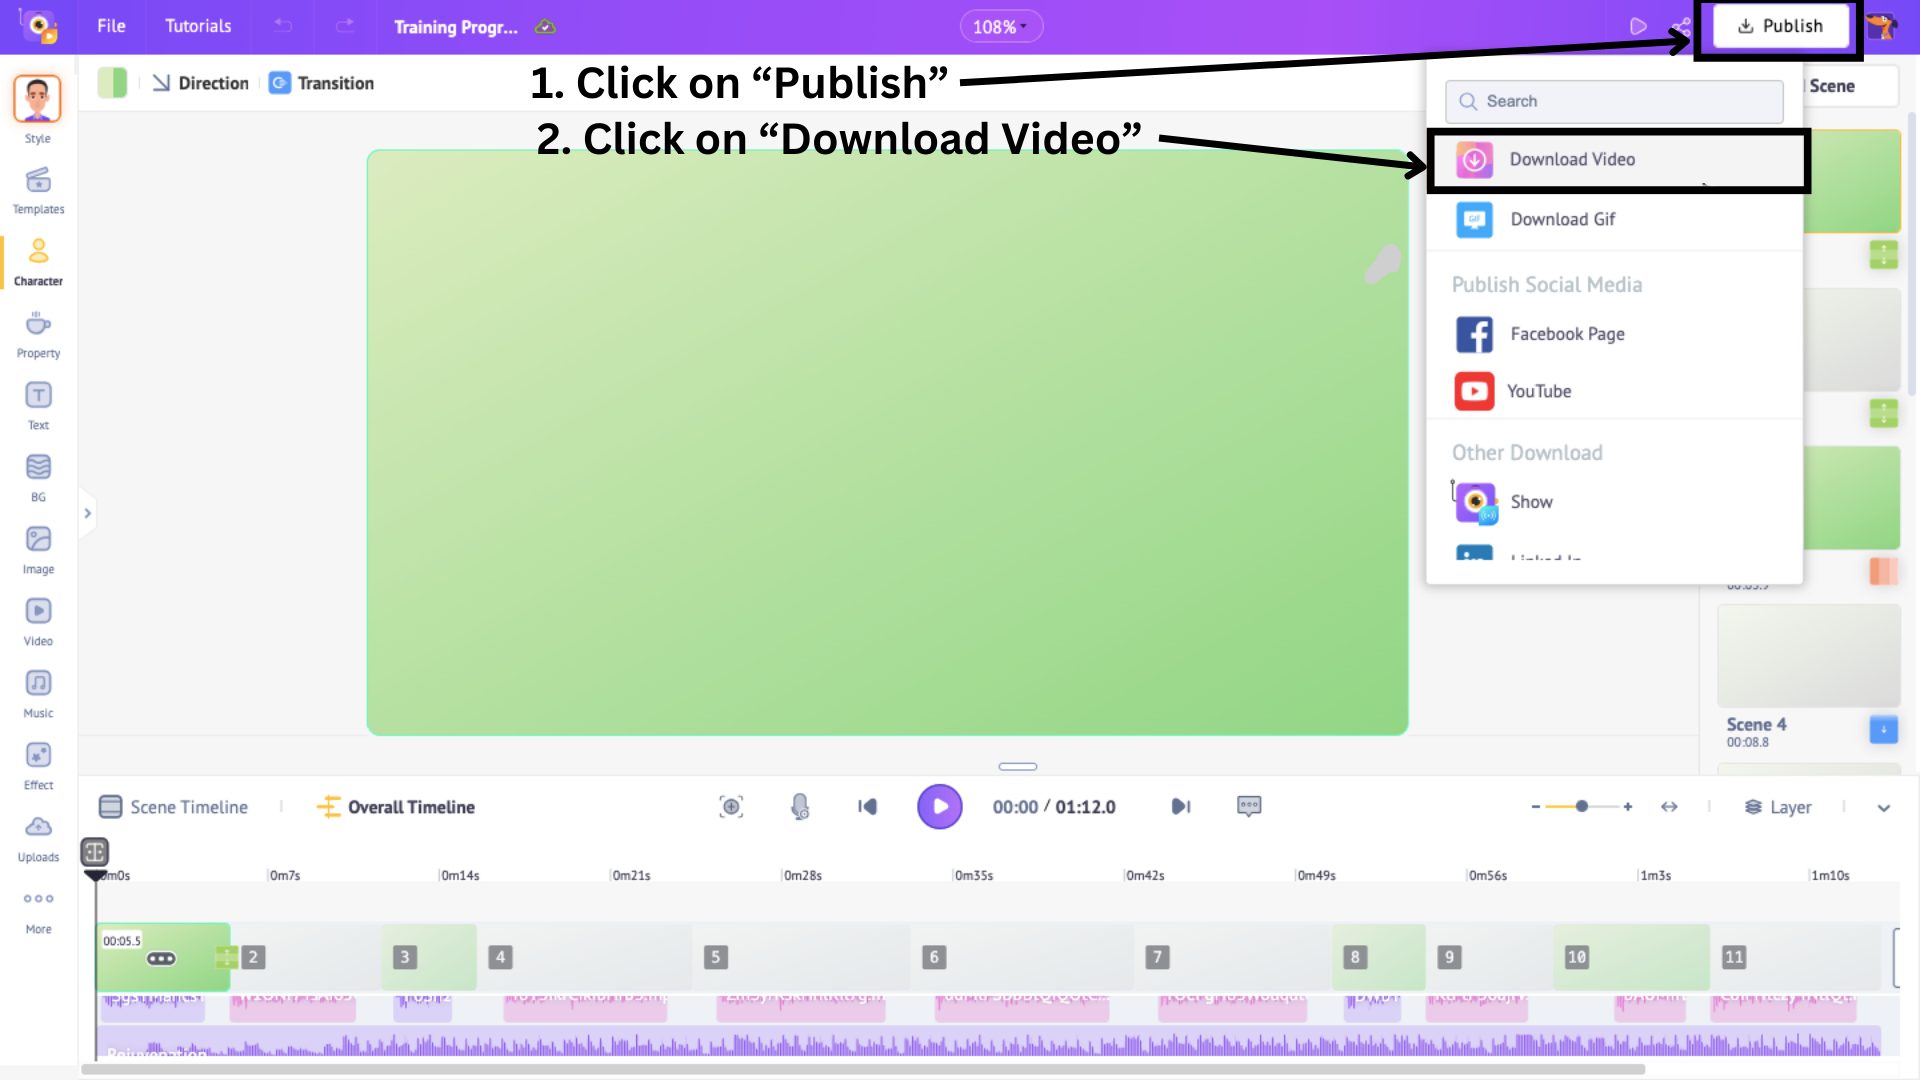
Next, to download your creation, click on Publish > Download Video.
Then, click on Download.
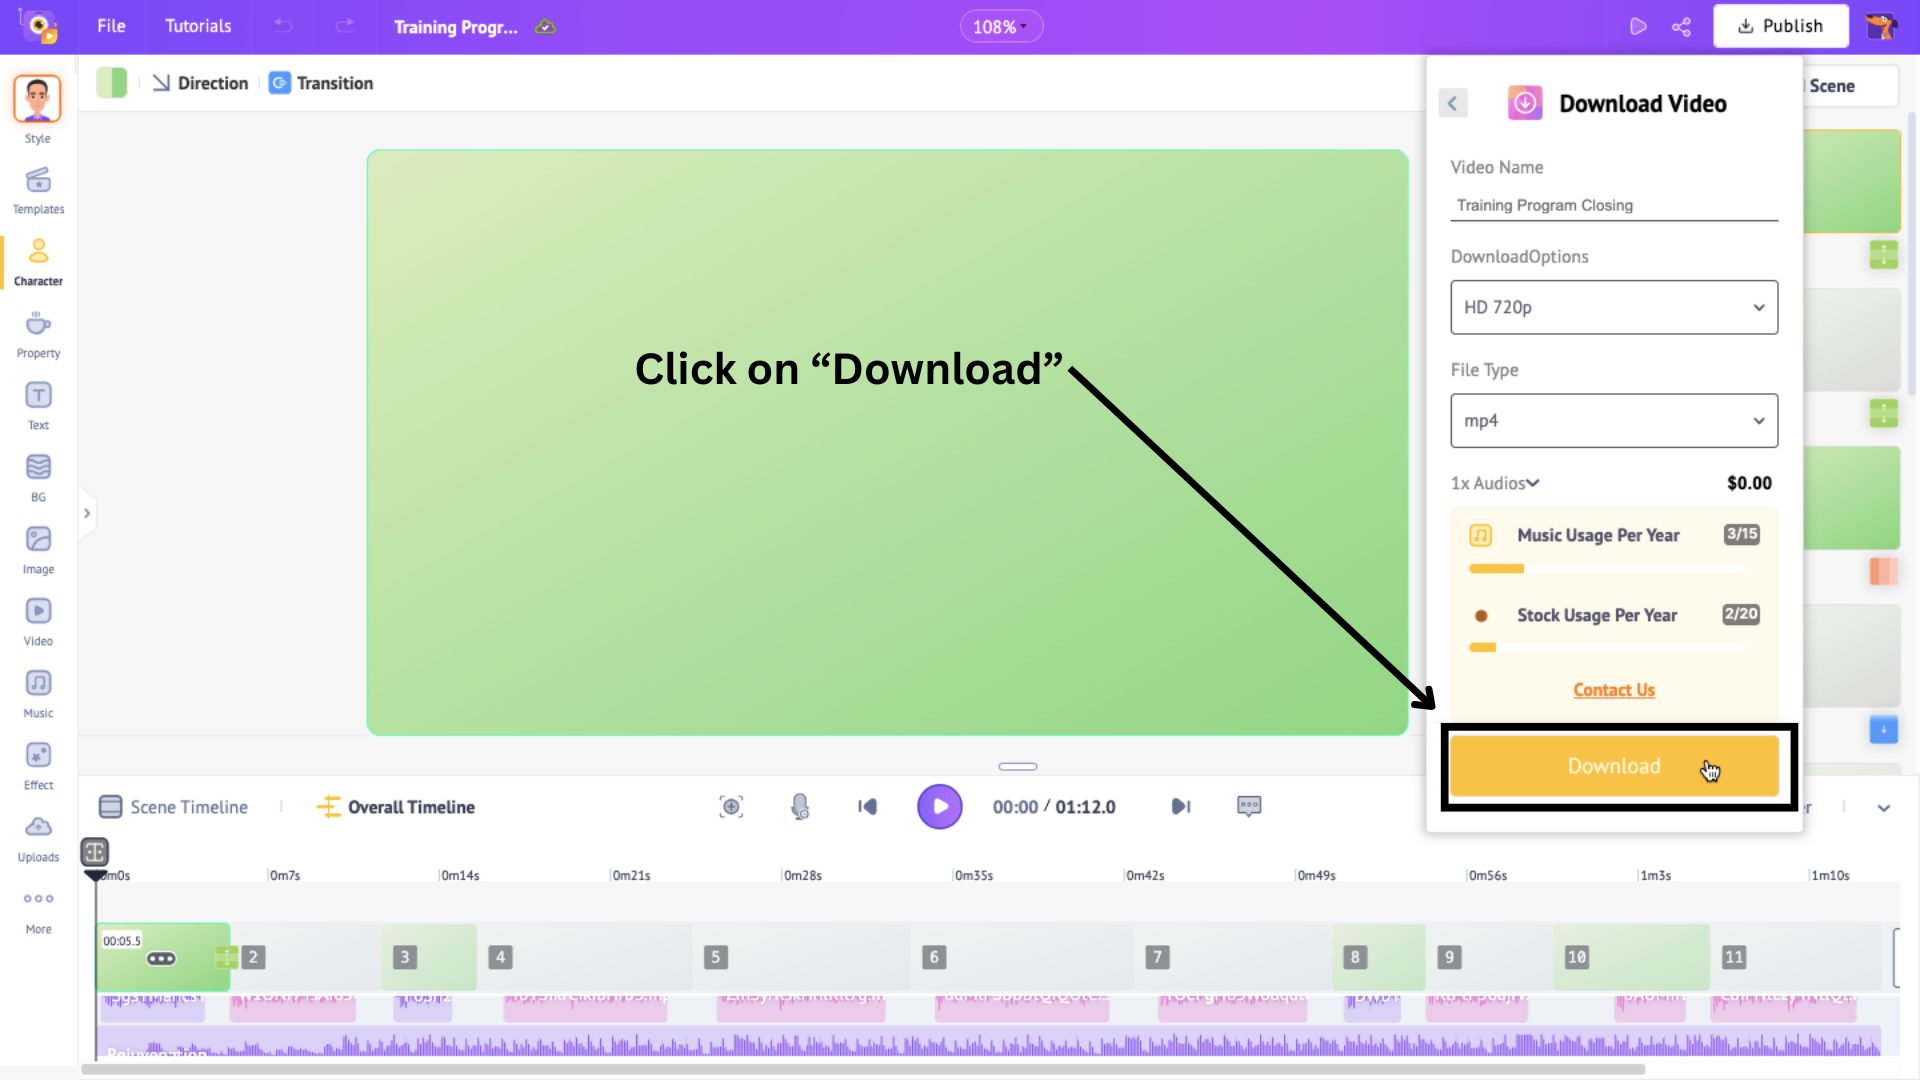
The video gets rendered, and you can download it from the Exports page.
This is how you can generate a video in a minute with Animaker’s AI and then edit it to your needs!
Apart from this, you can also use Animaker to create animated videos from templates or from scratch. Check out the links provided to learn how!
***
See how easy it is to learn how to make 2D animation with Animaker?
From adding characters and props to recording voiceovers and adding smooth transitions, everything is super easy and fun to do.
With tons of customization options and a huge library of assets, you can make animated videos without hassle.
In just a few clicks, you can bring your ideas to life and download your animated video, ready to impress.
So, what are you waiting for?
Head over to Animaker’s 2D animation software today and start creating your animation magic and don't forget to check out our iOS app for fun and exciting contests to win big!