How to Create a Square Video in iMovie (With Pictures)
Wanna know how to create a square video in iMovie?
In this article, we give you step-by-step instructions on how to create a square video in iMovie.
And as a bonus, we also show you a free, far easier way to create square videos on Mac.
How to Create a Square Video in iMovie
It's not possible to create square videos using iMovie!
There’s no functionality to convert your video to square dimensions.
We’ll use iMovie to edit the video and then use Keynote to change the dimensions.
We’ll only be using Keynote to crop the video to square dimensions.
Keynote is a presentation software that comes preinstalled on Mac OS.
Edit and Export Your Video using iMovie
First, edit your video as you normally would using iMovie.
Make all the audio and video adjustments.
Use the editing functionalities that are unique to iMovie.
Once you’re done editing the video, export the video from iMovie
Use Keynote to Change the Dimensions to Square
Now that you have edited and polished your video using iMovie, let's change its dimensions to square using Keynote.
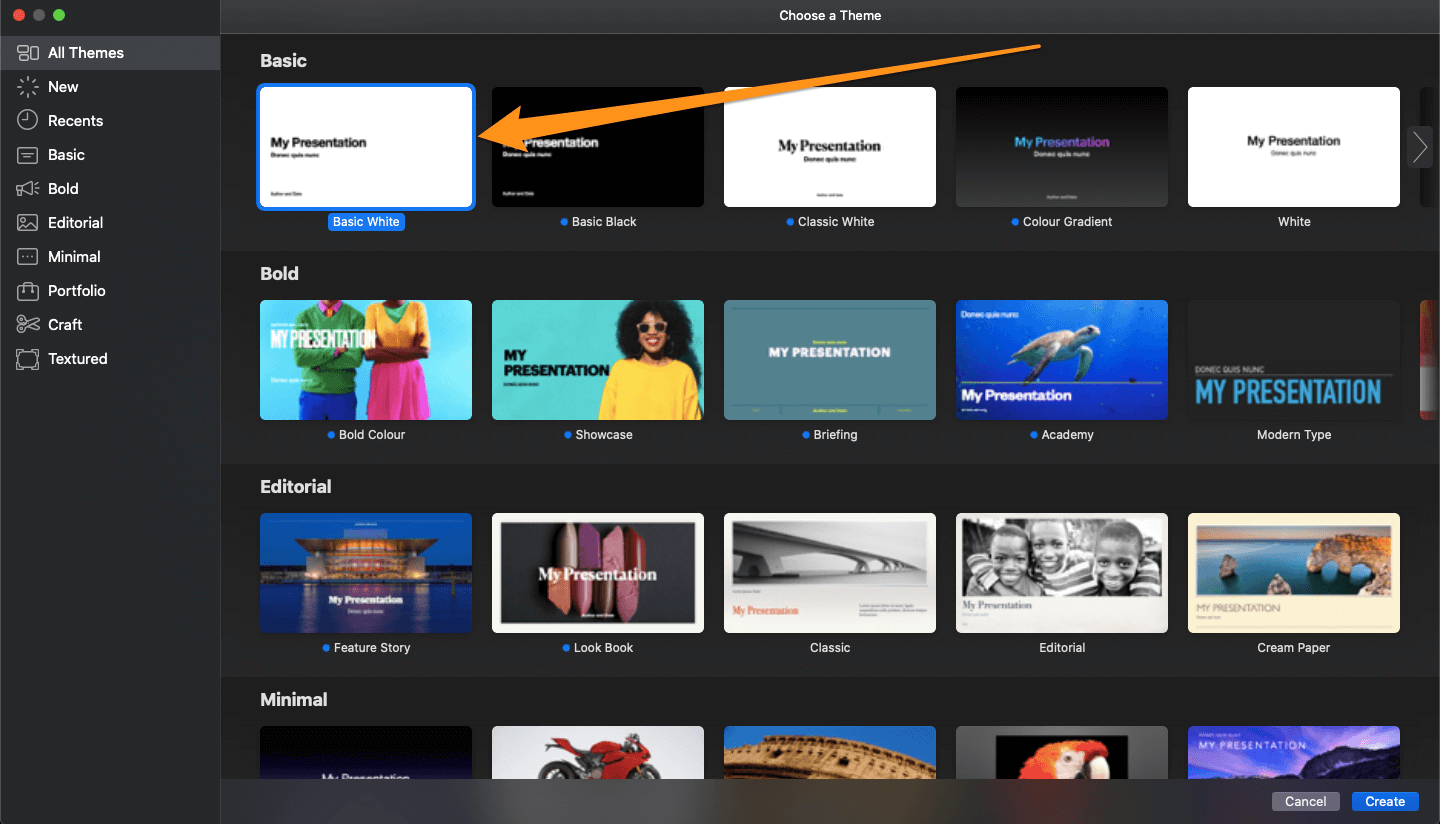
- Open Keynote and under the Basic section, select the “Basic White” theme.
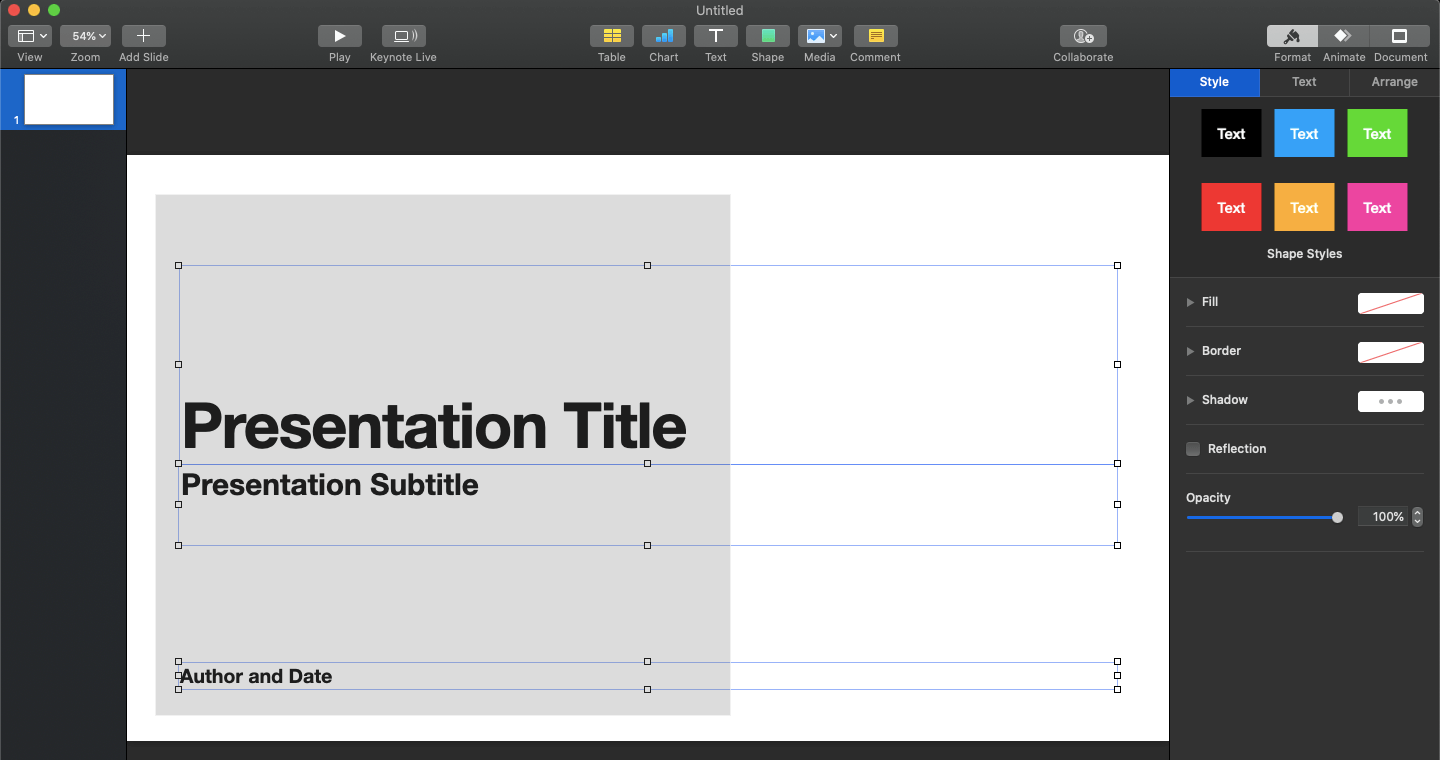
- Click and drag (or hit “cmd + A”) to select the text boxes, and hit “delete” to delete them.
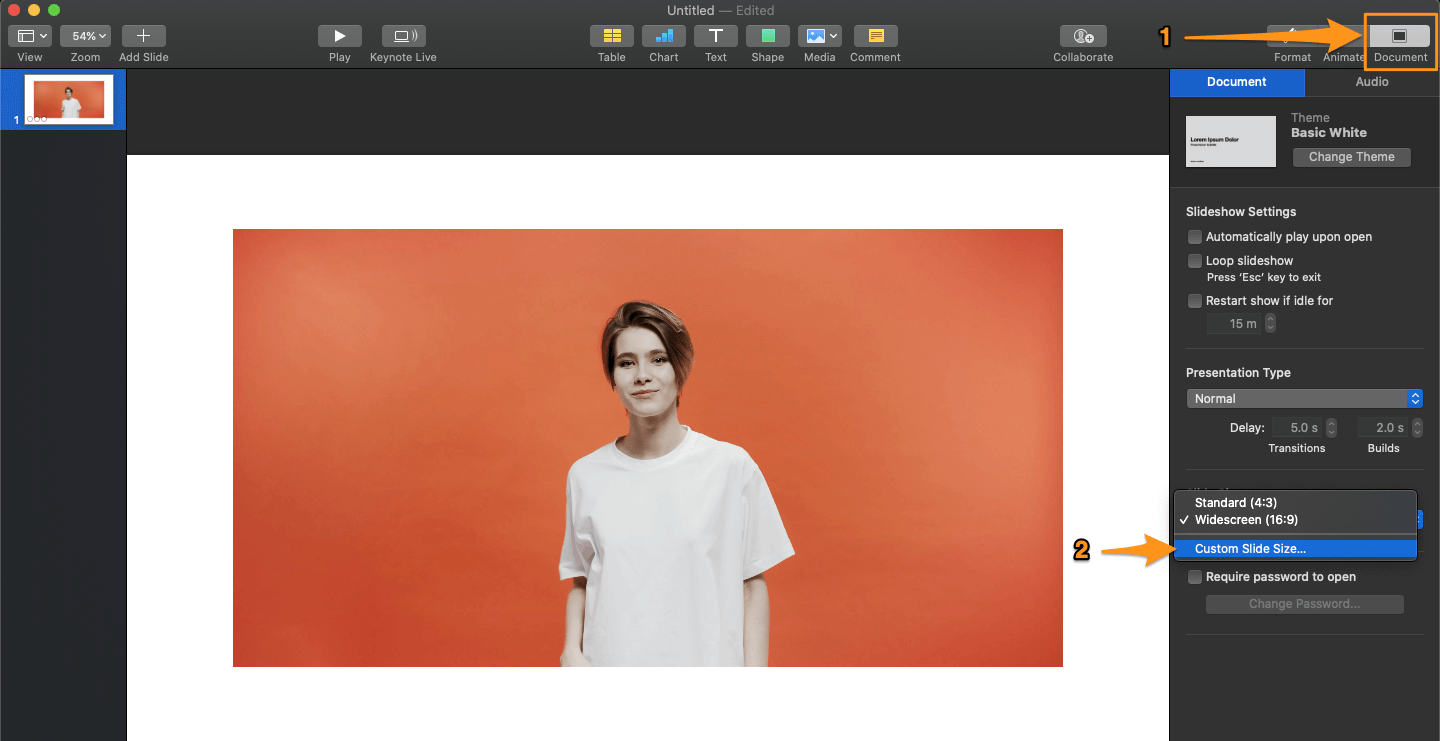
- Now drag and drop the video onto the blank slide. Click on the tab that says Document in the top right corner of the screen, then click on the Slide Size dropdown menu and select “Custom Slide Size…”.
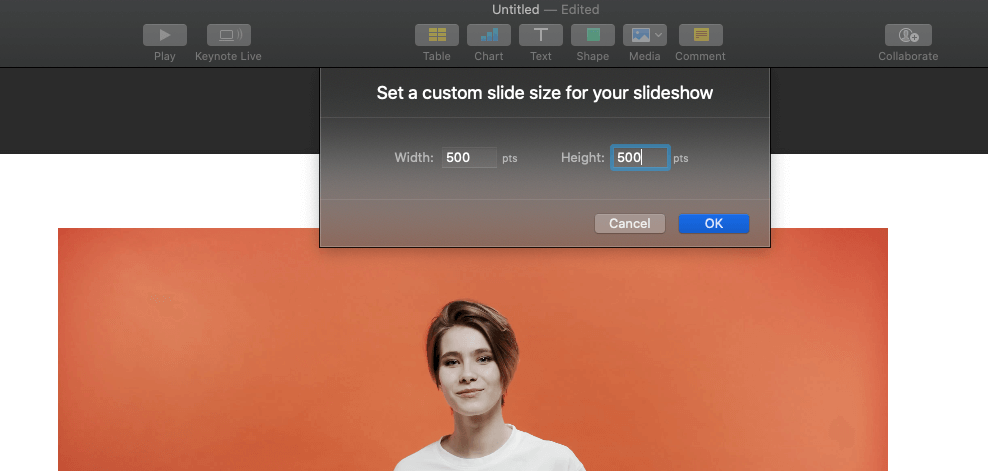
- To create a square video, make sure to input the same value for both the width and height of the video. For instance, if you’re going to set the width of the video to 500, set the height too to 500. Once you’re done setting the width and height, click “OK” to save the slide in these dimensions.
- Now make your video fit the square dimensions properly by dragging out one of its corners.
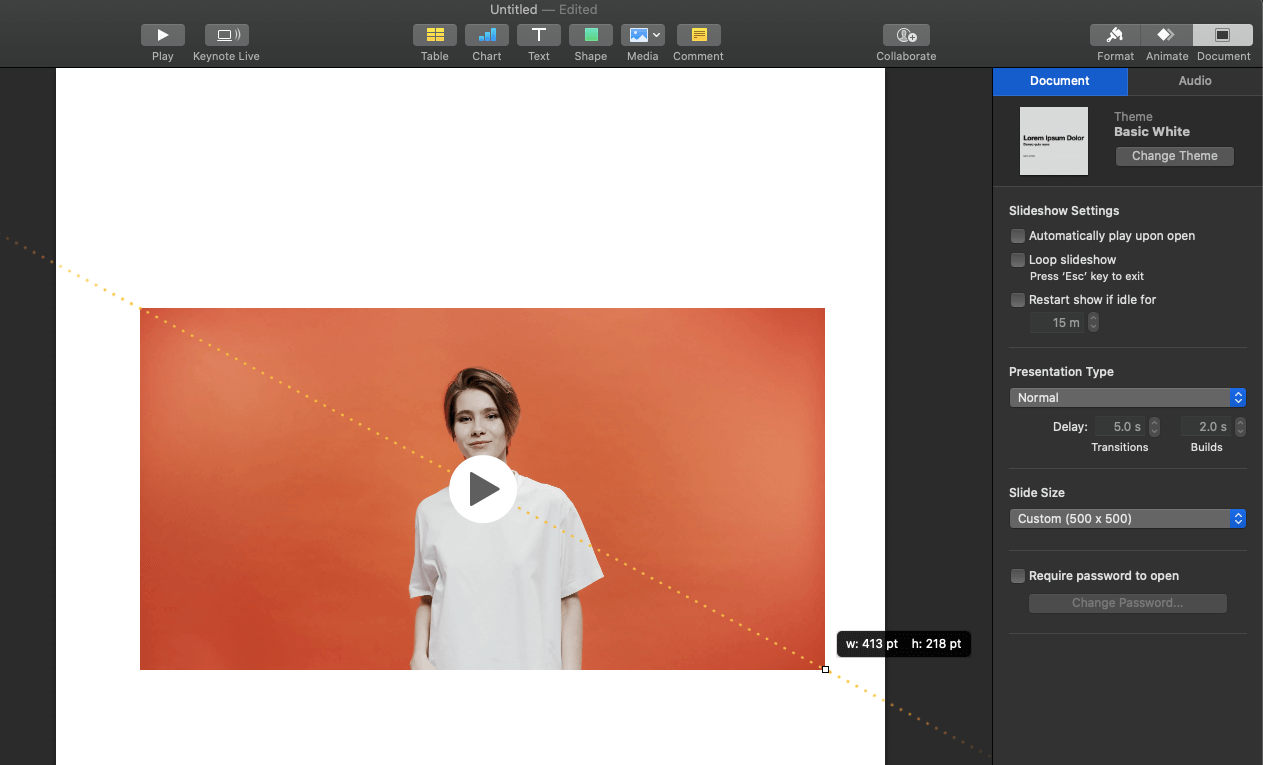
- To add text to your square video, click on the Text button in the top center of the screen. If you want to add your logo or any images, simply drag and drop them onto the video.

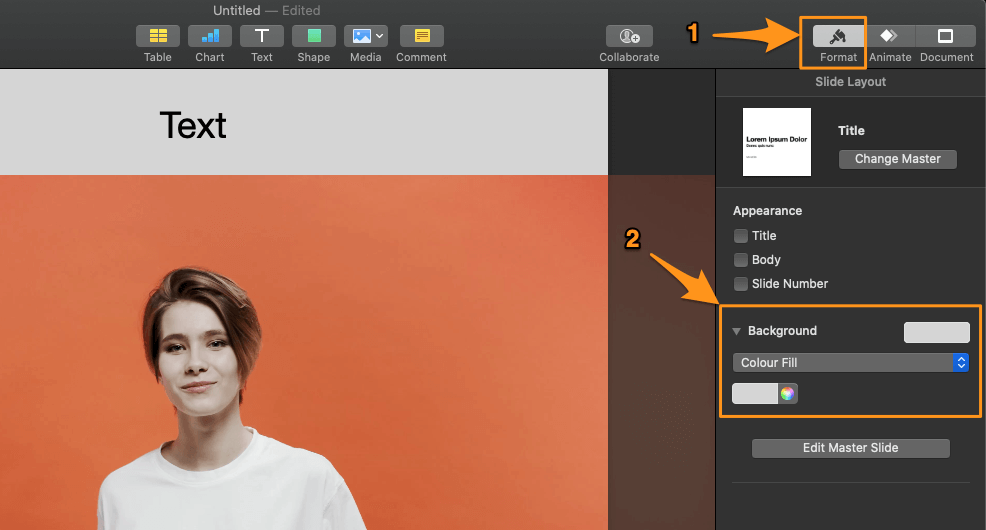
- To change the background color, click on the white background area, then click on the tab in the top right corner that says Format, and go to the Background section to pick a color.
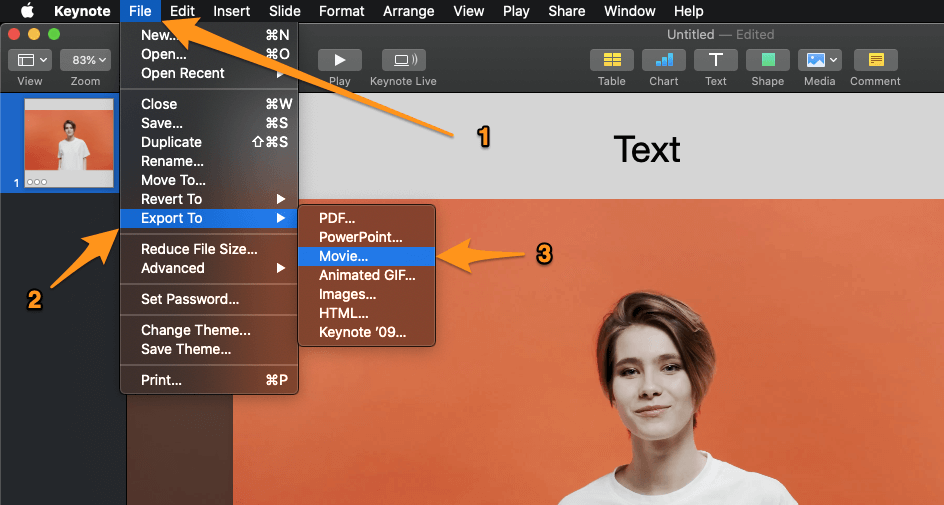
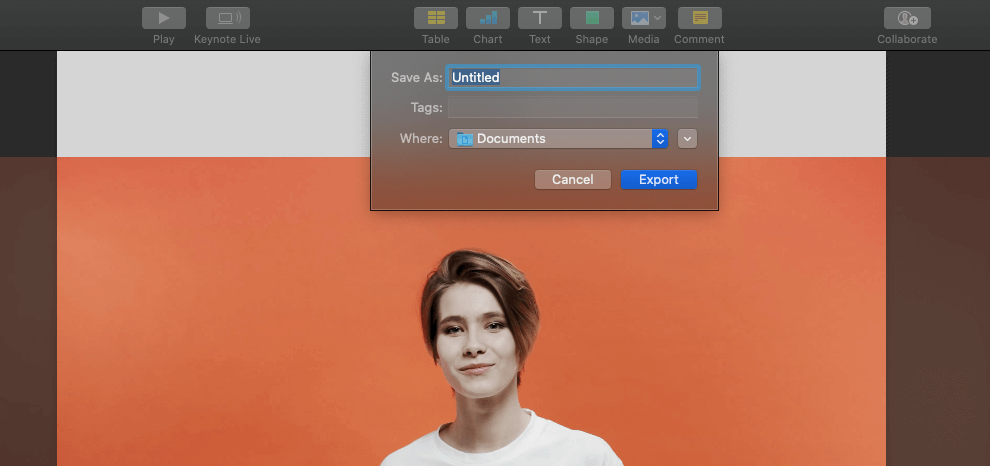
- Finally, export the video by clicking on “File”, “Export To”, and “Movie…”. A popup window will appear. Pick a resolution for your video and click Next.
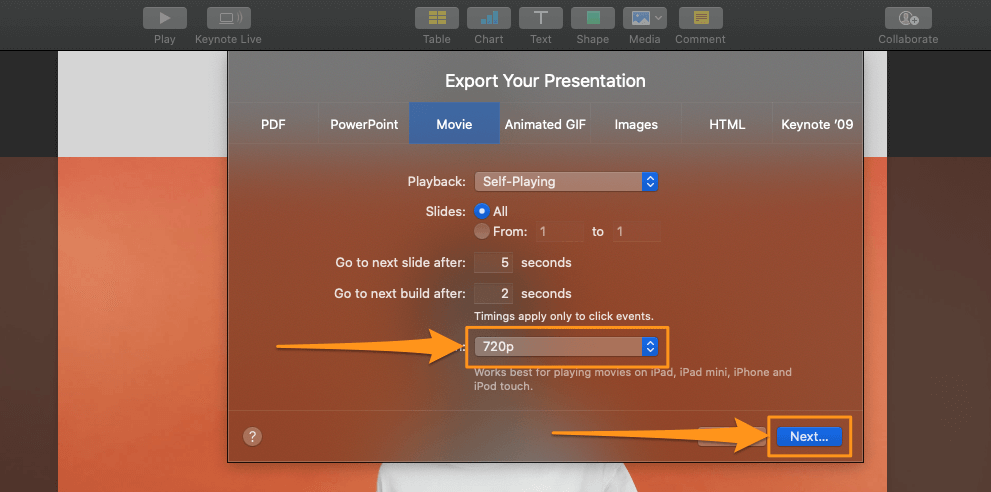
- Now choose where you want to save your square video and click Export.
How to Create a Square Video Online using Animaker on Mac
As you can see, it can be confusing and daunting to create square videos using multiple complex software tools that just don’t fit this use case well.
It’s really not worth it unless you are used to editing your videos in iMovie and don’t want to go beyond anything basic.
There’s a much easier way to make square videos for social media. Animaker’s square video maker makes it a breeze for anyone to create square videos in a snap!
You don’t need any video making experience to create square videos using Animaker.
Simply pick a size you want to convert your video to, in our case to square dimensions, upload your video, add text, shapes, stickers, and more to create a beautiful square video!
Let’s walk you through the exact steps you’d need to take to create a square video using Animaker
- First, sign up and log into the app. Now pick “Square” from the Create a video section in the dashboard.

- If you want to create your square video from scratch, click on the button with the plus icon and text that says “Blank”. If you'd rather use a template as a starting point to create your square video, pick one of the square video templates from our huge collection.

- To upload your video, go to the upload tab in the main navigation bar, then click on the upload button at the bottom to select the video you’d like to convert to the square size.

Once the video has been uploaded, simply click on it to drop it onto the canvas.Animaker automatically sets the video in a way that it occupies the entire space; that is, your video fills the entire width and height of your square video.
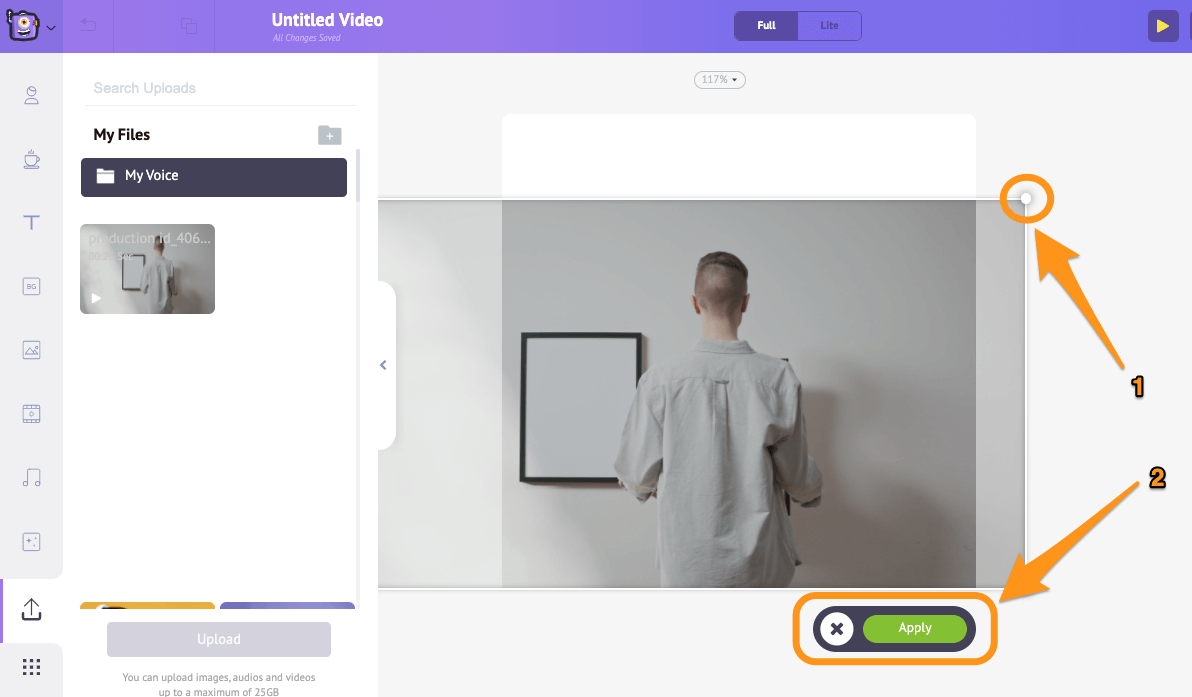
 If you want to adjust the position and size of the video so you have some space at the bottom and top — or on the right and left if it’s a vertical video — you can use our video cropping tool.
 - Click on the crop icon in the top right corner of the video, then hold and drag the edges of the video to shrink or expand it. Once you’re done resizing and positioning the video, click on the green button that says “Apply”.
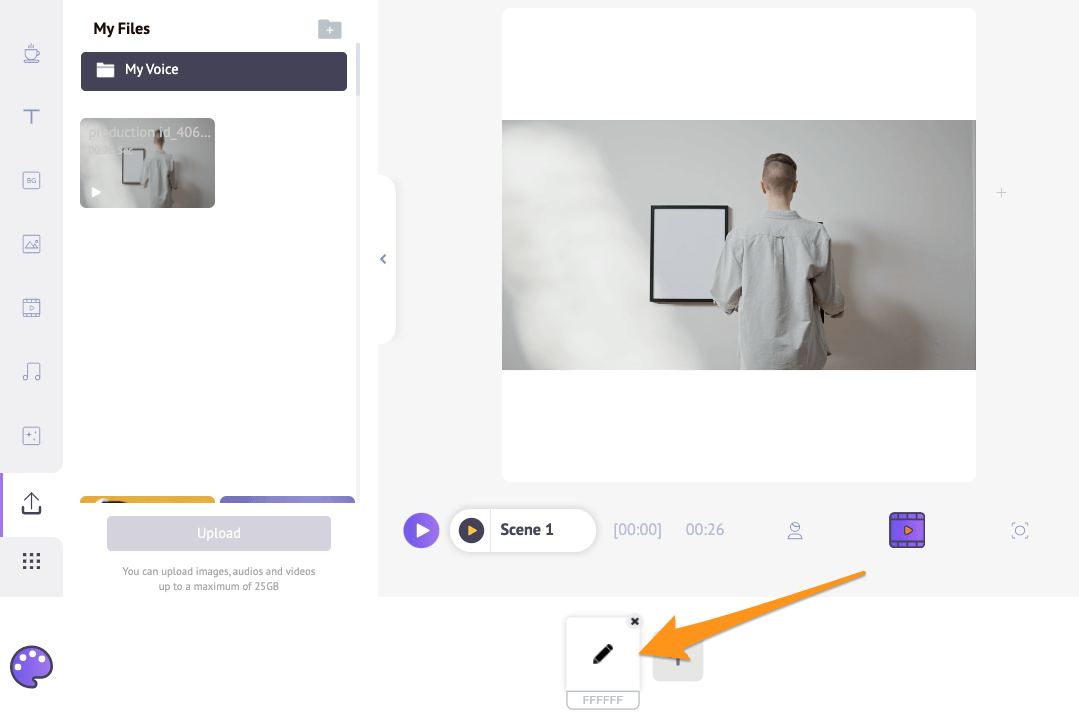
You can upload your own logos, images, and videos the same way you uploaded a video in the 3rd step. - To change the background color, click on the background area, this will bring up the color palette. You can now set your desired background color.
Also, you can use readymade stickers, shapes, emojis, gifs (from GIPHY), high-resolution stock videos and photos from Animaker’s huge built-in library.

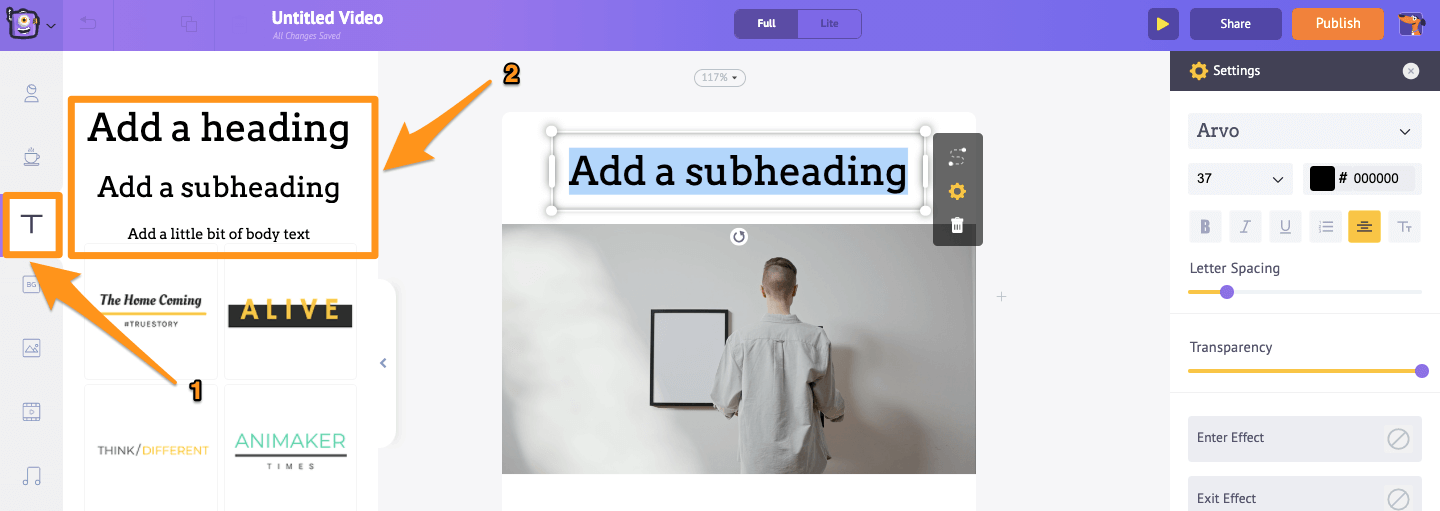
- To add text to the video, simply navigate to the text tab in the main navigation bar, then click on one of the text sizes to add it to to your video.
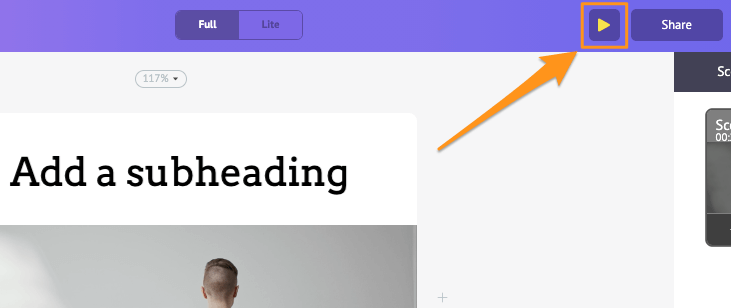
Once you’re done making the changes, preview the video to see if everything’s fine. Click on the play button beside the Publish button in the top right corner to preview the entire video.
- If everything seems fine, go ahead and hit the Publish button in the top right corner, select Download Video from the resulting dropdown, then pick the video’s resolution and hit Download.

And that’s how easy it is to create square videos on your Mac using Animaker’s square video maker!
If you have any questions on creating square videos online or on your Mac computer, please let us know about them in the comment section below.


