How to Create eLearning Videos That Boost Learner Engagement?

Shreshtra - September 13, 2024 - Leave your thoughts. 14 min read
In today's digital age, eLearning videos are taking corporate training by storm!
As more organizations shift towards online learning, the demand for high-quality eLearning content is at an all-time high!
This shift is not just a short-lived trend. It reflects the evolving needs of learners who seek engaging, flexible, and accessible learning experiences, and eLearning videos are the perfect way to deliver that.
But why are eLearning videos such a game-changer?
Because they engage learners in a way that text-based materials simply can’t! Studies show that 97% of L&D professionals find video more effective than text-based documents.
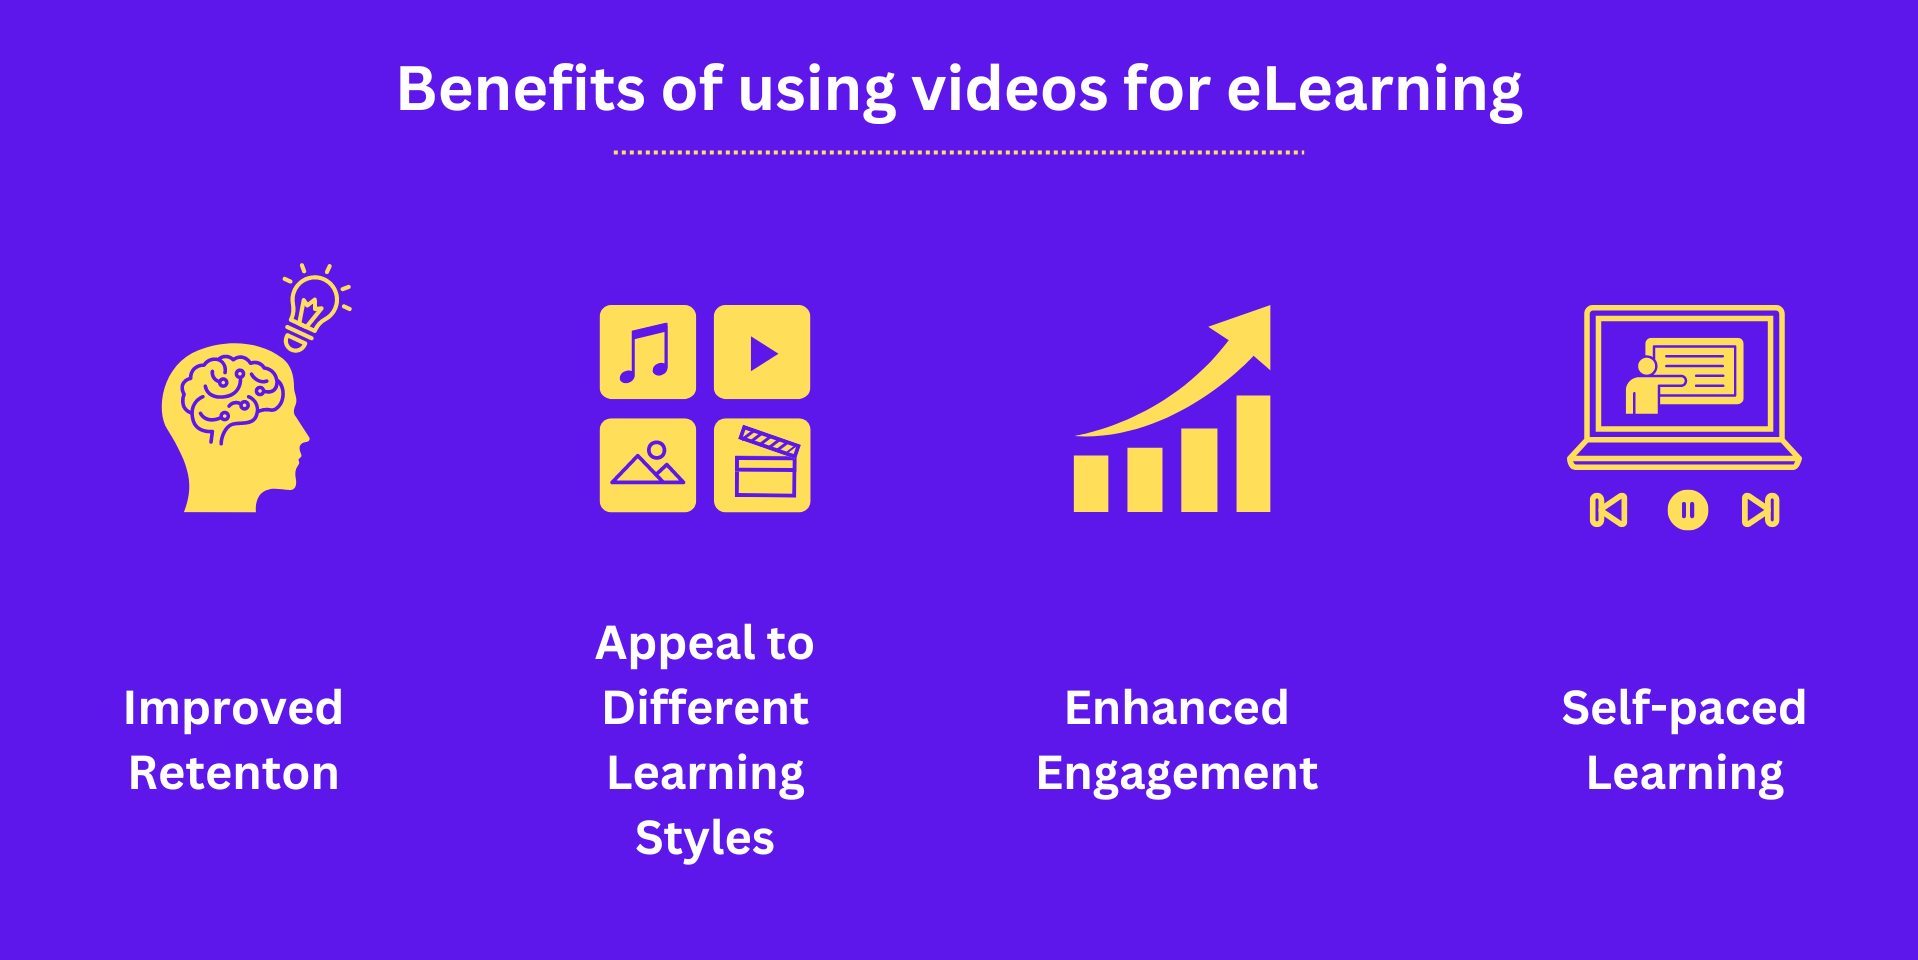
The benefits are endless! From boosting knowledge retention to accommodating different learning styles and giving learners the freedom to learn anywhere, anytime, eLearning videos are your secret weapon for corporate training.
Whether you're an educator looking to create engaging lessons or a corporate trainer aiming to deliver effective training videos, understanding how to create eLearning videos is essential.
In this article, we will look at -
- Types of eLearning videos
- How to create eLearning videos?
- How to add interactivity to eLearning videos?
Let’s get started!
Types of eLearning videos
How-To Videos
How-to videos provide step-by-step guidance for various processes and tasks, meeting the needs of diverse corporate teams.
These videos simplify complex procedures into manageable steps, facilitating employees to easily follow and replicate the actions.
Animated Explainers
Animated explainer videos explain concepts using captivating, vibrant visuals, animations, and dynamic storytelling, making learning both enjoyable and memorable.
Furthermore, animated explainers assist in keeping employees focused and motivated to complete the entire video.
Instructor-led videos
These videos have an instructor in front of the camera, explaining concepts and guiding learners through detailed tutorials.
The instructor’s gestures, tone of voice, and expressions make the content more engaging and memorable to learners.
Whiteboard Videos
Whiteboard videos explain topics with creativity, making content approachable and memorable with illustrations.
In this era of information overload, whiteboard videos stand out by delivering concise, impactful messages that resonate with audiences.
Interactive Videos
Interactive videos contain elements like clickable hotspots that branch out scenarios and prompt learners to make decisions.
These types of videos encourage problem-solving skills, making the learning process effective.
These are the most popular types of eLearning videos, each offering unique benefits to enhance learner engagement and retention.
Next, let’s see how to create eLearning videos for your organization.
How to create eLearning videos?
Creating eLearning videos involves a systematic approach to ensure they are engaging, informative, and effective.
- Begin by defining clear learning objectives and understanding your target audience.
- Then, plan your content meticulously by scripting and storyboarding your ideas, which helps organize your thoughts and maintain a logical flow.
- Next is the important part where you decide which tool to use. There are many online tools for creating eLearning videos.
But, if you want one with extensive features and user-friendly, use Animaker.
Animaker is the World’s No.1 ranked Animation-making tool, which helps create professional-looking 2D animations and live-action videos.
Animaker’s impressive features include -
- Animated character library - 1000+ characters of different ages, sizes, and professions with 1000+ actions and 20 expressions and an in-built character builder to create a Billion+ character possibilities.
- Asset library - 150M+ assets, including 2D backgrounds, properties, icons, stock images, videos, and royalty-free music.
- In-built AI features like AI animation generator, AI asset generator, AI subtitle generator, and AI voice-over generator.

These are the major impressive features of Animaker.
Creating an eLearning video with Animaker involves three steps -
Step 1: Create a blank project
Step 2: Add elements to the video
Let’s begin!
Step 1: Create a blank project
Now that you know them, it is time to learn how to create eLearning videos with Animaker!
The first step is to log in or sign up to Animaker.
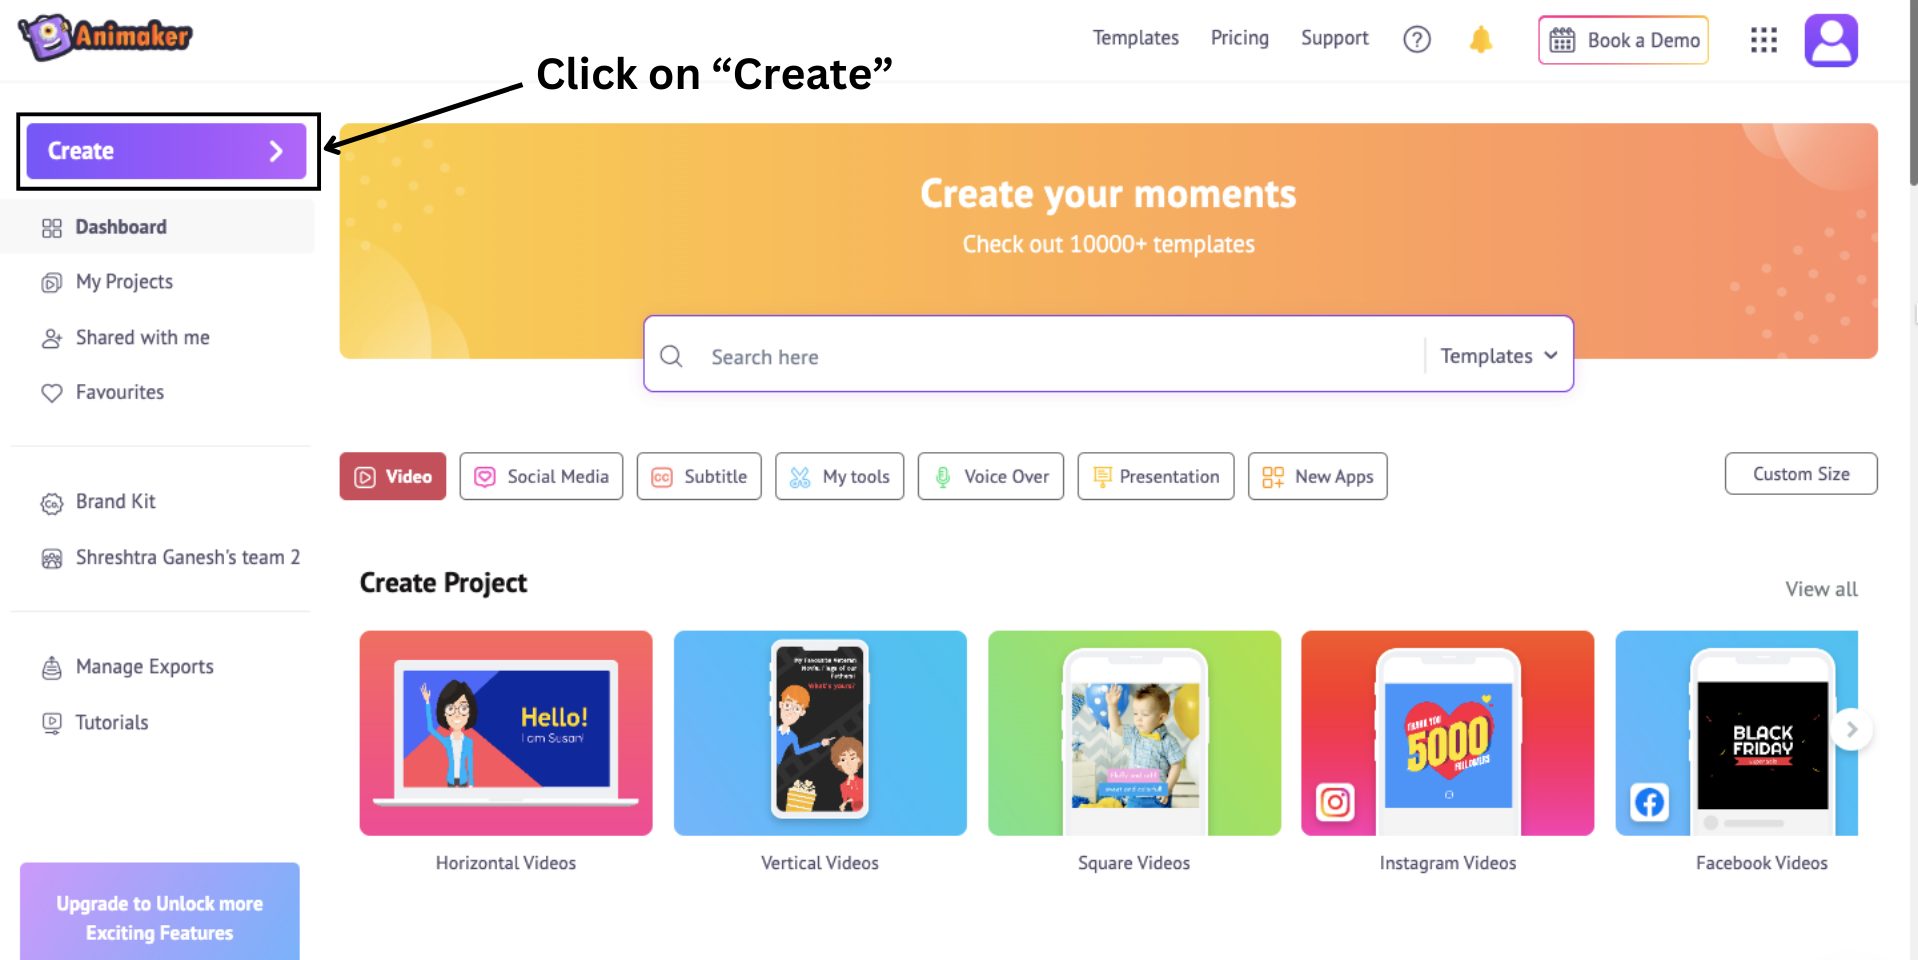
To create a new project, select Create.
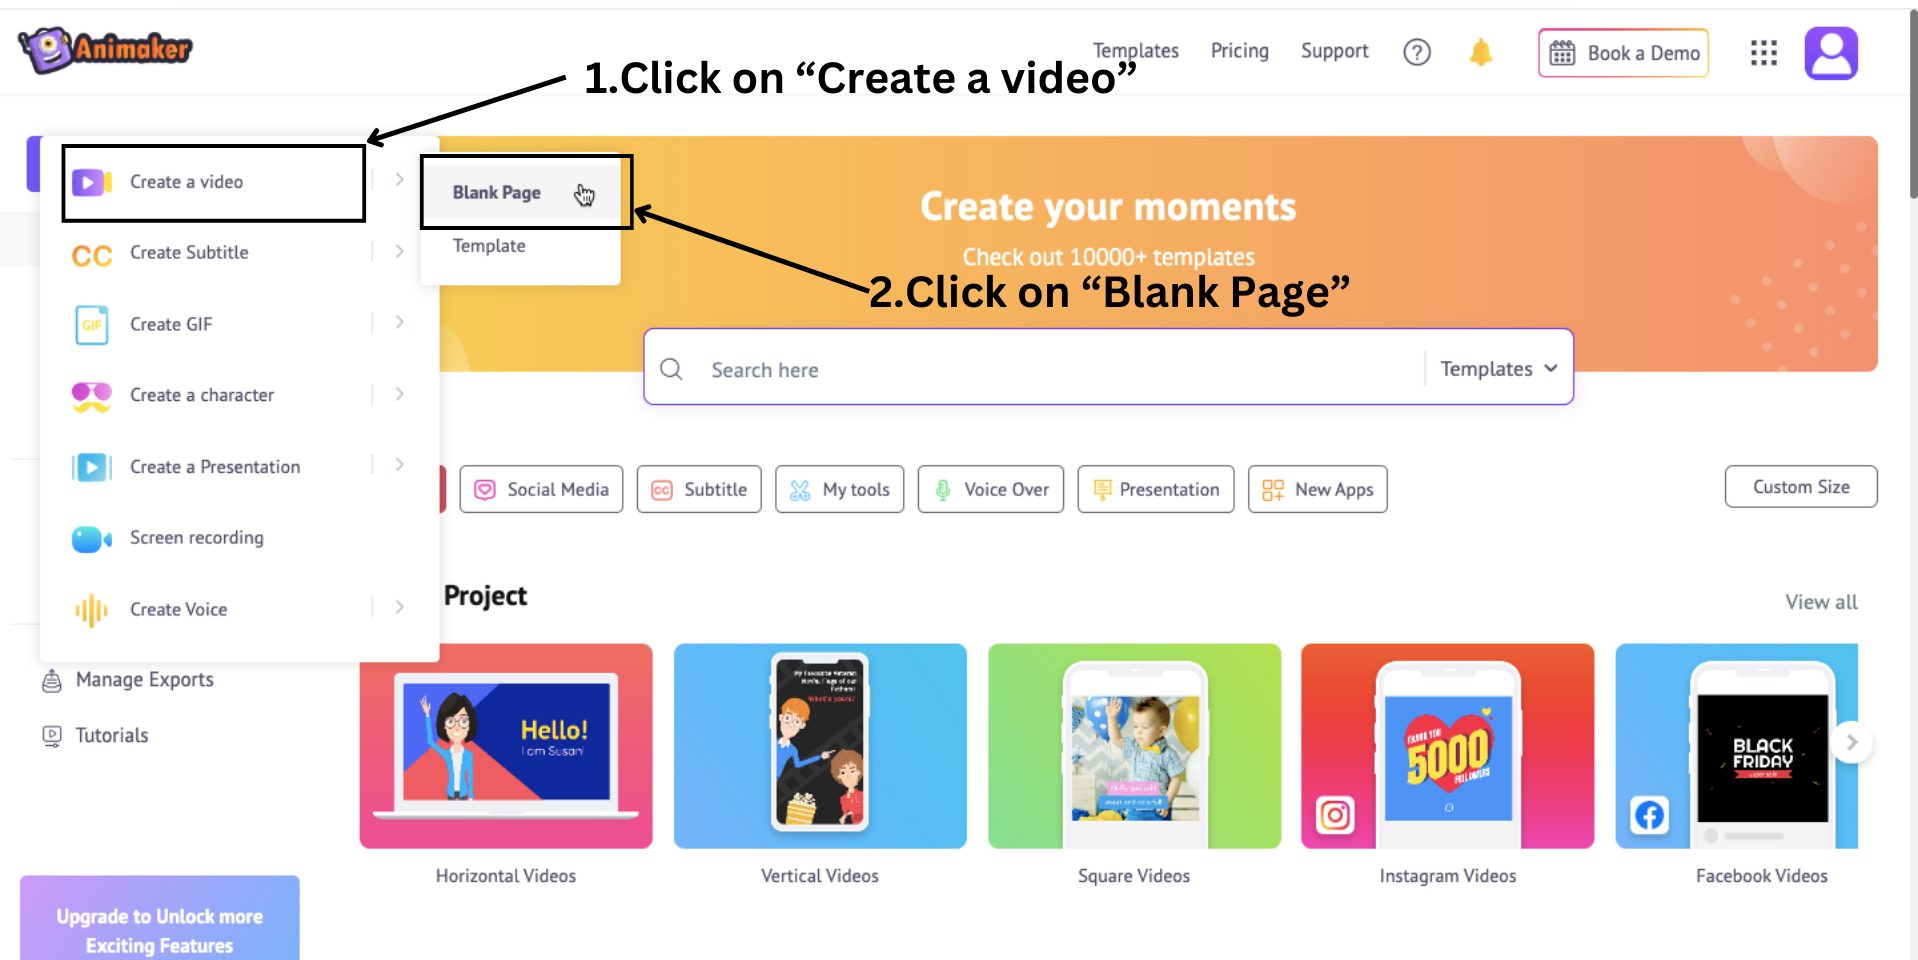
Then, click on Create a video > Blank Page.
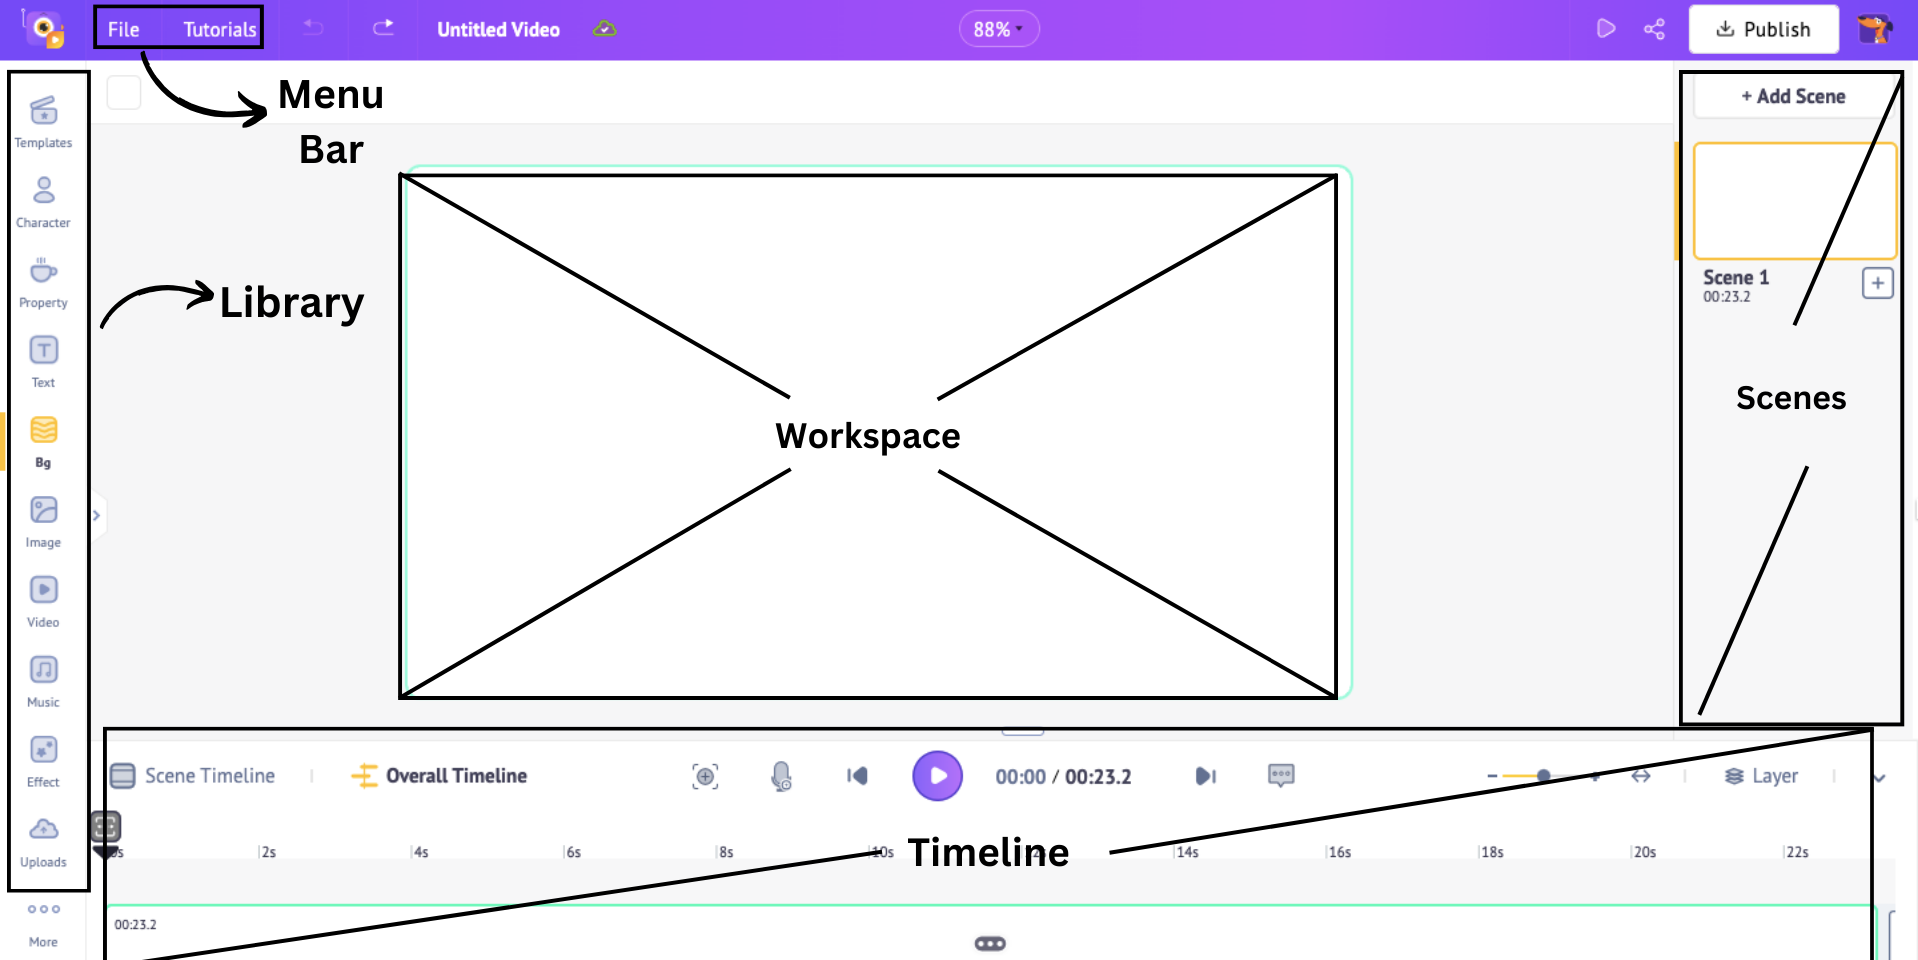
This opens a new blank project. The workspace is in the center of the screen, where you can create and edit your video. On the right is the scenes section, where you can manage and organize your scenes. On the left is the library with millions of assets as follows.
Above the workspace is a menu bar with additional options and tools, and the timeline is located at the bottom, where you can precisely adjust your video and its assets.
Step 2: Add elements to the video
I’m going to make an eLearning video on Sales Techniques and Negotiation. So, in the following section, we will look at how to add the following elements to our video.
Let’s begin!
1. Background
The first step is to add a background to our empty workspace.
There are five background options: solid, gradient, 2D, image, and video.
For my video, I'll select a 2D background. To do this, I'll click on Bg in the library. You can browse through the options or use the search bar to find a suitable background.
I decided on an office background by searching and selecting it from the results.
And just like that, the first element is done! Let’s move on to the next.
2. Character
Animaker's library includes over 1,000+ characters of different sizes, ages, and professions from various industries such as healthcare, retail, education, construction, law enforcement, and more.
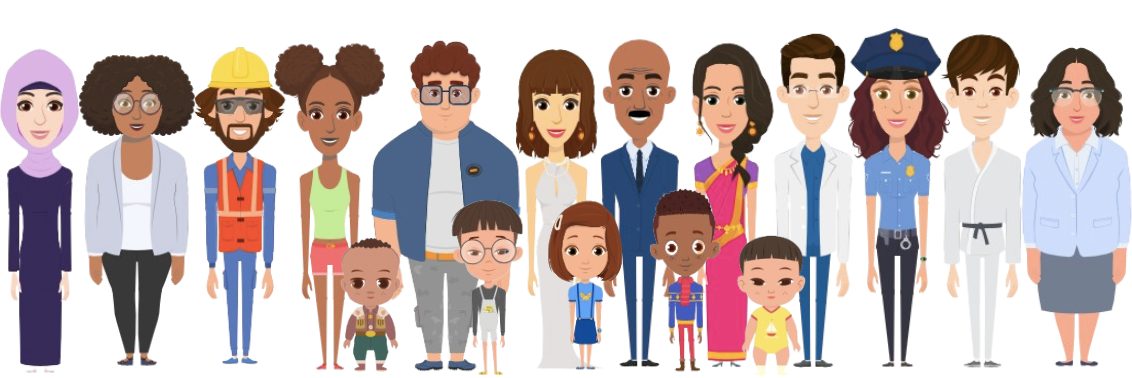
This makes it useful for corporations to create videos to train employees in diverse workplace scenarios.
To choose one of the characters, click on the Character section in the library, browse through the different categories, and click on a character to add to the scene.
Here, I have selected a business-friendly female character to fit my video topic.
You can choose a character in a similar way, or you can create a character from scratch that resembles someone from your organization. You can do so with Animaker’s inbuilt avatar maker.
This powerful tool lets you create over a billion character possibilities, allowing you to customize everything from skin tones and facial features to outfits and accessories, ensuring that your avatars are unique and fit your brand theme.
This way, your eLearning video will have familiar faces throughout the video course.

To learn how to create a character from scratch, check out this video:
Now that we have added our characters, it is time to animate them!
Animaker offers 800+ animations to the characters. These animations range from basic actions like walking or waving hands to more detailed movements such as dancing or working on a computer.
To animate the character, click on the character and search for an action in the action tab on the left. I’m choosing my character to wave.
In addition to the waving, I added a walking and an explaining action to my character.

Check out the video below if you’re curious about learning how to add multiple actions to your character.
And that’s how you add a character and animate them with just a click! Let’s see how to add a property next.
3. Property
Animaker has 90K+ icons and properties that you can add to your video.
With Animaker’s properties collection, you can use everyday objects like office accessories, machinery, and furniture to build environments for your videos.
To add a property, click on Property from the library and search for a property in the search bar. I’m going to search for a table with a computer screen.
Once you select a property, resize and position it in the scene.
You can add multiple properties to the scene if you wish. Let’s move on to adding text to the scene.
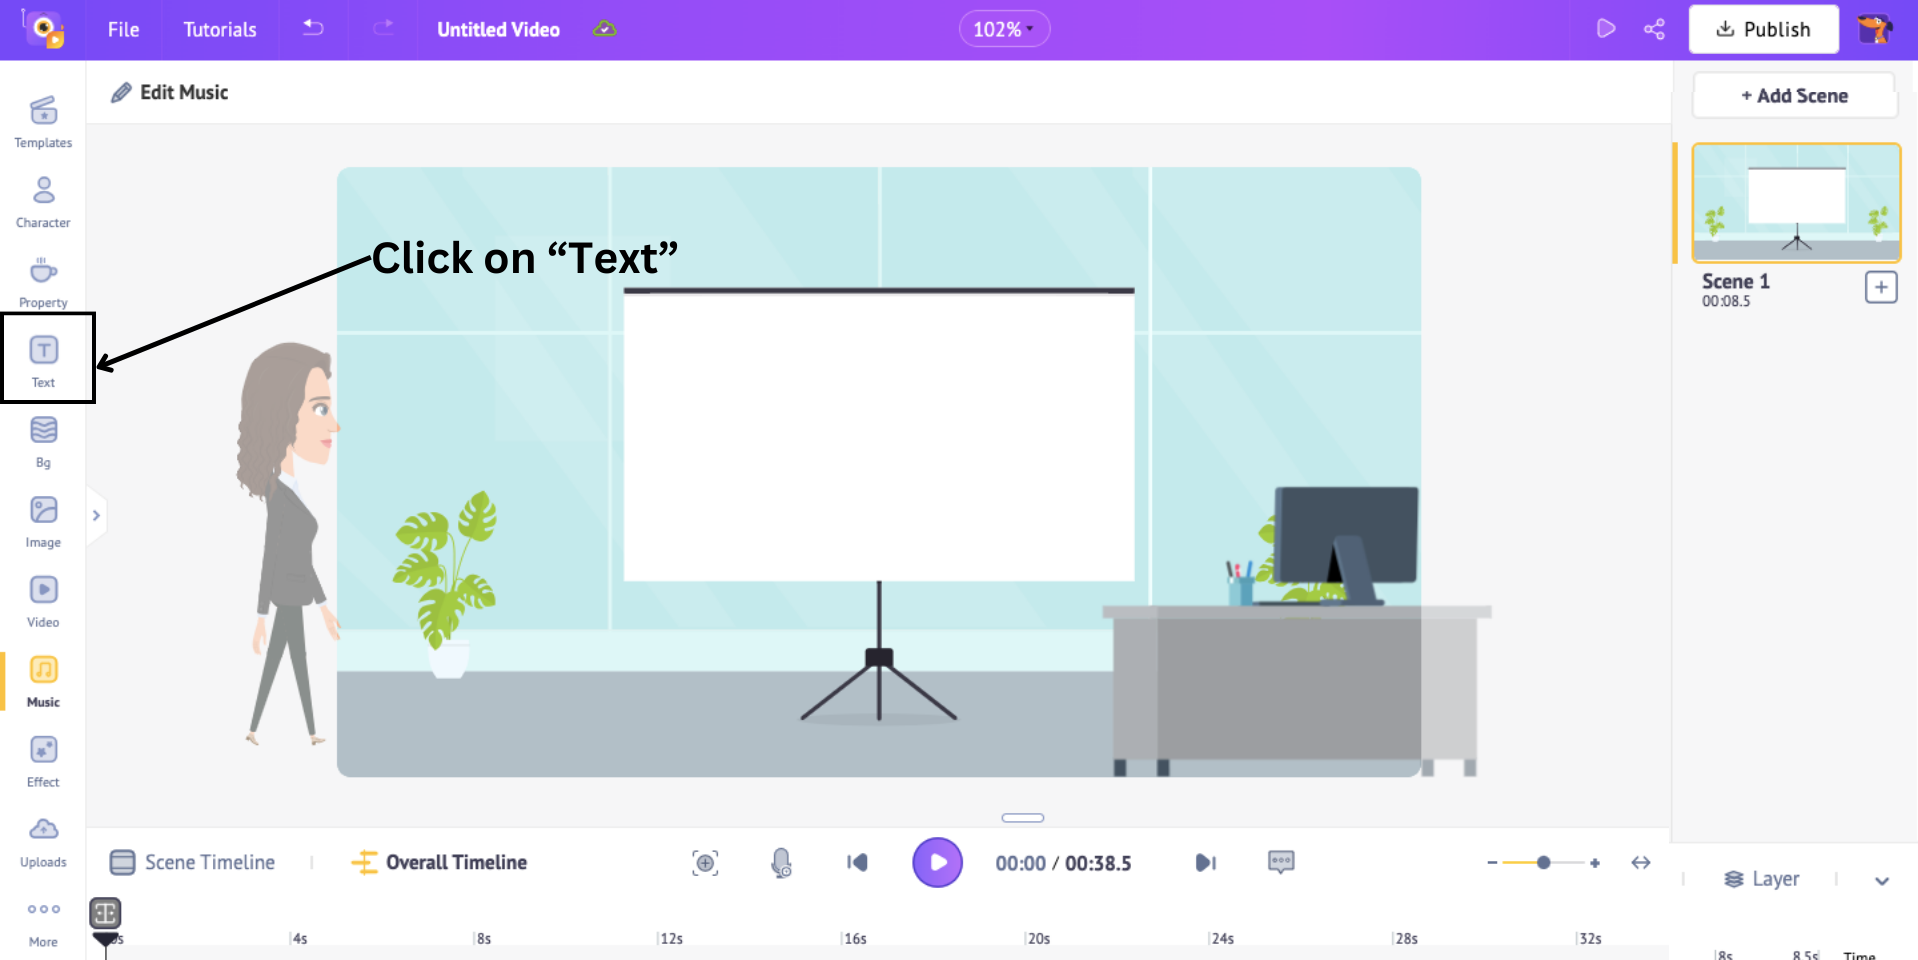
4. Text
Since this is the first scene of my video, I want to add the topic of the video here.
So, to add text, click on Text from the library.
This opens a side panel with two types of text - Plain or Prebuild.
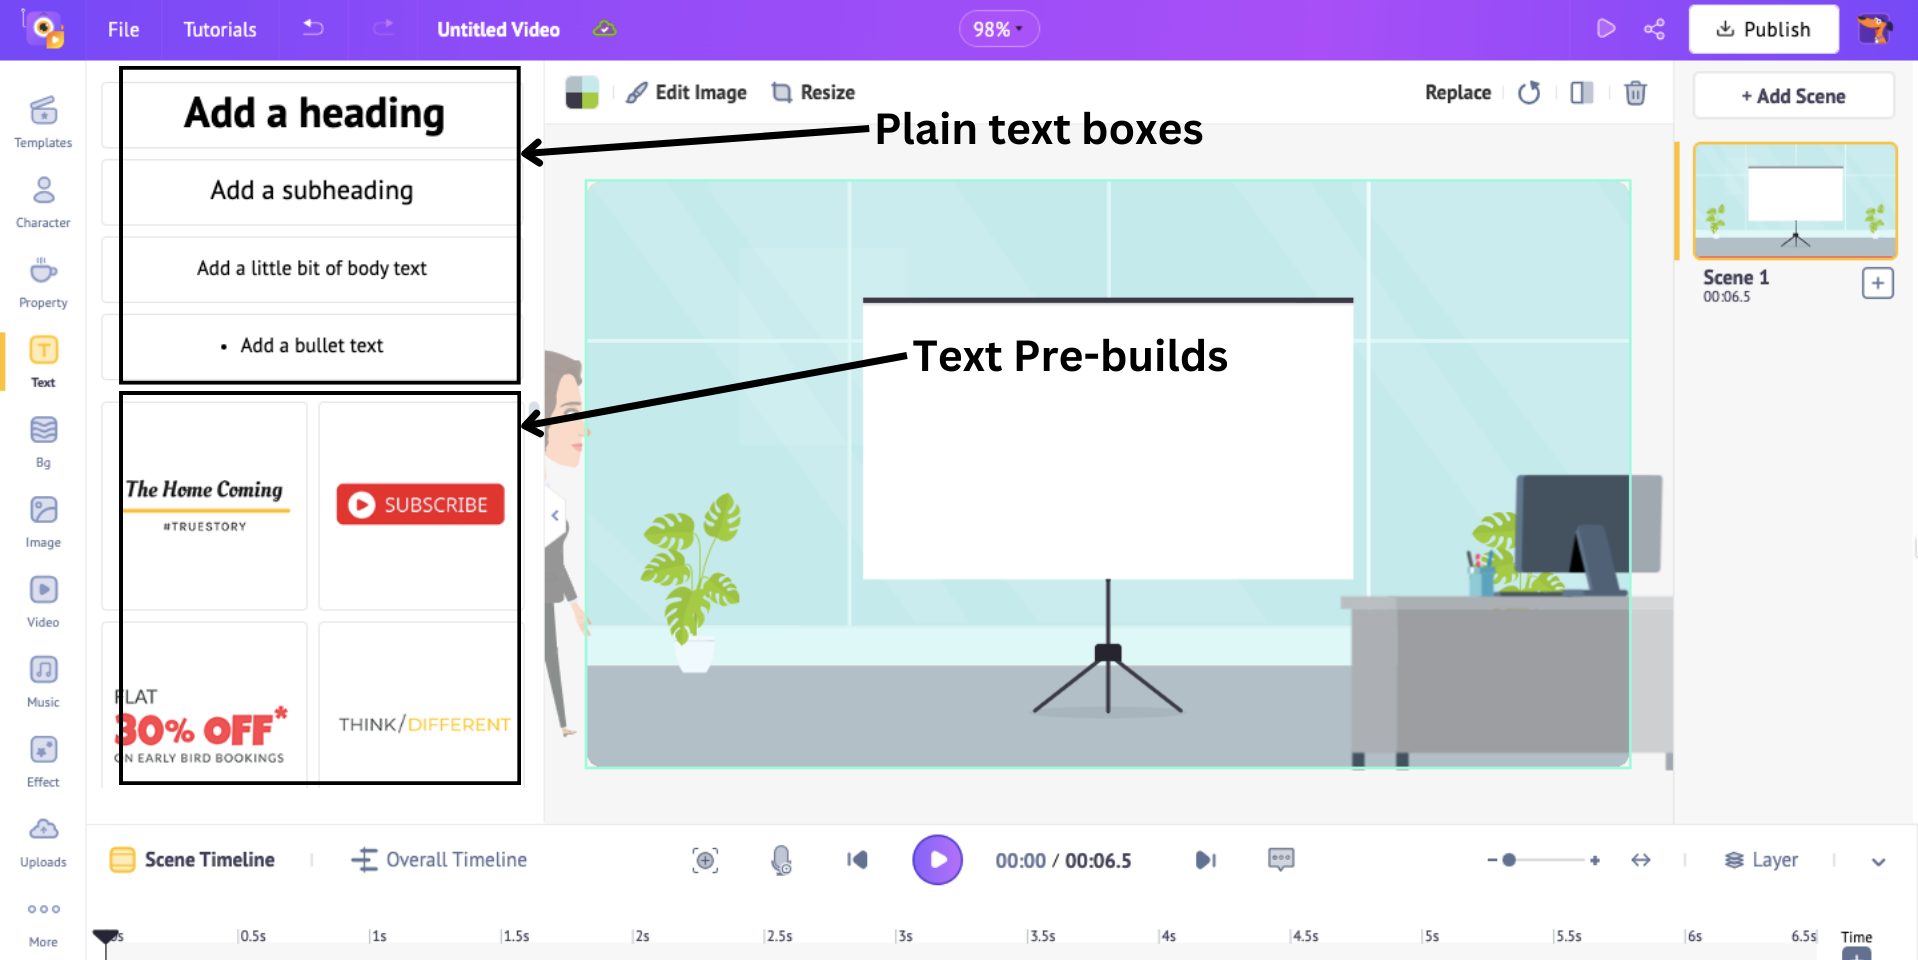
I’m going with Plain text. Once you choose the type, click on it to add to the scene. After positioning it in the workspace, I type in the title.
You can edit text, such as changing the text font, size, color, and more, with the Edit Text panel on the left.

When you add text, a new colored section appears on the timeline. Here, the orange section indicates the text's duration in the scene.
Adjust the ends of this section to control when you want the text to appear in the scene. I’m adjusting the text to appear near the end of the first scene.
This is how you add text to a scene. Let’s move to the final but very important element.
5. Voice
Animaker has over 2000+ voices in 200+ languages. To add a voice to the character, click on the character and click on the Lip-sync option. You will see three options for adding a voiceover.
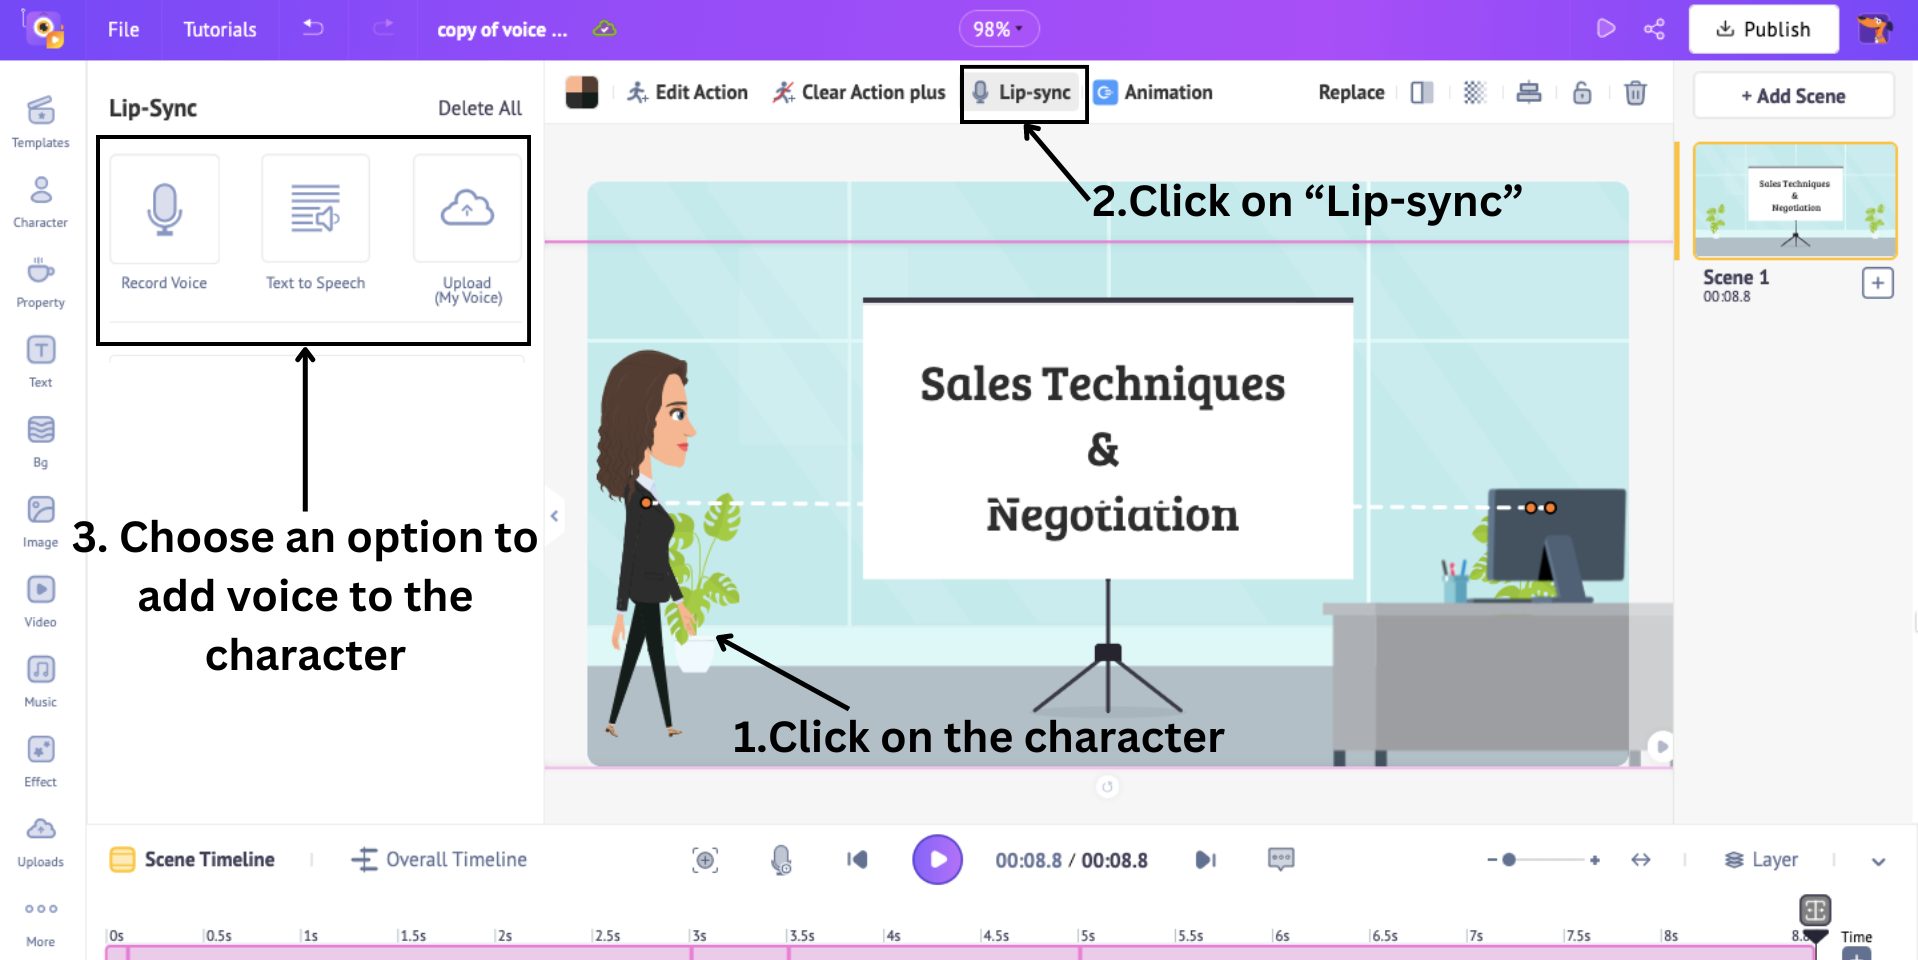
- You can record your voice
- You can use AI to add voice with Text to Speech feature
- You can upload a pre-recorded voice
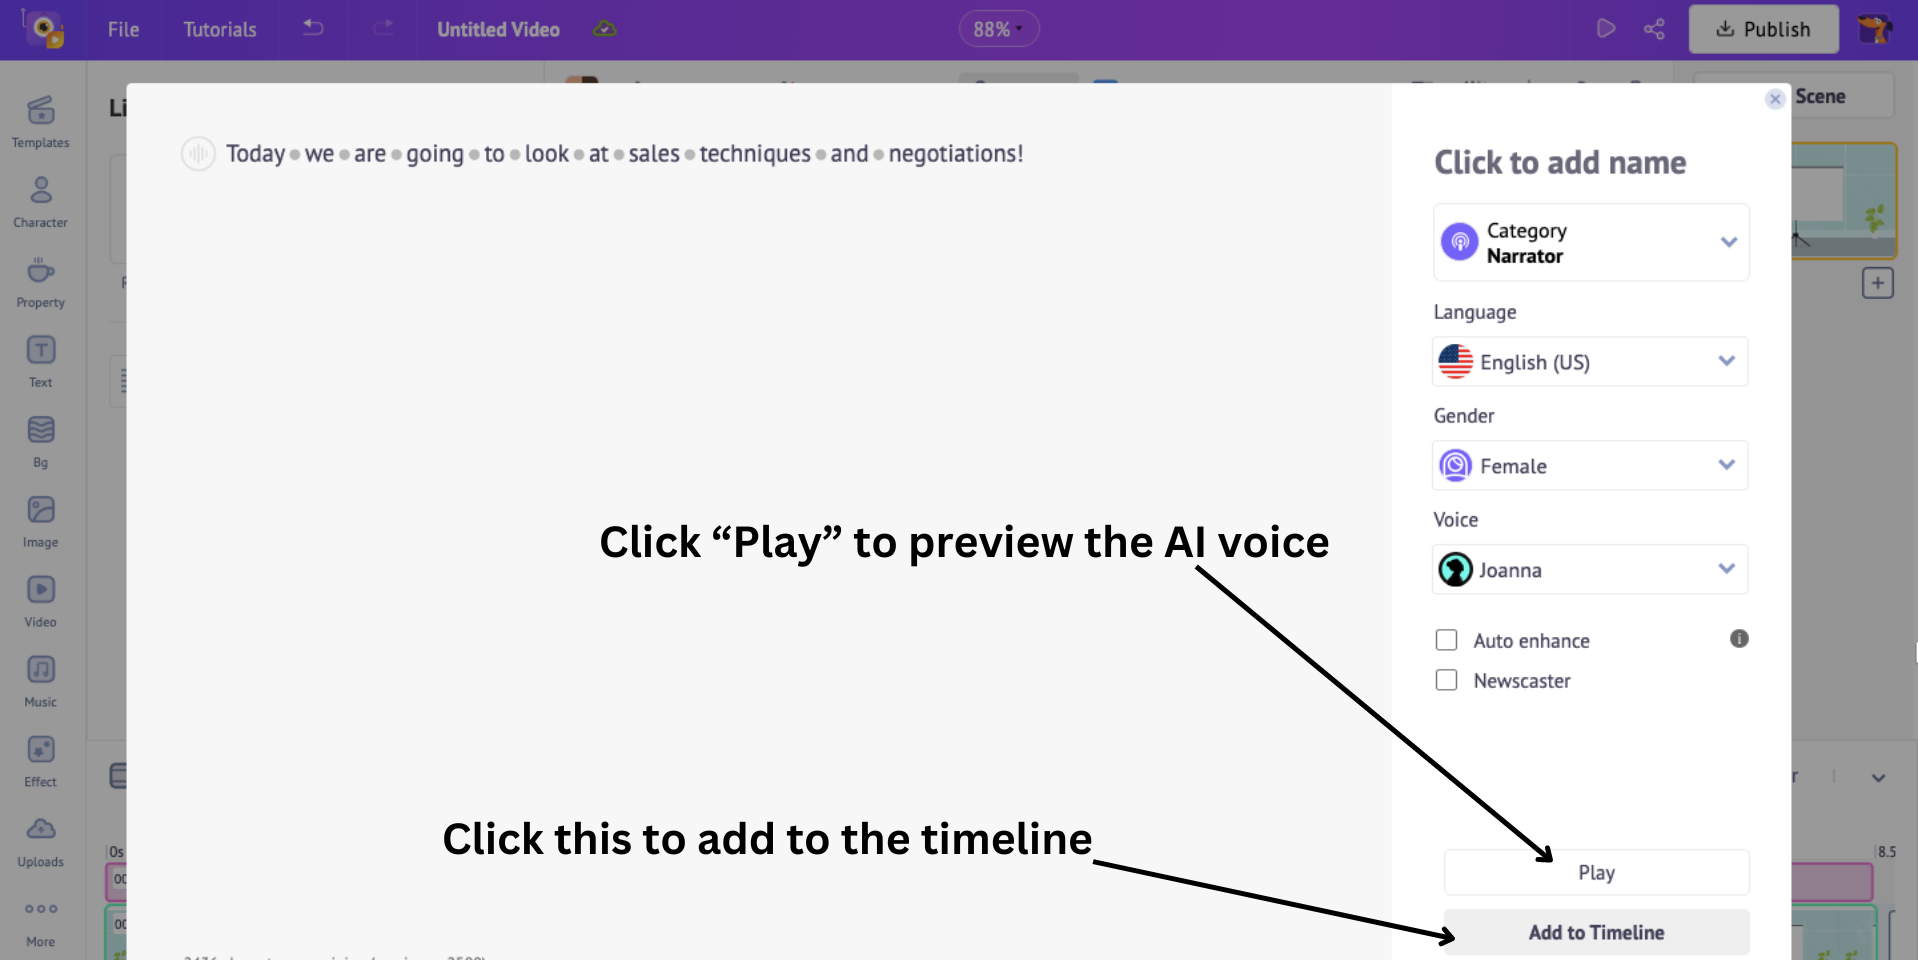
Here, I’m going to use AI voiceover. For that, click on the Text to Speech option. Now, you can simply type in your text and choose a language, gender, and voice.

Click on Play to preview the voice and add to the timeline by clicking on that option.
After adding the voiceover, the scene looks like this.

This is only the first scene of your video. To add more scenes, click on the three dots on the scene tab on the right. It will open two options: Add Scene and Duplicate.
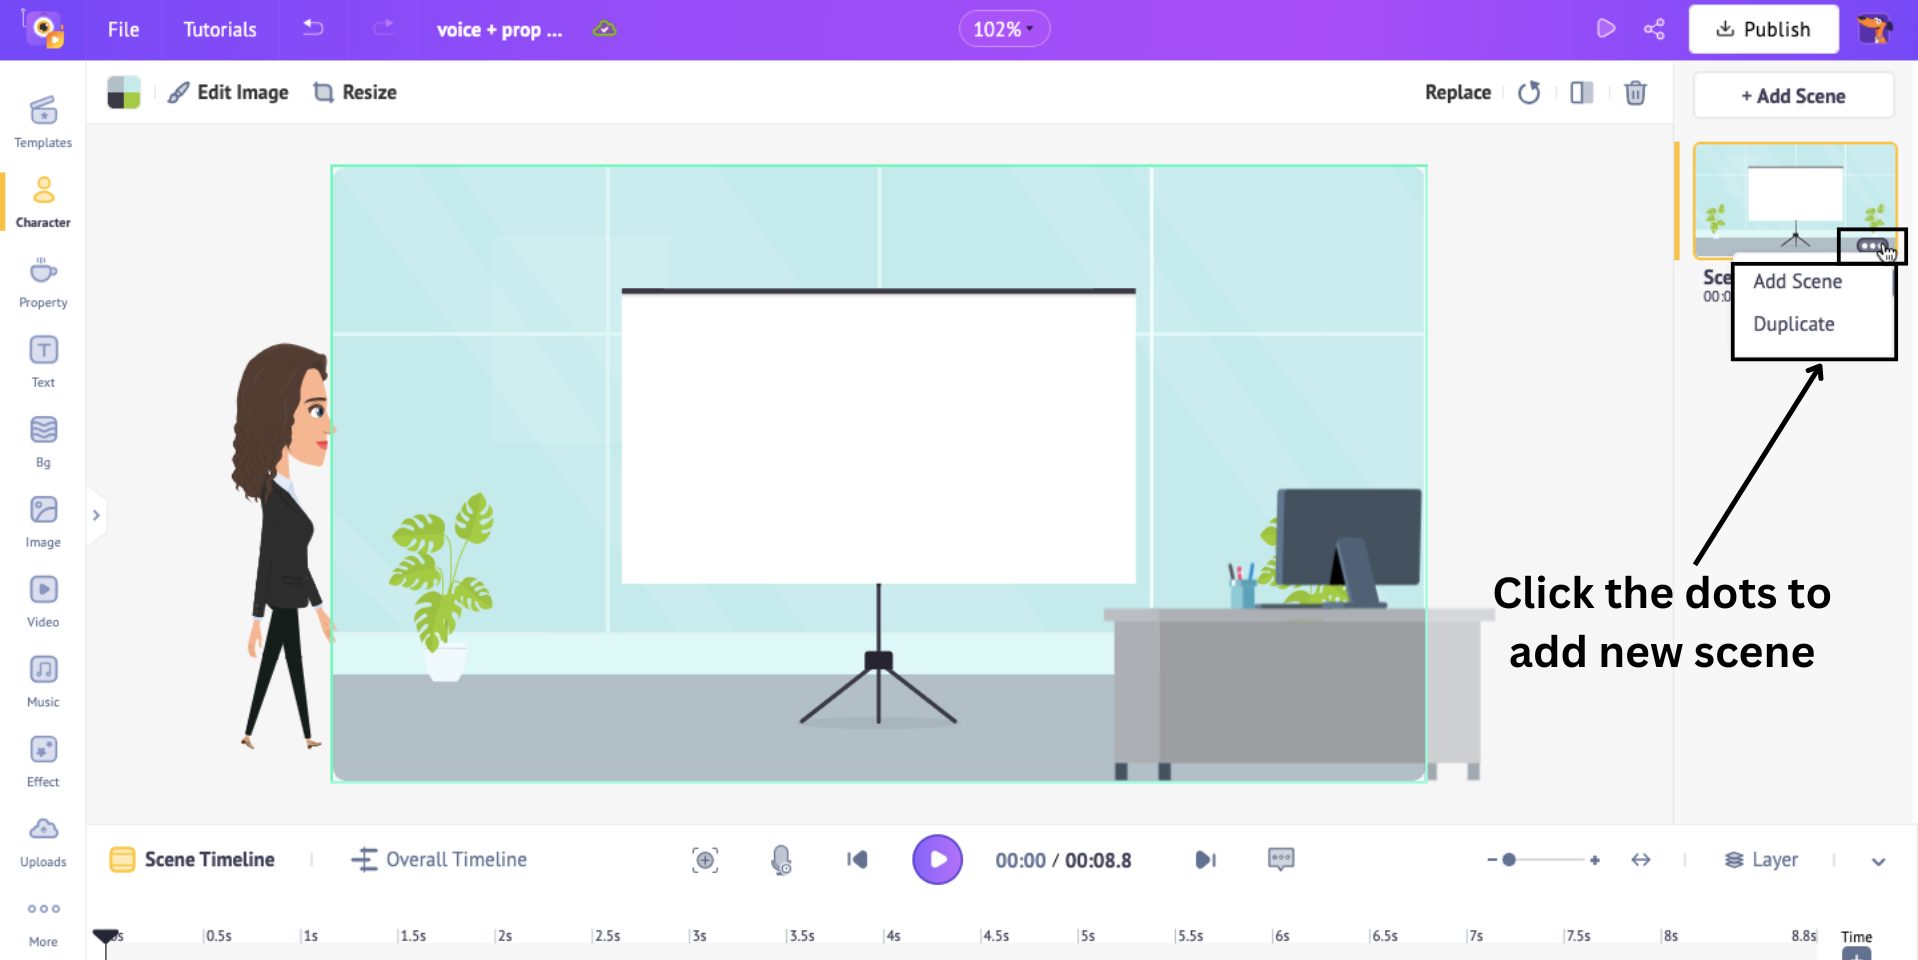
Choose Add Scene if you want to create a new scene from scratch, or choose Duplicate if you want a new scene with all the previous elements in it.
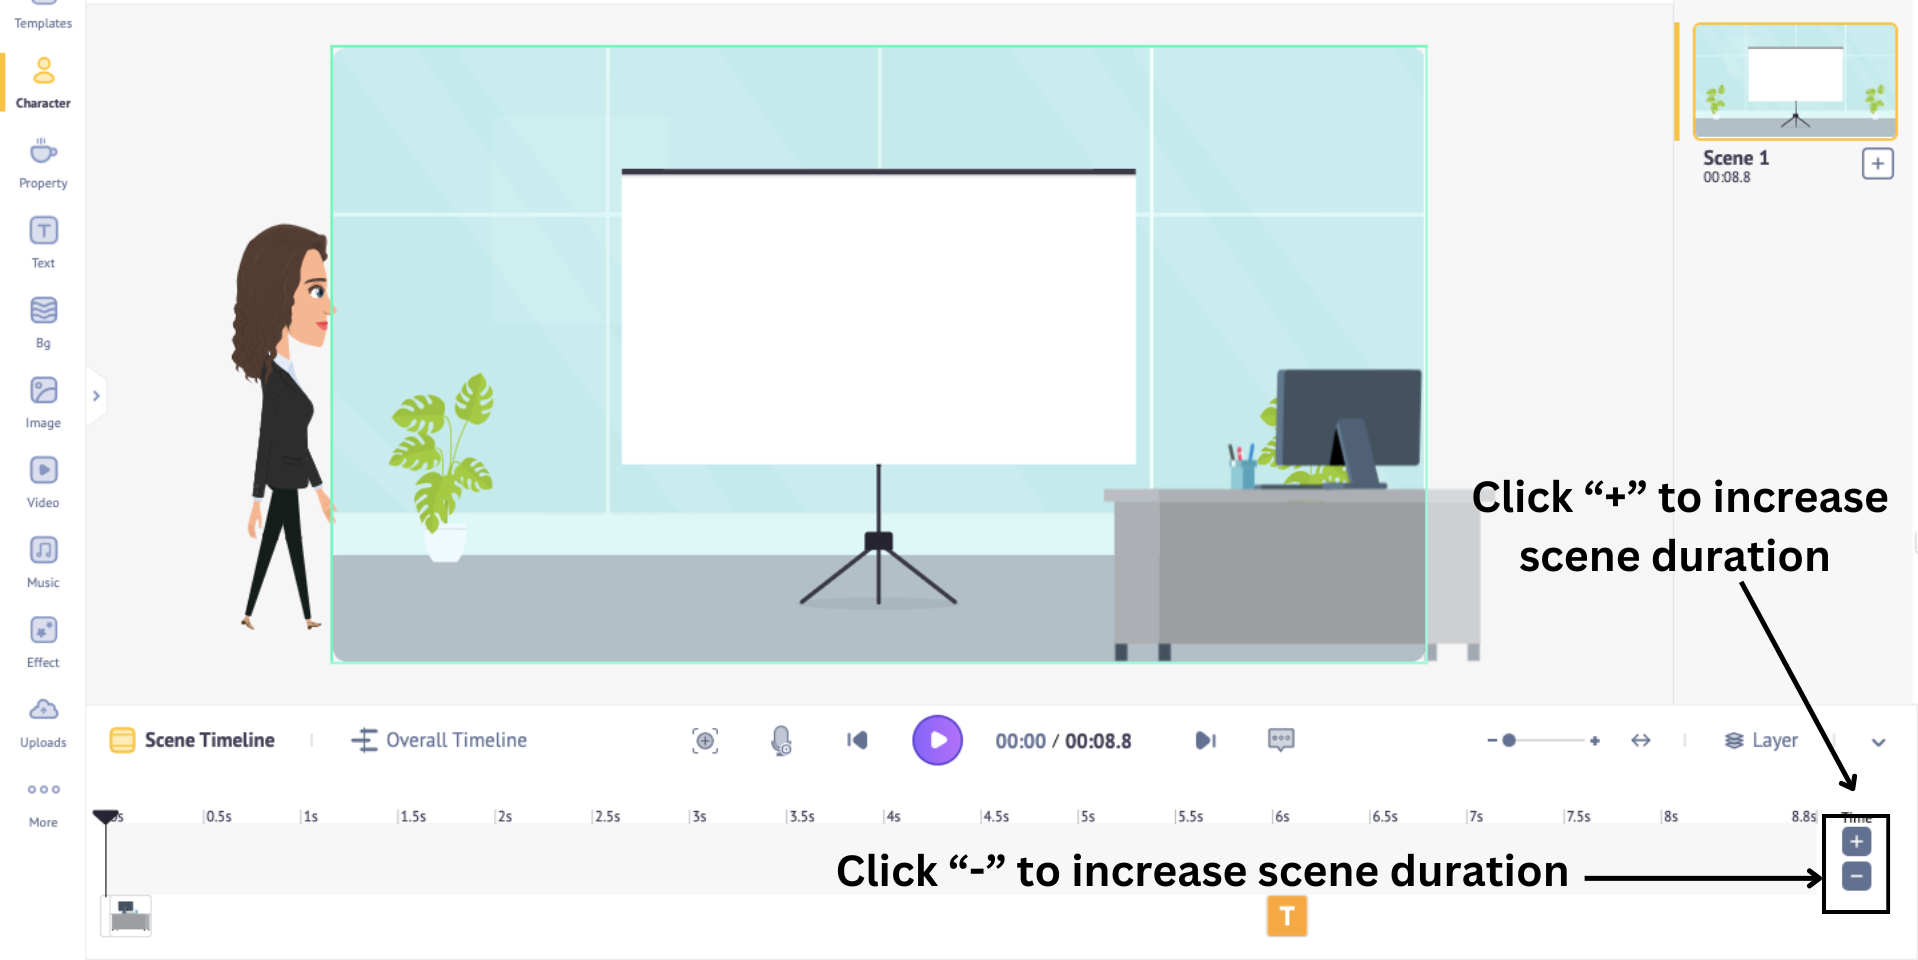
Every scene’s duration is 10 seconds by default. If you want to adjust the duration, click on the “+” and the “-” signs in the bottom right corner to increase or decrease the duration.
Using the previous steps, you can add elements to the scenes, building your eLearning video.
Once you finish creating your video, click on Preview to watch your video from start to finish.
Step 3: Download the video
If you’re happy with your creation, the last step is to download your video!
To do that, click on Publish > Download Video > Download.
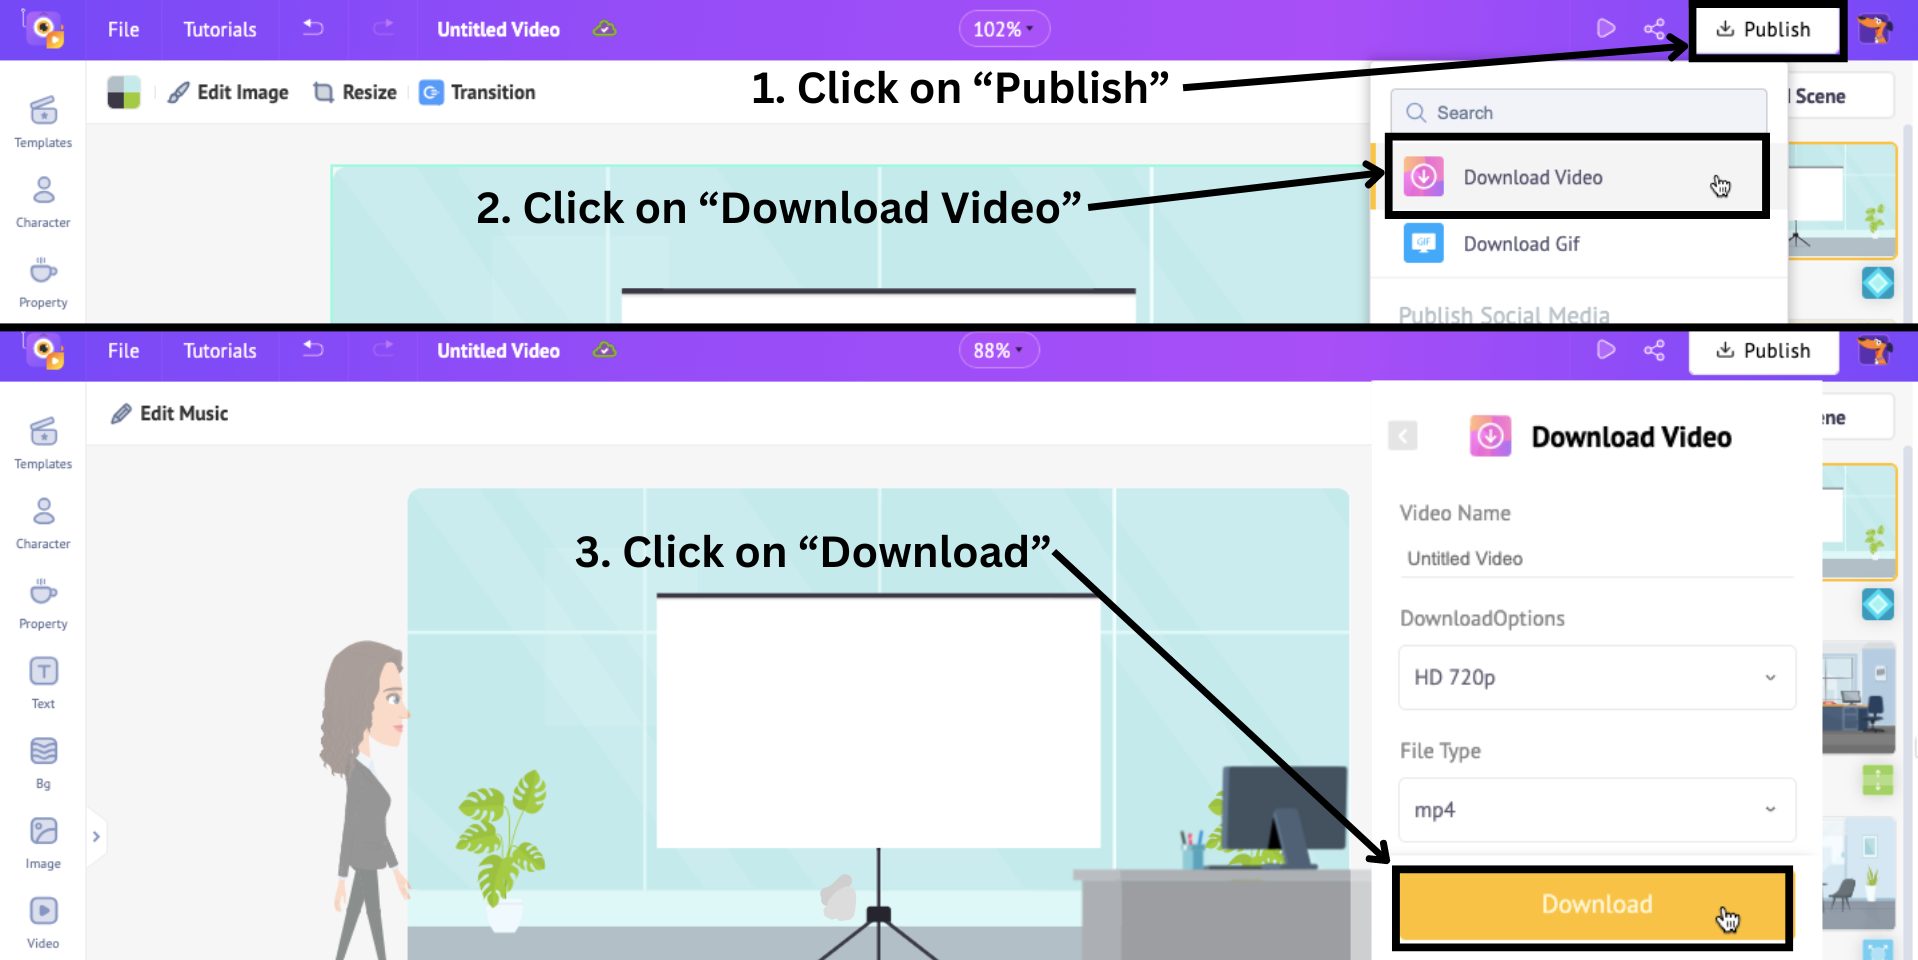
The video begins to render, and you can download it from the exports page.
This is how you create your eLearning video with Animaker! It is very easy, right?

But wait, there's more you can add to your videos!
To make your eLearning video even more engaging, you can add interactive elements by integrating it with Articulate Storyline.
With Articulate Storyline, you can incorporate quizzes, clickable objects, and other interactive features that enhance the learning experience.
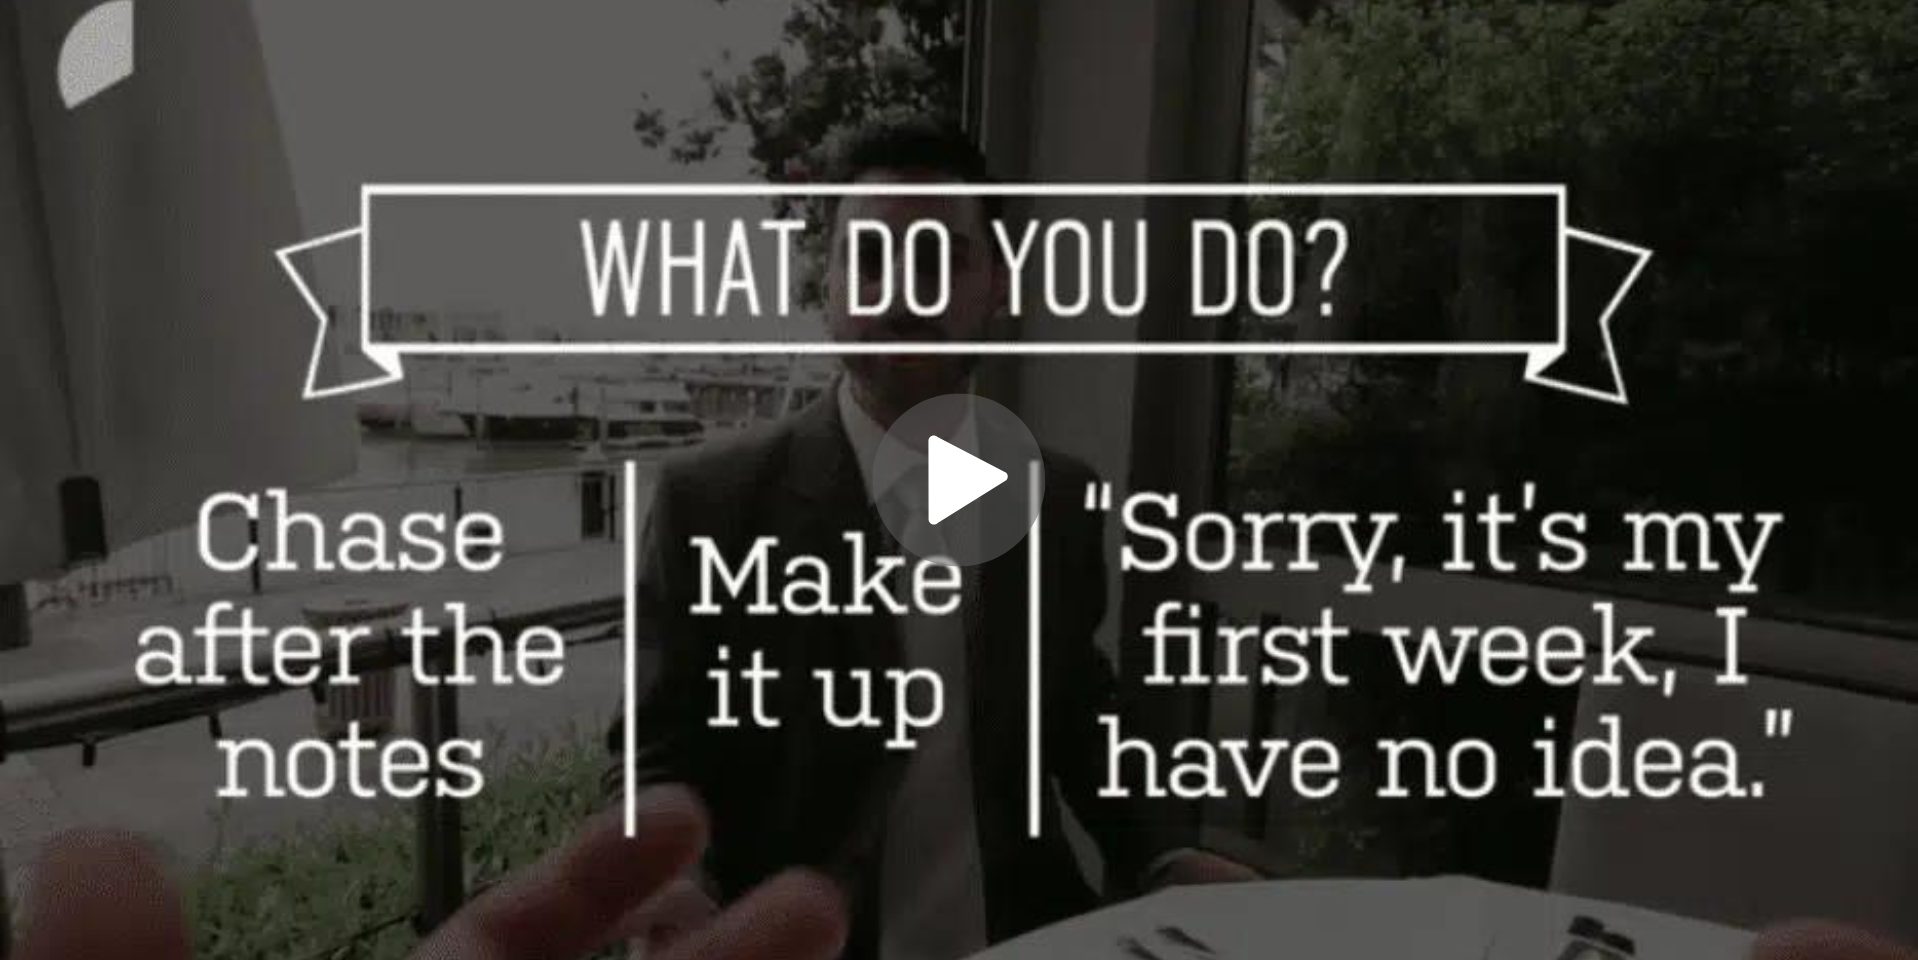
What we are going to do here is make the video interactive by adding various scenarios and choices, allowing the audience to make decisions that lead to different outcomes.
So, I will present a problem after explaining a topic, offering multiple choices that lead to different outcomes, with in-video feedback for each option to reinforce learning and encourage critical thinking.
To create such branching scenarios, you'll need to create separate video segments. This involves creating an initial video that presents the problem, followed by additional videos that display the outcomes of each choice—one showing the correct response (Outcome 1) and another showing the incorrect response (Outcome 2).
This method allows learners to explore different scenarios, enhancing engagement and thorough understanding.
Ready to add interactivity to your eLearning videos? Let’s see how.
How to add interactivity to eLearning videos?
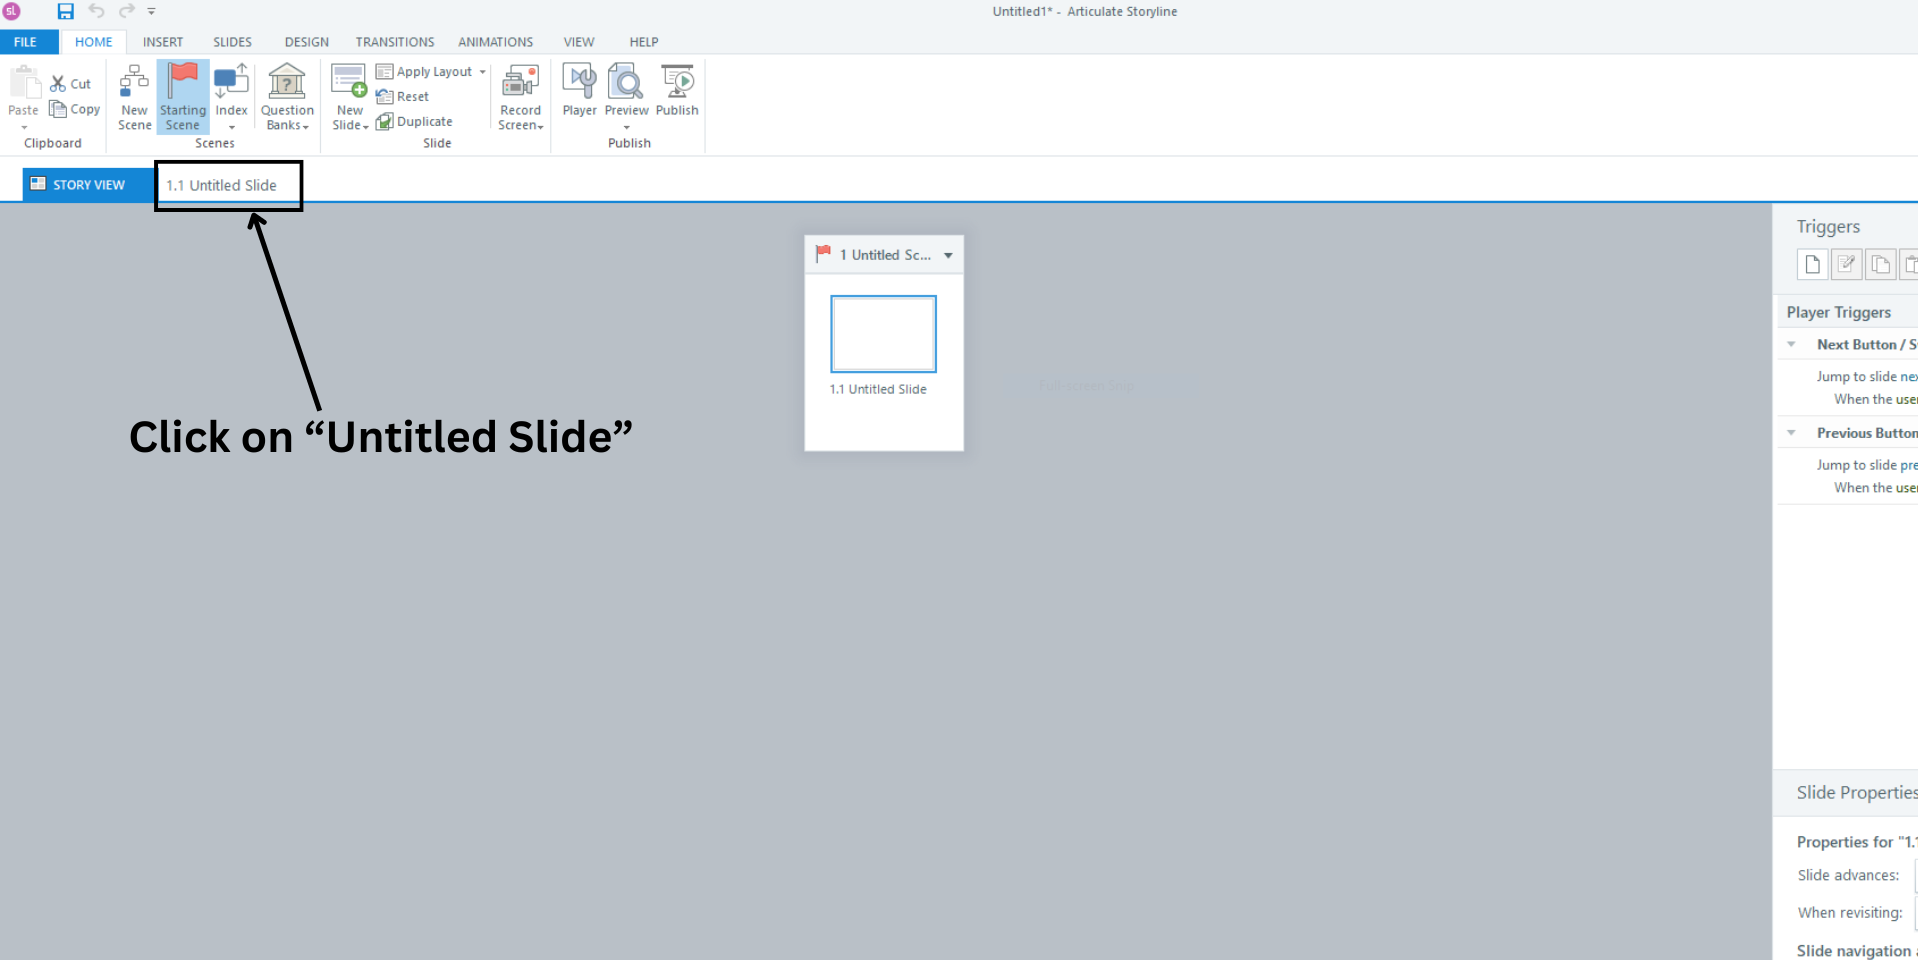
When you open the Articulate Storyline software, click on the Untitled slide tab next to the Story View tab. This is where we will upload our video.
Here, go to the Insert tab and select Video to add a video file from your computer to the slide.
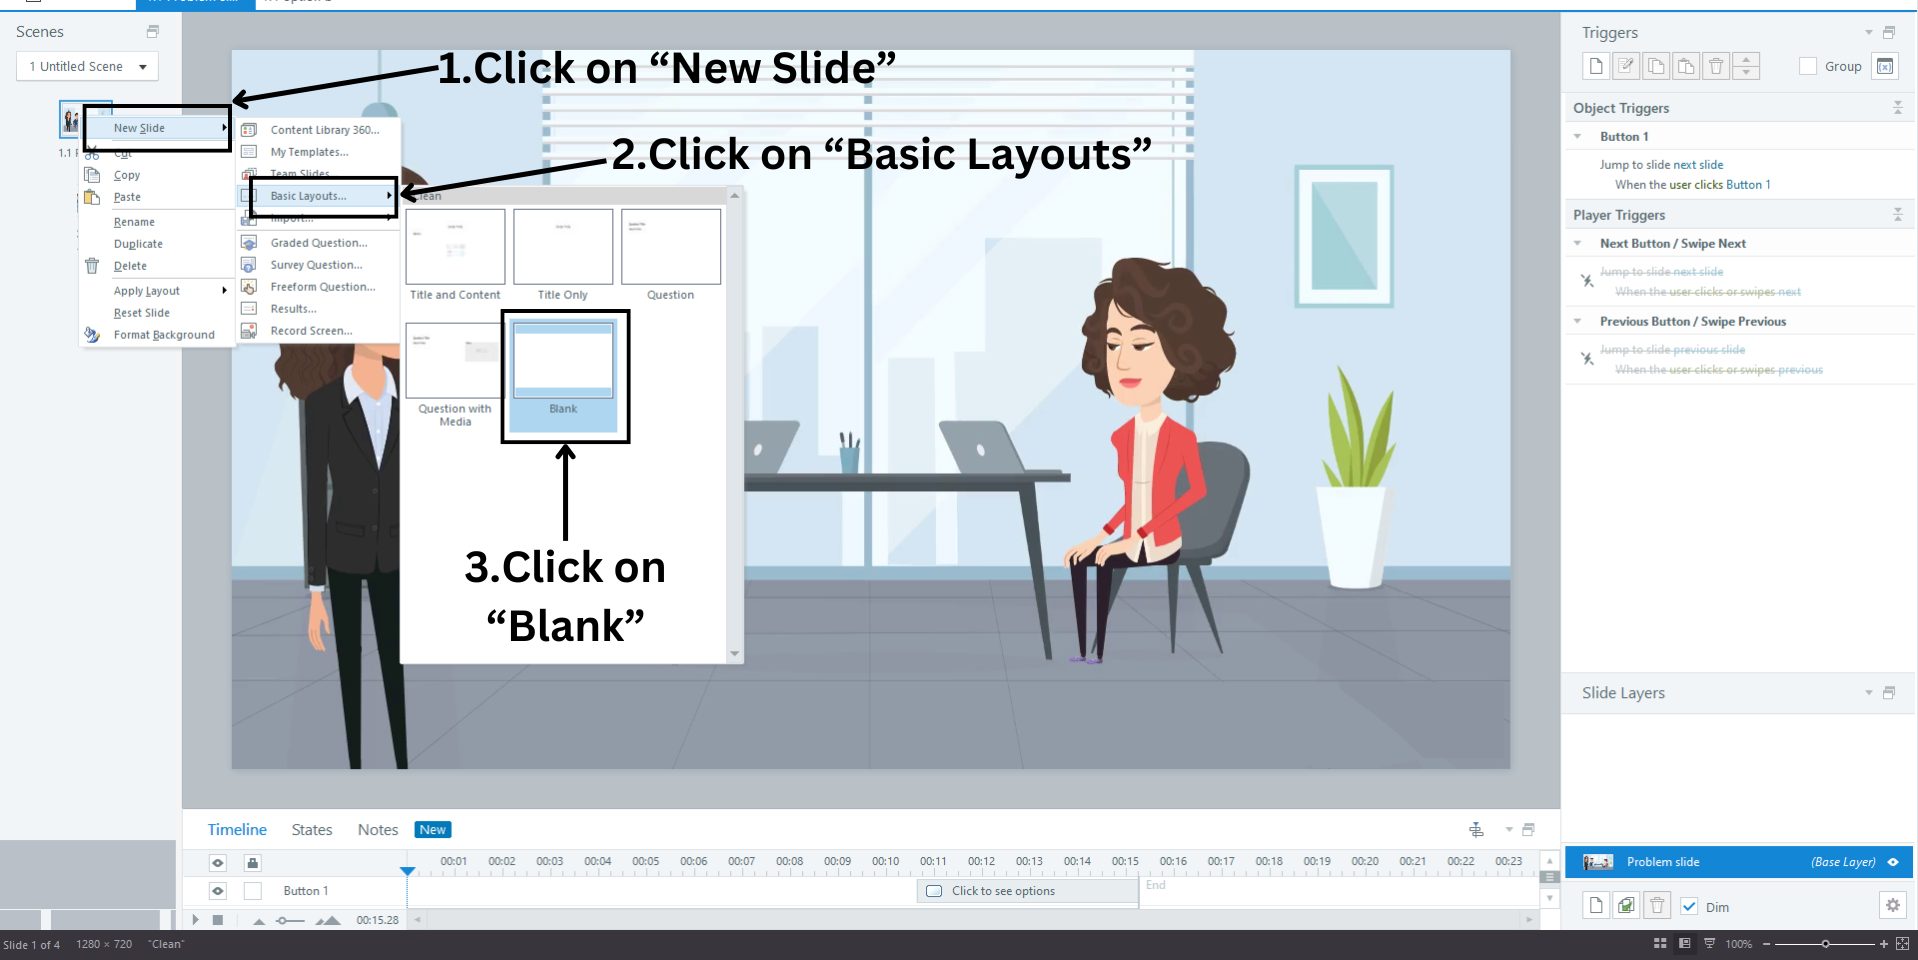
This is how you add your video to the first slide! To add the next video to a new slide, right-click on the first slide on the left and select New Slide > Basic Layouts > Blank.
Upload your second video, or you can add the video that presents a problem here. I’m going to upload a picture as this is where I include interactive options.
Similarly, you can add new slides with other videos.
Once you add all the required slides, it is time to add options for interactivity. Go to the slide where you want to add options. In my case, it is the second slide where I added the image.
Now, to add interactive options, click on the Insert tab and click on Buttons.
Select a button from the options, then click and drag the cursor to place the button in your desired position. Modify the button style by clicking on the Button Styles option above.
Click the buttons and type in the different choices. Here, I will use only two buttons. You can have more if needed.
The choices are added, but we want these options to give different outcomes when selected by the audience.
To do that, click on one of the added buttons and select the Create a new trigger icon on the right.
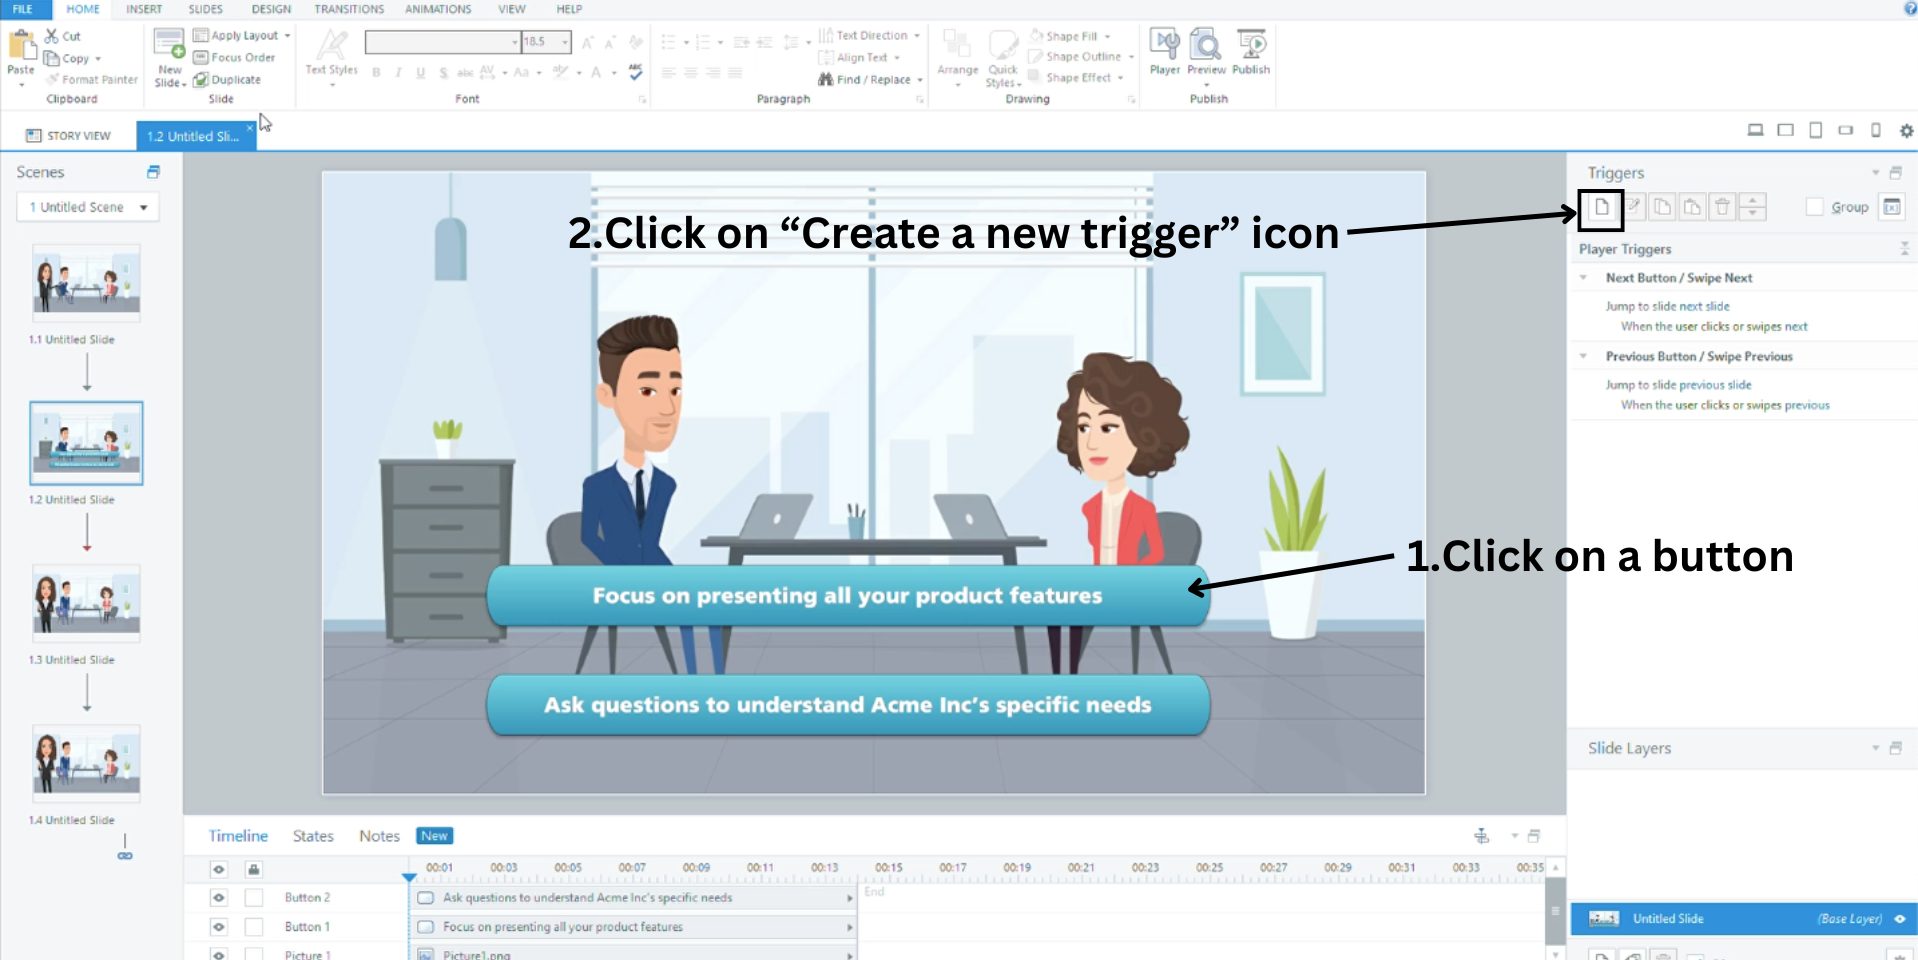
This will open a pop-up window with mandatory options called - Action, Slide, When, and Object.
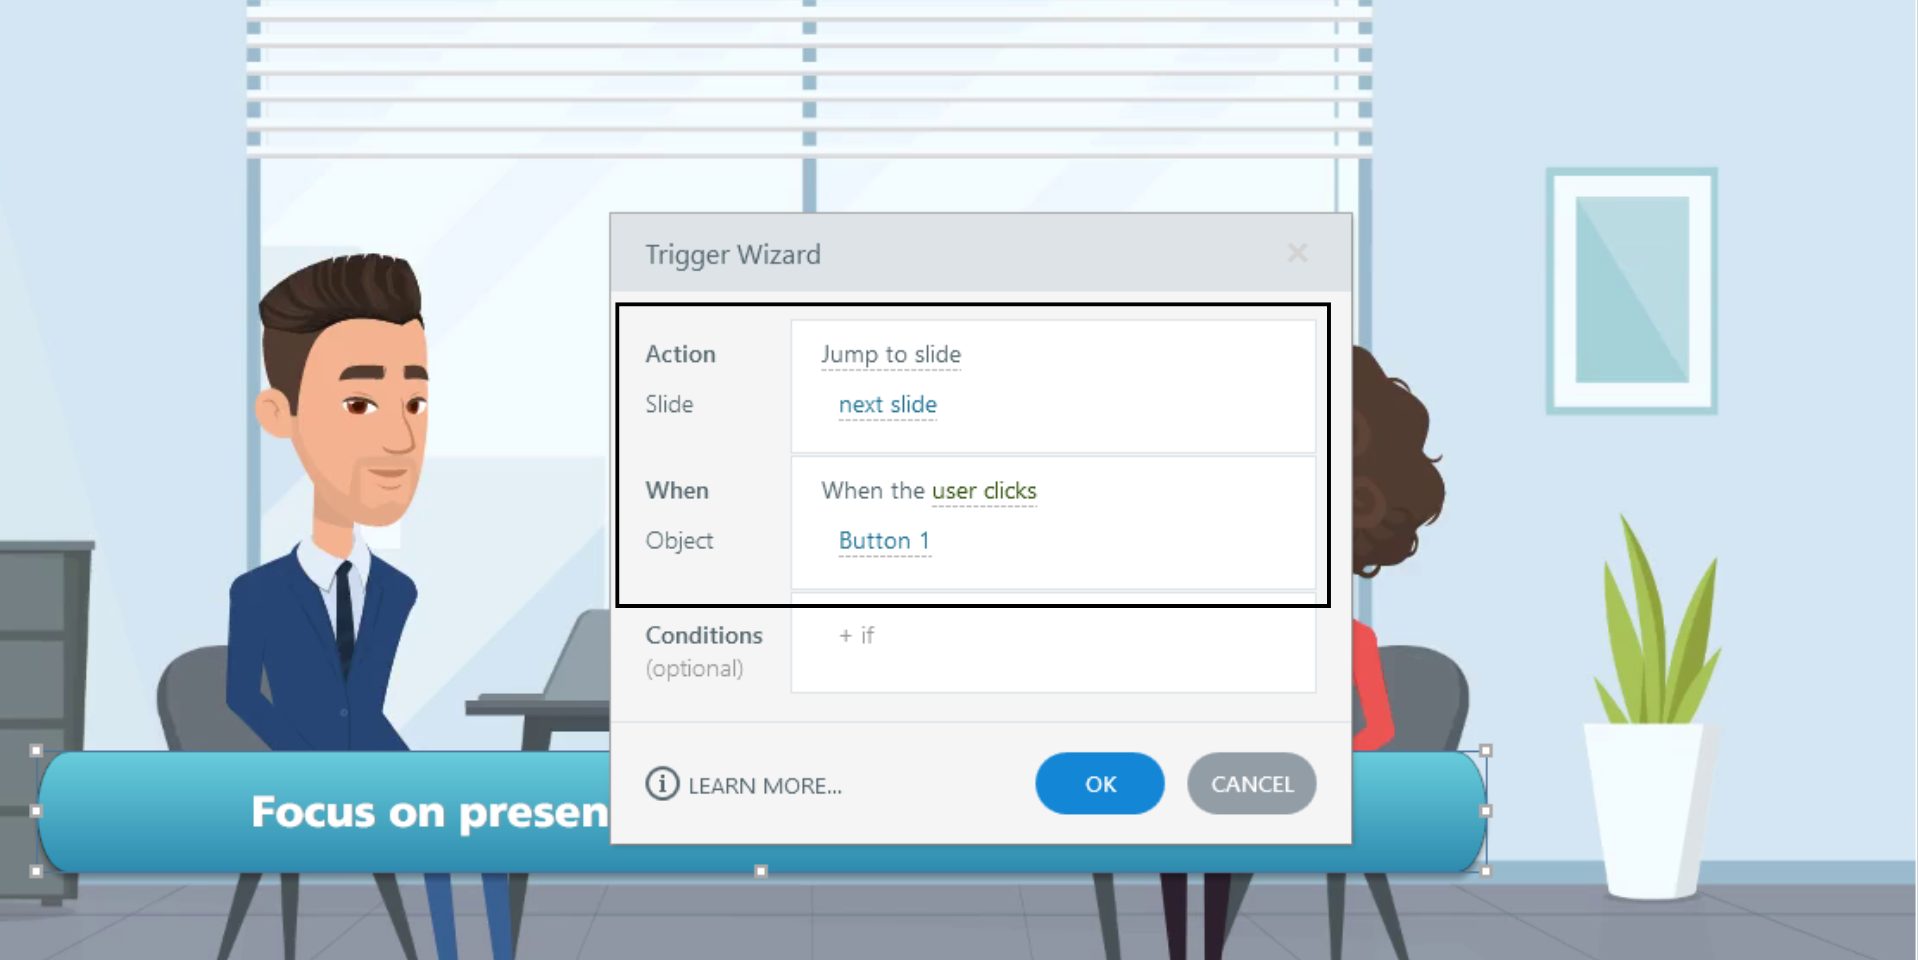
Here’s what each option mean -
- When - this refers to the time you want the trigger to occur.
- Object - the object that causes the scene to change. In this case, the object is the button.
- Action -The default action is "Jump to slide," which is exactly what we want. Additionally, there are other actions such as Show layer, Hide layer, Move, Jump to time/cue point, Play media, etc.
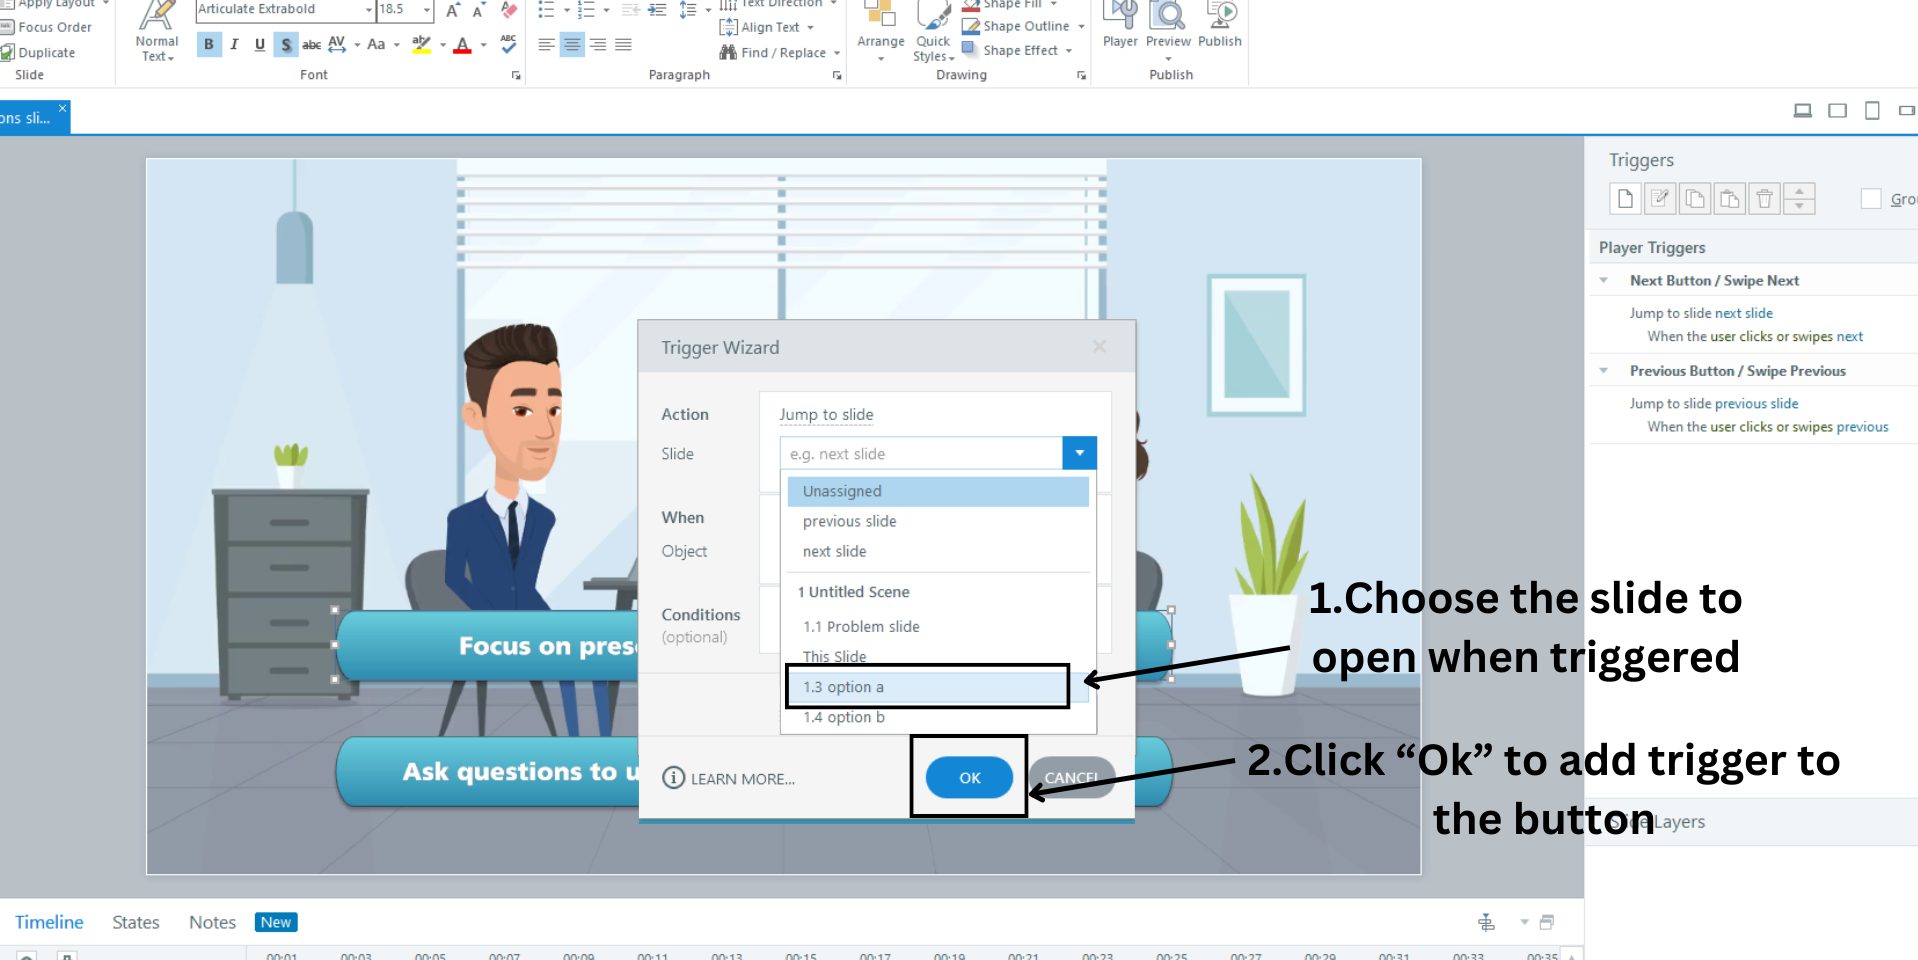
Here, the Slide option is Next Slide by default. But for easier reference, you can click on it and select the particular slide that should open when the trigger occurs.
In my case, since I chose the first button, I chose the slide with option 1 video to open if the user clicks on that button. Then, click on Ok to add the trigger.
Repeat the same process to add the trigger for the other button as well.
According to my script, option 1 is the wrong choice, while option 2 is the right choice. So, I’m going to include a button at the end of the "Option 1" slide that, when clicked, will revert back to the slide presenting the problem.
This way, the employee can retry their action and learn the correct answer by selecting the other option.
If you notice, you can see that when a button is added, it appears throughout the slide.
But I want it to appear only at the end. So, to adjust when the button appears, drag the ends of the button element on the timeline.
Add the trigger to this button like how we did previously, and it is important to choose the right destination slide.
We've completed adding the button to the slide for Option A. Similarly, you can add buttons to the other option slide to allow users to move on to the next scenario.
Note: For this, you would need more videos for the new scenario and rightly pointed triggers.
Once you have finished creating multiple scenario-based elearning video, it is time for one last important step, that is, publishing your course.
To do that, click on the Publish option in the home tab. From the pop-up window, click on Web and rewrite the title of your course and choose the destination folder. Then, click Publish.
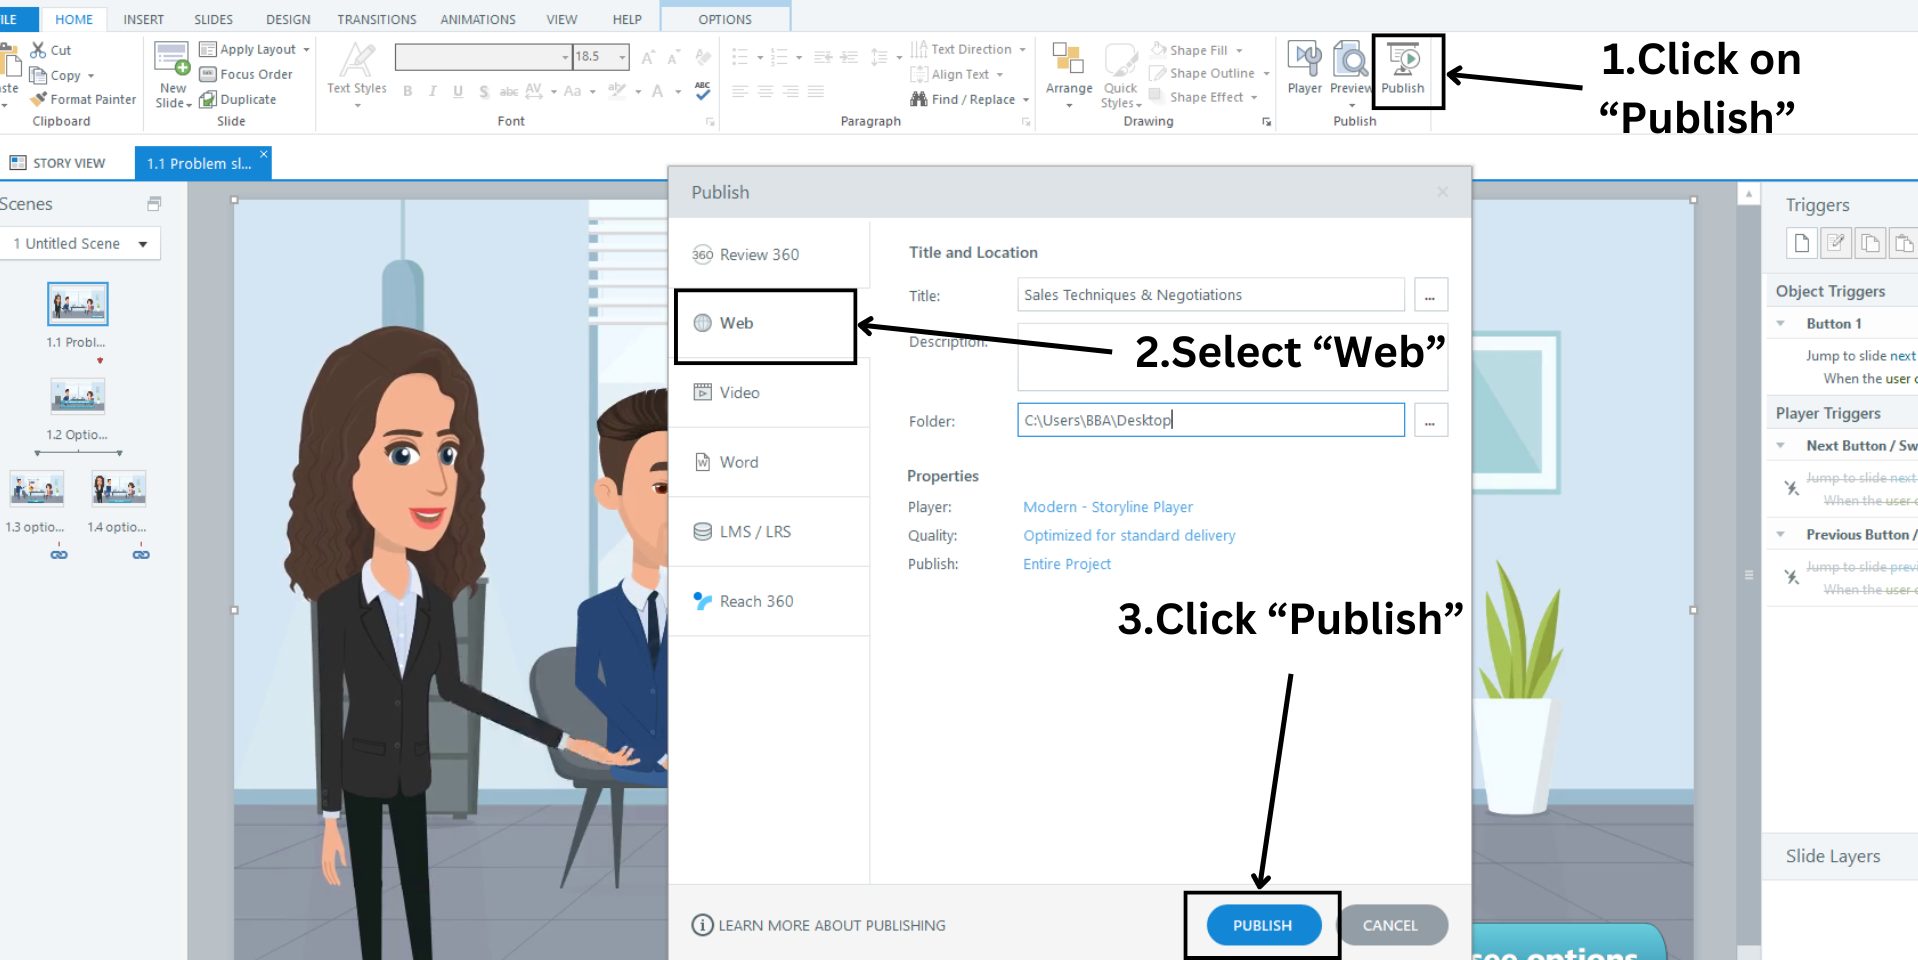
You can find the downloaded course in the destination folder.
After uploading my video to Articulate Storyline and adding interactivity, my scenario-based eLearning video course looks like this -

Now, the eLearning video course looks lively with all the animations and interactivity, right?
This is how you create engaging videos with Animaker and integrate with Articulate Storyline for interactivity.
By carefully planning your content, utilizing engaging visuals, and incorporating interactive elements, you can create videos that not only educate but also captivate your learners.
Remember to continuously gather feedback and make improvements to ensure your videos remain relevant and effective. If you want more tips for creating eLearning videos, check out the link provided.