How to Add a Voiceover on Google Slides: A Quick Guide
Creating a presentation is like creating a beautiful piece of art. It requires skill and creativity to put together an impressive presentation.
One effective way to make your presentations stand out is by adding voiceovers to your Google Slides!
Voiceovers are like narrations/recordings of a person speaking, and they can make your presentations more engaging and captivating.
Whether you want to explain a concept or share a story, voiceovers can bring life to your slides.
In this blog, we'll show you just how easy it is to add a voiceover on Google Slides.
If you already have a voiceover, you can jump to this section - How to add voiceover to Google Slides with existing audio files.
If you want to create a voiceover from scratch, you can switch to this section - How to create a voiceover and add it to Google Slides.
So, let's get started!
How to add voiceover to Google Slides with existing audio files:
For you to add an audio file to your Google Slides presentations, it must be in MP3 or WAV audio format.
If you already have the voiceover for your slides in the correct format, the steps to use them in google slides are very straightforward.
Here they are:
Step 1 - Upload the voiceover to Google Drive
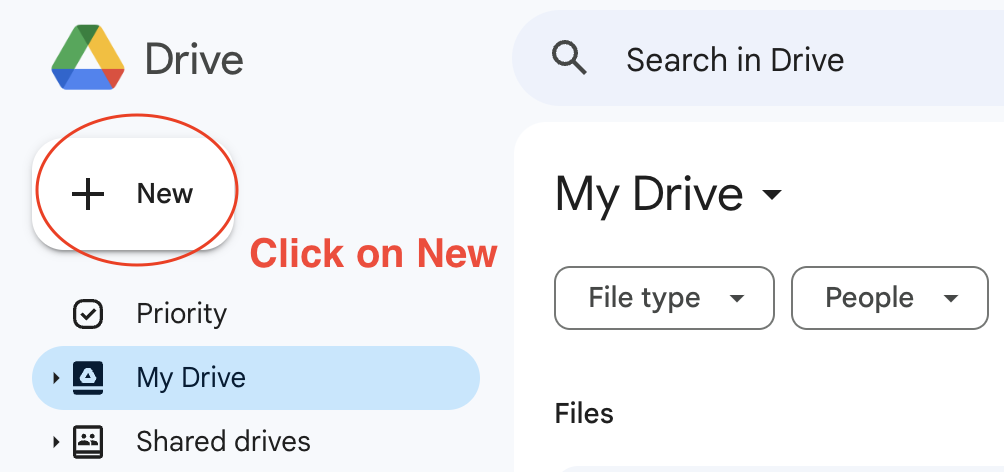
First, open your Google Drive. To upload an audio file, click on the New button at the top left corner of the window.
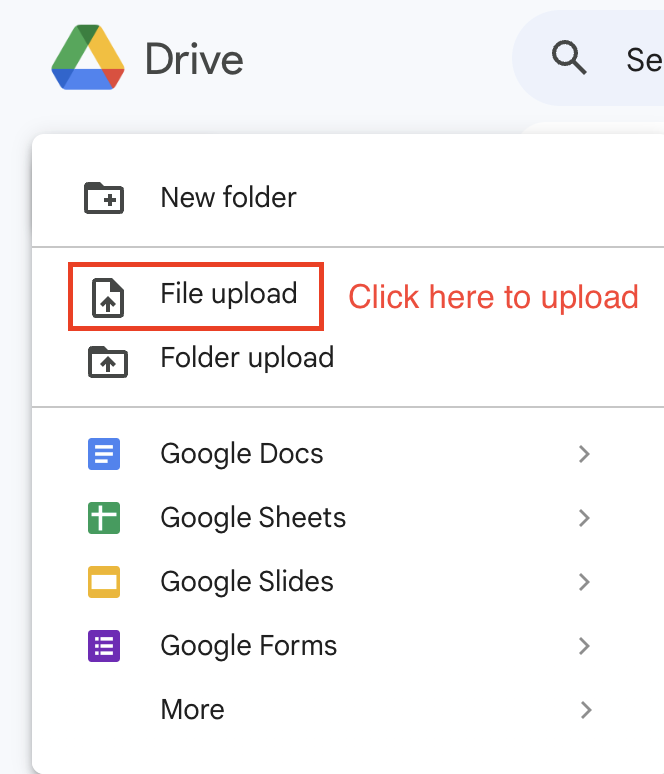
Next, select the File Upload option from the dropdown menu.
Alternatively, you can drag and drop the audio file onto the browser window with Google Drive open.
Step 2 - Insert the voiceover
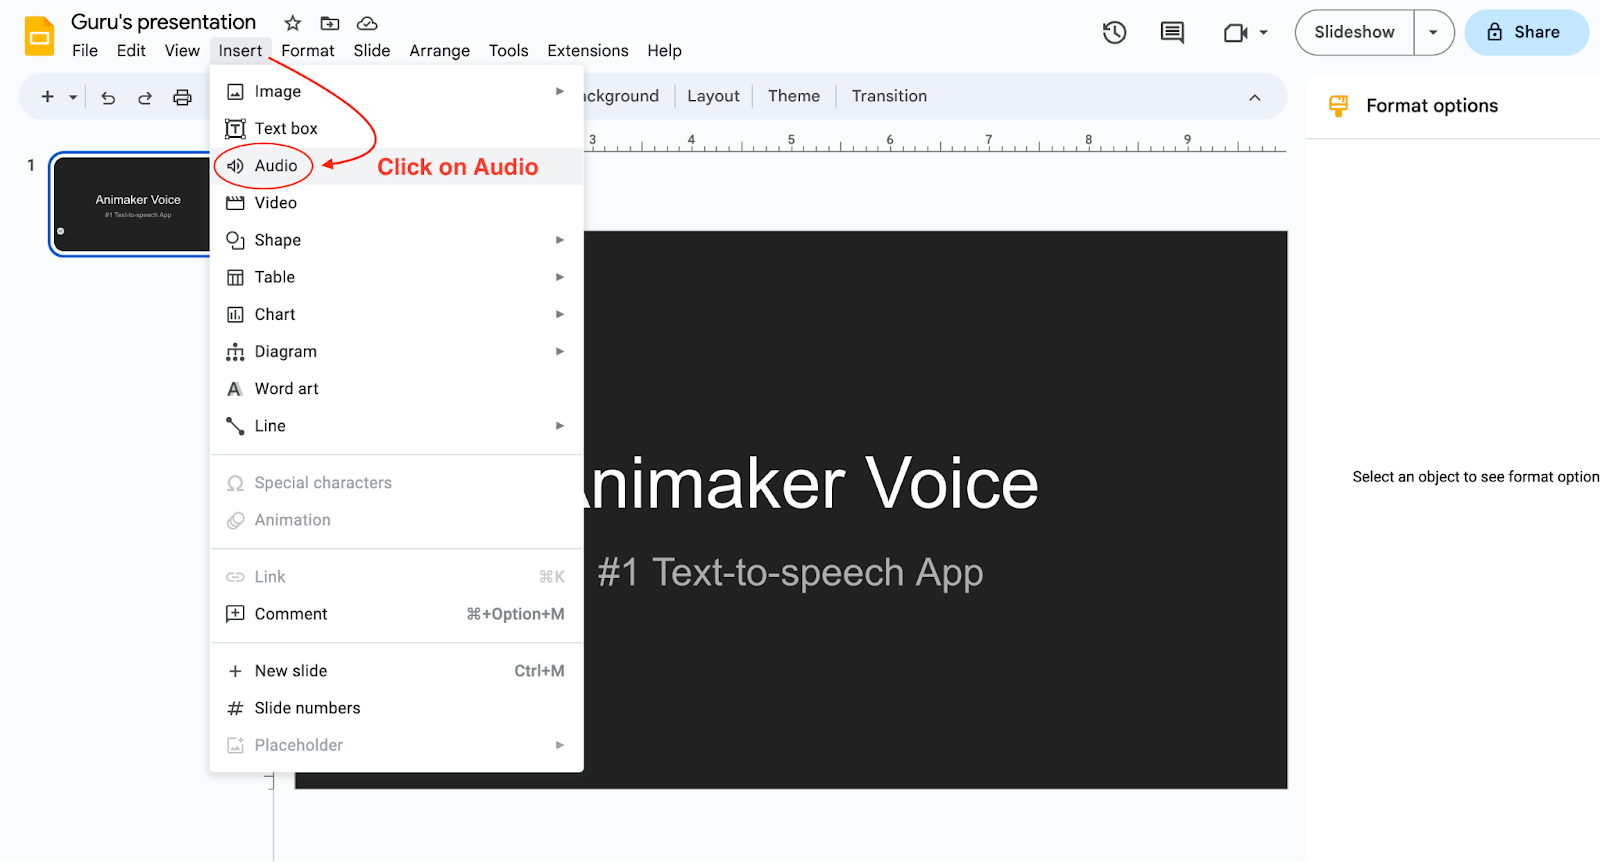
Now open your Google Slide where you want to include a voiceover. Then click on the 'Insert' option in the top menu.
From the dropdown menu, select 'Audio.'
Under My Drive, browse and select the audio file you wish to add and click on ‘Insert.’
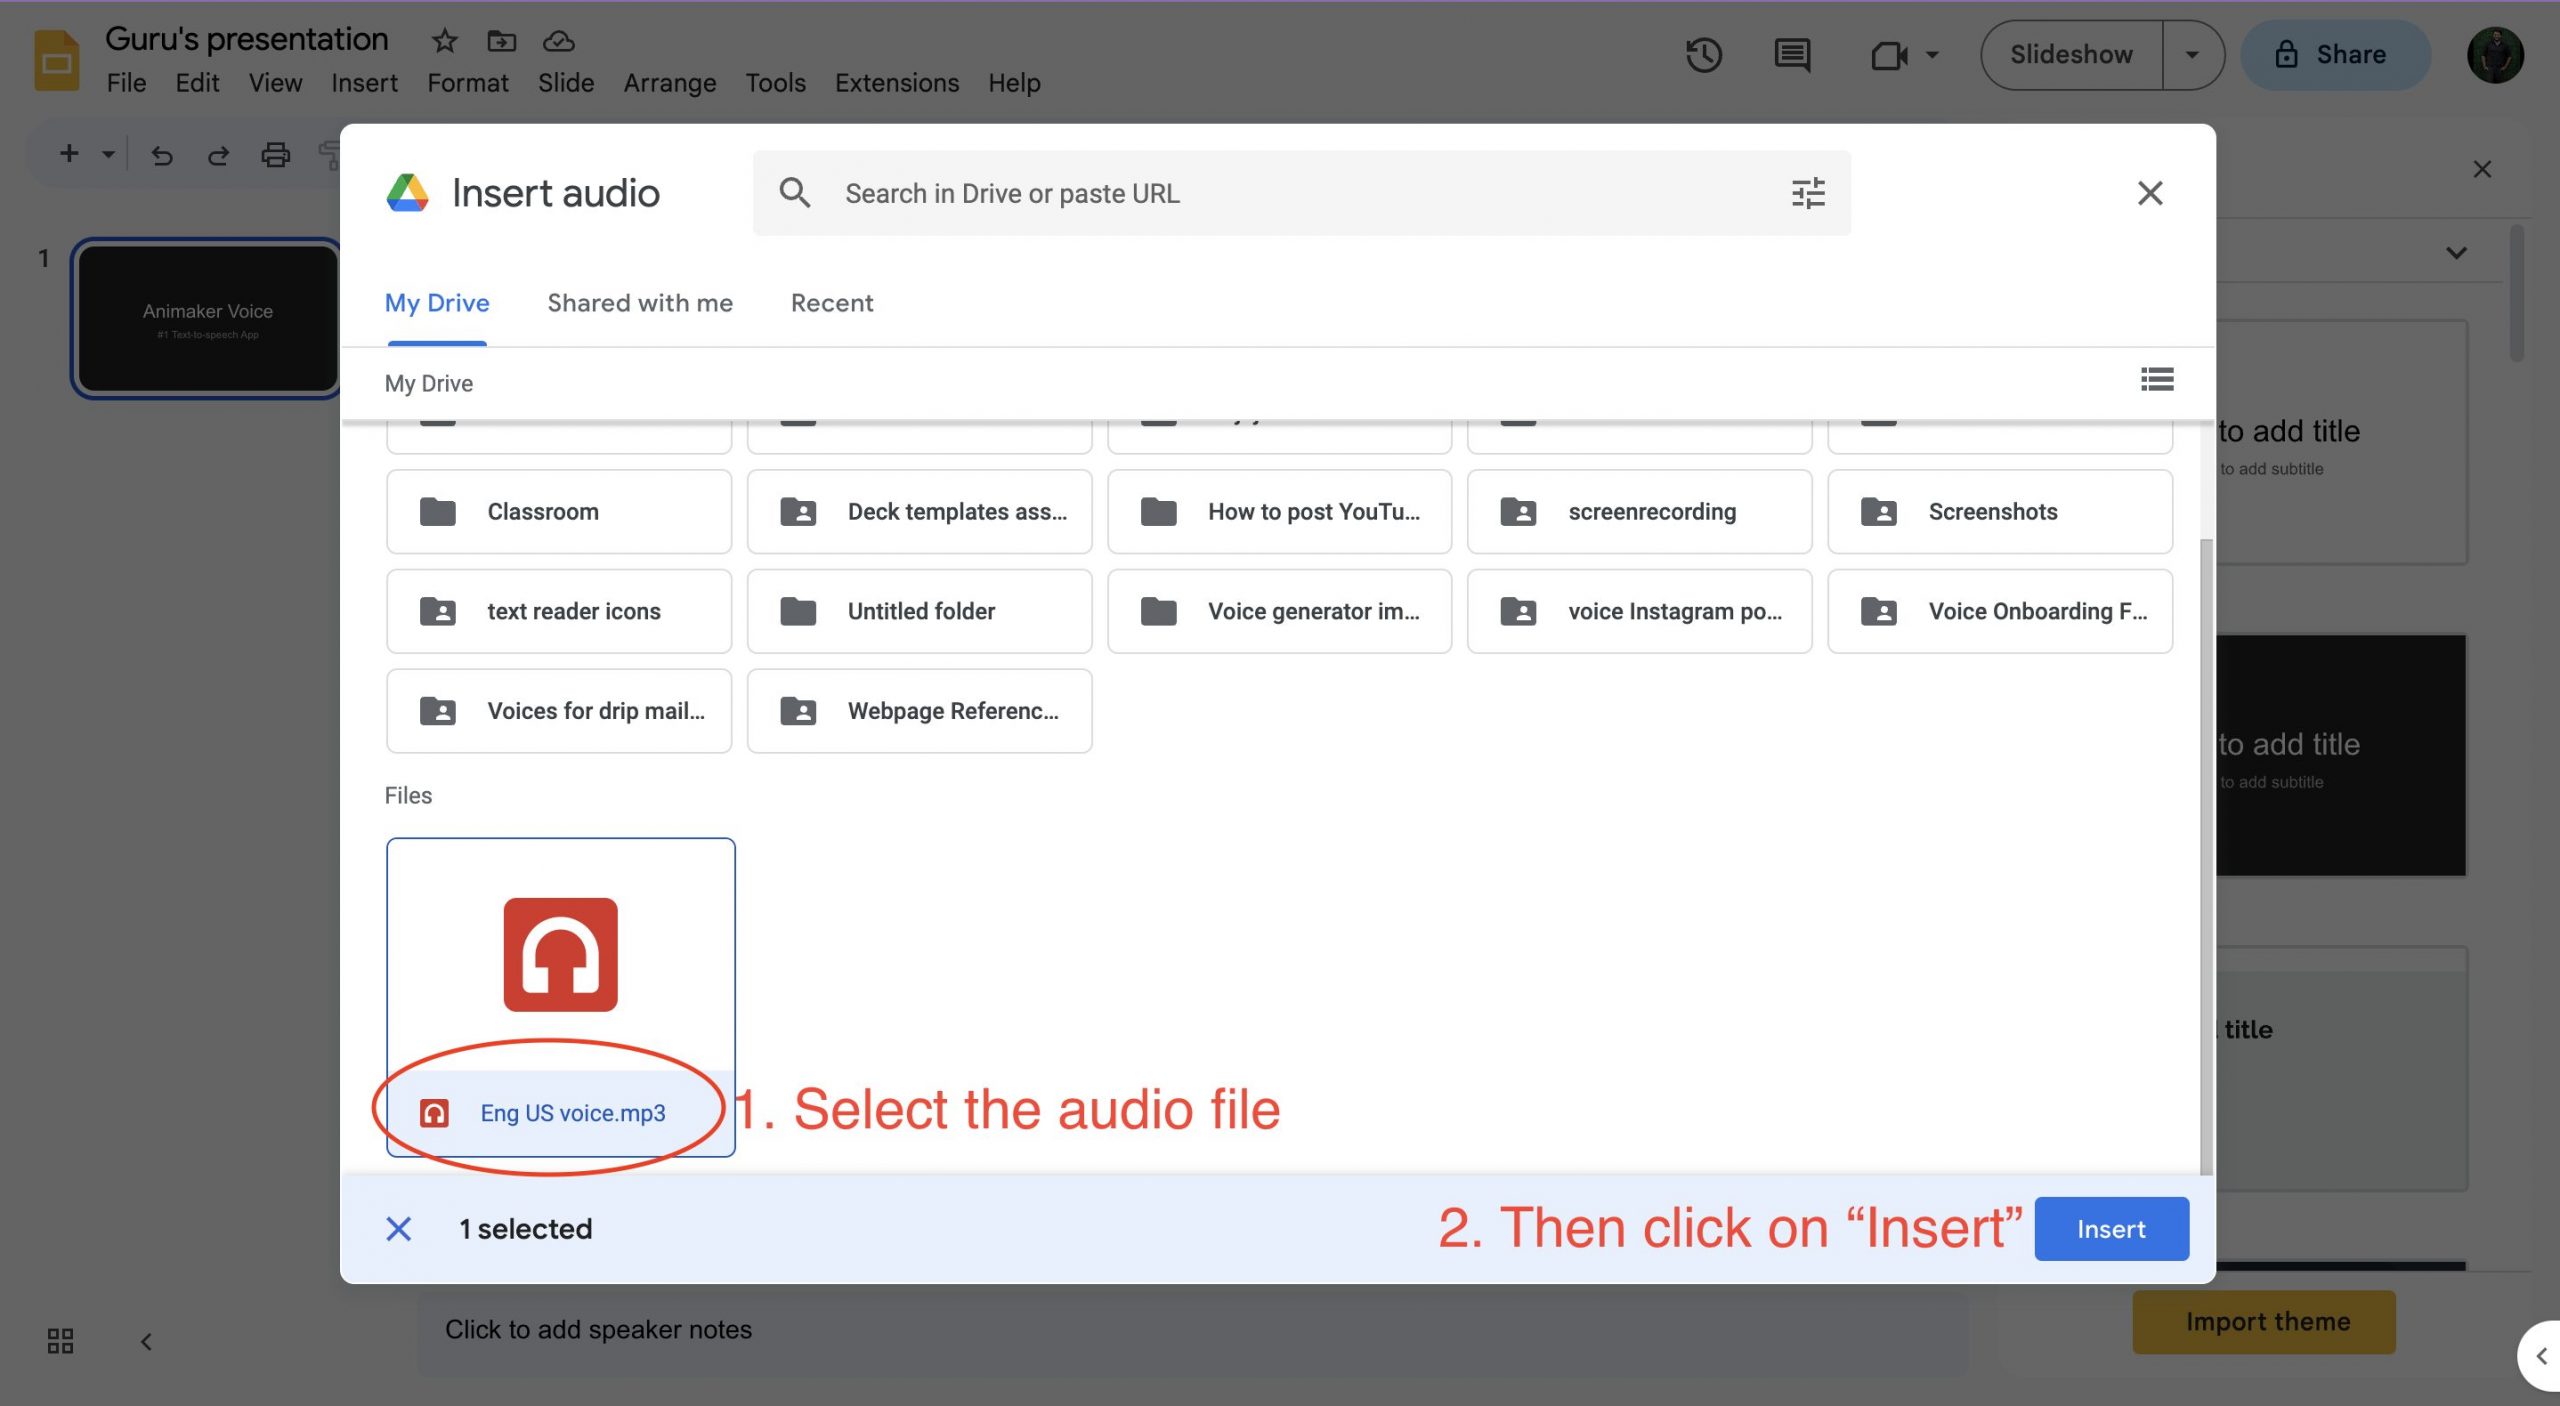
Step 3 - Customize/Preview the voiceover
After inserting the audio file into the Google Slides presentation, a speaker icon and a small audio player widget will appear on the slide.
To play the audio when you are presenting your slideshow, simply click on the speaker icon.
You can drag the speaker icon and position it anywhere else on the slide if desired.
You can further customize the voiceover playback using the audio format options on the right side.
![]()
In the format options menu, you get options that allow you to alter the volume at which you want the audio to play when you are presenting.
You can also choose when to start playing audio while presenting. You can choose between ‘on click’ and ‘automatically’.
If you choose to play on click, the voiceover in the slide will start playing only when you click after landing on that particular slide.
If you choose to play automatically, the voiceover in the slide will start playing automatically when you present that particular slide.
Spend some time on these options and figure out which one works best for your presentation.
And Voila! You have successfully learned how to add voiceovers to Google Slides in simple steps.
Alright. Now that you have learned how to upload your existing voiceover to your Google Slides, let’s quickly jump onto how to create voiceovers for your Google Slides from scratch.
How to Create a Voiceover and Add it to Google Slides
If you don’t have a voiceover already, don’t worry! We will help you create one in just a few steps.
You can record the voiceover using a voice recording tool if you feel comfortable using your own voice.
In such a case, we suggest you try online voice recording tools like Rev and Veed or use offline voice recording software such as Apple’s GarageBand or Audacity, whichever is convenient.
In this article, we’ll cover how you can record a voiceover using Rev’s free online voice recording tool.
Record a Voiceover for Your Google Slides Presentations in 4 Simple Steps using a Free Voice Recorder App:
Step 1: Recording your voice
- Open the tool and click the Record button to start recording your voiceover
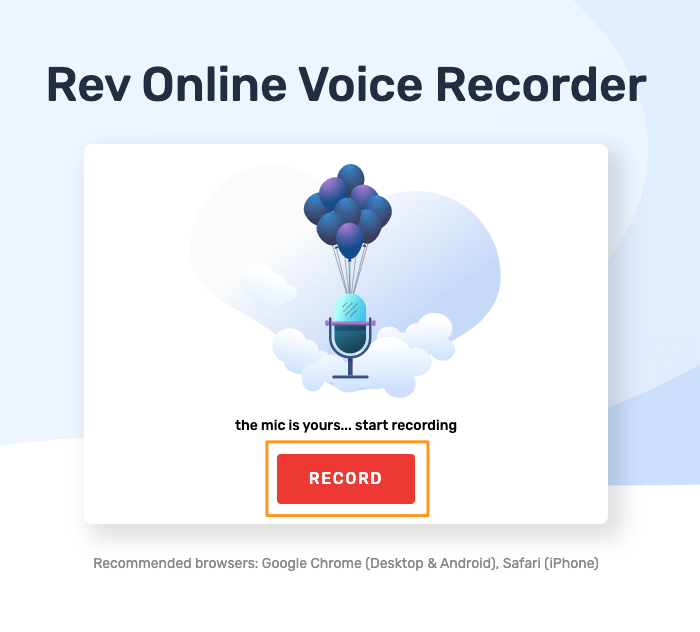
Step 2: Take a pause from recording
As you are recording, you can pause the recording by clicking on the Pause button.
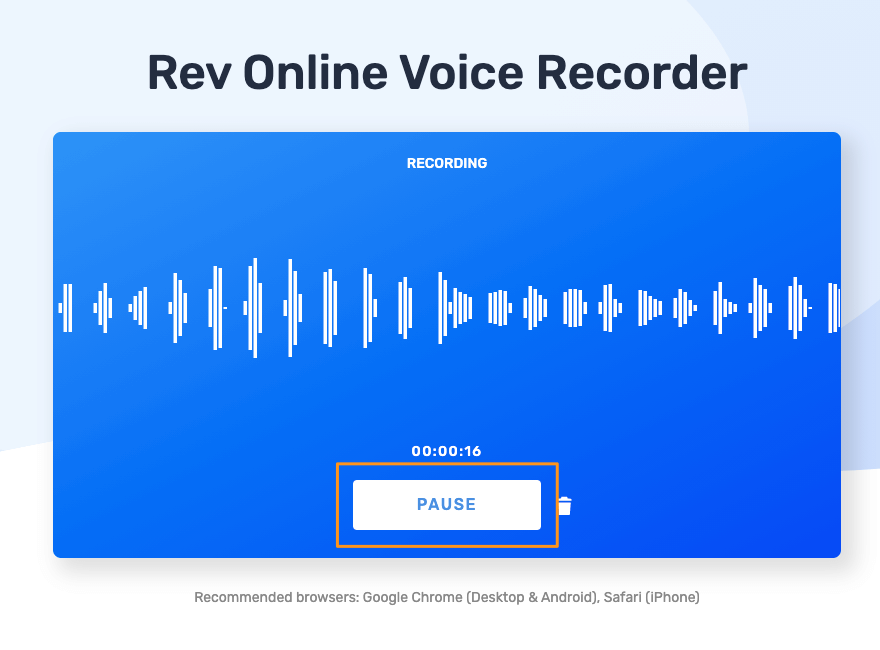
Step 3: Resume and Preview the recording
You can then resume recording by clicking on the Resume button or preview what you’ve recorded by clicking the Preview button.
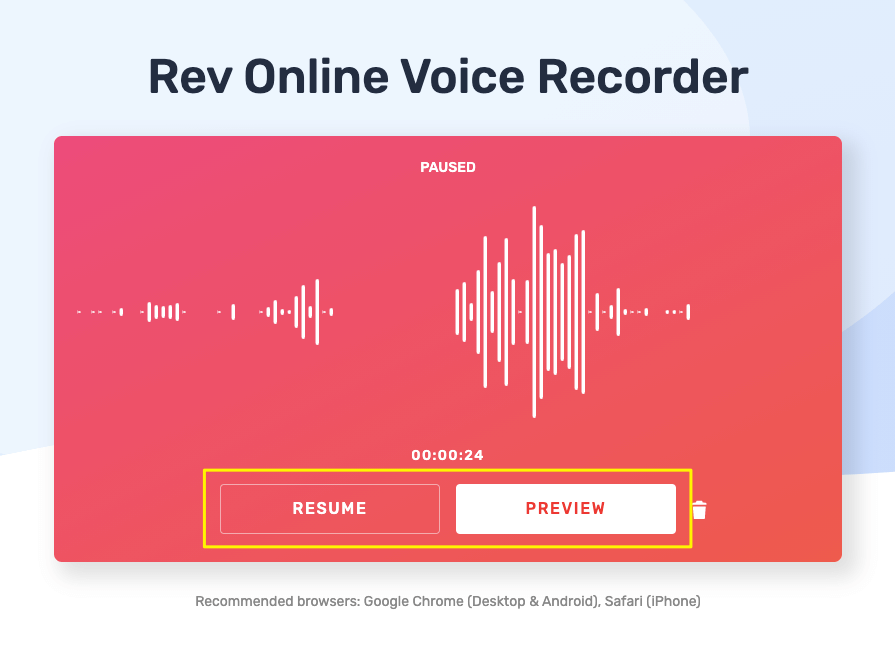
Step 4: Download the recording
Clicking on the preview button will take you to a window where you can preview, transcribe, or download the recording.
Click the download icon next to the transcribe button to download the recording.
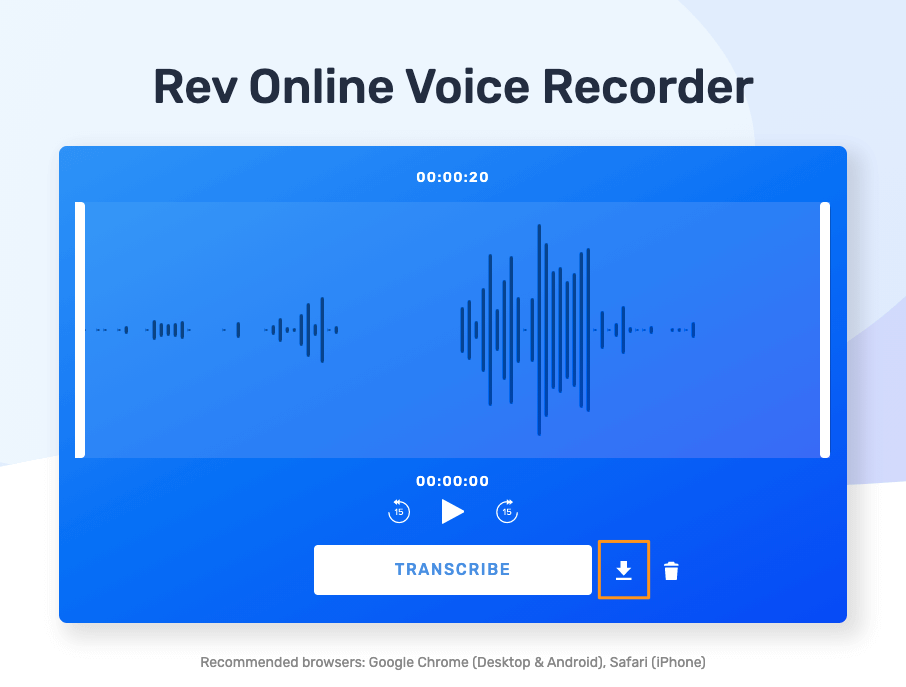
In this way, you can easily record your voice, download the voiceover as audio files, and use them in your Google Slides directly.
Once you have successfully created your voiceover, head to this section - How to add voiceover to Google Slides with existing audio files.
This is the easiest way to create and add your own recorded voiceovers to your Google Slides.
However, if you feel it’s better to have a professional voiceover in your Google Slides, jump to the next section, where you can learn more about creating realistic voiceovers using a text-to-speech application.
Create Realistic Voiceovers Using Text-to-Speech App - Animaker Voice
If you are uncomfortable using voice recordings in Google Slides, you can opt to create realistic voiceovers using text-to-speech applications like Animaker Voice.
Animaker Voice uses the AI-powered NTTS (Neural Text To Speech) model to generate ultra-realistic, crystal-clear audio narrations just from your scripts.
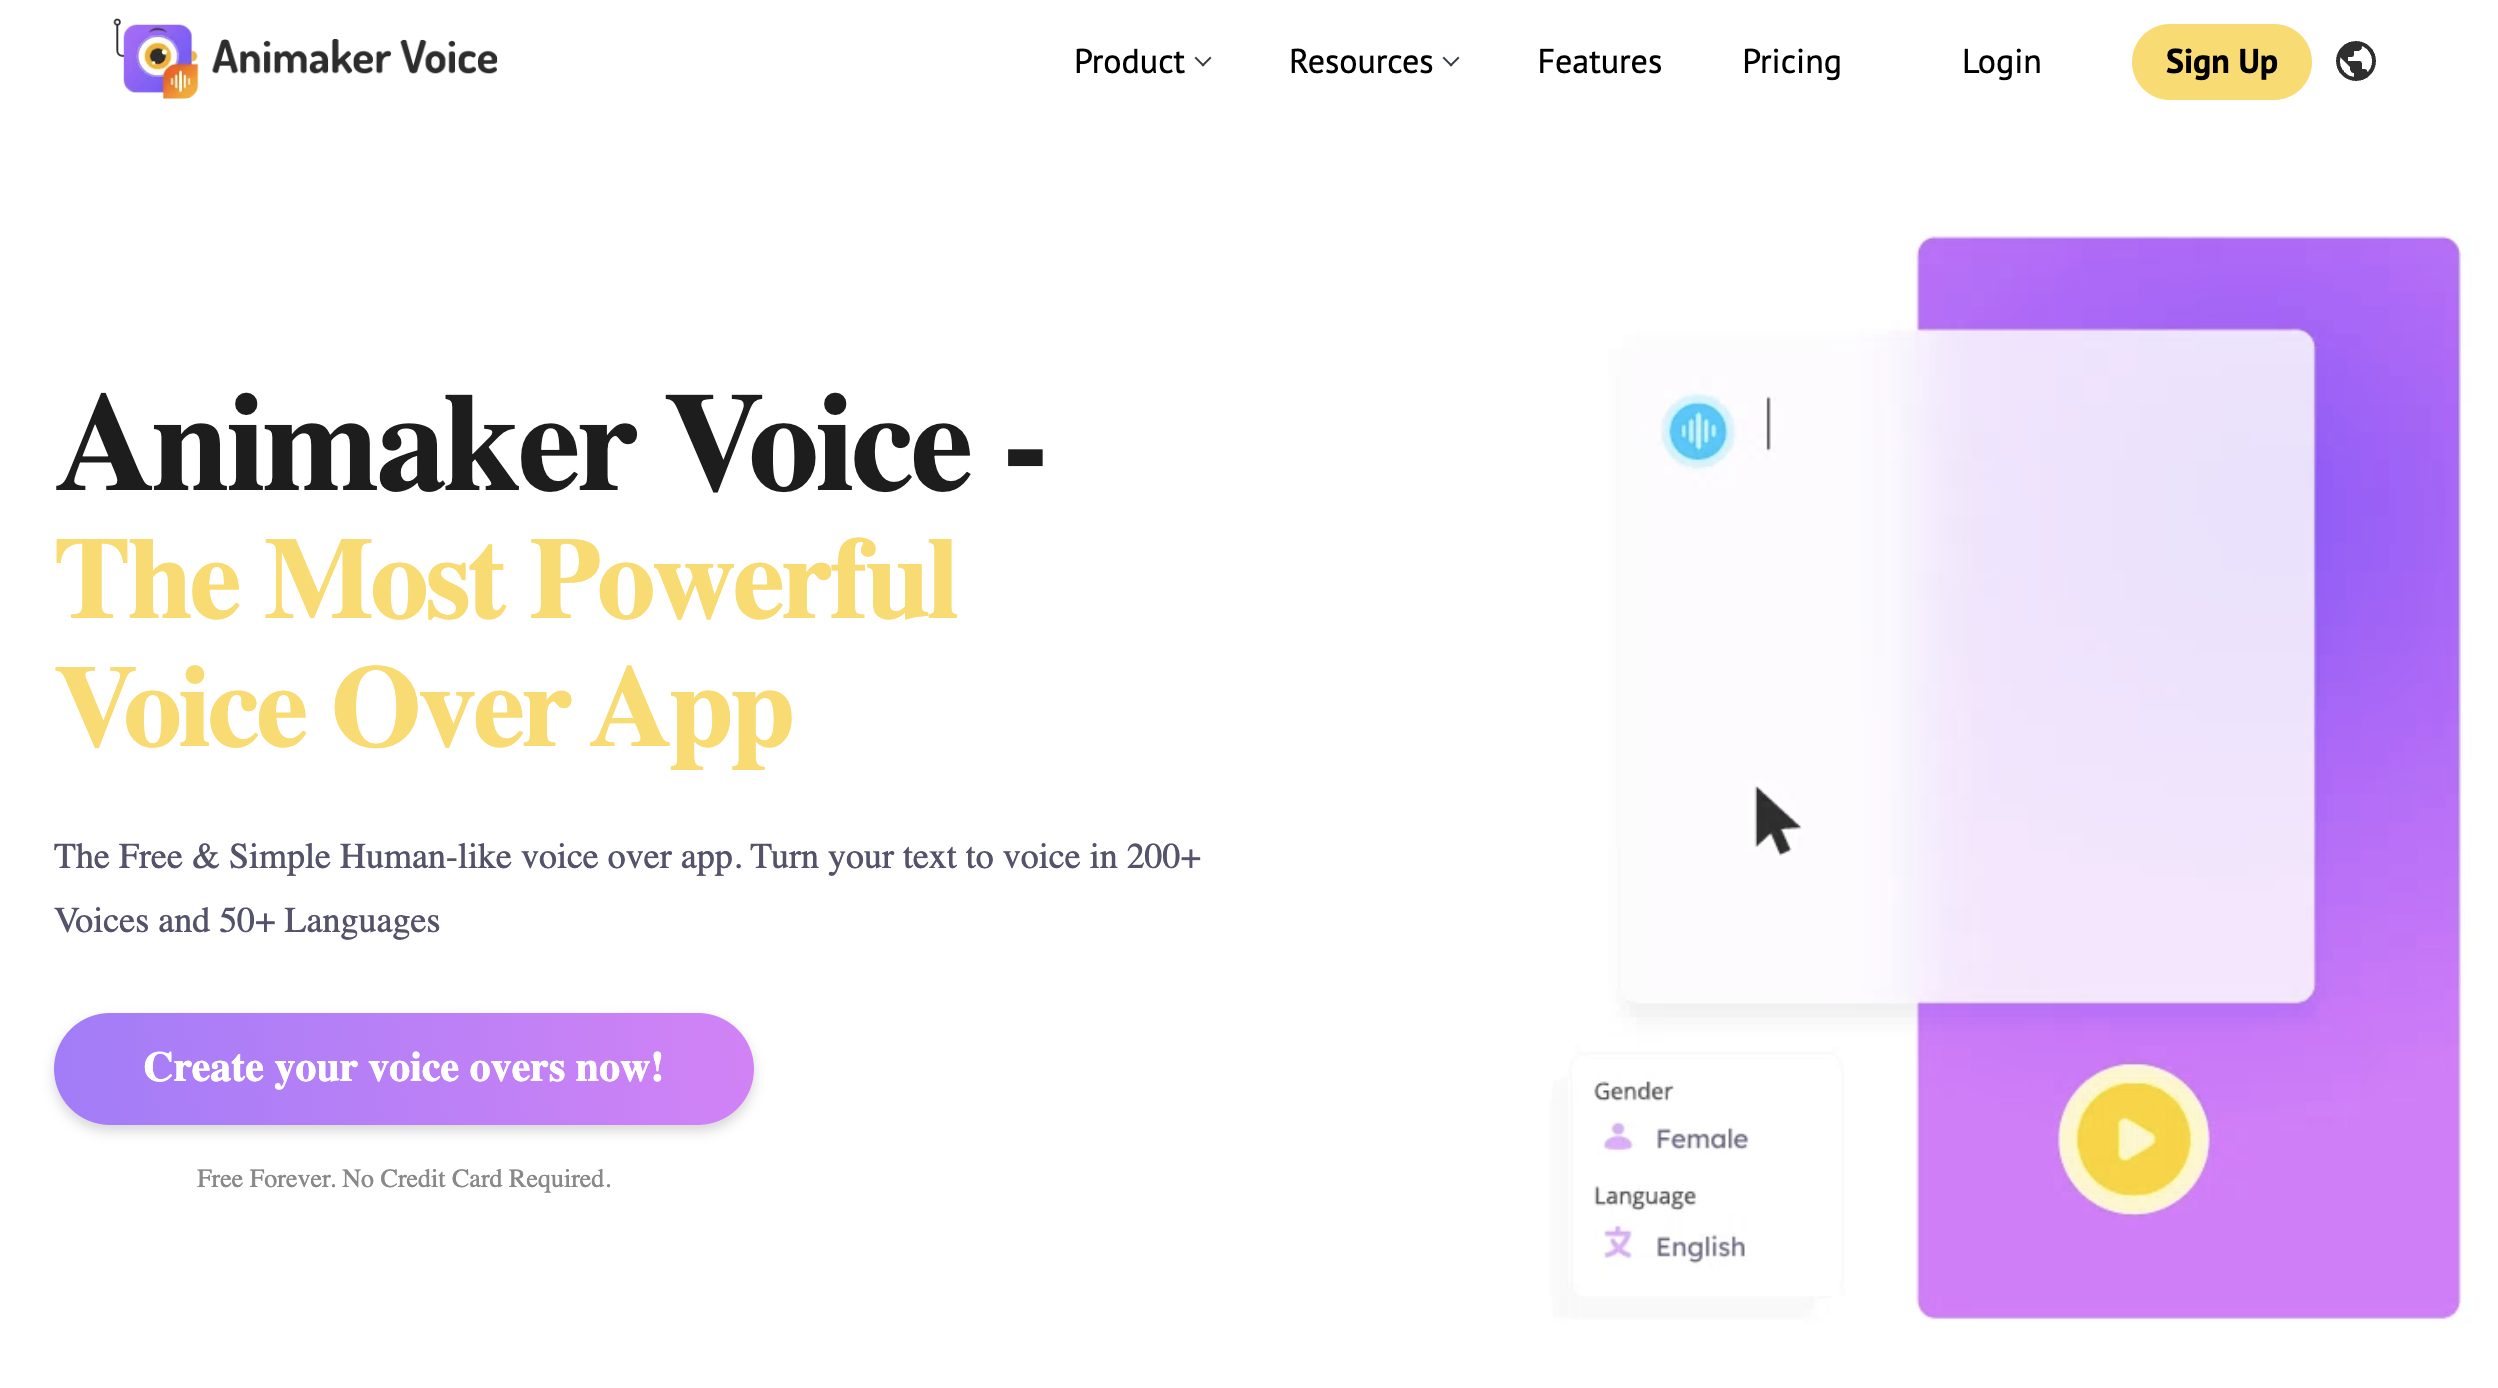
You can create a computer-generated voice just from text instantly once you signup for Animaker’s free account.
Check out this video tutorial to convert your script to speech in the Animaker Voice text-to-speech app.
Without spending a lot of money and time, it’s very straightforward to create a super realistic voiceover just from text and add them to your Google Slides.
Once you have successfully created your TTS voiceover, head to this section - How to add voiceover to Google Slides with existing audio files.
Do you know any other exciting hacks on how to add great voiceovers to your presentations on Google Slides?
Please let us know about them in the comment section below.
