Crop a Video in VLC on Windows 10 and Mac (With Pictures)

Pragadeesh N - January 12, 2021 - Leave your thoughts. 4 min read
Looking to crop a video in VLC on your Windows 10 or Mac computer?
Whether you are using VLC on your Windows or Mac computer, we got you covered.
In this article, we show you how to crop a video using VLC on both Windows and Mac computers with easy step-by-step instructions and pictures.
As a bonus, we’ll also show you how you can use Animaker’s Crop Video Tool to crop a video online on your Windows PC or Mac computer. If you aren’t aware of Animaker, it’s a free online DIY video making tool that you can use for simple editing tasks like trimming and cropping videos to creating full-blown animated and live-action videos directly from your browser.
How to Crop a Video using VLC on Windows 10 and Mac
If you have VLC installed on your Windows PC or Mac computer, you can use it to crop your video. Here are the steps:
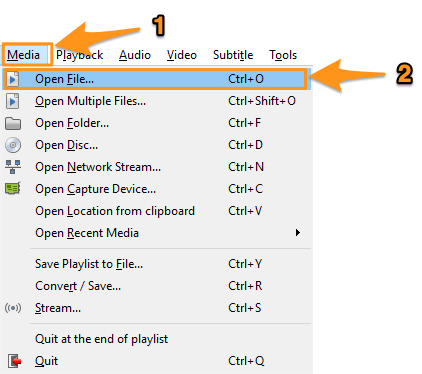
- Open VLC and open the video file you want to crop. To open a video using VLC on Windows 10, go to Media > Open File.
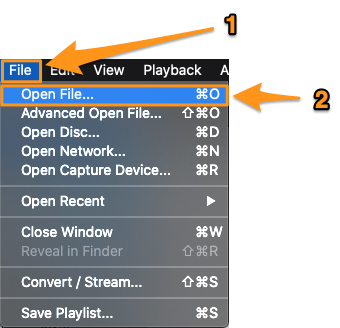
If you’re on Mac, go to File > Open File.
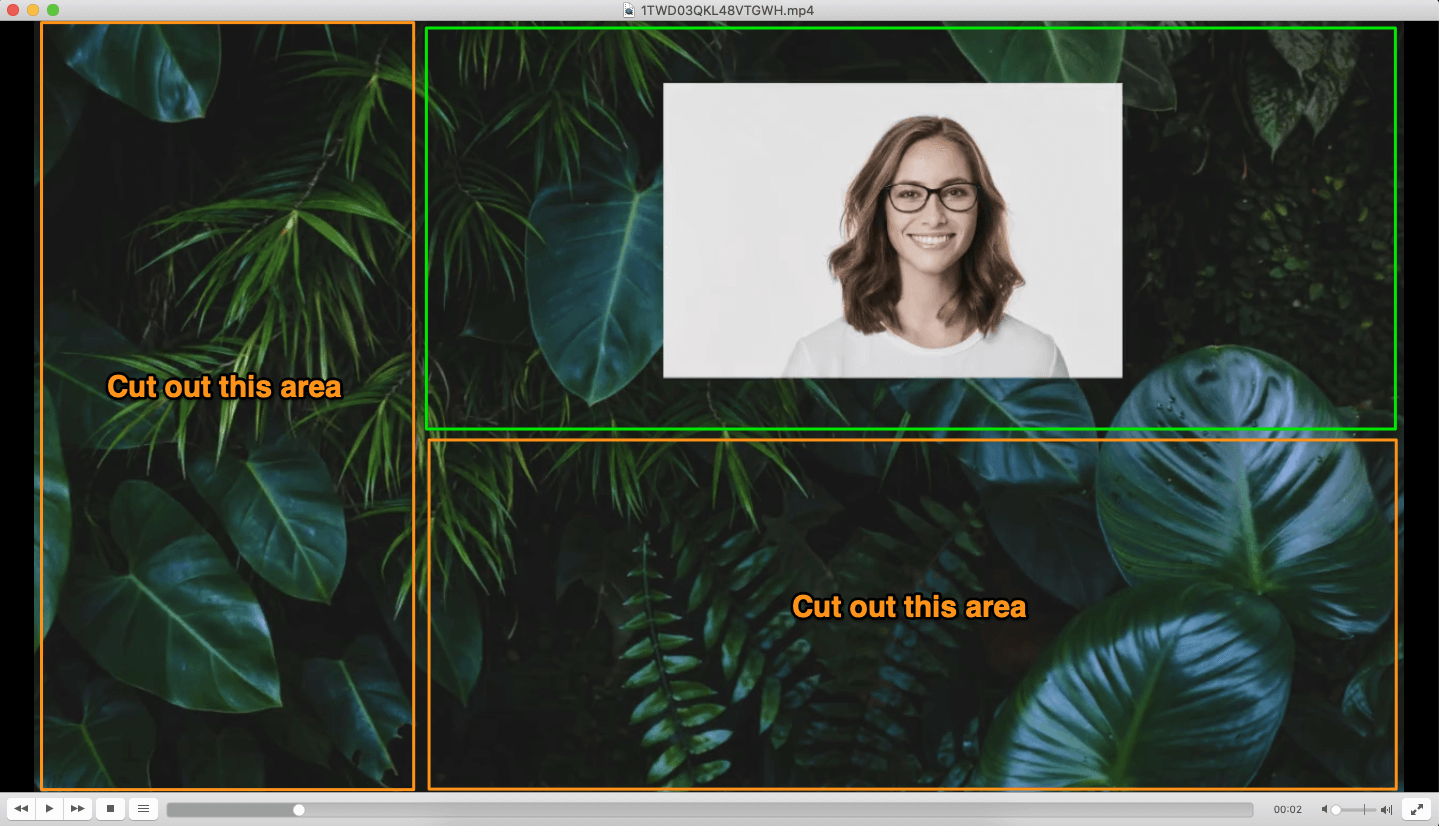
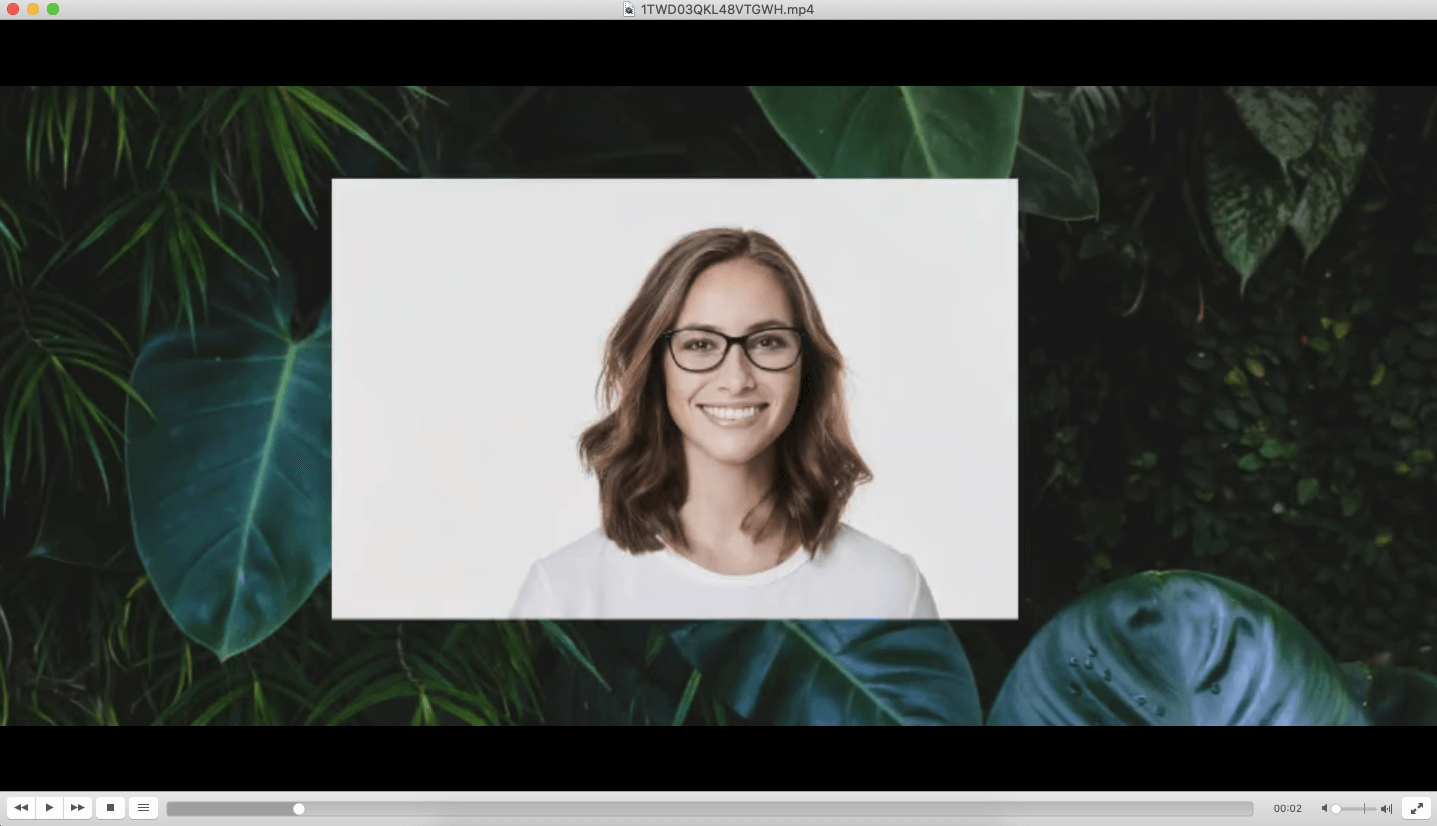
- Once you’ve opened the video, decide on the areas you’d like to cut out so you get the part you can use. Let’s say we want to highlight the part where there’s a picture of the woman. For that, we’ll have to crop the video from the bottom and left side.
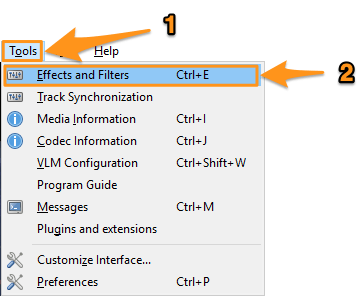
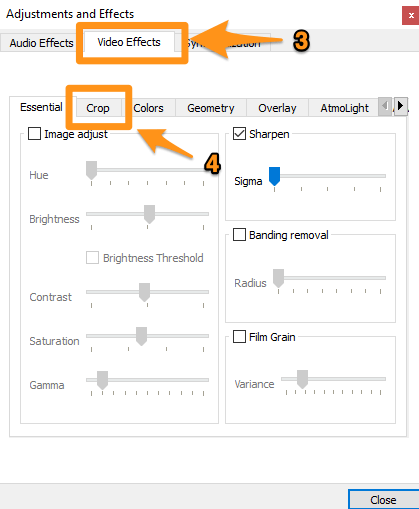
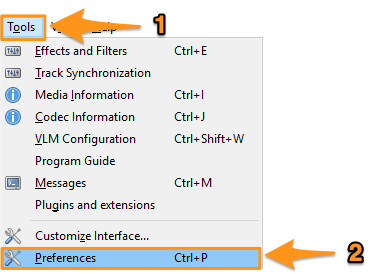
- Once you’ve decided on that, go to Tools > Effects and Filters > Video Effects > Crop if you’re on Windows 10.
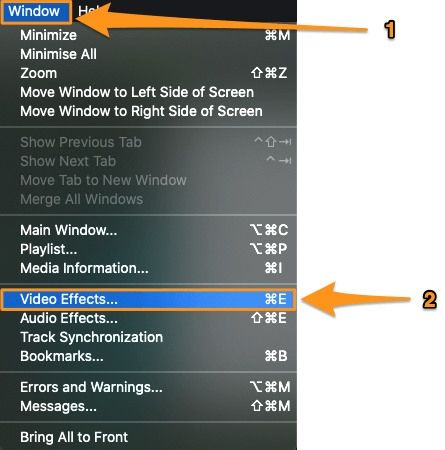
On Mac, go to Window > Video Effects > Crop
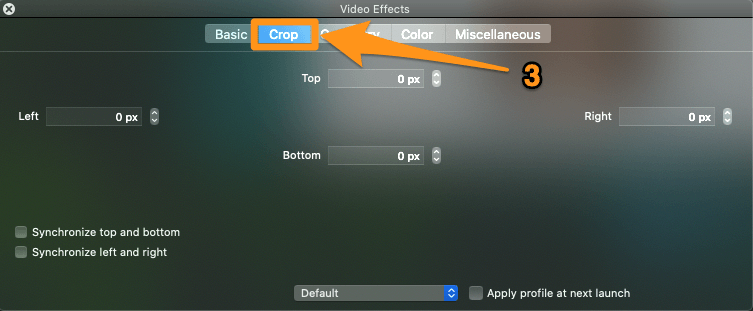
- Now let’s select the part we want to use. Like we said before, we’re going to have to cut out the parts on the left and bottom to get the area we want to highlight. Enter the values in the appropriate fields to crop out the unnecessary parts.

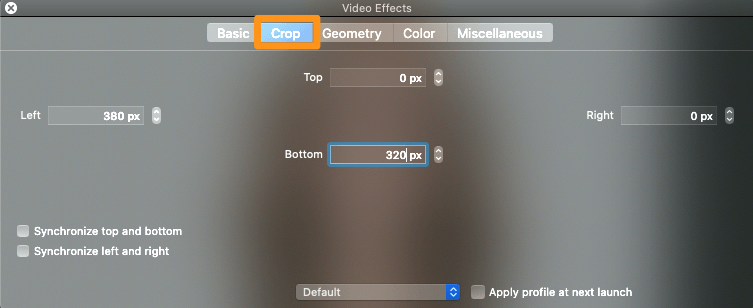 Once you’ve entered a value (in pixels), hit Enter to make the changes reflect. Adjust the values until you get your desired area. Just a few steps later, we’ll need the values you just entered, so write them down somewhere.
Well, we’re not done yet. You can’t go ahead and save the video yet. There are a couple more steps before you can do that.
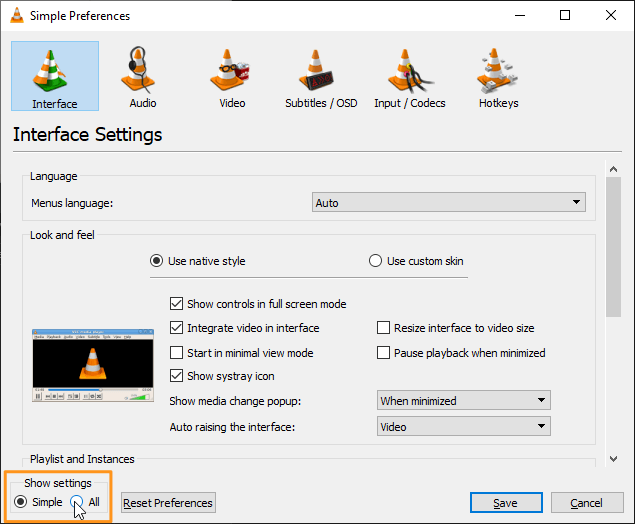
- Once you’re done entering the values and successfully cropping just the area you want to use, close the popup window and go to Tools > Preferences if you’re on Windows.
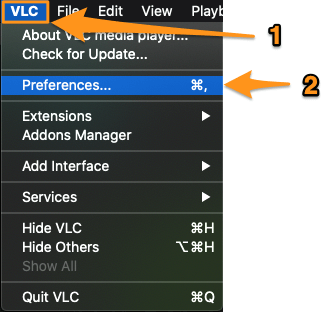
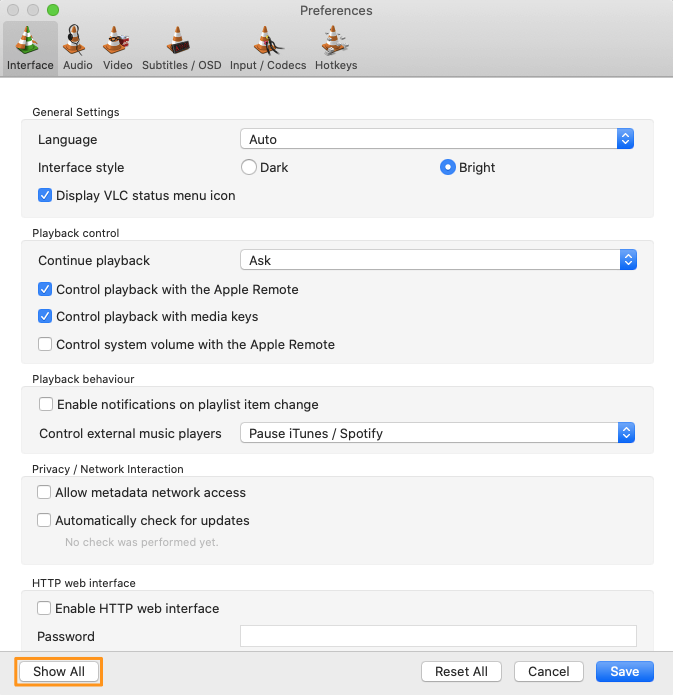
On Mac, go to VLC > Preferences.
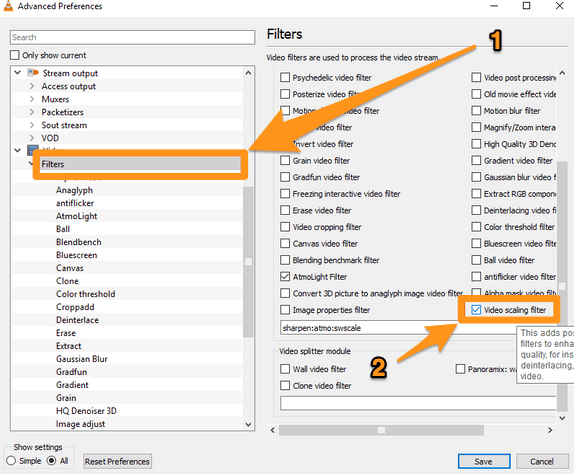
- Next, on Windows 10, under the Show settings section, click on the All radio button.
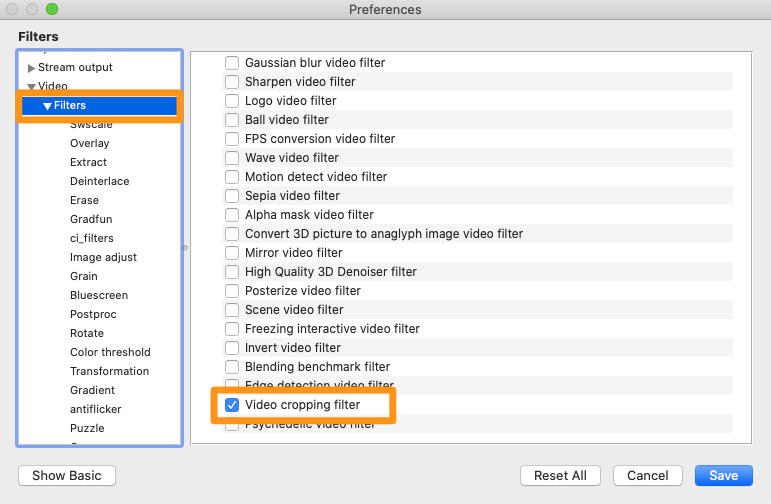
If you’re on Mac, click on the Show All button in the bottom left corner.
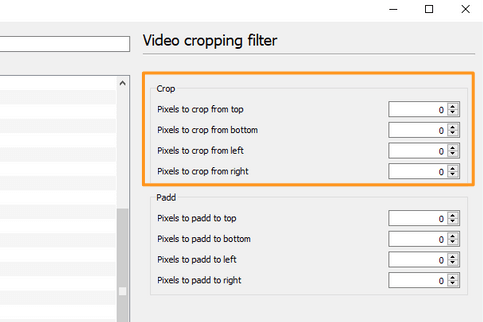
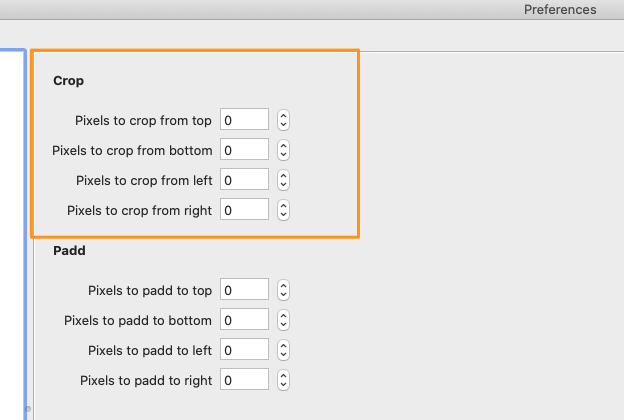
- Now go to Video > Filters > Croppadd. This step is the same on both Mac and Windows 10.
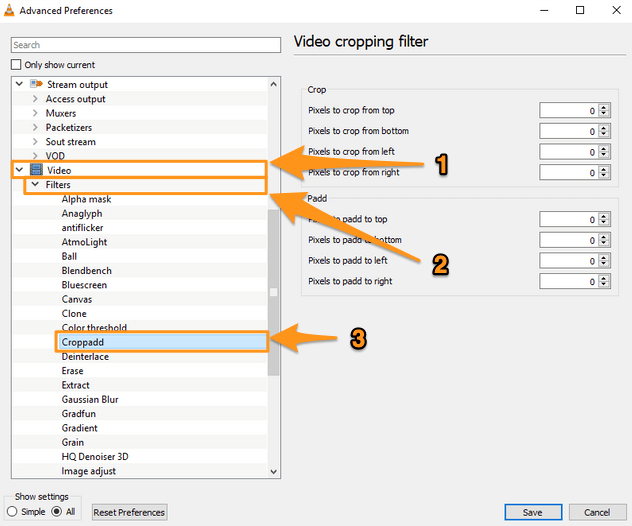
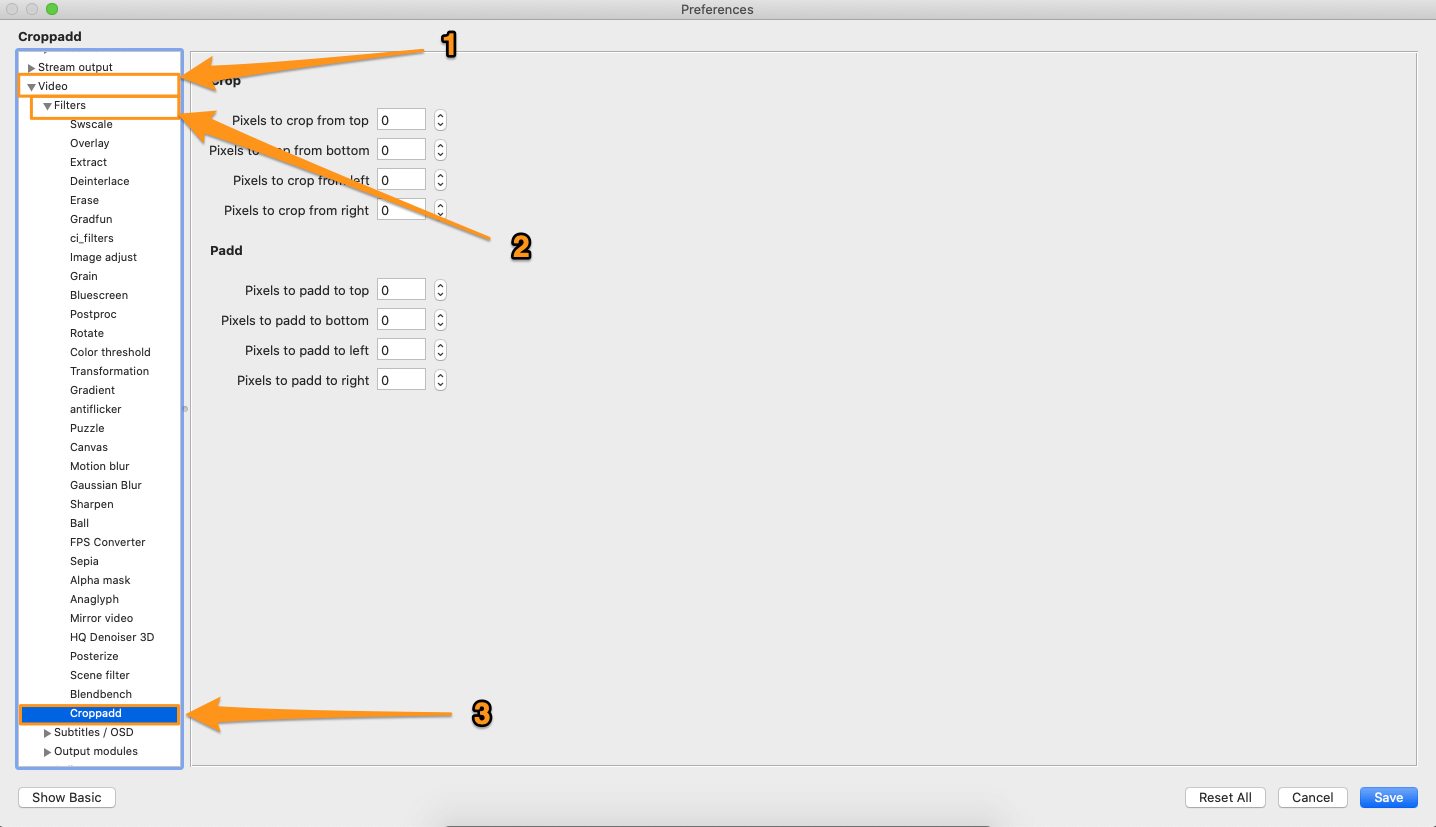
- Under the Crop section, enter the values you’d entered earlier. This step too is similar on both Mac and Windows 10.
- Once you’ve entered the values, click on the Filters submenu, then tick the Video scaling filter (Video cropping filter on Mac) checkbox, and then click on the Save button in the bottom right corner to apply the changes. Finally, choose a file name for the video and save it in your desired location.
Now let’s see how you can crop your video in a much easier way online on your Windows or Mac computer.
How to Crop Video Clips Online using Animaker
As you can see above, it’s a hassle to crop a video using VLC. You can choose to avoid these unnecessary steps and use a simple tool to crop your video instead.
Animaker’s Crop Video Tool is a lightweight app that works in your browser and lets you crop videos in 4 simple steps. Here are the steps to crop a video using Animaker:
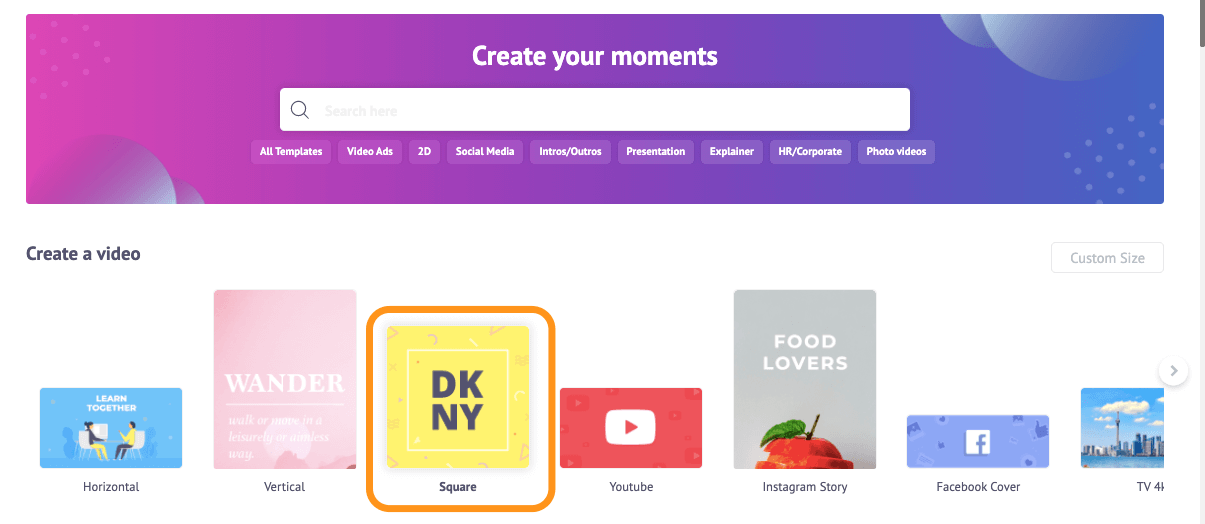
- Sign up or log into the app. Now pick the dimensions you’d like to crop your video to. If you want to crop your video to square dimensions, pick Square under the Create a video section in your dashboard.
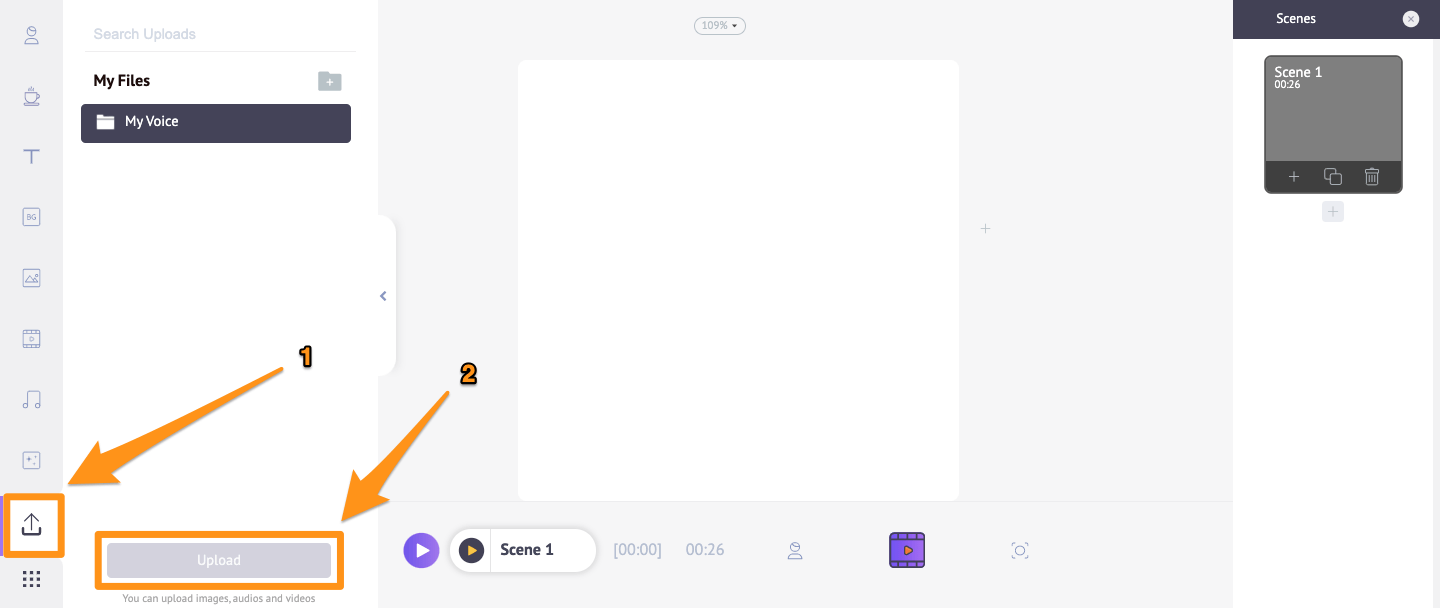
- Upload the video you want to crop; navigate to the Upload tab in the main navigation bar, then click on the Upload button at the bottom of the tab window.
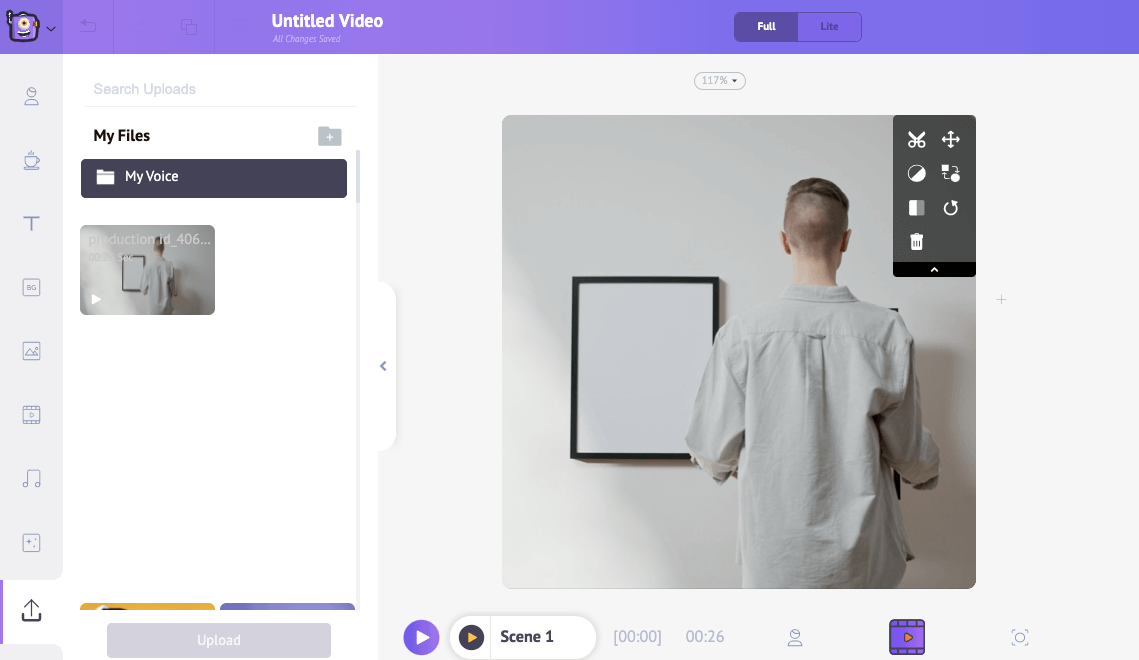
Once the video’s uploaded, click on it to set it onto the canvas.
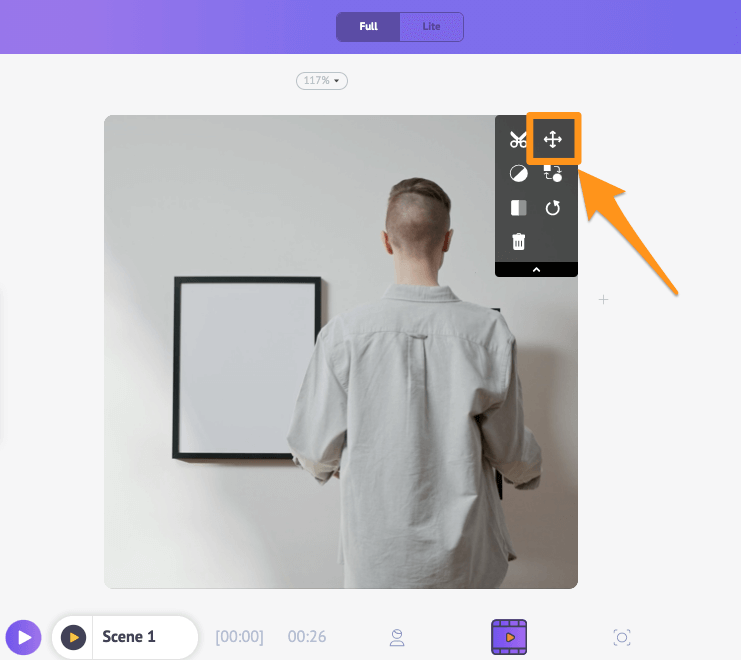
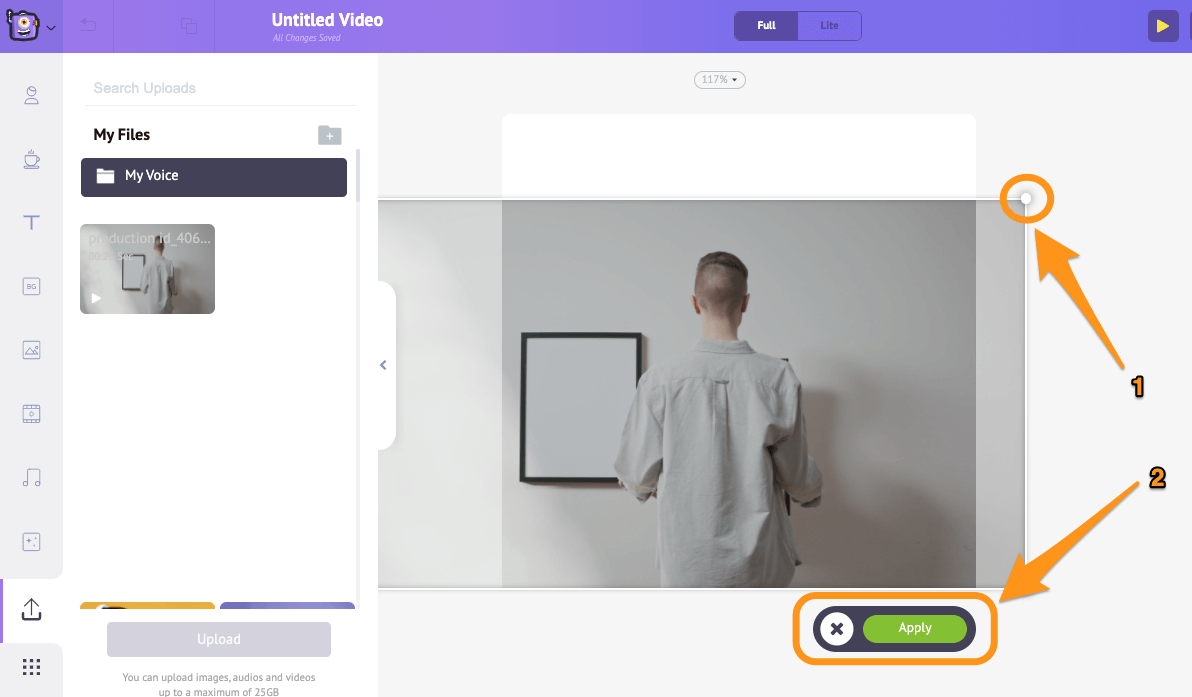
- Now click on the Crop button to start cropping your video. Hold and drag the edges to scale it or shrink it, then adjust the position so it fits the dimensions perfectly. Once you’re done making the adjustments, click on the green button that says Apply to save the changes made.
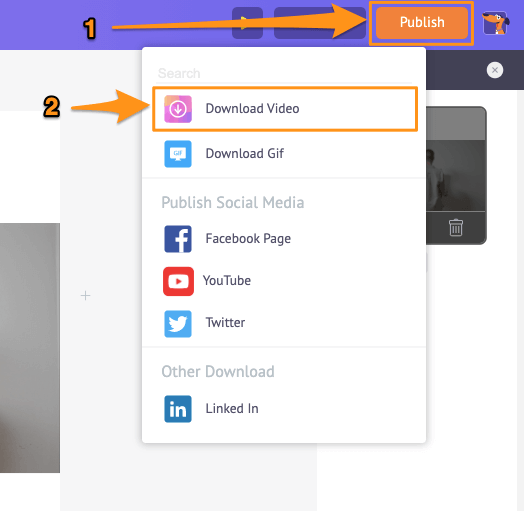
- To download your cropped video, click on the Publish button, then select Download Video from the dropdown menu.
Apart from letting you crop videos, it lets you trim, rotate, flip, mute, adjust videos, and more. Animaker’s online video editor has all the tools you need to edit your videos for your social media channels and the web. So be sure to check out these tools.
Got any questions on cropping your videos using Animaker? Any interesting tips or tools to crop a video? Please let us know about them in the comment section below.