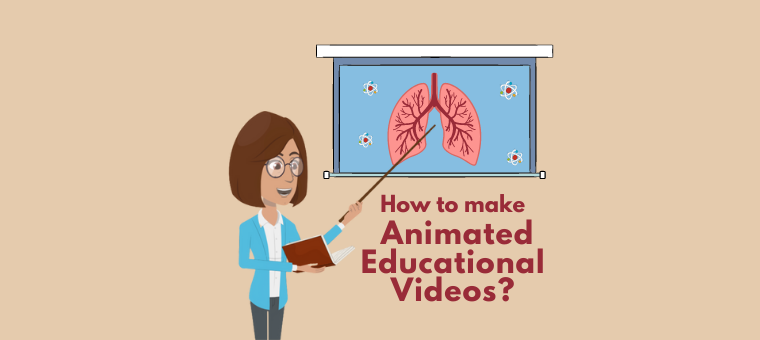
Animated educational videos and how to create them

Dhivyasshri Krishna - September 14, 2022 - Leave your thoughts. 12 min read
Are you a teacher aiming to impress your students?
Or, are you a student trying to get straight A’s for your assignments?
Student or teacher, all we have is one goal in mind. We want to stand out!
But due to workload or laziness, we end up making the same old boring presentations!
If you want to
- Take your lecture/assignment to the next level,
- Make your point heard,
- Make an everlasting impression,
You will need a presentation unlike any other.
But, presentations are sooo 90s! Let’s do things the 2K way!
Let’s bring Animated educational videos into the picture!
Why make those mundane presentations when you can make cool videos to explain a topic?
Why use robotic clipart when you can have characters and properties zooming across the scene in your videos?
Imagine the look on your students’/classmates’ faces when they see those awesome animations!

And the best part is, your points get registered on their head in no time without you trying hard!
So, let’s get started and get our hands on making the perfect animated educational video!
Wait, I can see you sulking! Are you thinking about the hours you need to put in to make a great animated video?
Haha… Don’t worry! We are giving you this solution cuz we have a great tool in hand that lets you create breathtaking animated videos in less than 10 minutes!
To create your stunning educational video, we will use Animaker, a DIY video-making platform that helps even a beginner create fascinating animated videos quickly and easily.
Check out this video to learn how to create educational videos through a video tutorial.
Alternatively, continue reading if you want to learn how from a textual guide.
How to make Animated Educational Videos using Animaker?
Even the most complex concepts can be fun when we deliver them correctly!
Follow these steps to create an awesome animated educational video and make learning fun and effortless for the audience!
- Step 1 - Create an Account
- Step 2 - Exploring the Animaker Dashboard and Interface
- Step 3 - Creating the first scene
- Step 4 - Add/Delete/Duplicate scenes
- Step 5 - Creating the second scene
- Step 6 - Add transition effects
- Step 7 - Add Music tracks
- Step 8 - Preview and Download the video
Now, let’s check out how to create animated educational videos for school projects. With a concept ready in mind, let’s proceed.
Step 1 - Create an Account
Visit Animaker. Login if you’ve already created an account. If not, create a new account and log in.
Step 2 - Exploring the Animaker Dashboard and Interface
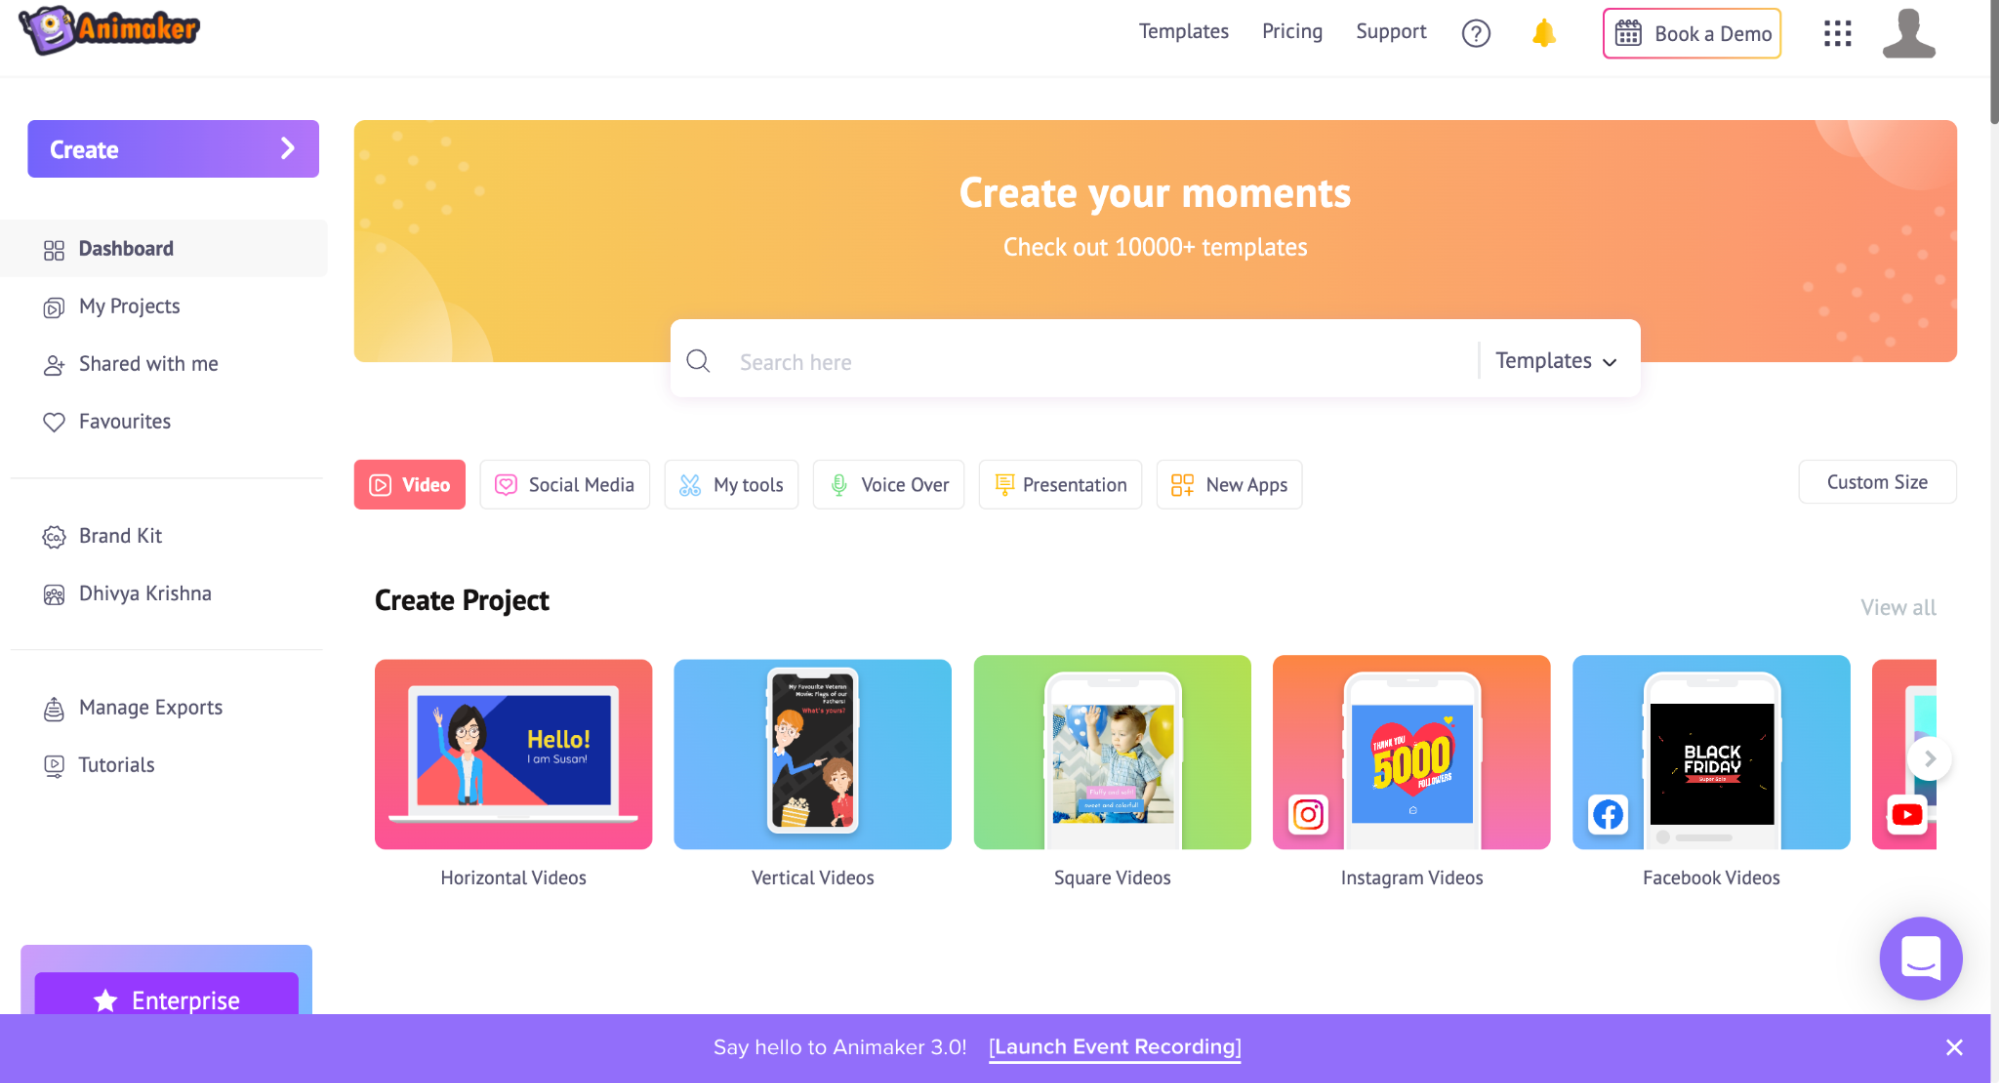
Once you log in, you will be taken to the Dashboard.
If you’re unsure about starting a project from scratch, don’t worry, we’ve got your back. Let our Animaker pre-built templates do the job for you.
Go to the templates page and preview any template to get an idea about how it looks. Then, if you like any template, click on it to launch it as a project and customize it to your needs.
Or, if you would like to create a video from scratch, we’re here to help you create one.
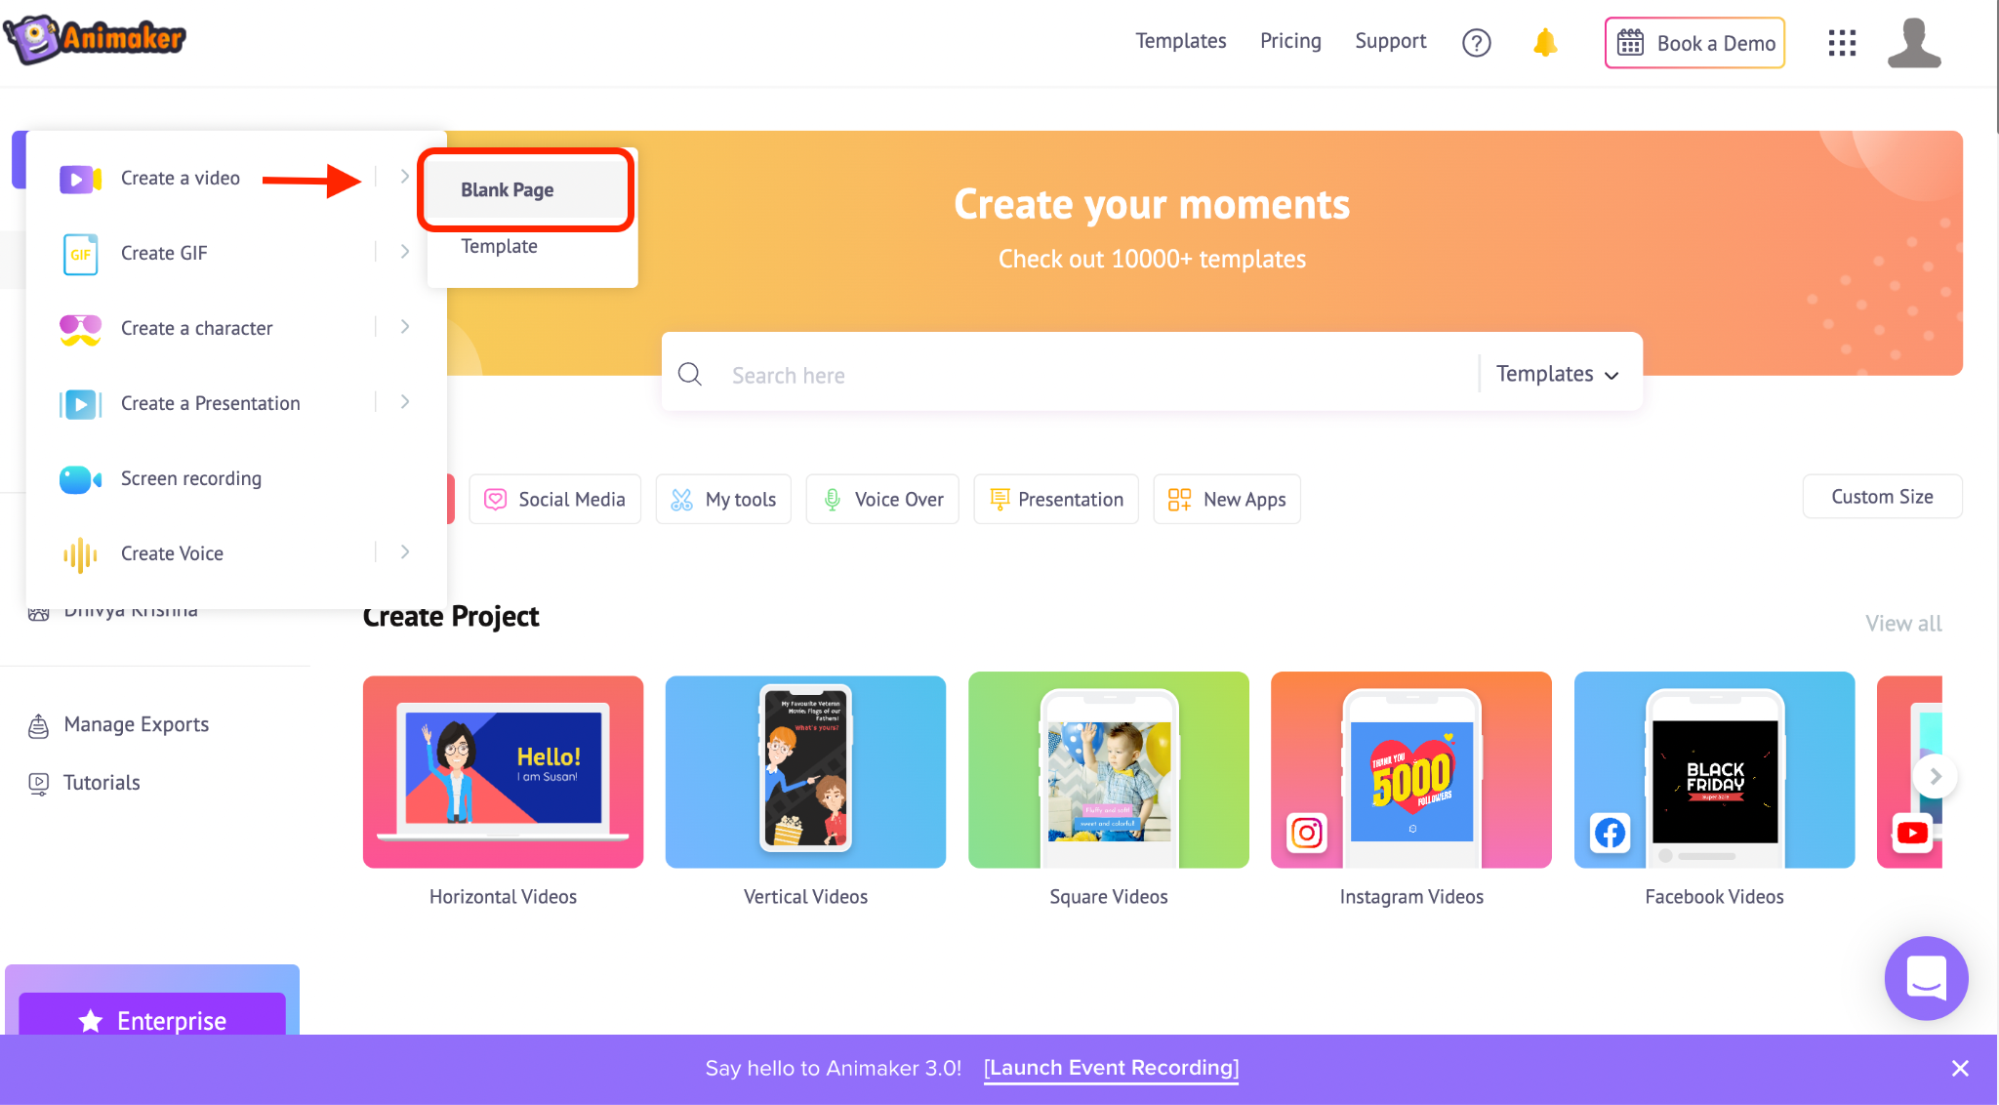
To create a new project, click on the ‘Create’ option from the left and follow as instructed in the image below.
Before jumping into creating an educational animated video, let us get you accustomed to the Animaker interface.
There are five sections in the app:
- Library
- Workspace
- Scenes
- Menu bar
- Timeline

Library – The Library of the Animaker app is where you will find all the assets needed for your video, including characters, props, icons, stock assets, music files, and more.
Workspace – The whitespace at the center is called the workspace. This is where your animated educational video will come to life.
Scenes – This section houses all the scenes of the video. Just like how many slides come together to form a presentation, the scenes come together to form your awesome video.
Menu bar – You can preview the video, change its title, and share and publish the video from the menu.
Timeline – At the bottom of the screen is the timeline. The timeline helps you monitor the time limits and effects of the assets you have added to the scenes.
Step 3 - Creating the first scene.
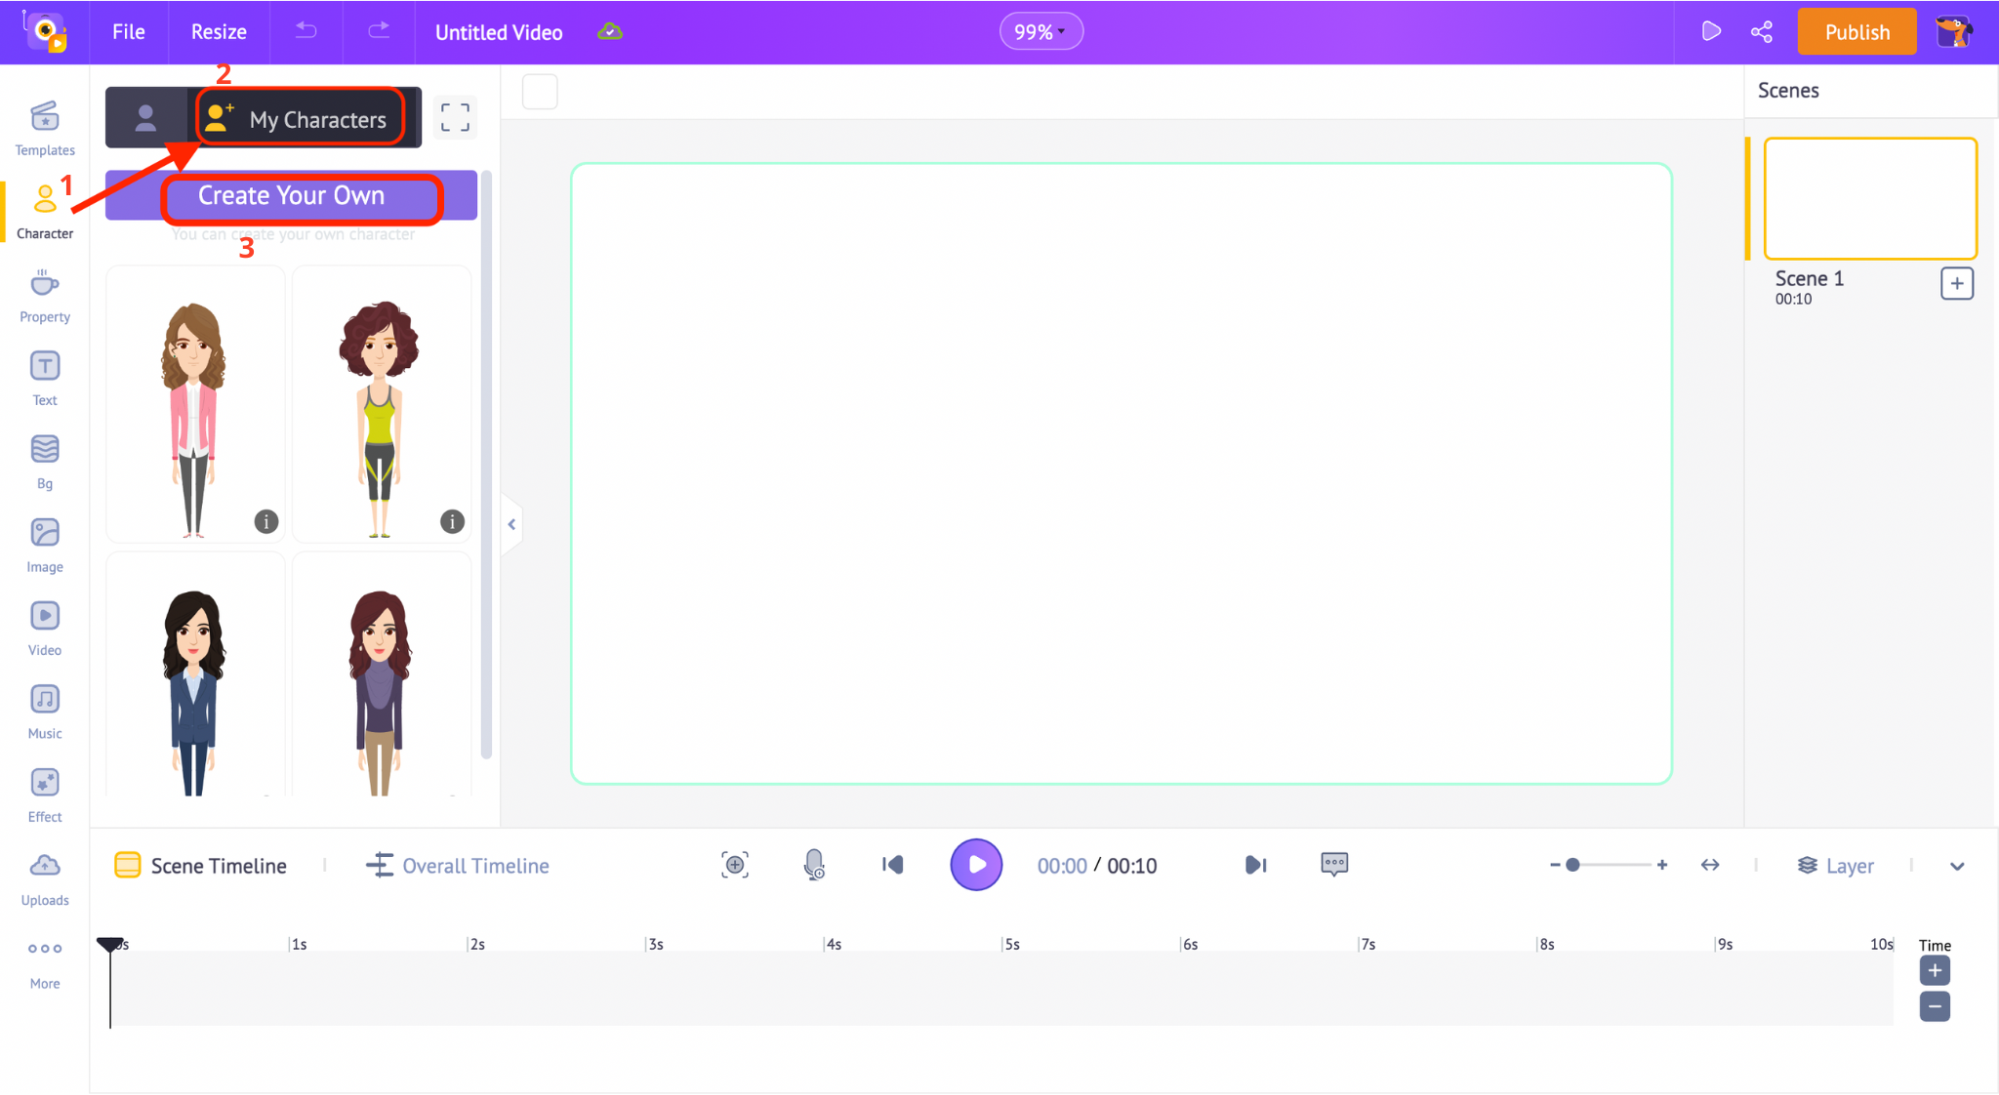
Adding a Character:
Let’s start by creating an animated character. You can either add a pre-made character from the library or create custom characters by clicking on the ‘Create your own’ under the character tab.
Using this option, you can create a character that resembles you and features your doppelganger in your video! Now, wouldn’t that be exciting?
Click on the link to learn how to create animated characters.
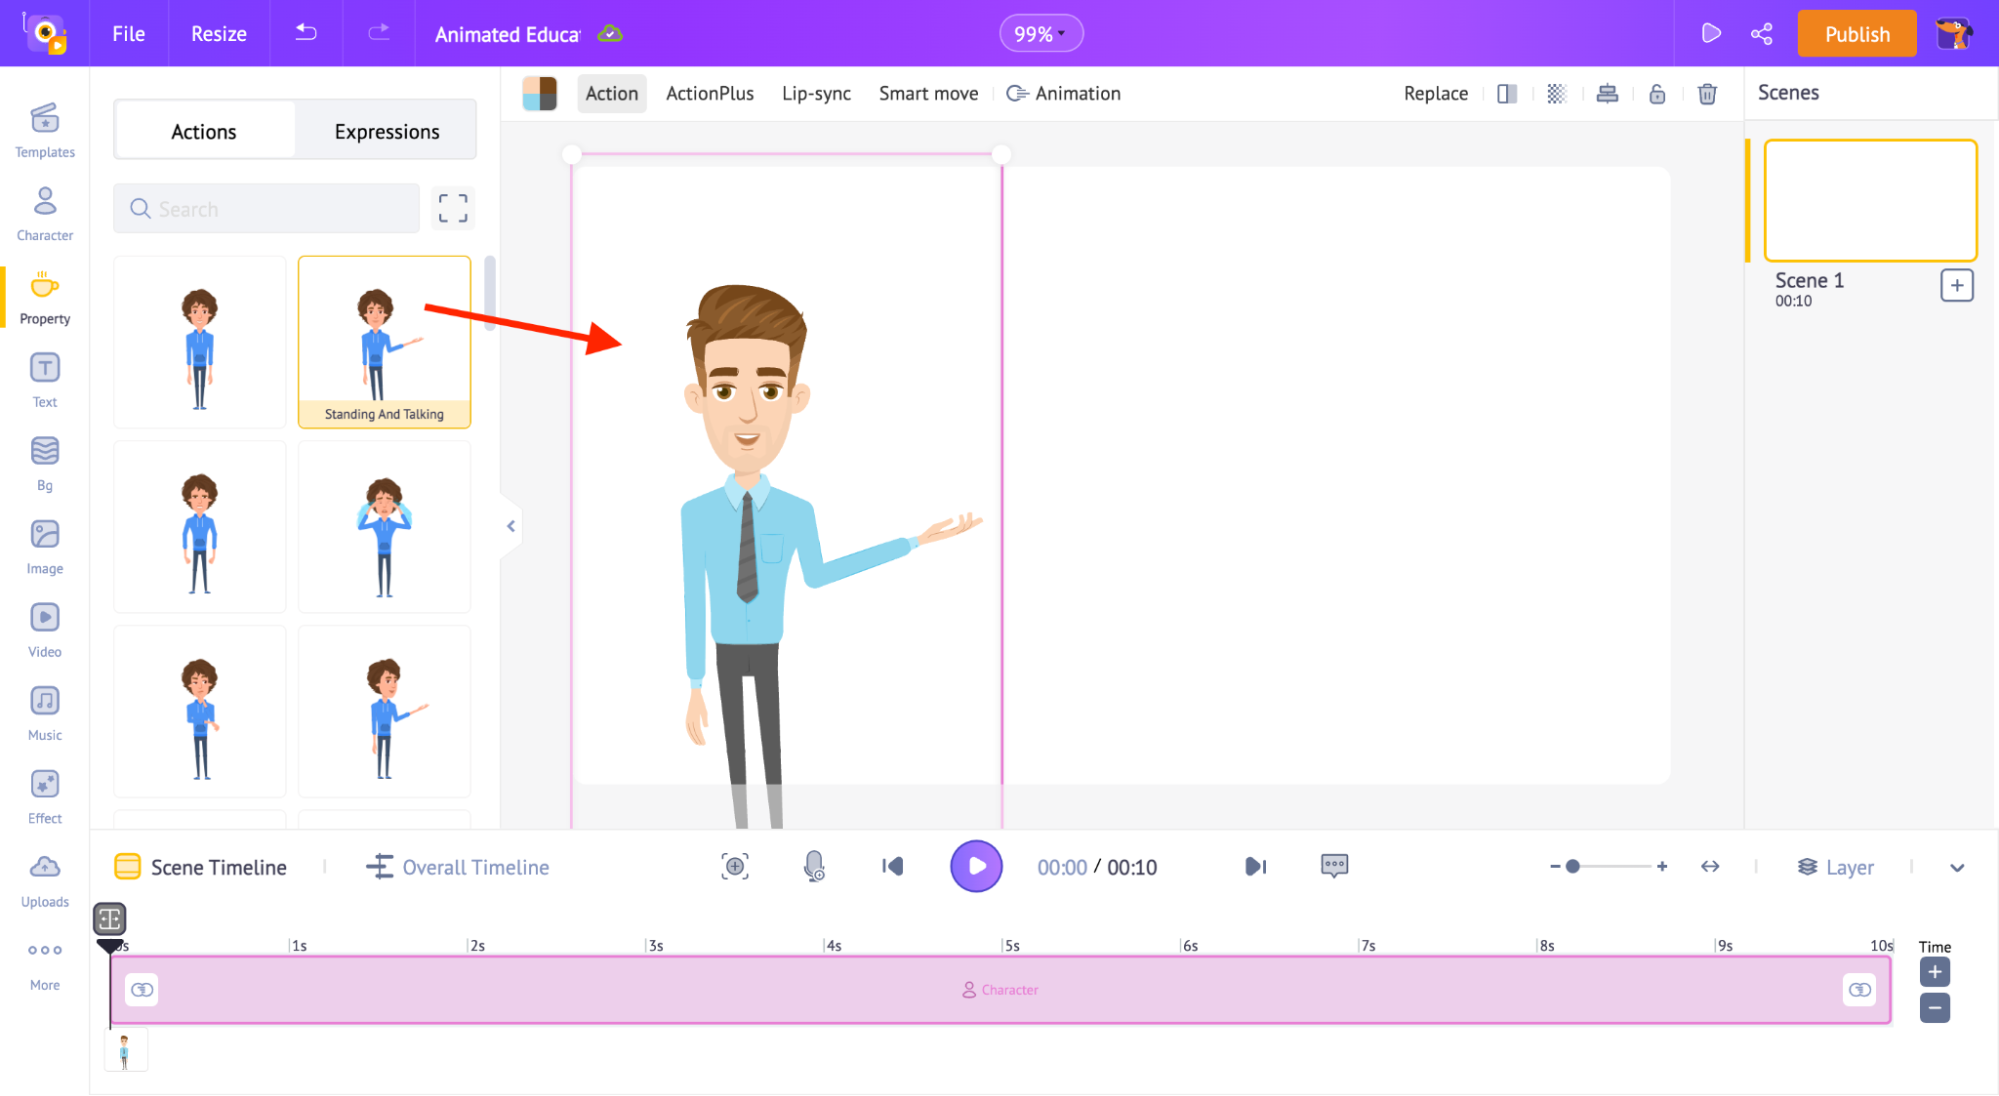
Add your character to the workspace by simply clicking on it. Once you add the character, click on it to find a bunch of options above.
Click on the ‘Action’ button and explore 500+ actions for the character.
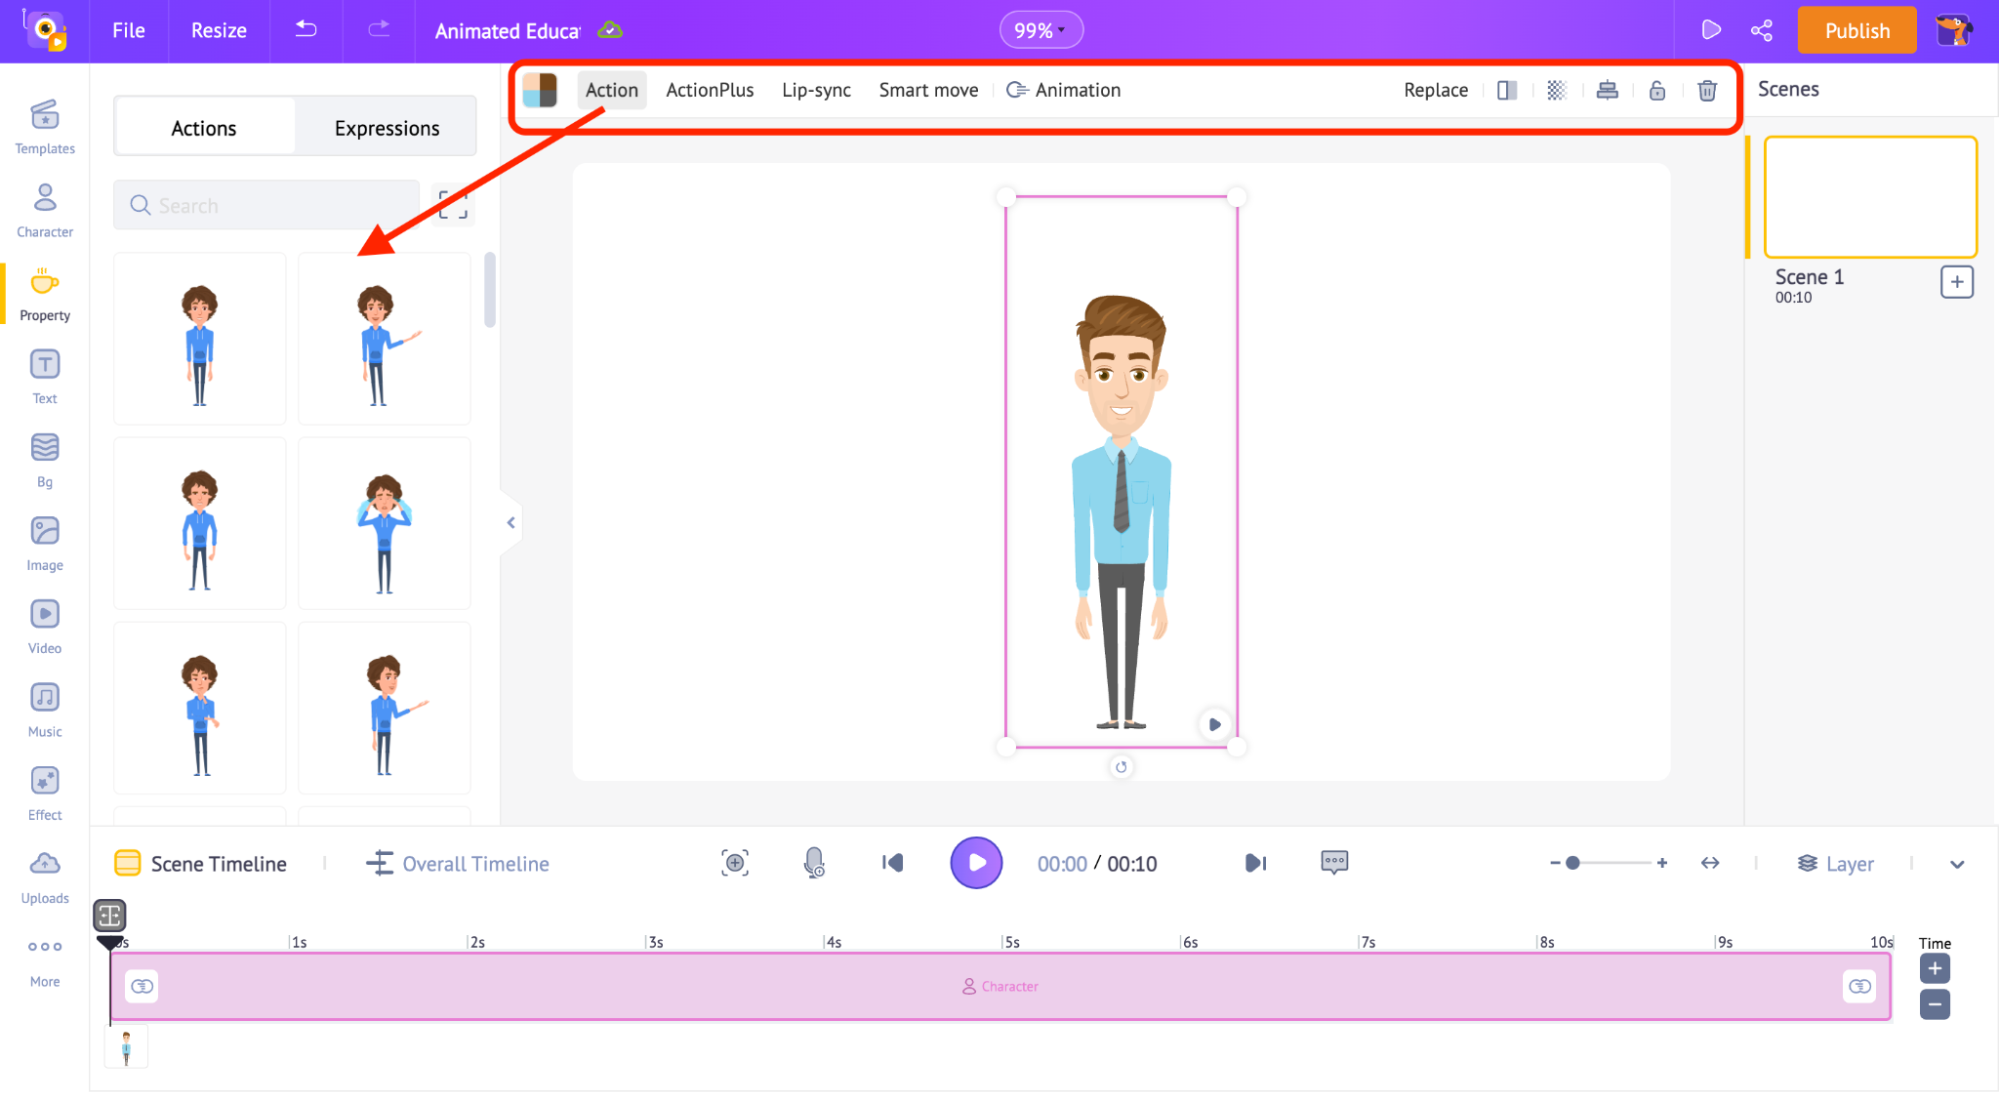
Now, let’s click on the action, which seems like talking.
Adding a Background:
Now, it’s time to add a background to the scene. Click anywhere on the workspace. You will notice a new color palette opening in the library section.
Click on the ‘edit’ option to change the color.
You can add multiple colors as a gradient to your background by clicking on the plus button.
You can also change the direction of the shades like this...
Apart from the solid color or gradient color BGs, Animaker also houses many animated, image, and video BGs. You can change the background using the library's BG/Image/Video tabs, as shown in the GIF below.
Adding Text:
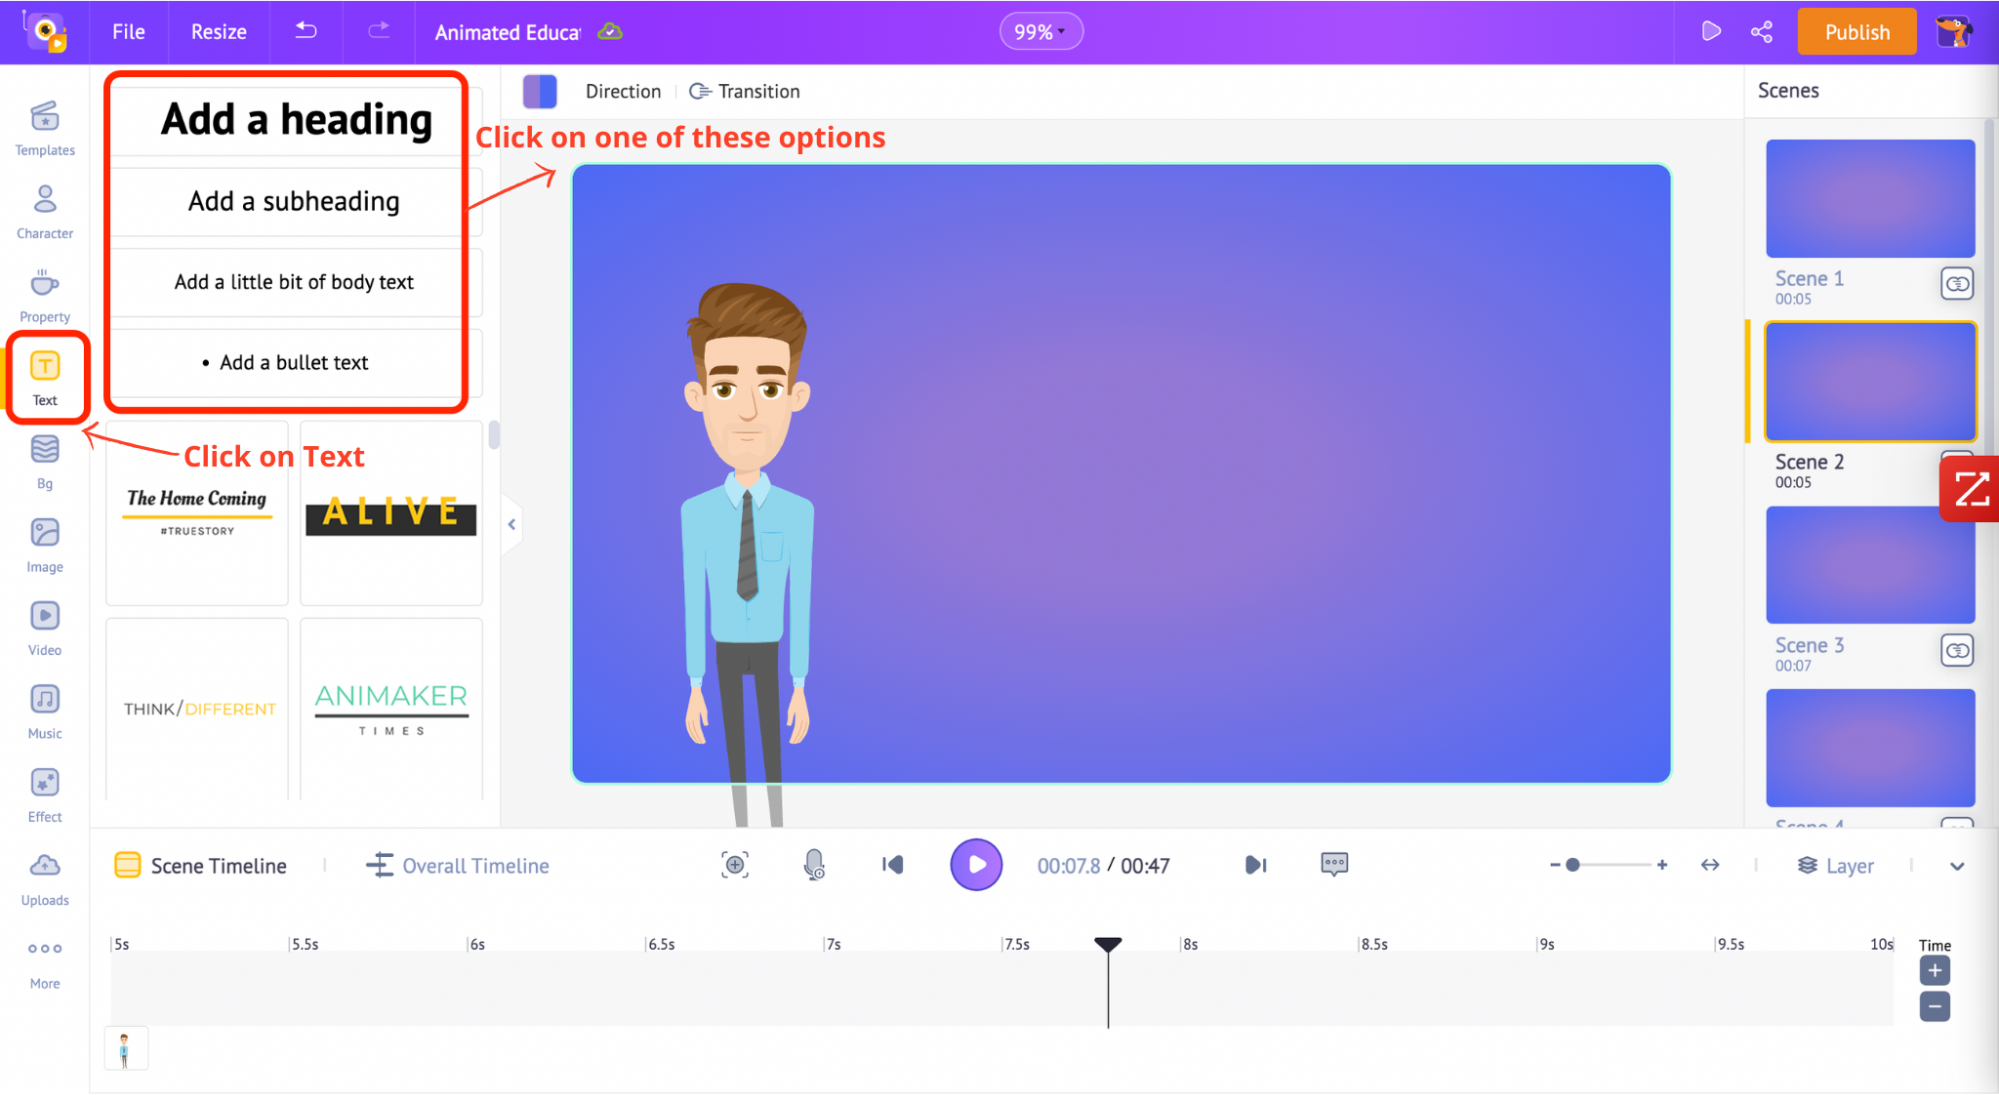
This is the first scene, the introductory scene. Let’s tell the viewers what the video is about. Open the text section from the library and click on one of the text boxes. Add your text.
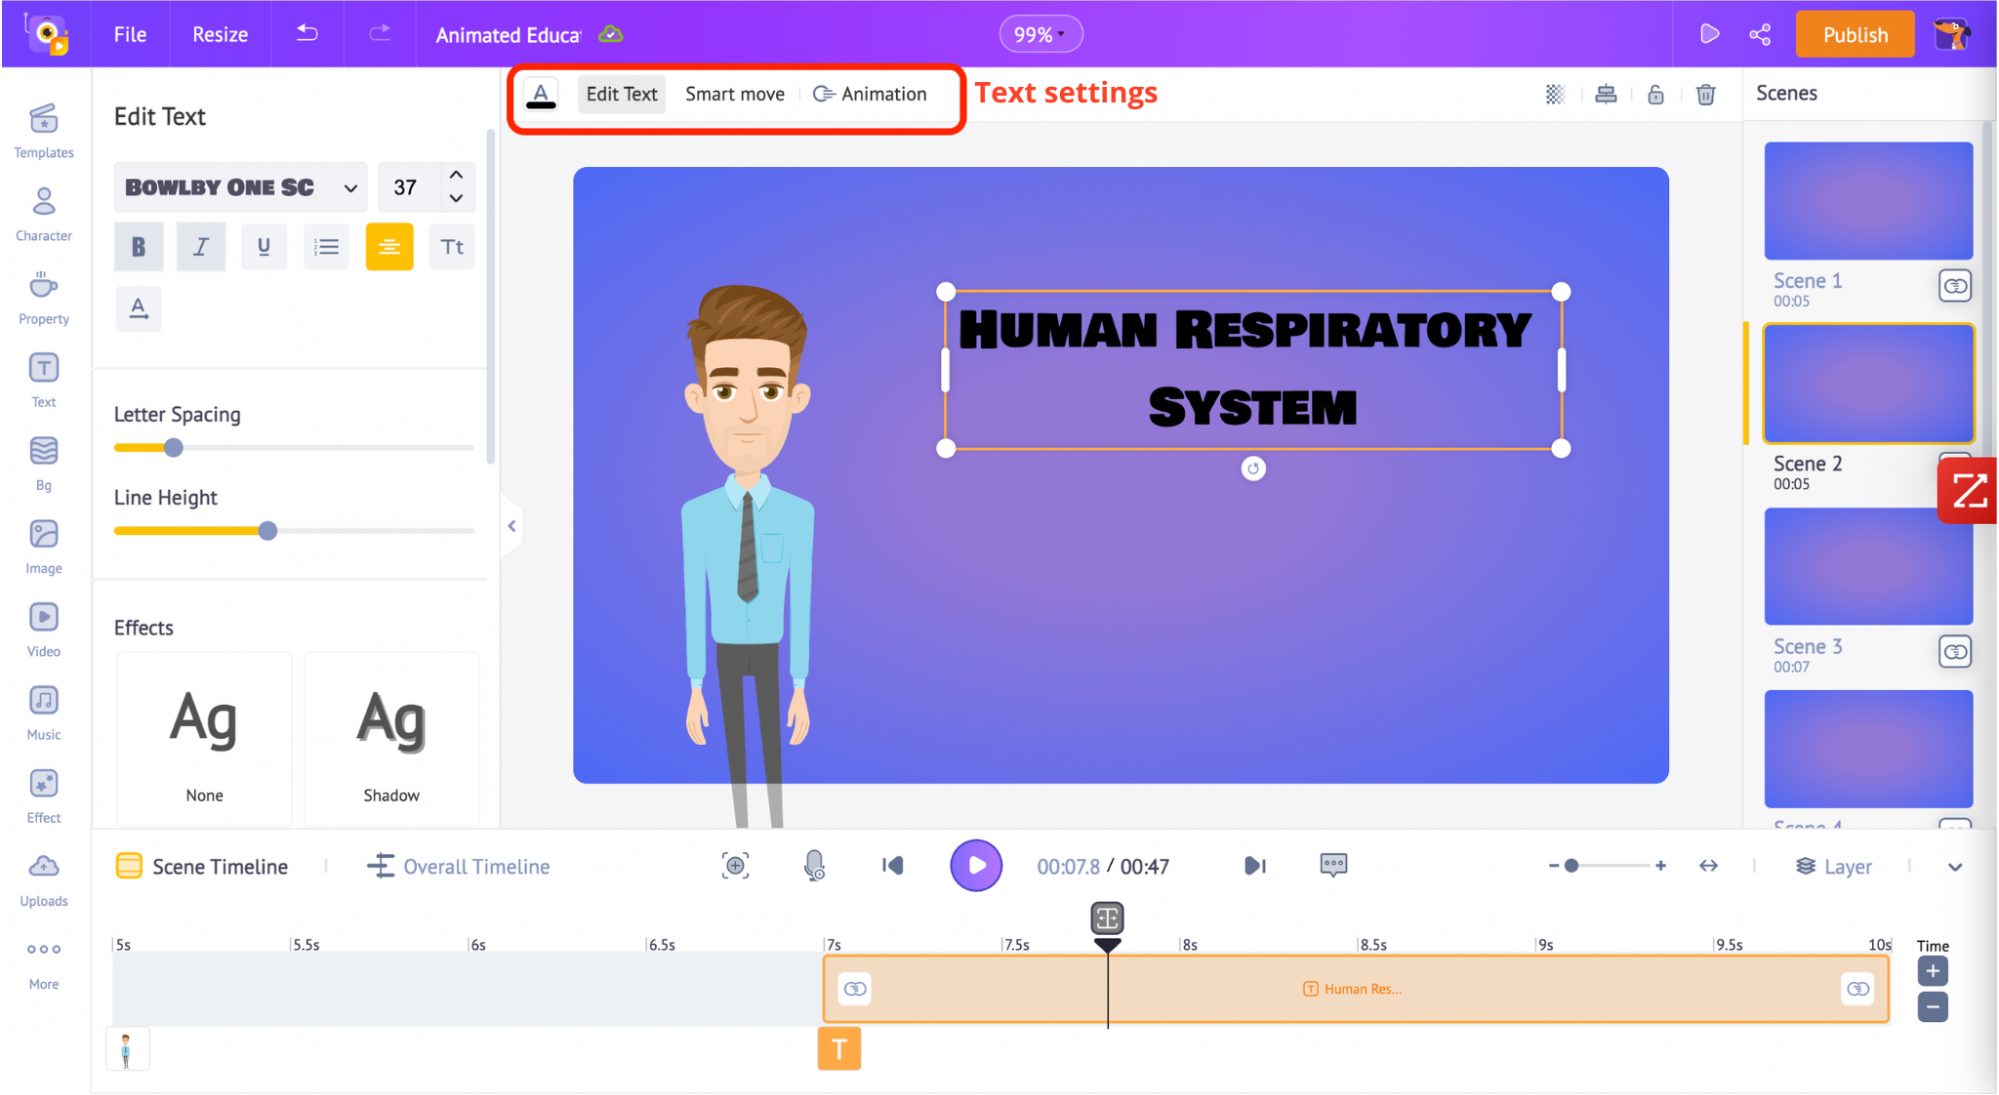
Now, click on the text. This opens the text settings on top. Here, you can customize the font, text color, and add effects and animations to your texts.
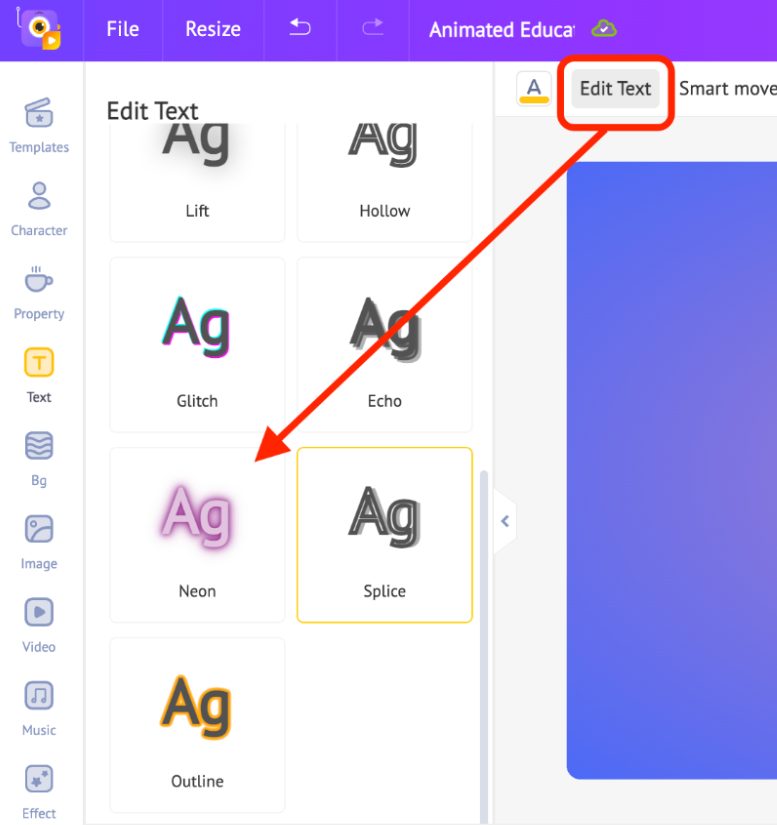
Scroll down the “Edit Text” option and click on one of the ‘Effects’ options to enhance your text.
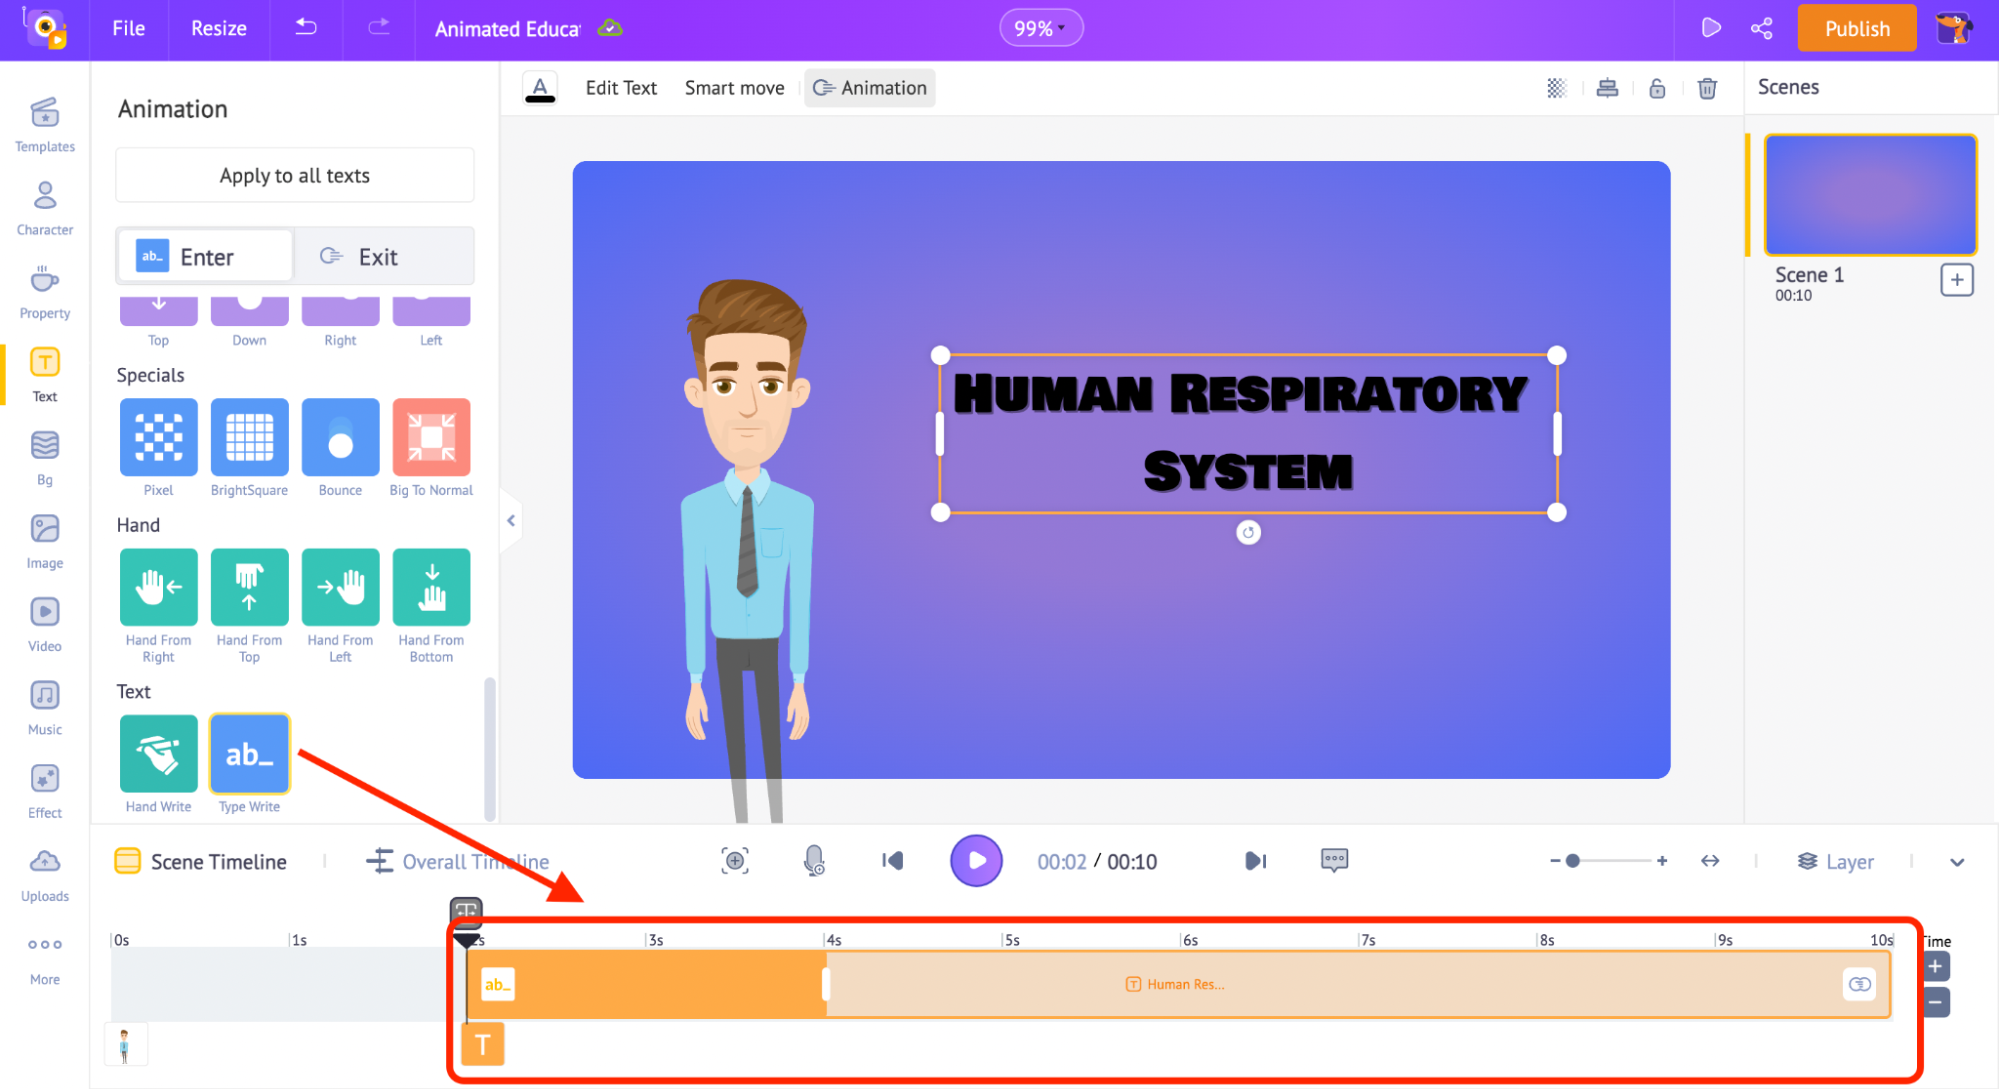
When you click on the text, you will see a yellow-colored bar in the timeline. This bar represents the duration for which your text will be visible.
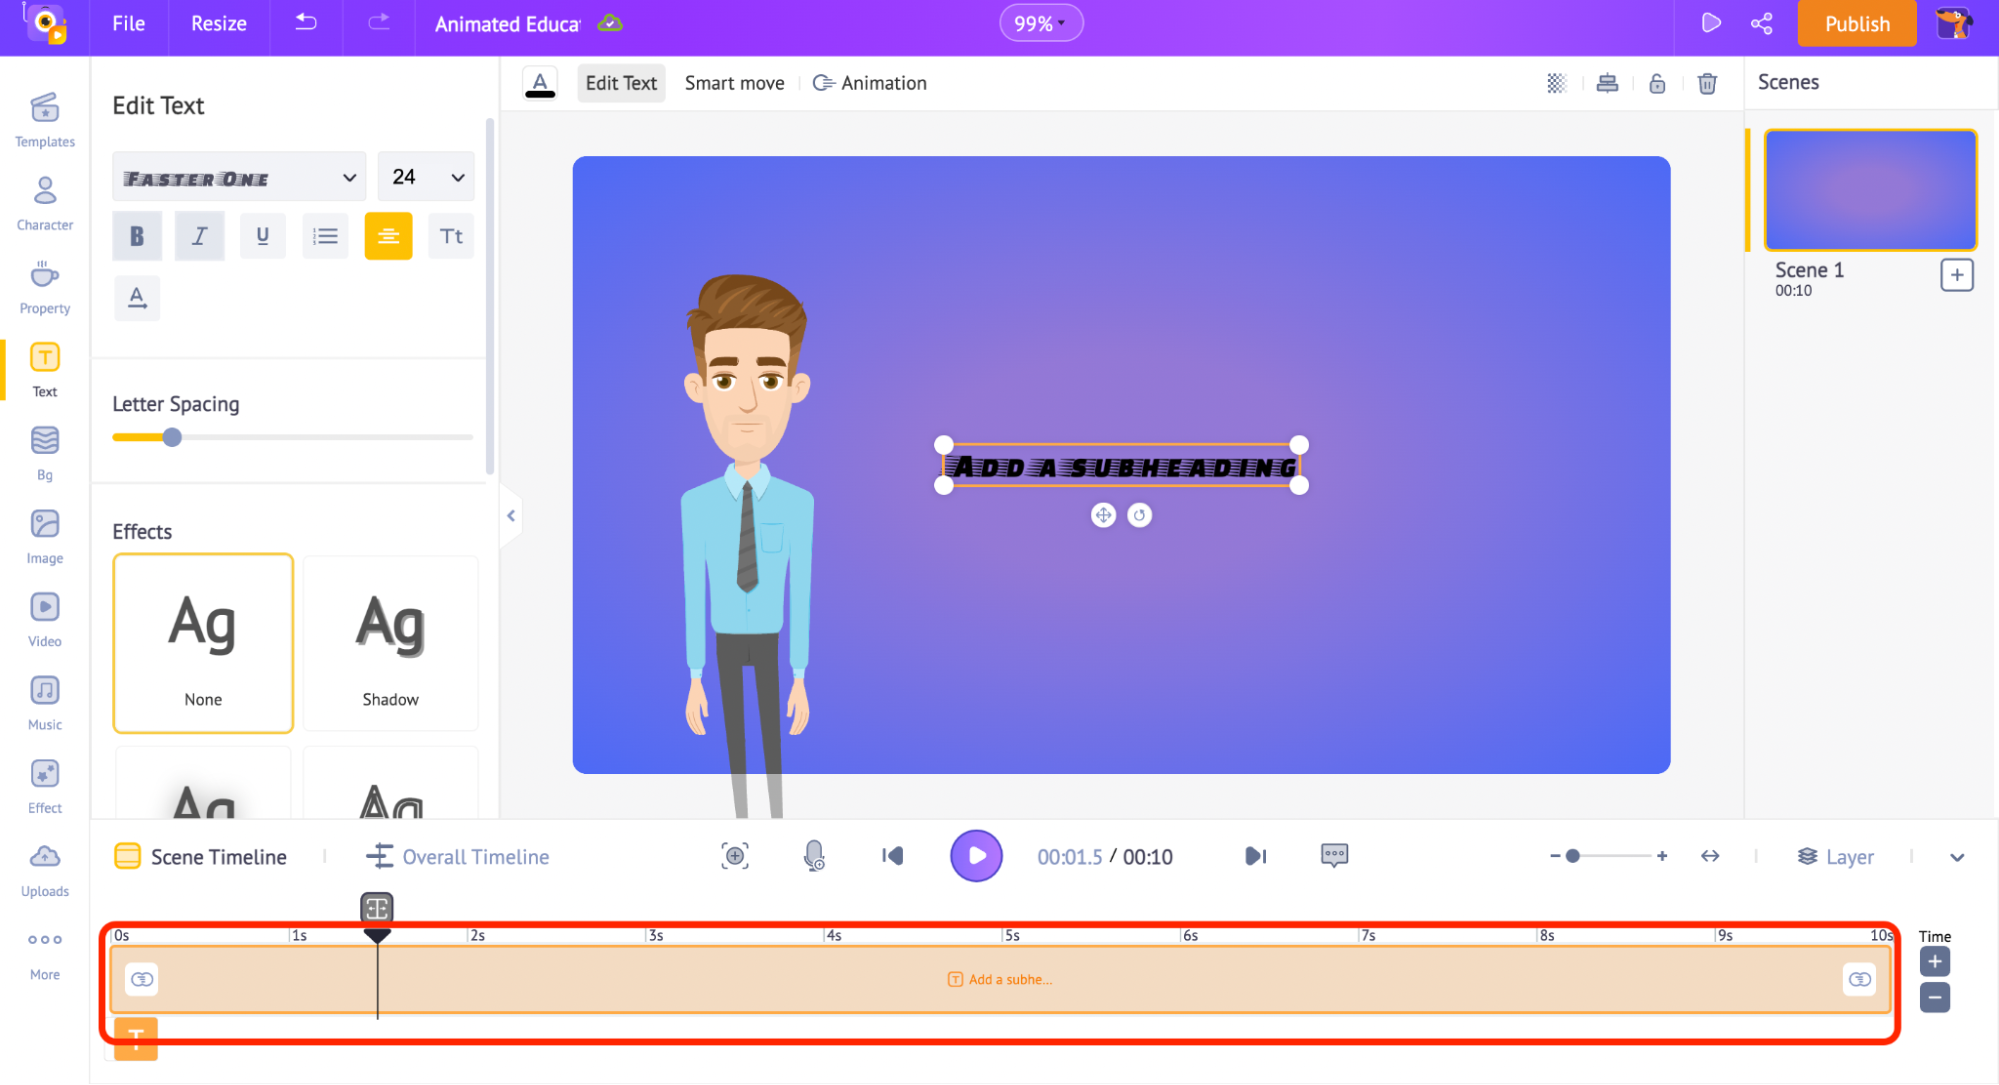
Let’s make the text appear a little later. So, we’re going to drag the left edge of the yellow bar and place it as ‘2s’, which makes the text appear after the first 2 seconds.
Now, we are going to add some animation to the text.
Click on the text to find the ‘Animation’ option on the top.
Click on any of the entry animations from the ‘Enter’ tab. Next, adjust the duration of the animation effects in the timeline by adjusting the dark yellow bar.
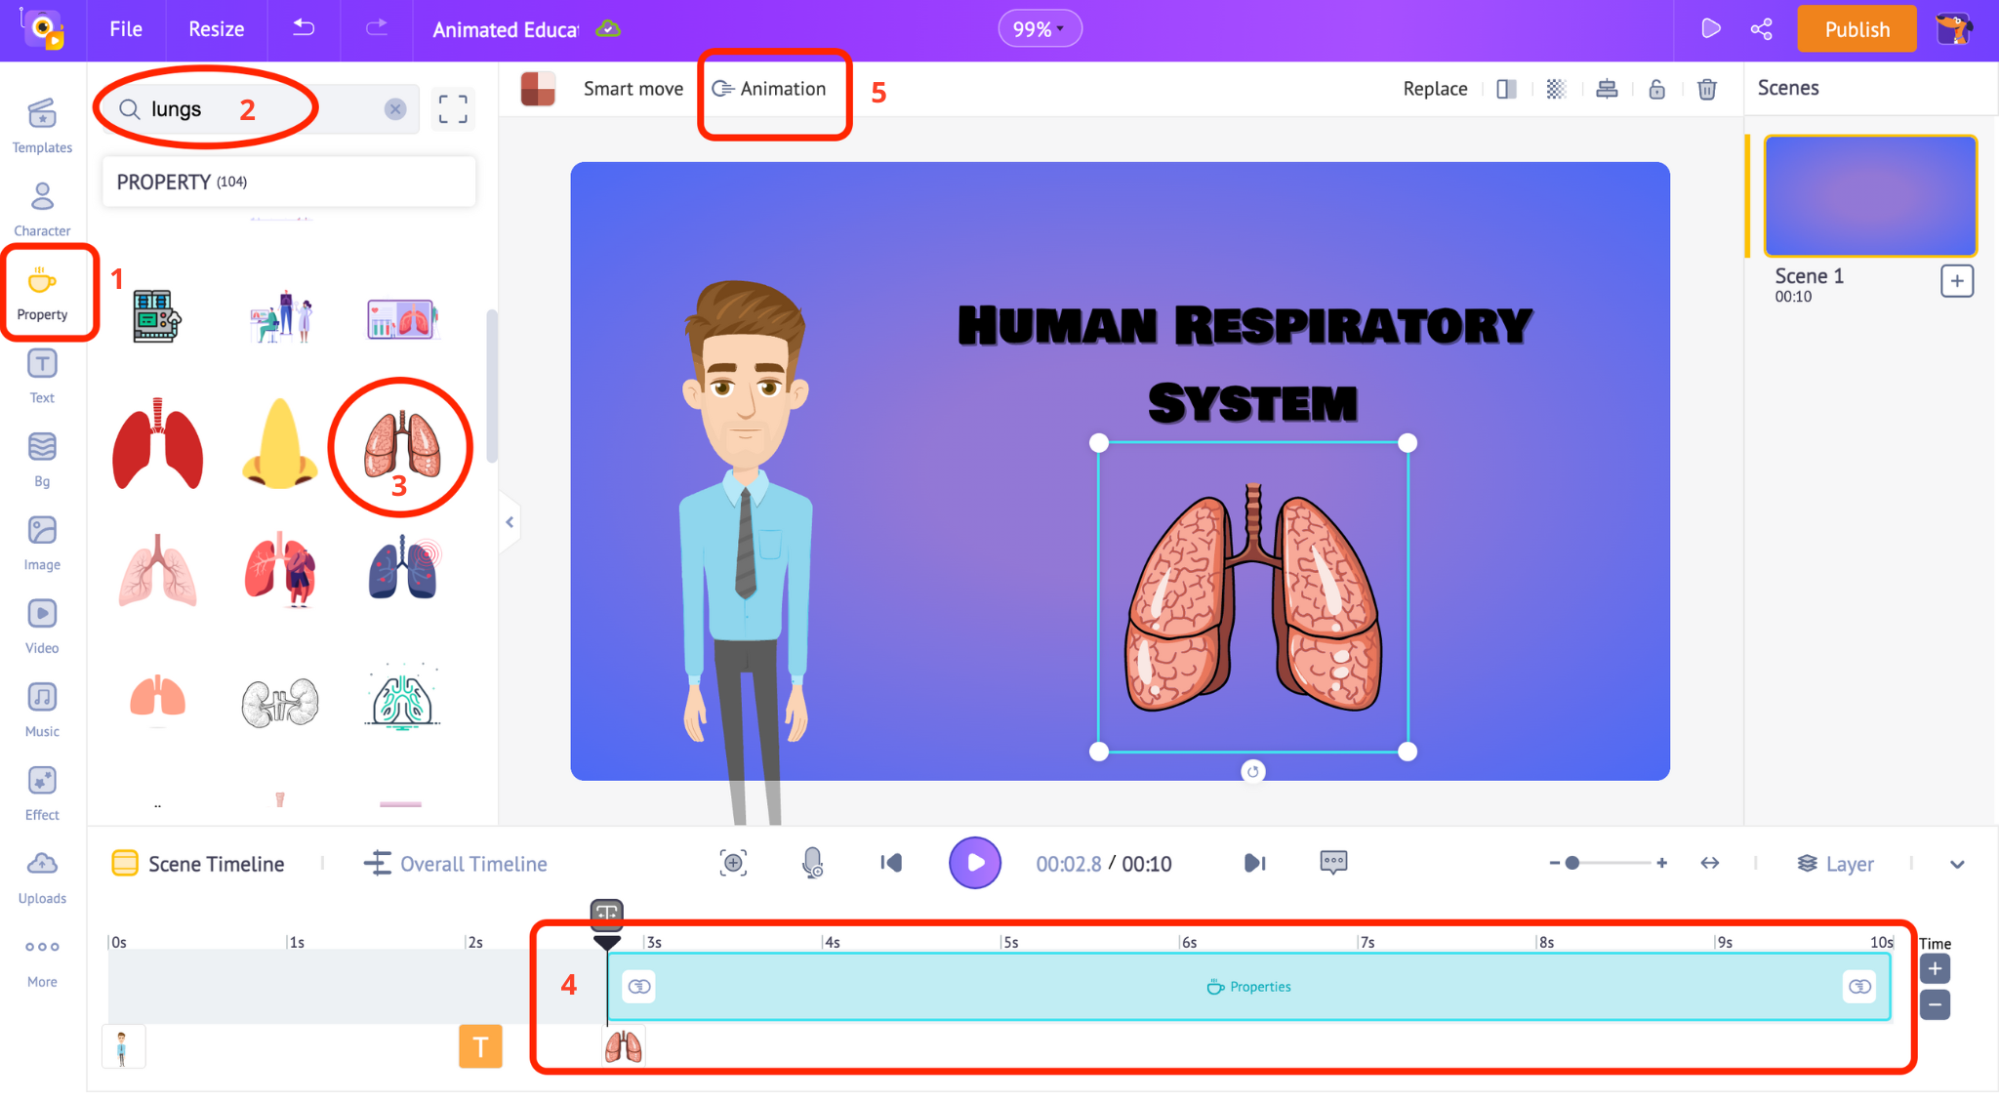
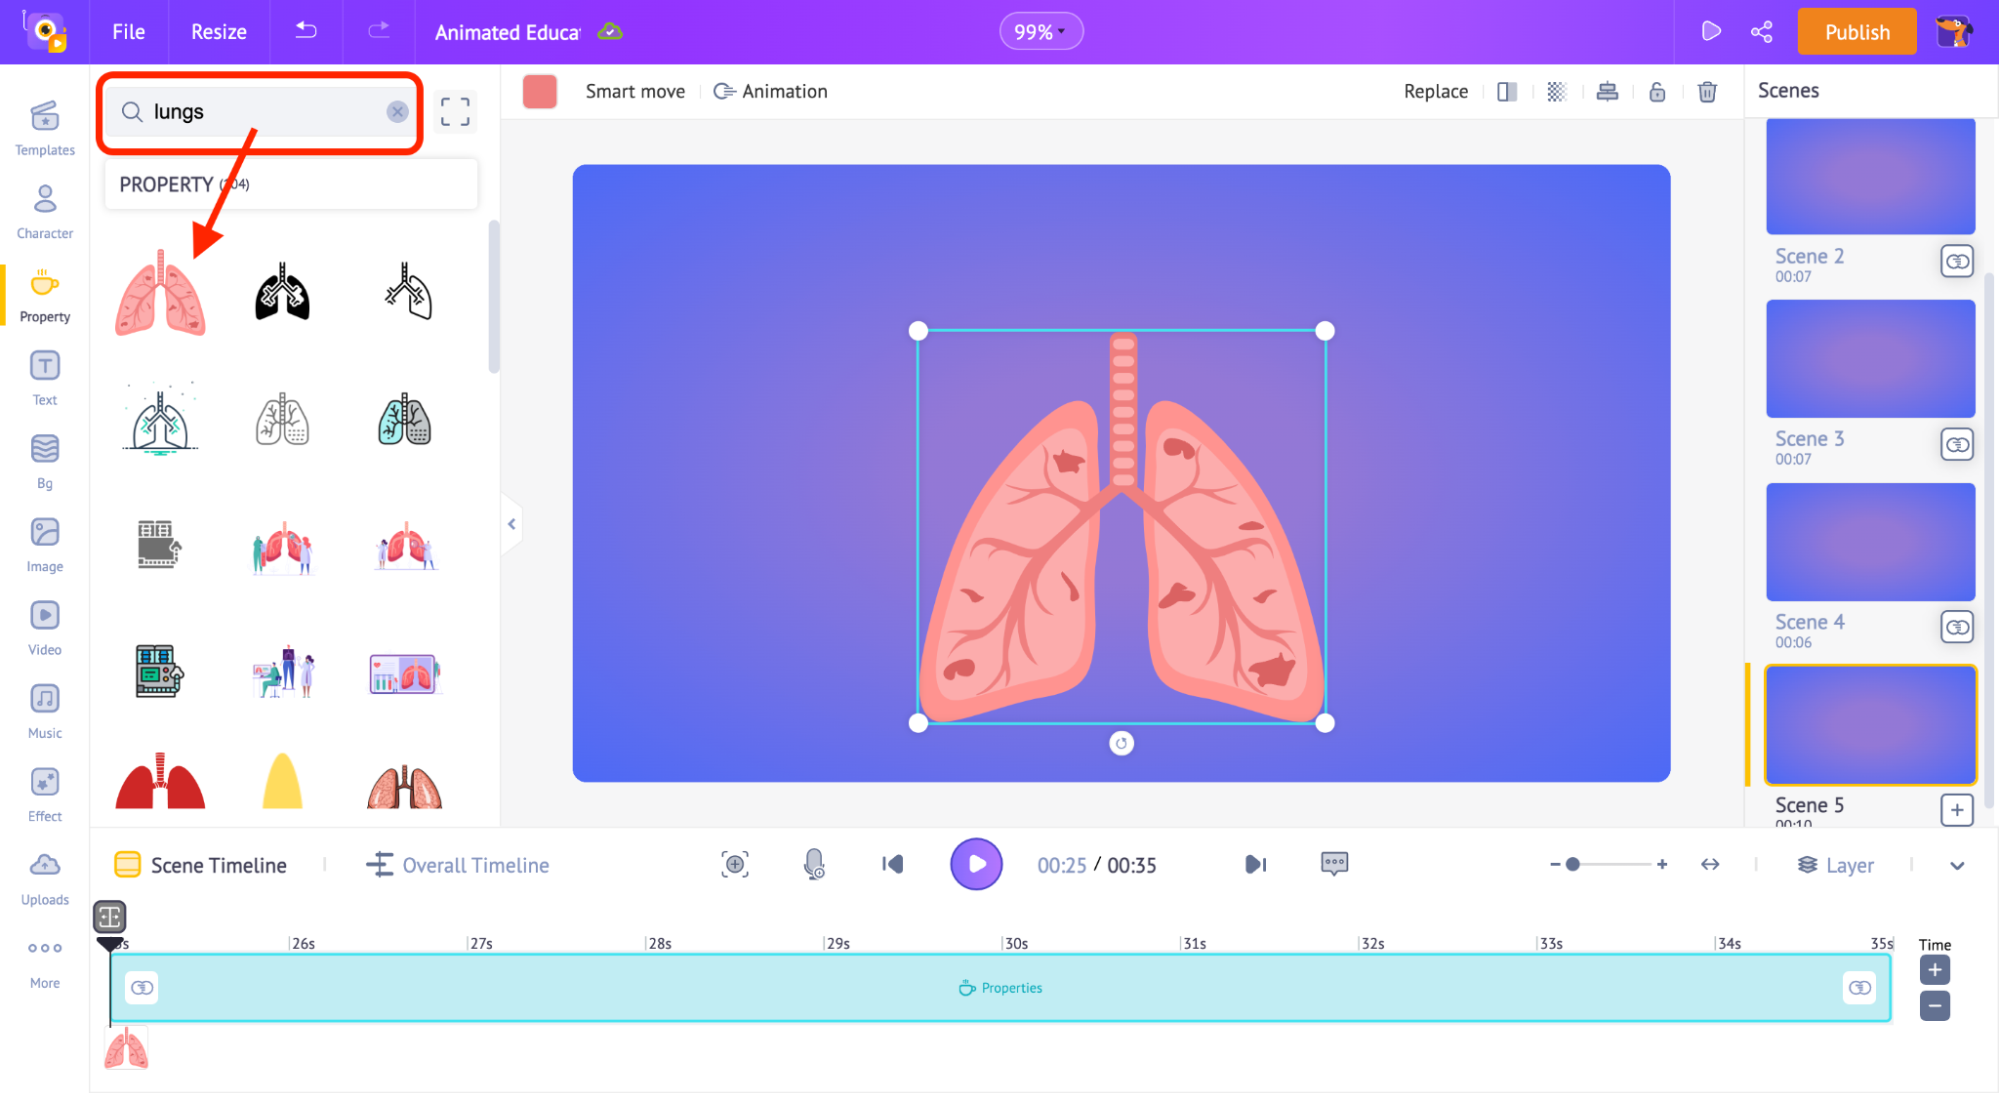
Adding Properties:
To add a property to the scene, click on the properties section (from the library). Since the video is about the Human respiratory system, I will search for the word ‘lungs.’
Click on one of the search results to add it to the workspace. Then, just like you did for the text, you can adjust the property’s duration in the timeline and add an effect to it by clicking on the ‘Animation’ option.
Adding voice-over to the character:
To add a voice-over to this character, click on the character and select the ‘Lip-sync’ option. You can see a bunch of options appearing.
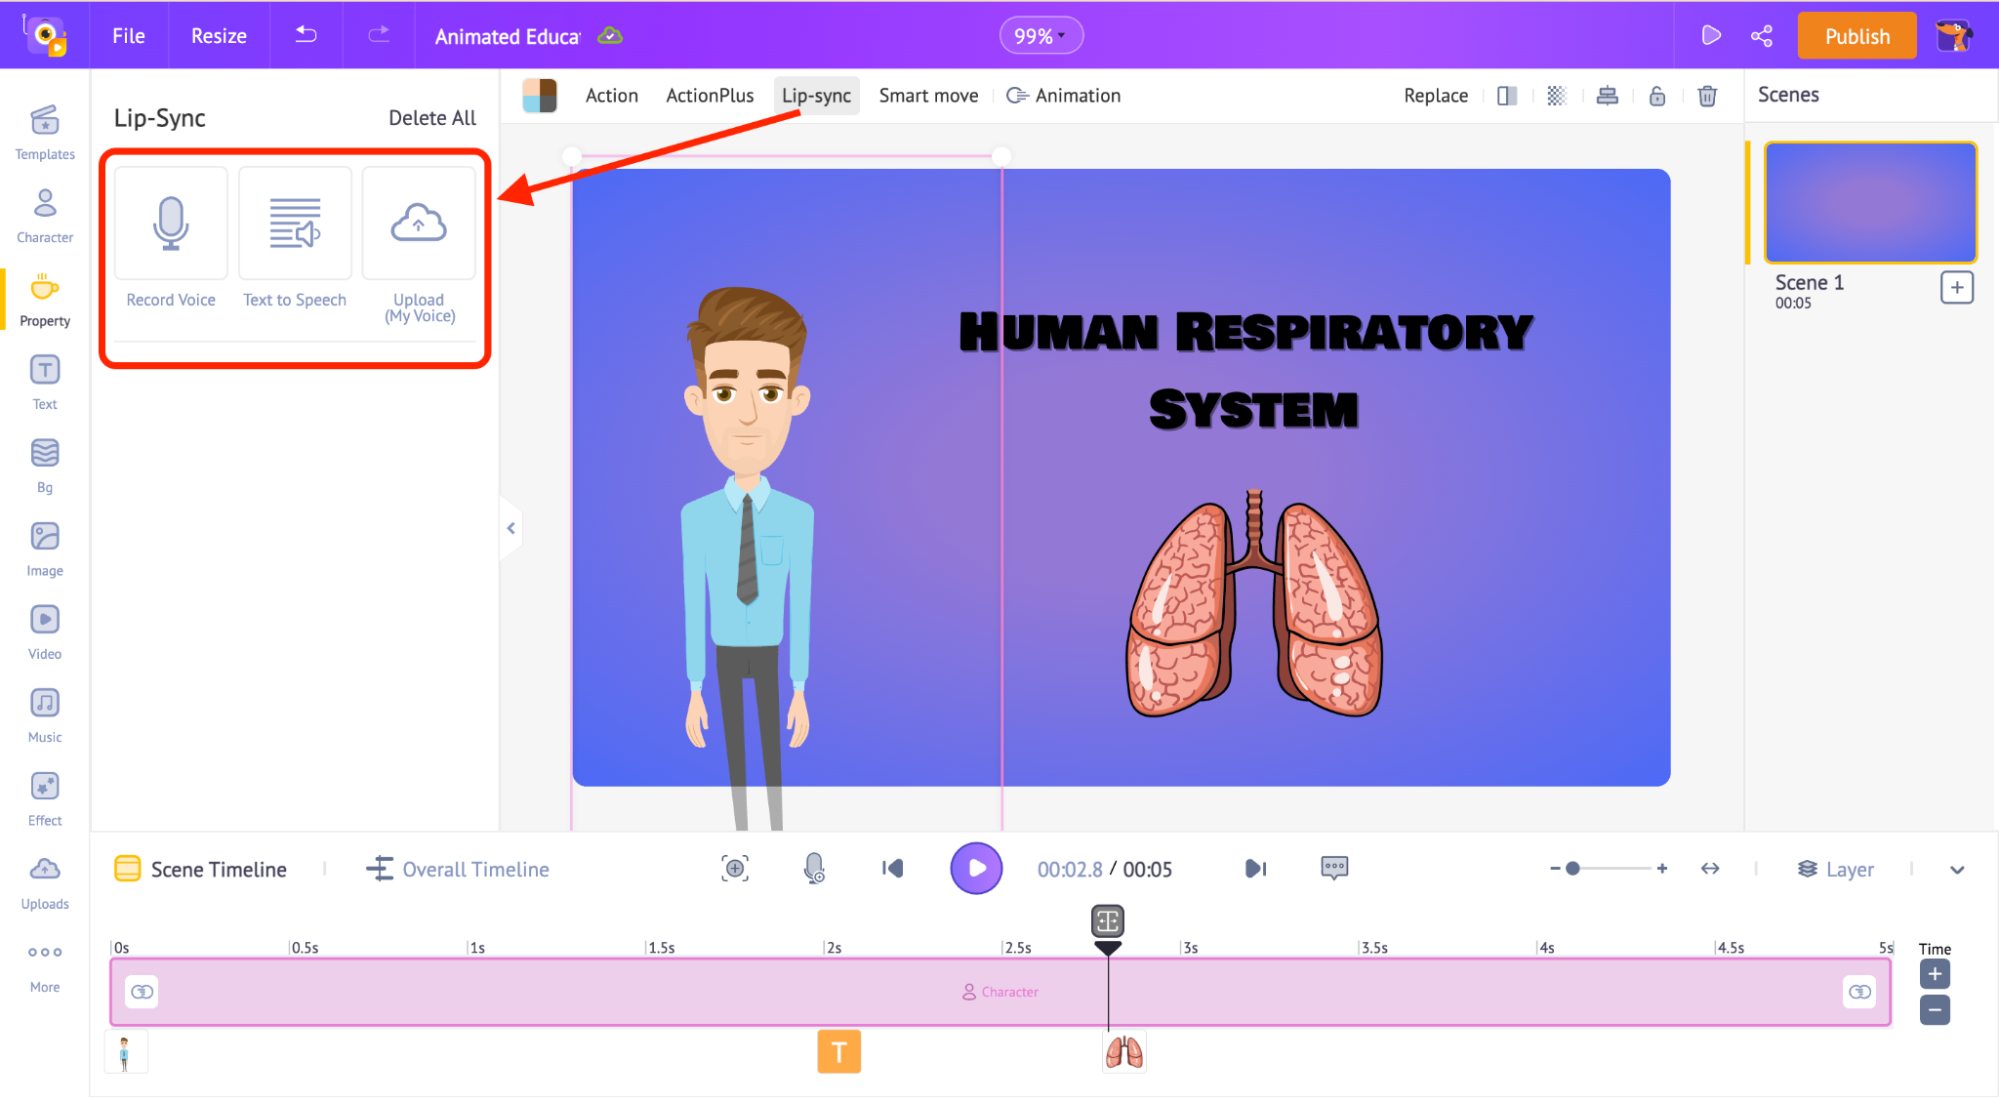
- You can directly record your voice using the ‘Record Voice’ option.
- If you already have a script, you can simply upload your text and convert it to a voiceover using the ‘Text to Speech’ option.
- The ‘Upload’ option allows you to upload any pre-recorded voices.
I have a script ready, so I will use the “Text to Speech” option. Animaker easily converts the text into a voice that automatically lip-syncs with the character. Here, you can change the gender, language, and voice to differentiate between two characters.
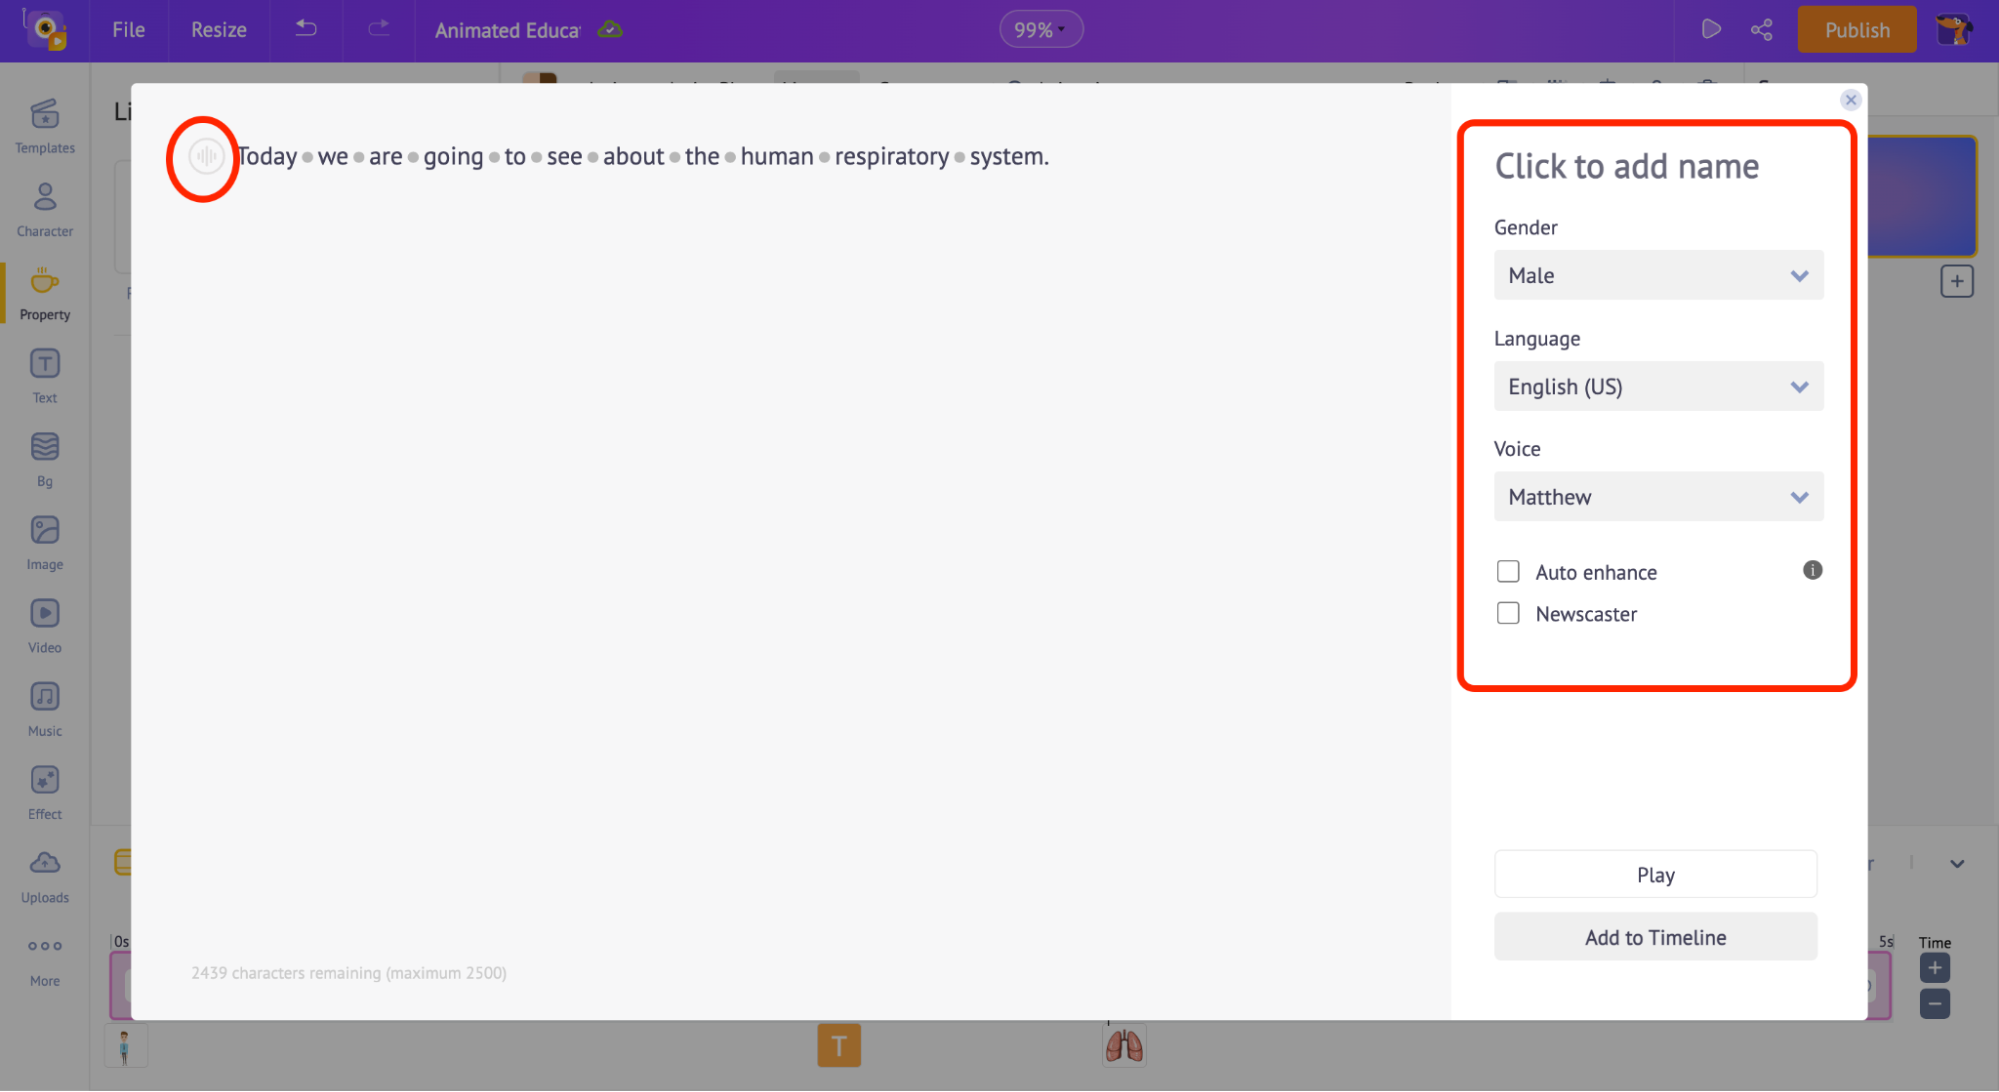
When you want to convert the text into speech, you can use features such as sound, pitch & volume to make it sound better and natural. Click on the button to the left of the text (rounded red in the screenshot above) to access these options.
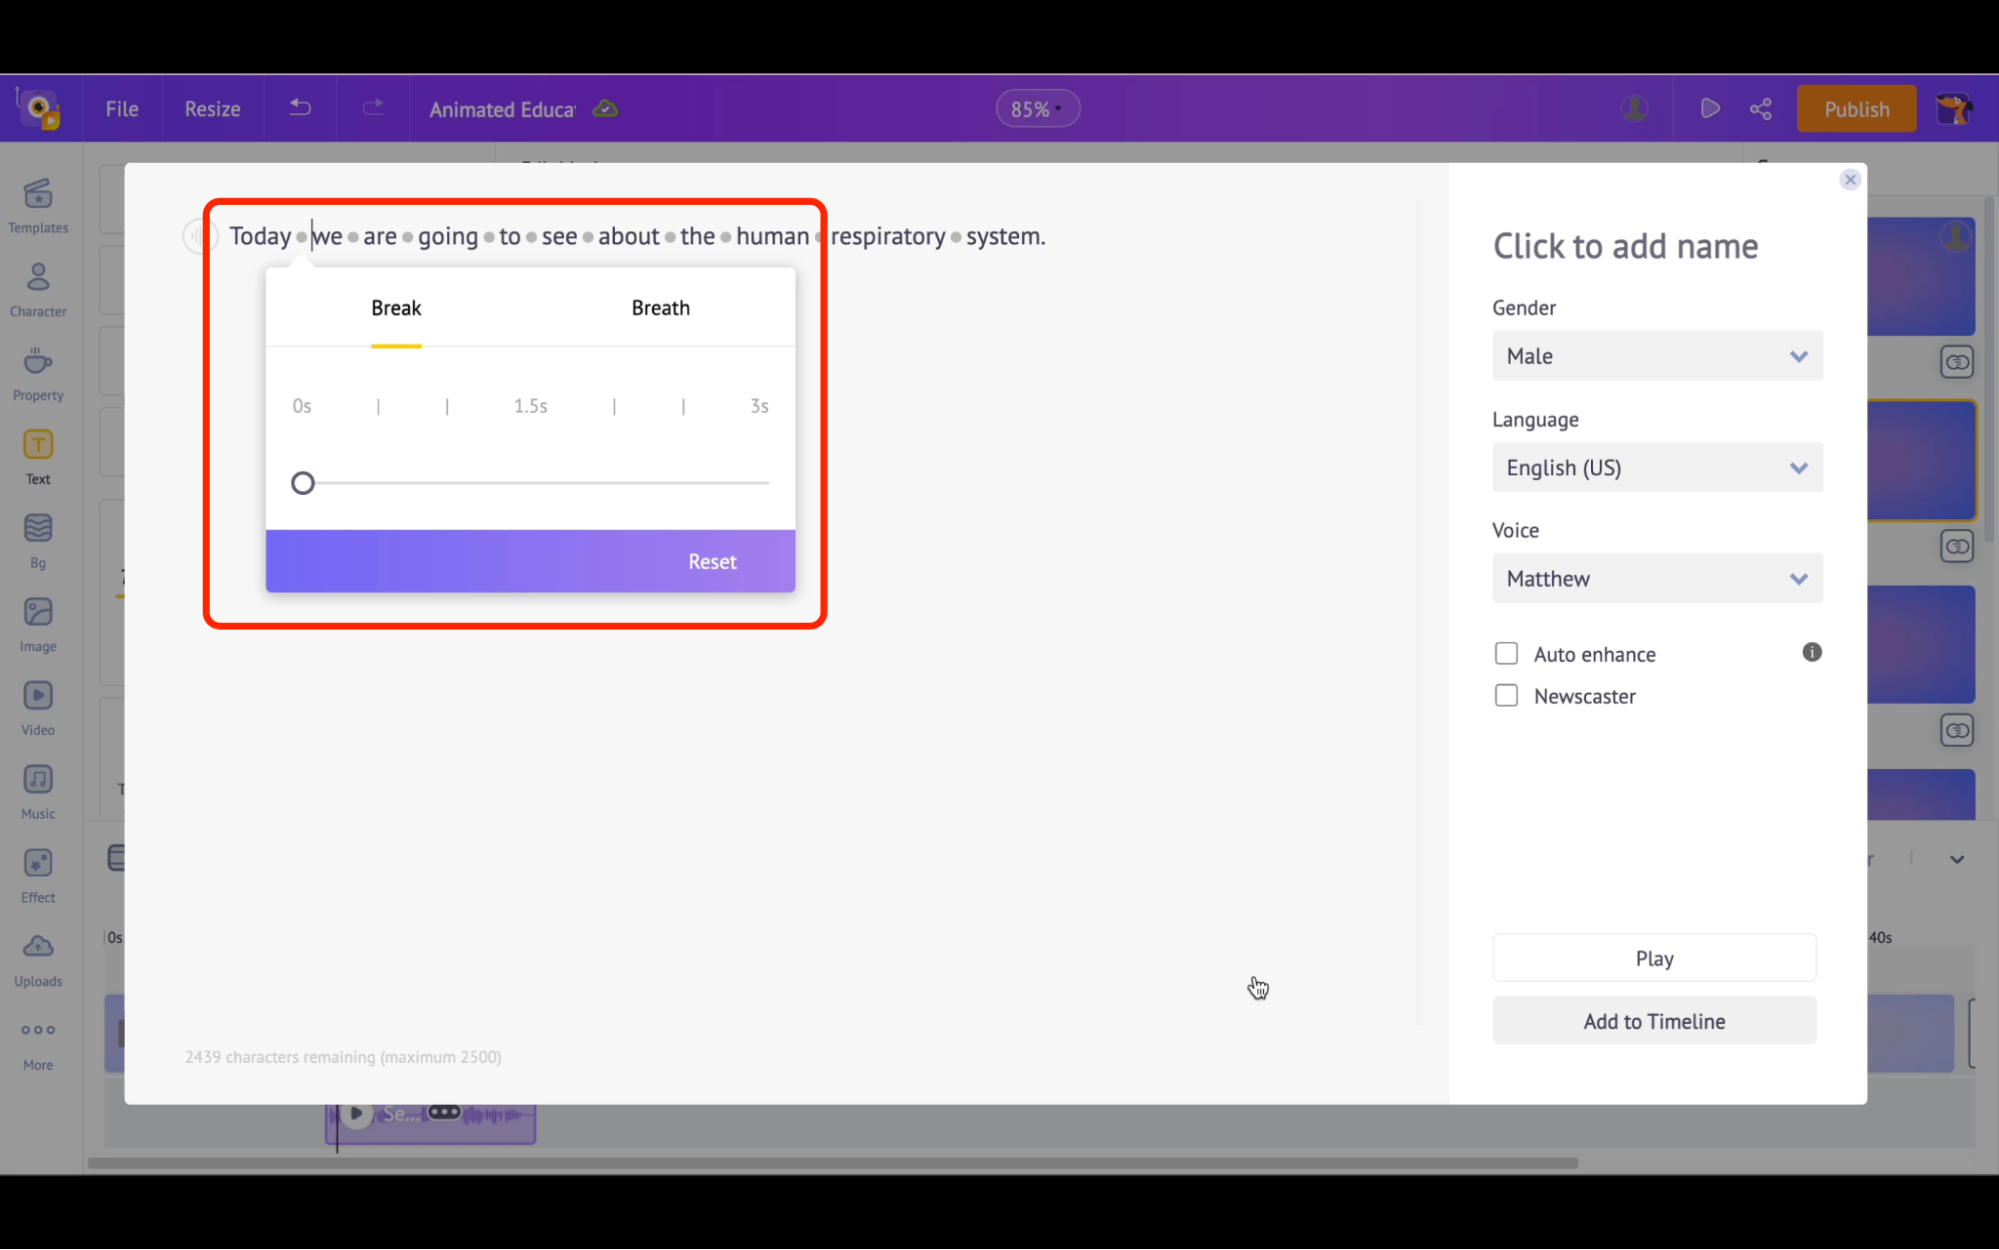
Not just that, you can control the break and breath in the sentence by clicking on the grey dot between each word.
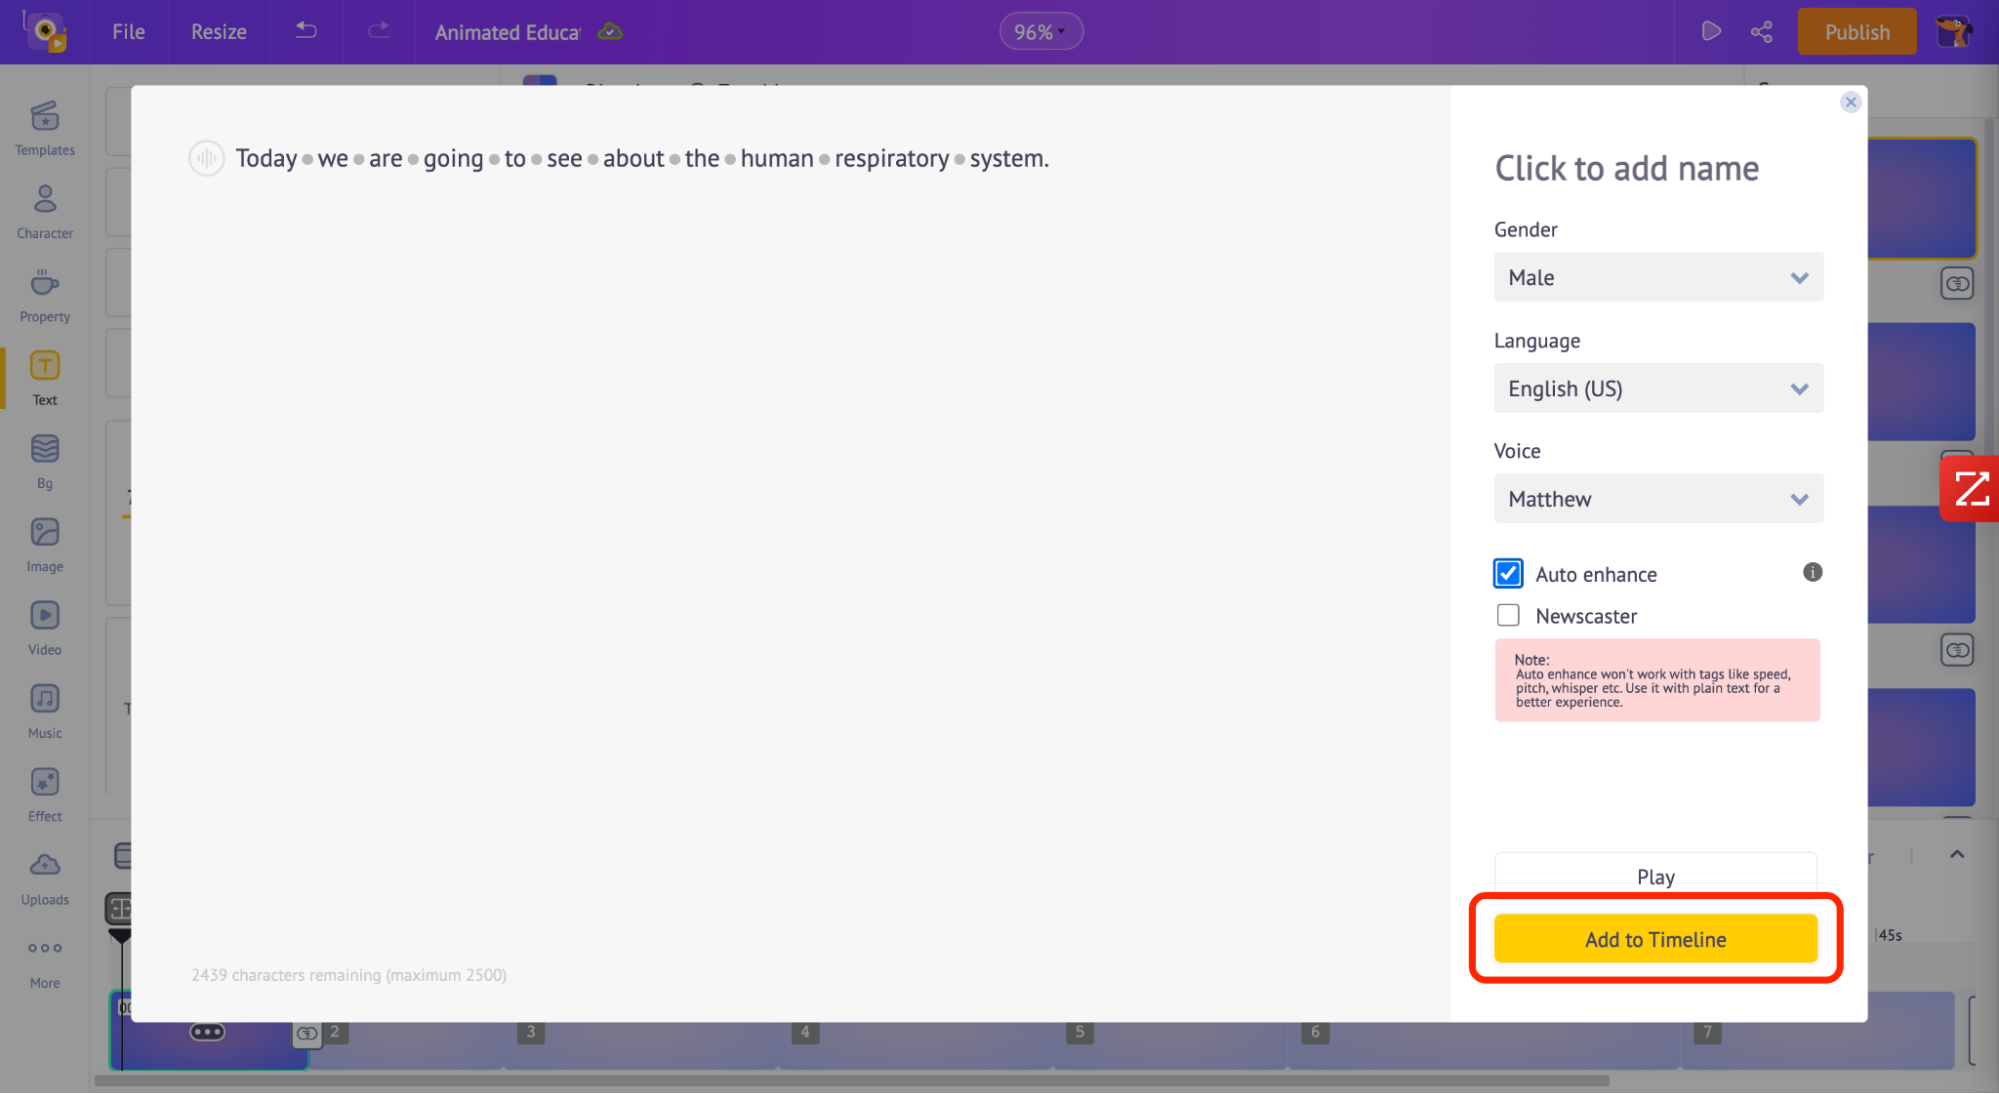
Once you’re okay with the audio, click on the ‘Add to Timeline’ option, and the audio will automatically sync with the character.
Adding Background narration voice:
We just saw how to add a voiceover and lip-sync it to the character. Now, let’s add it as a background voice instead of adding it to the character.
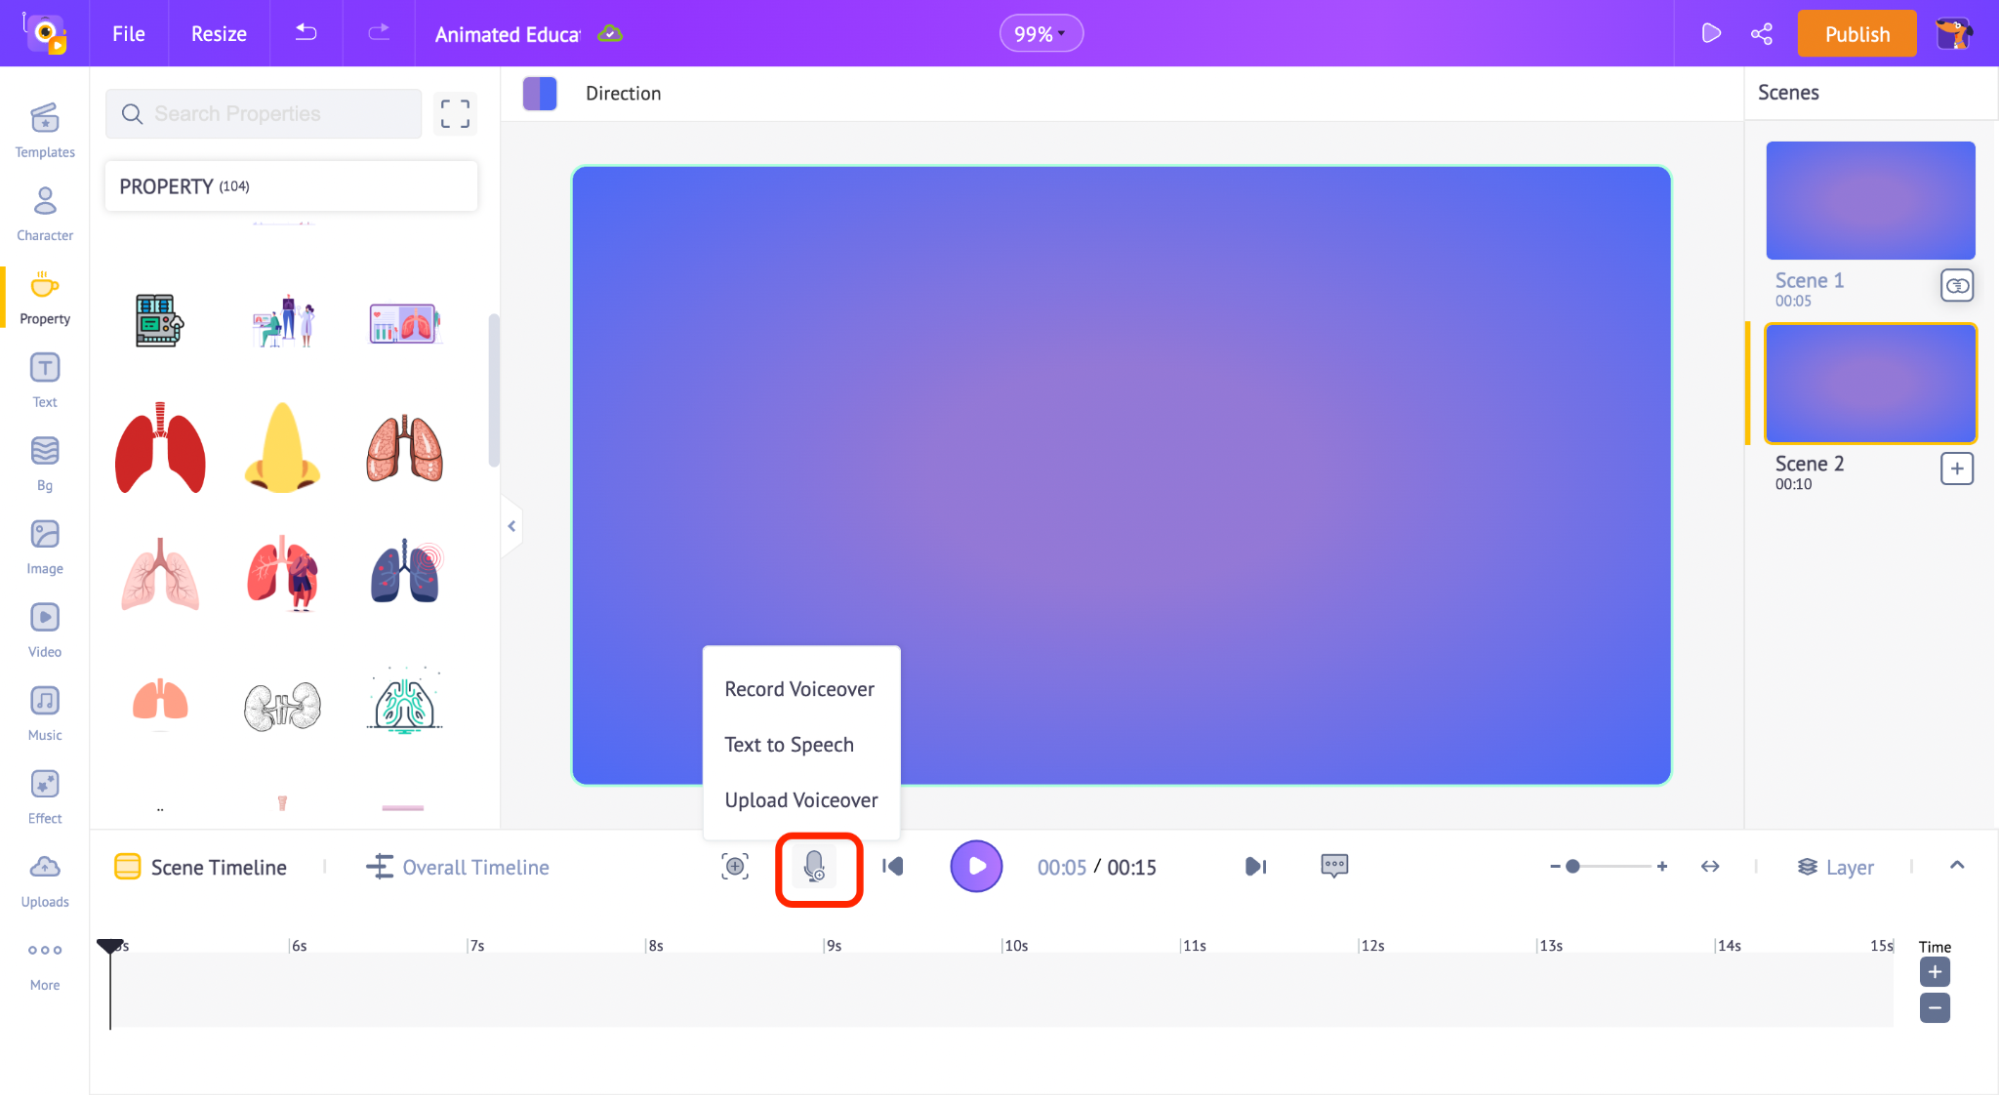
As you see in the above screenshot, there is an option to add a voice from the timeline. Click on the voice-over symbol and choose ‘Text to Speech’ to paste the ready-made script.
After you adjust the volume, pitch, and other options, click on the ‘Add to Timeline’ option to add the voiceover to the scene.
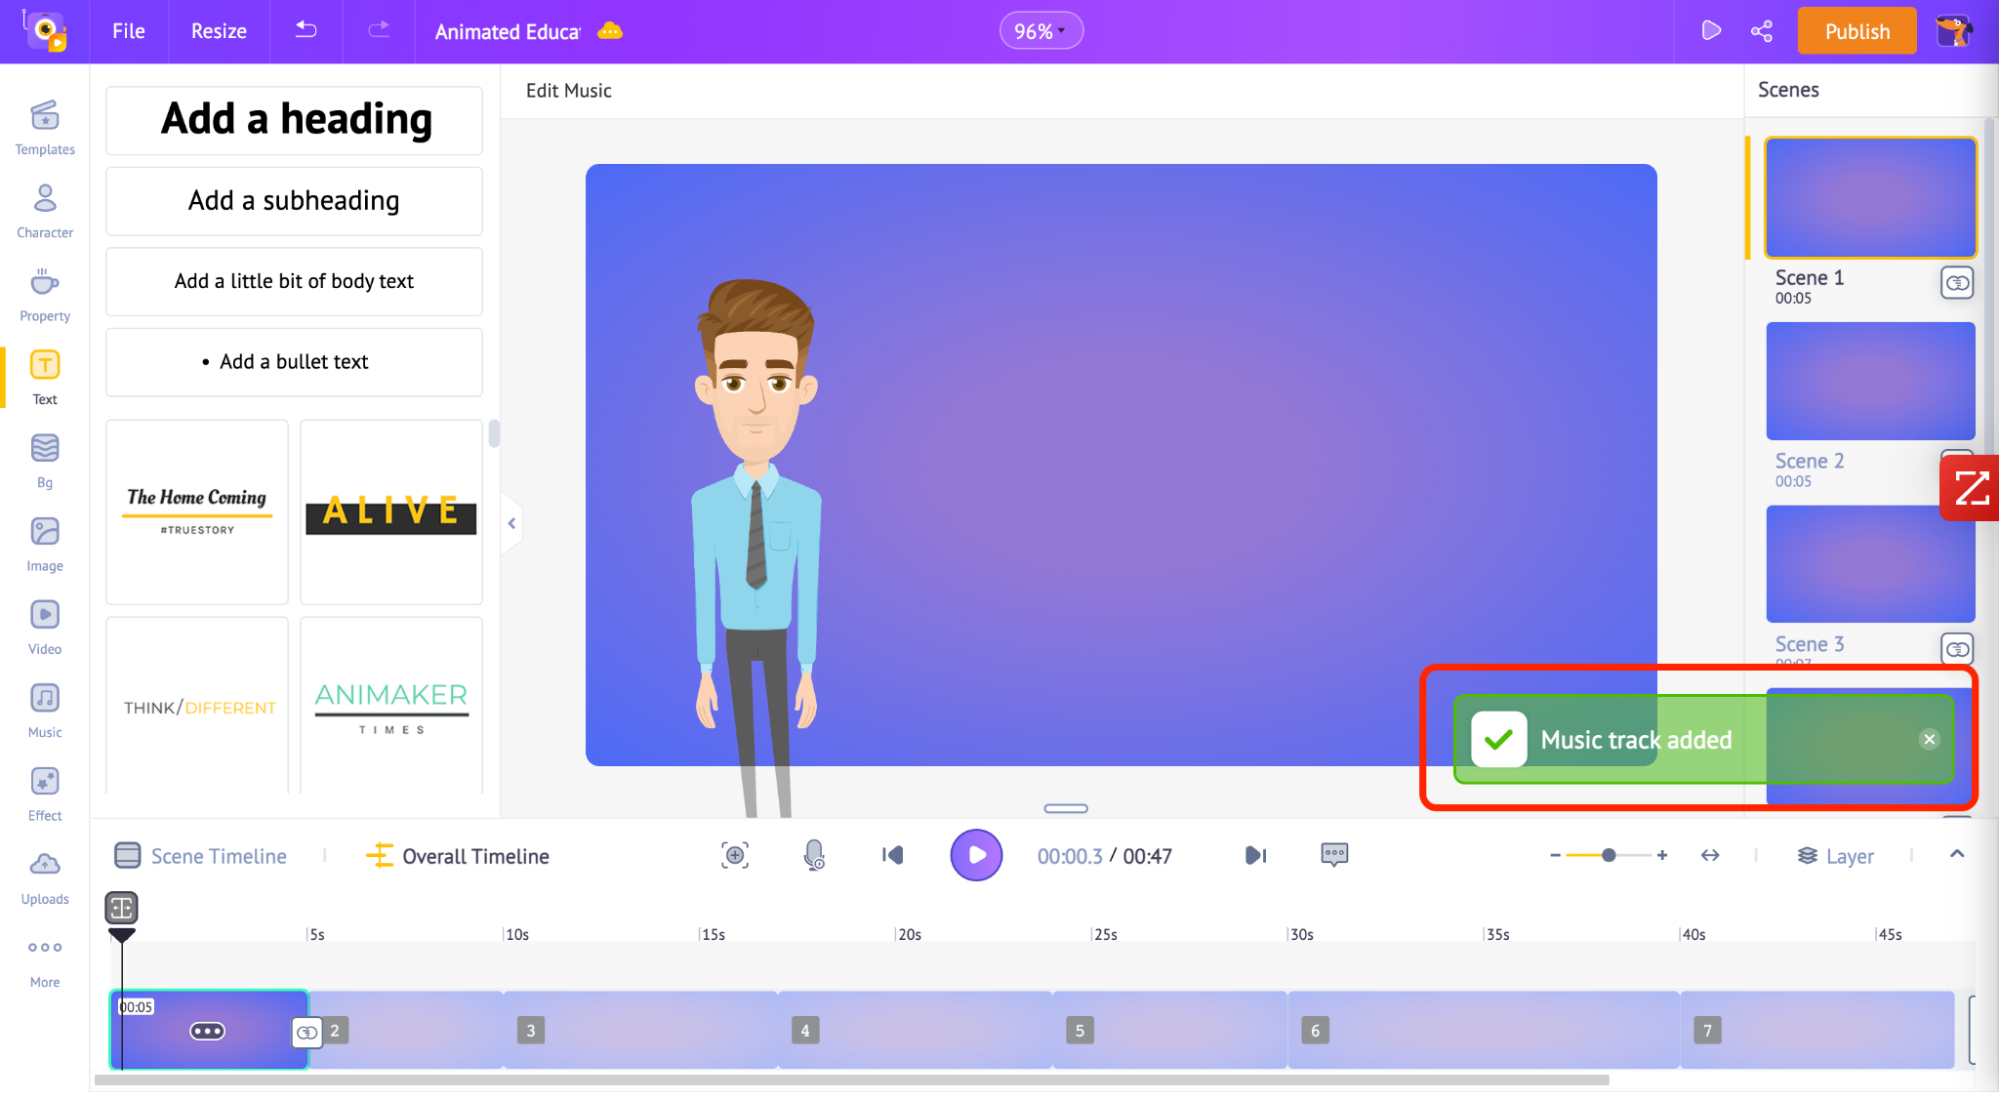
You’ll get a pop-up (as shown in the below image) once you have added a voice-over.
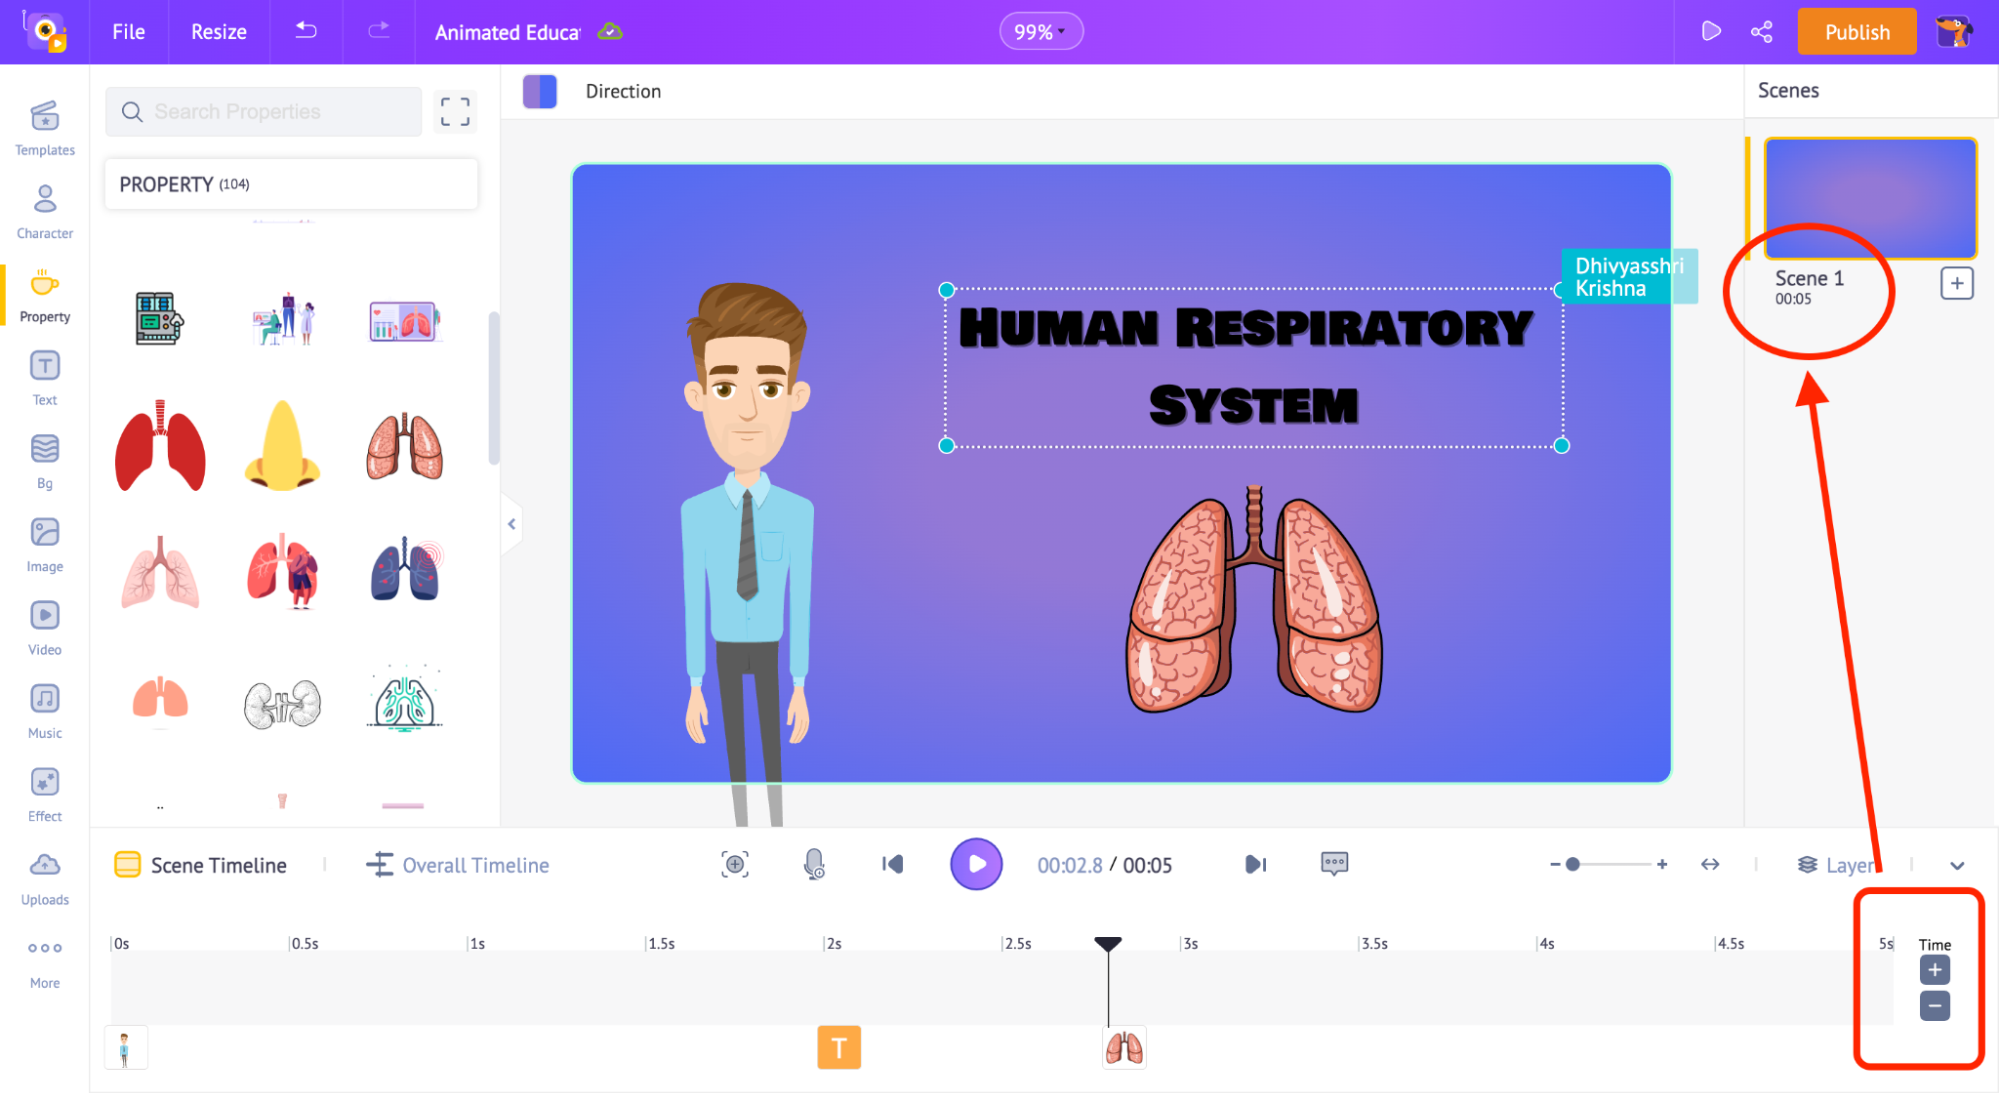
Controlling the scene duration
By default, the scene duration is 10 seconds. Let’s make it 5 seconds. To adjust the scene duration, click the plus or minus buttons on the bottom right.
Once you click the minus button five times, you will notice the scene’s duration is reduced to five seconds.
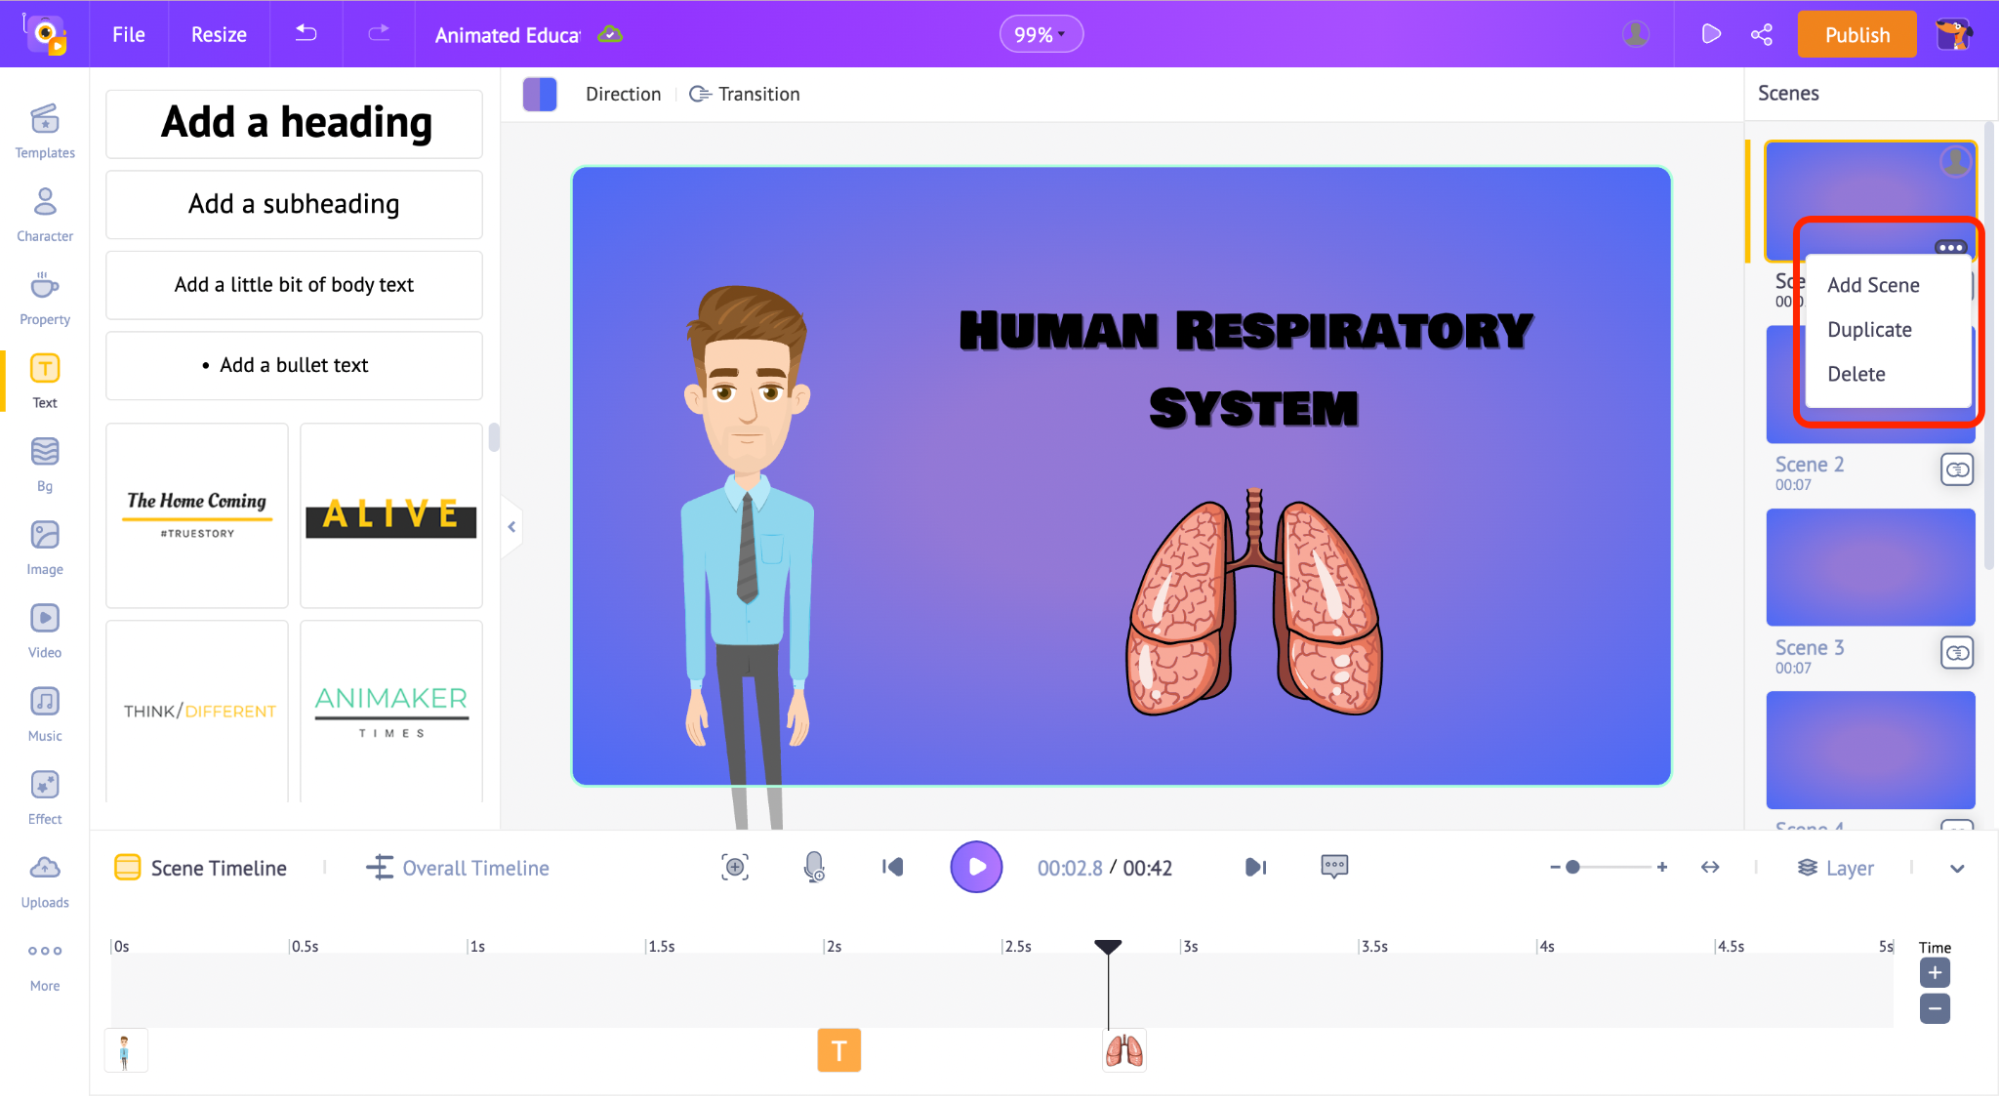
Step 4 - Add/Delete/Duplicate scenes
From the scenes tab, click on the three dots on any scene. You will see three options appear.
Add scene - This lets you create a new blank scene.
Duplicate - This lets you duplicate the current scene. This is the easiest way to apply the properties of one scene to another.
Delete - This deletes the current scene.
Since I want all my scenes to have the same background, I use the duplicate option.
Step 5 - Creating the second scene.
Since I duplicated the scene, the second scene comes with all the elements from the first scene.
In this scene, let’s show how the oxygen molecules move through the lungs.
First, let’s add the lungs. So, go to the properties section and search for the term ‘lungs’.
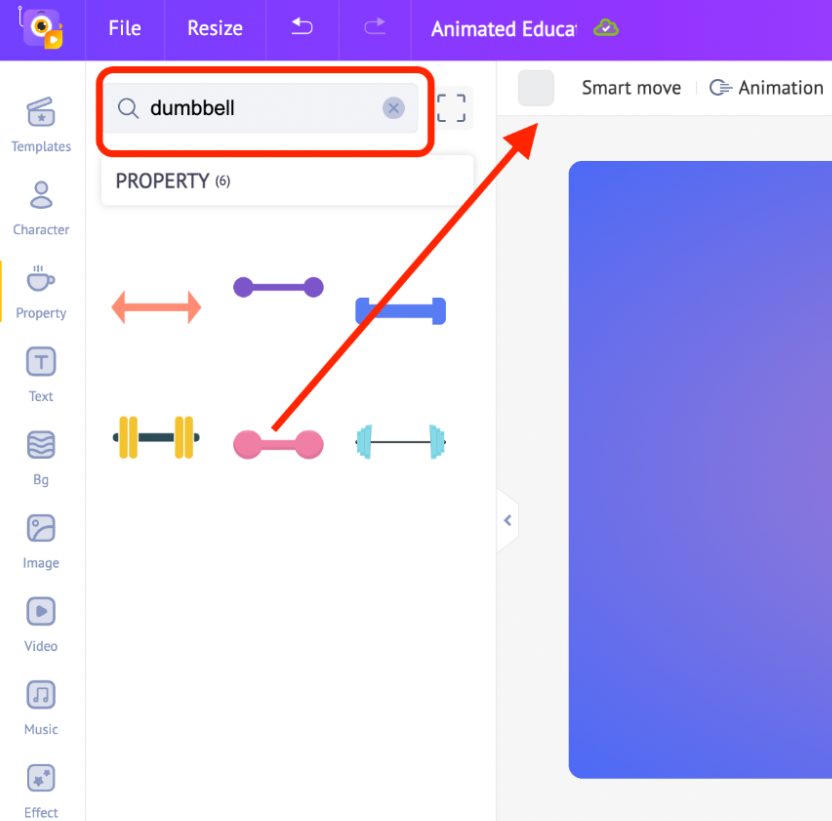
Now, let’s add the oxygen molecules. But first, we need a property that resembles oxygen molecules. Since the molecular structure of oxygen resembles dumbbells, we are using a dumbbell to represent the oxygen molecules.
After adding the dumbbell, click on the ‘color’ option to change its color.
Now, let’s make the O2 molecules move through the lungs! The idea is to make the O2 molecule enter the trachea pipe and move into the left lung. For this, we will use the ‘Smart Move’ option.
Place the dumbbell at the beginning (top) of the lungs and click on the ‘Smart Move’ option. Now, you will notice two frames appear on the timeframe. By adjusting these frames, we can make the O2 molecule move.
One frame must be at the top of the pipe. Click on the second frame and drag it to the end of the pipe. In the timeline, click on the second frame and move it away from the first frame.
This is how the molecule moves now.
Now, let’s make the molecule enter the left lung. For this, we add another frame of the dumbbell. To do this, drag the black playhead on the timeline slightly to the right and click on the ‘+’ symbol. This adds the third frame.
Now, drag the third frame to the end of the left lung’s nerves.
Instead of making the molecule move straight, you can adjust its path by moving the dotted lines between the second and the third point (as shown in the GIF below).
It’s showtime now! Look at how the O2 molecule moves.
Instead of recreating the animation for the right lung, you can simply copy-paste it and adjust the directions.
That was easy, wasn’t it?
Like how we created the first two scenes, you can create the other scenes too.
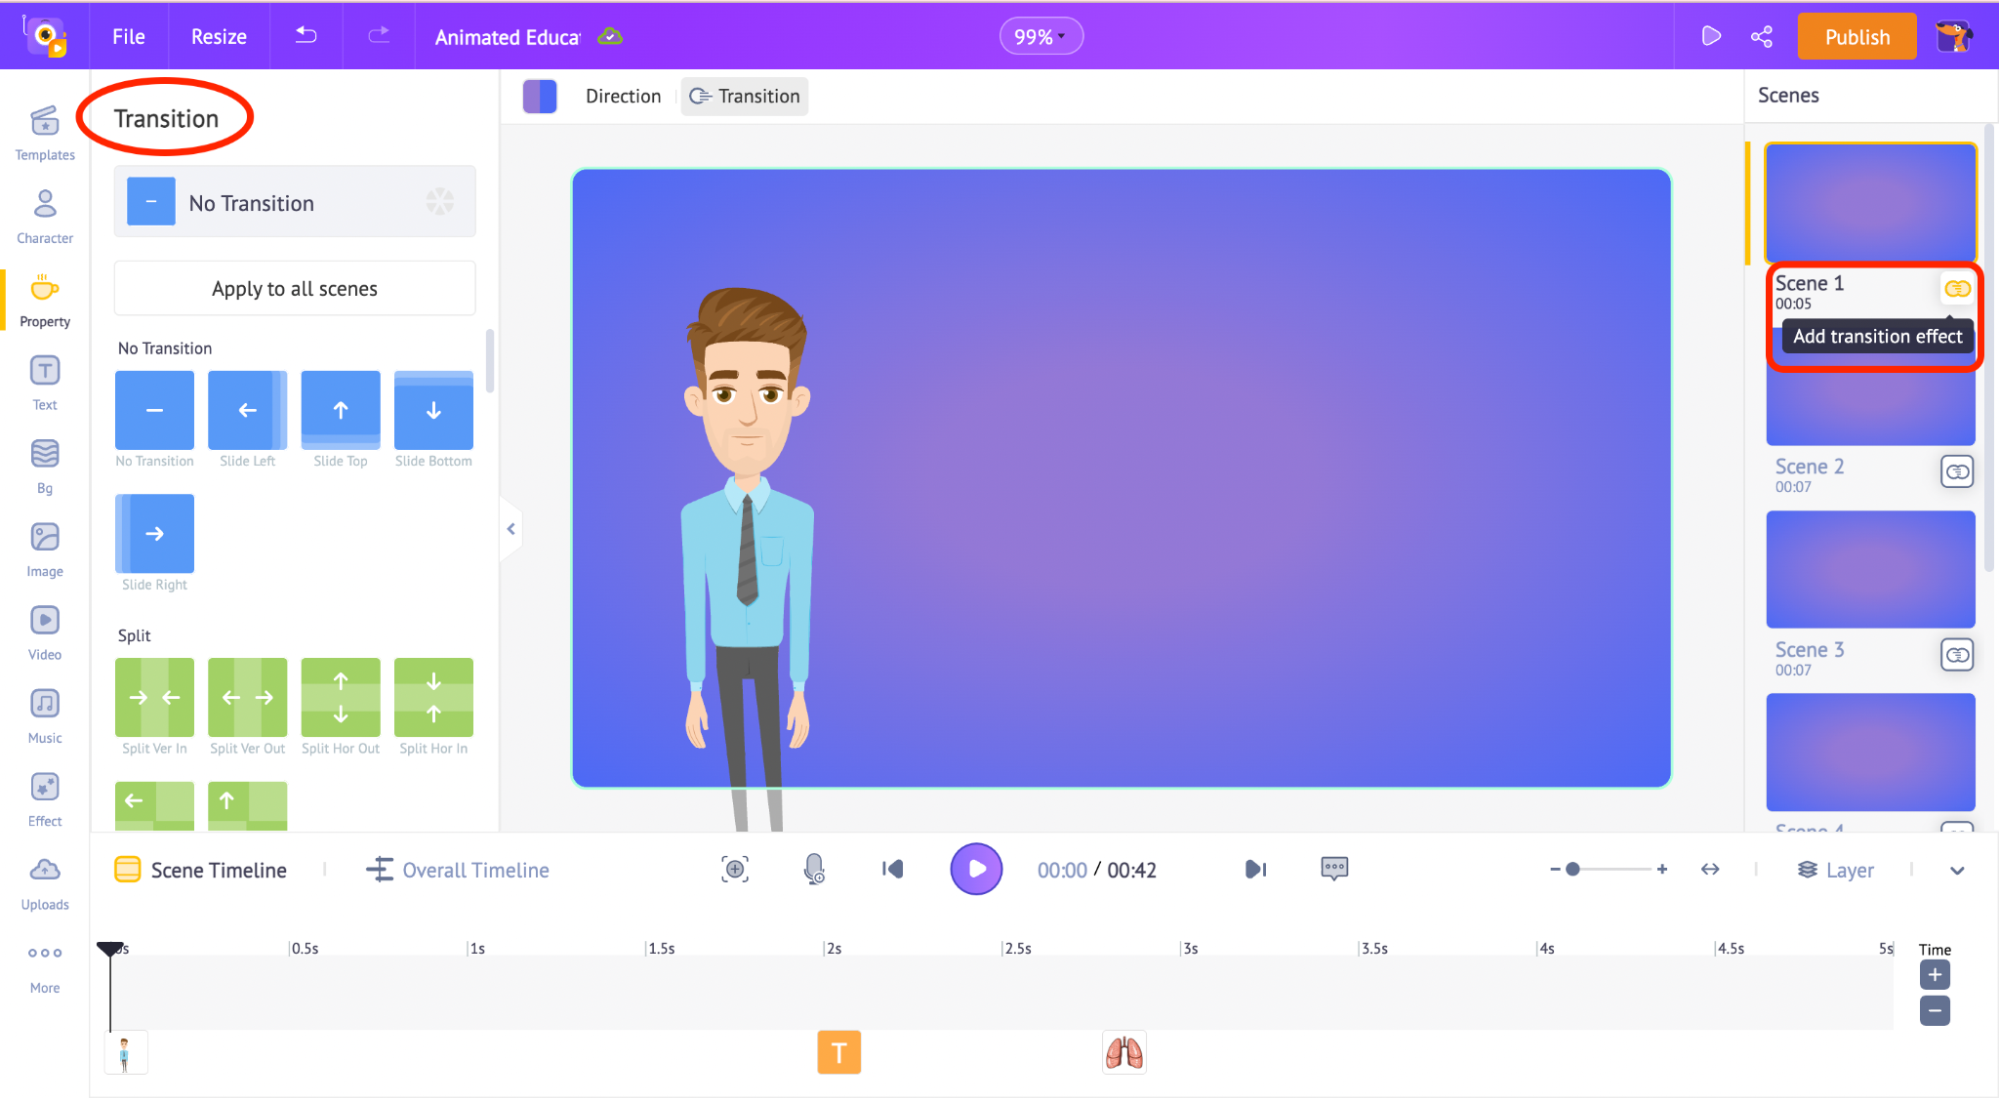
Step 6 - Add transition effects.
Let’s add a transition effect between each scene. Click on the transition effect in the scene section to open the transition tab. From here, you can add different transitions between scenes.
Step 7 - Add Music tracks
To add a music track, go to the music section in the library. There are 30,000+ copyright-free music tracks that you can use. You can hover over the music tracks to hear the music.
Click on any of the tracks to apply to your video.

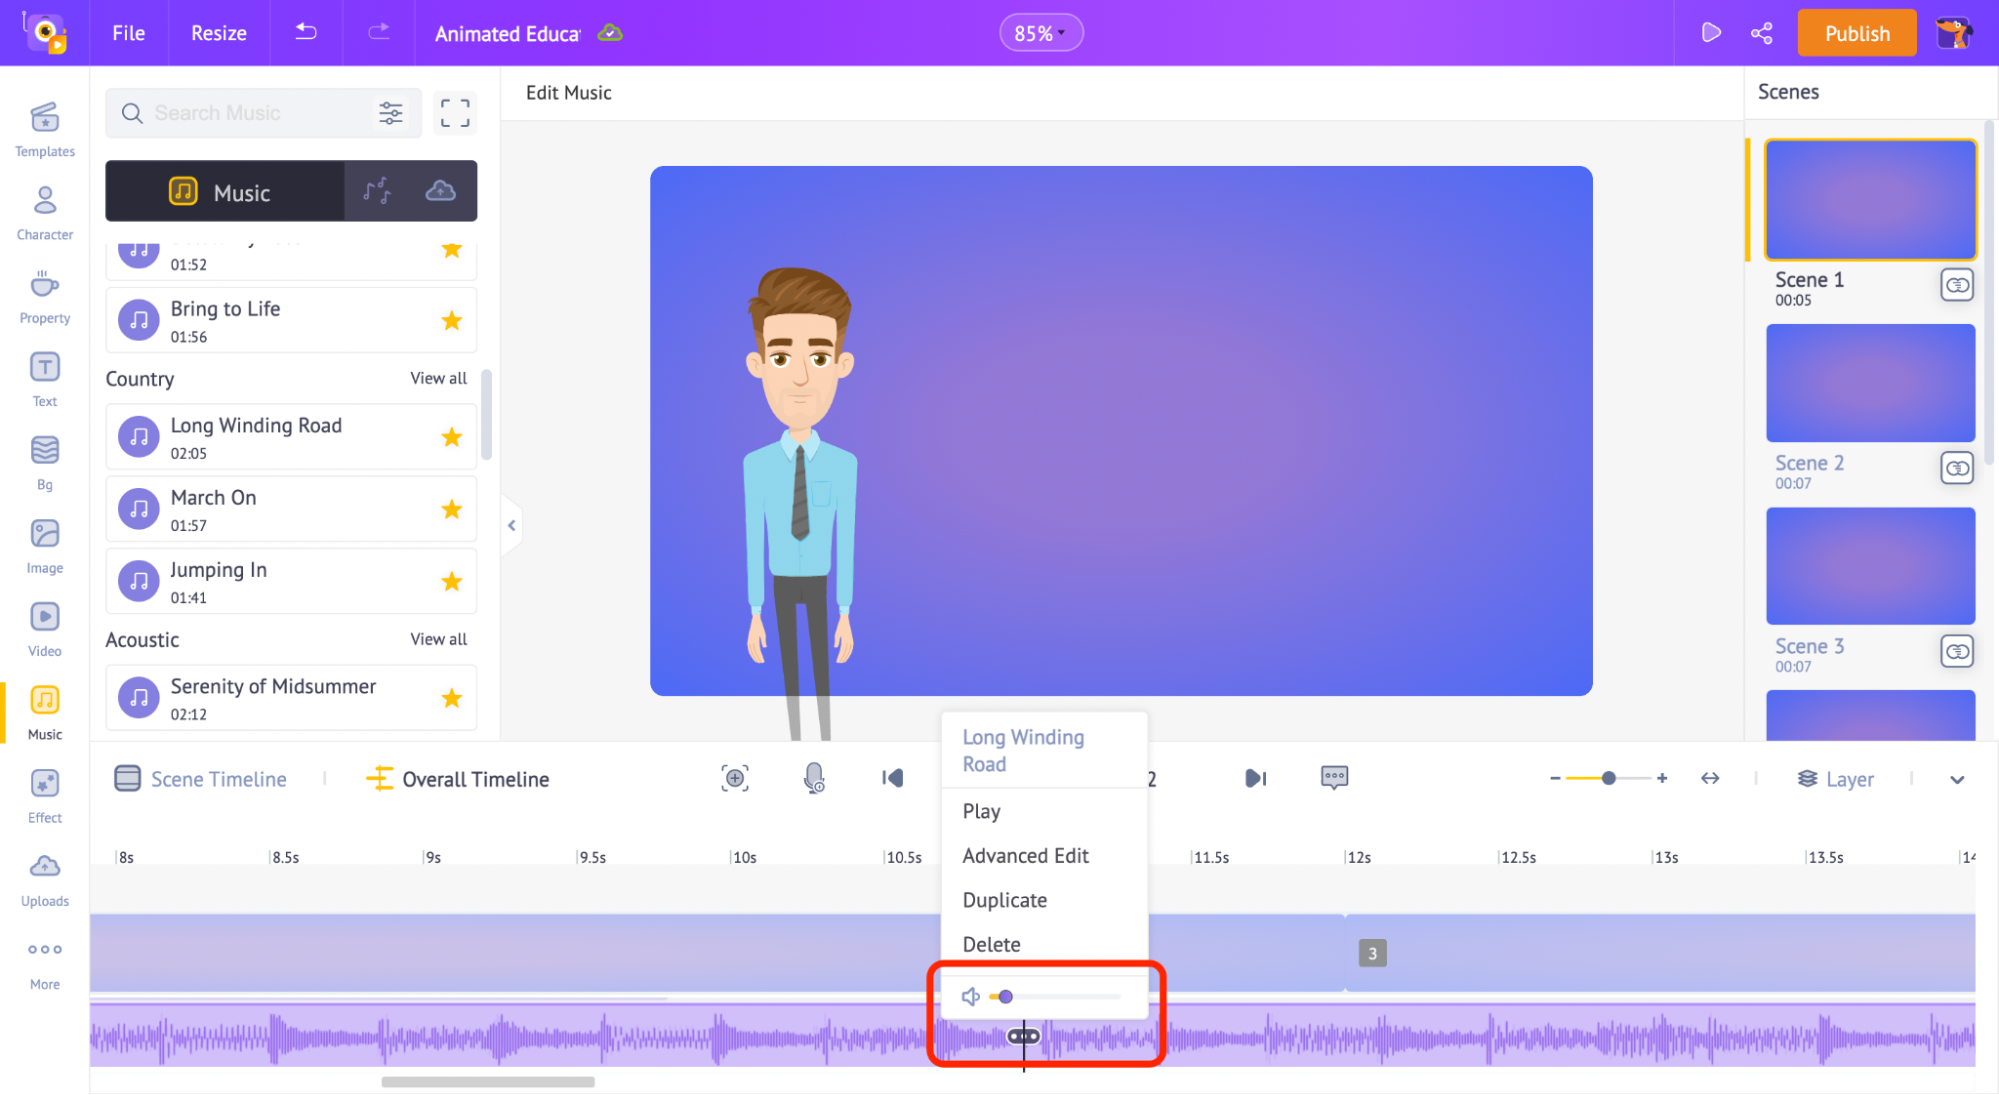
Let’s reduce the volume of the track so that it doesn’t affect the voice-over tracks that we added earlier. To reduce the volume of a music track or voice-over, go to the ‘Overall Timeline’ and click on the three dots present in the middle of the track.
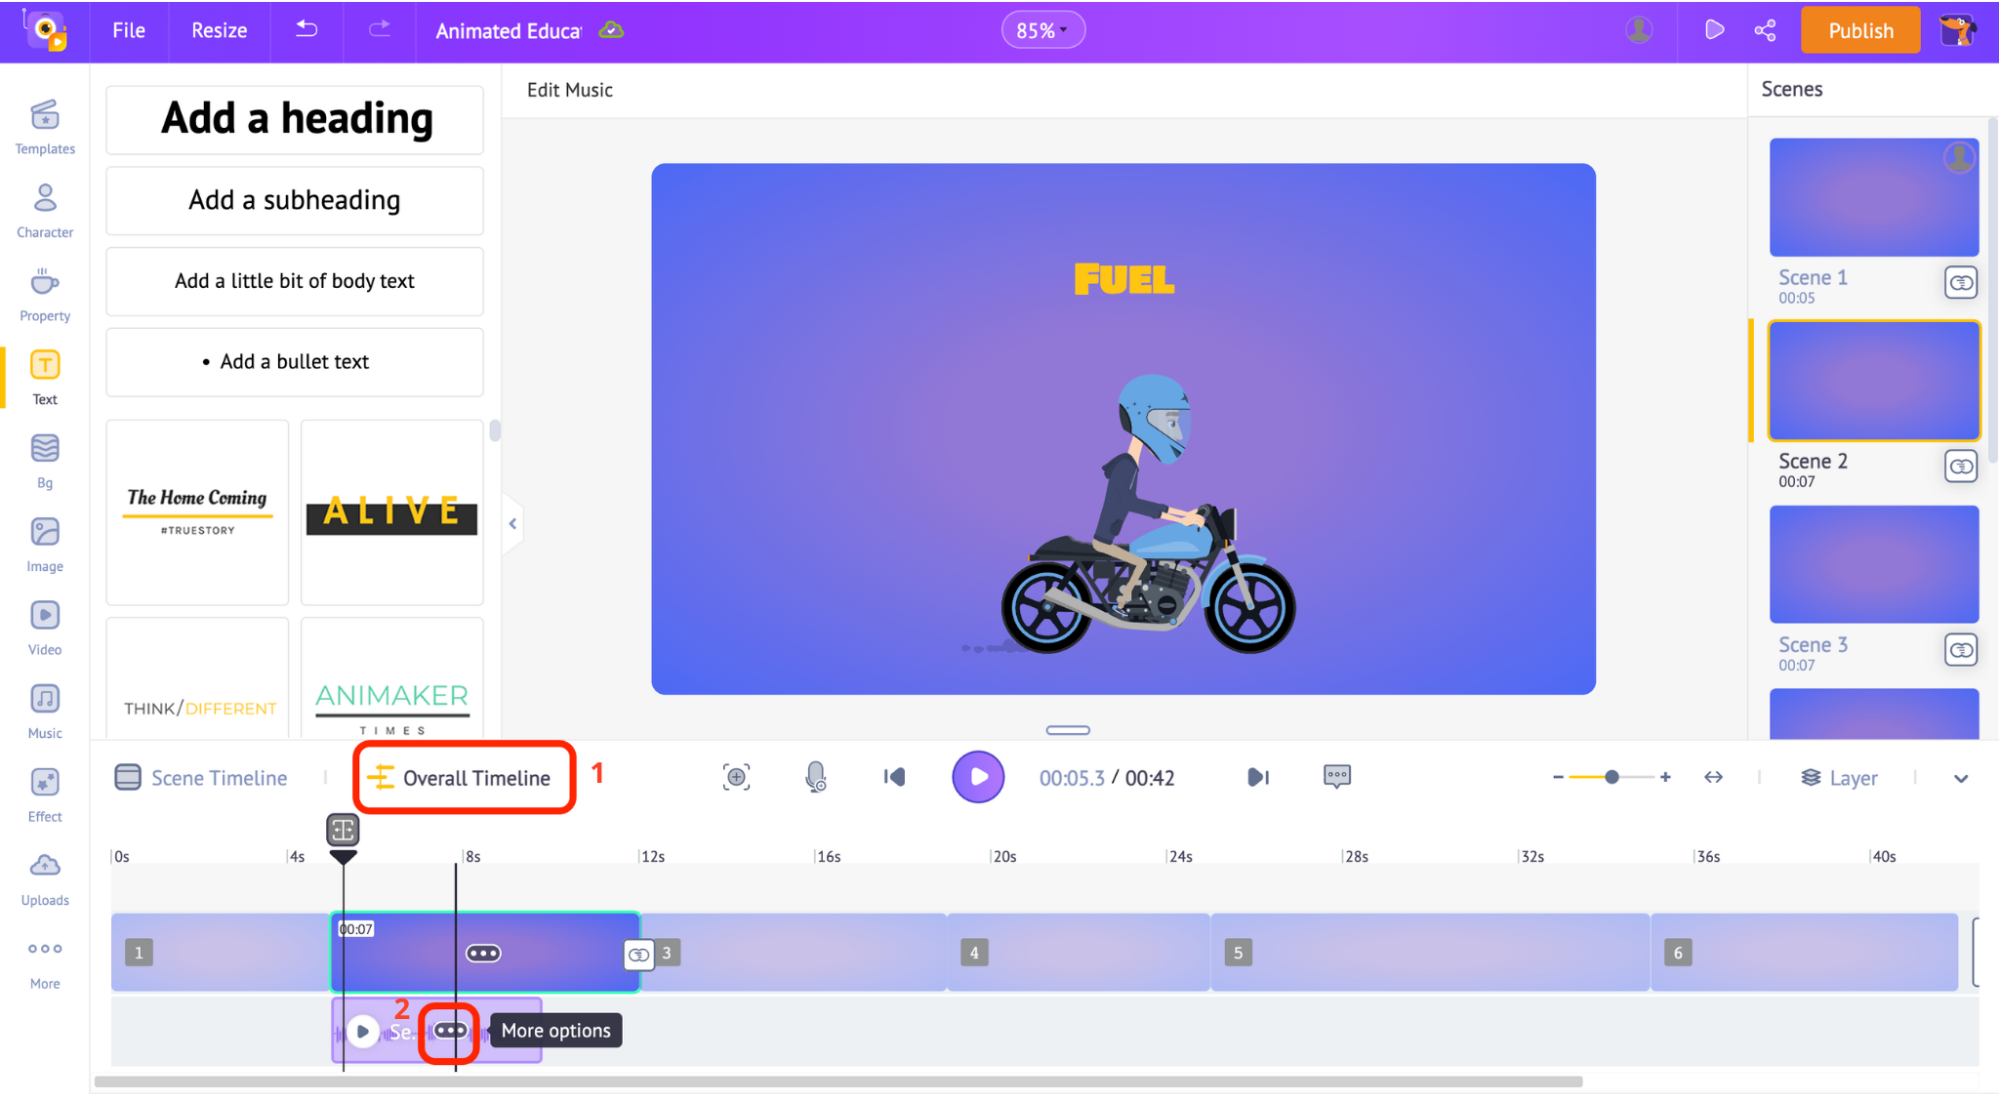
As you see in the image below, you will see a set of options to control the track’s volume, play the track, work on advanced edits, duplicate it, or delete it.
Use the volume slider to control the track’s volume.
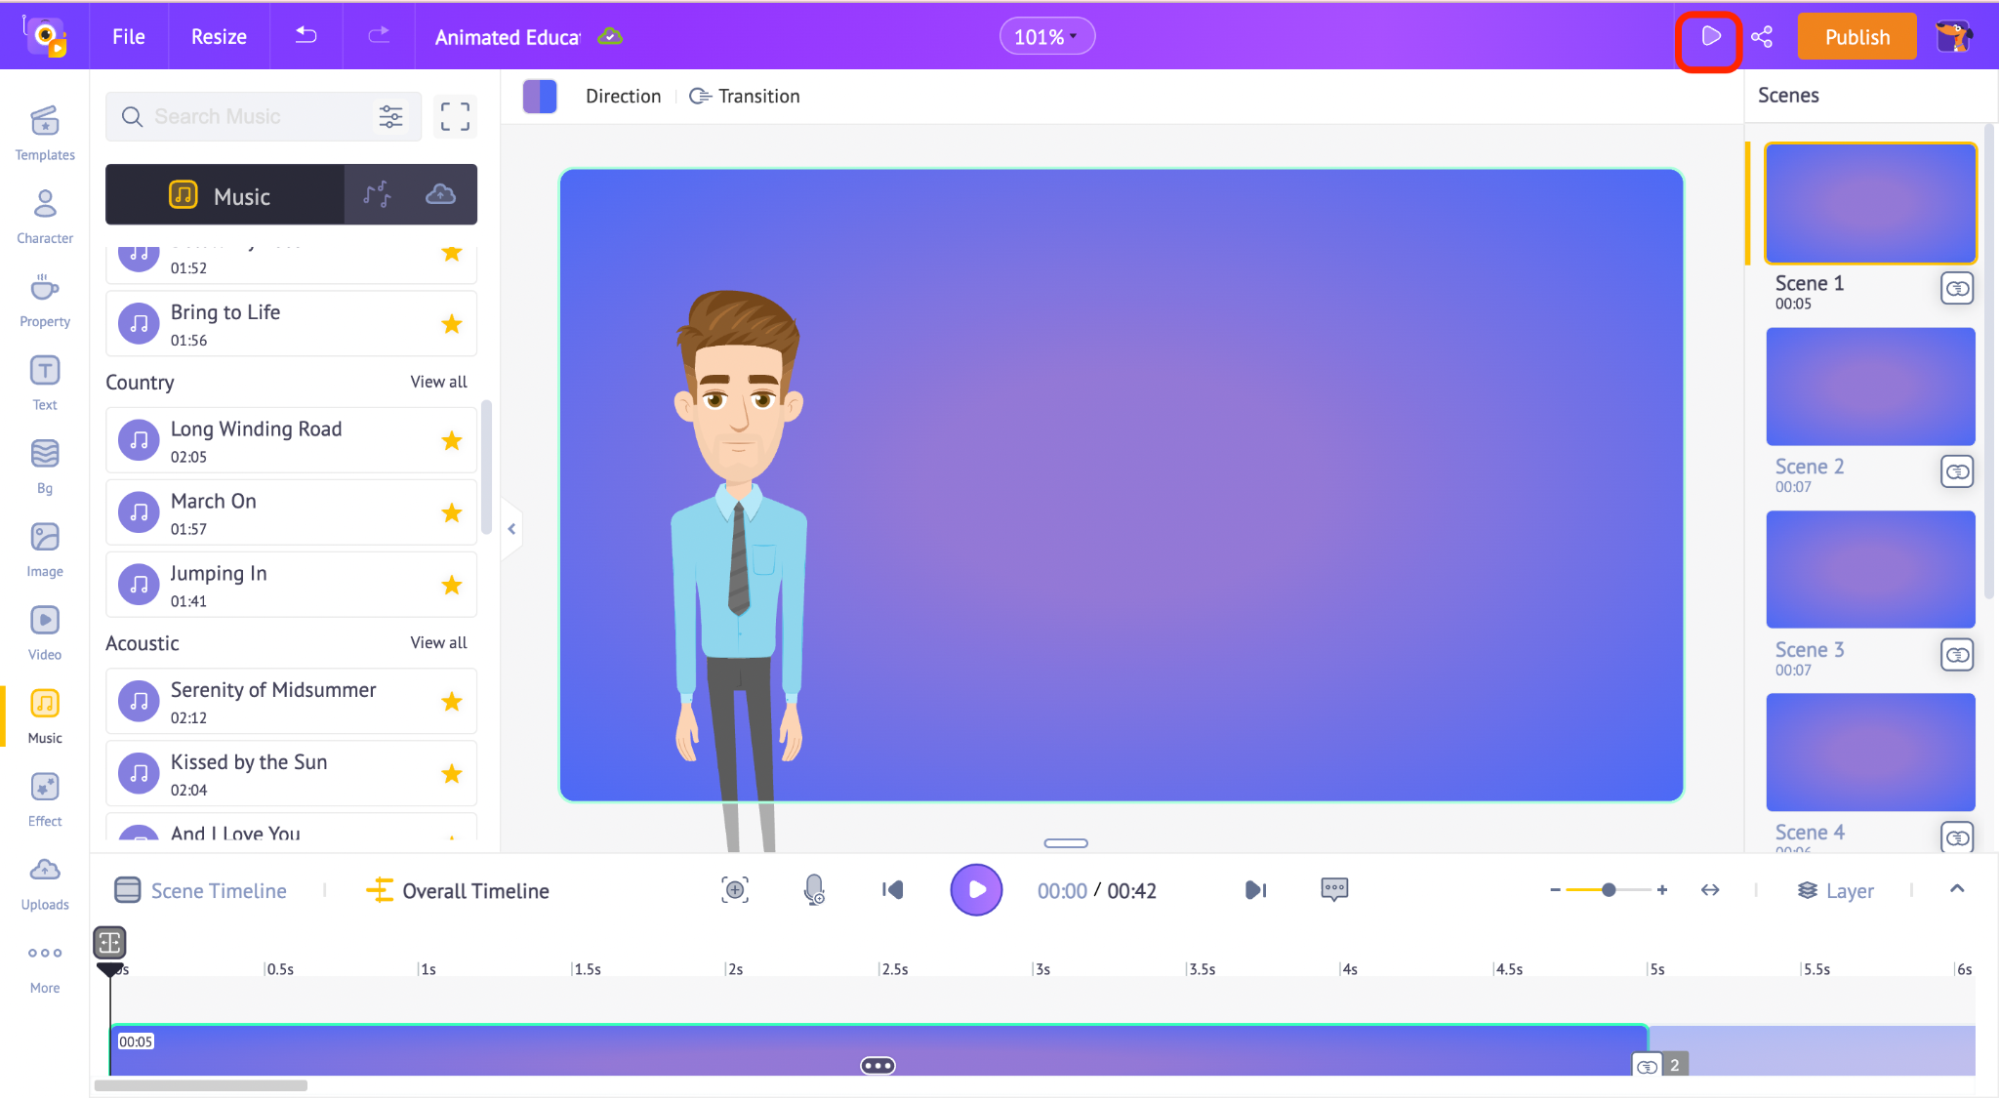
Step 8 - Preview and Download the video
To preview the video, click on the preview option at the top.
To download the video, click on the ‘Publish’ button on the top and select the ‘Download Video’ option.

This will take you to a page where you can manage your exports.
Now, you know how to create animated educational videos.
So, don’t wait further!
Get hands-on experience in creating an amazing animated educational video & excite your class!
Create an animated educational video now!
Got questions? Add them to the comments section below. We will be more than happy to help!