Introducing Animaker Deck.
Imagine these three situations.
- You are an entrepreneur who has an investor presentation in less than a day.
- You just landed your first job as a teacher in a middle school, and you have your first day of class tomorrow.
- You have a sales presentation with a client in the evening, and you still don’t have a sales ppt on hand.
The one thing that’s common between these three individuals is that all of them want to make a solid first impression.
Given that all three of them don’t have enough time on their hands, is there a way for these presenters to come up with something that is stunning and at the same time easy to prepare?
Sounds like they need to pull off a miracle. Doesn’t it?
And a miracle is exactly what Animaker will help them deliver. Known to many as the world’s most intuitive DIY Animation tool, Animaker comes along with the World’s largest animated character library which consists of 50+ characters, 2000+ properties, 3000+ maps and much more. In addition to letting users make videos in 5 different video styles, Animaker recently launched its Presentation Deck feature.
*What? Are you serious?*
Yes, I am. Think about having the ability to present your idea with super fun animated cartoon characters and properties without even having to leave the Animaker application.
Gone are the days when you had to awkwardly pause your animated video presentations then and there with the pause button at the end of each animation slide to explain the animation bit that your audience just witnessed.
With the new Animaker Deck, you can create a video once and use it both as an Animated video and as an Animated presentation. You don't have to learn a new Presentation Deck making tool.
To access the Presentation Deck you make within the application, you just have to click the ‘Presentation Mode’ link in the Animaker application, and you are good to go.
Where exactly is this Presentation Mode link?
Go to your Animaker Dashboard and click the settings button displayed on the project you want to Present.
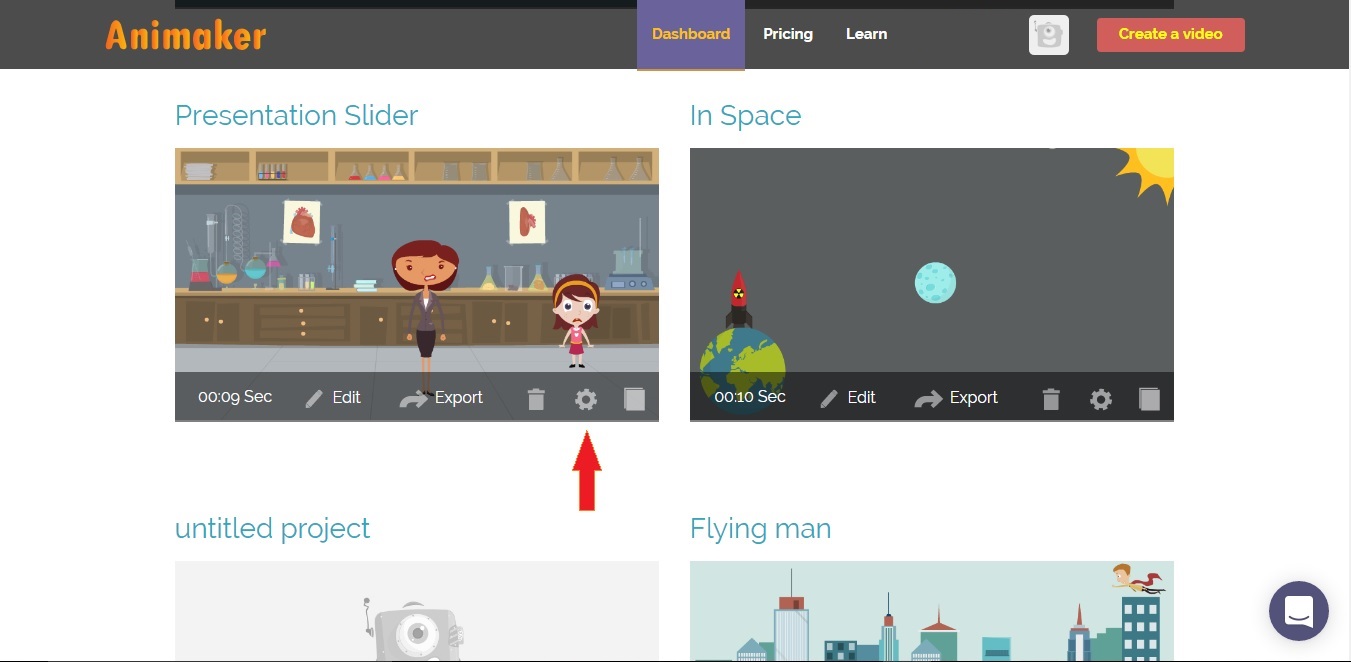
Click the link which is displayed after the text “View in Presentation mode”.
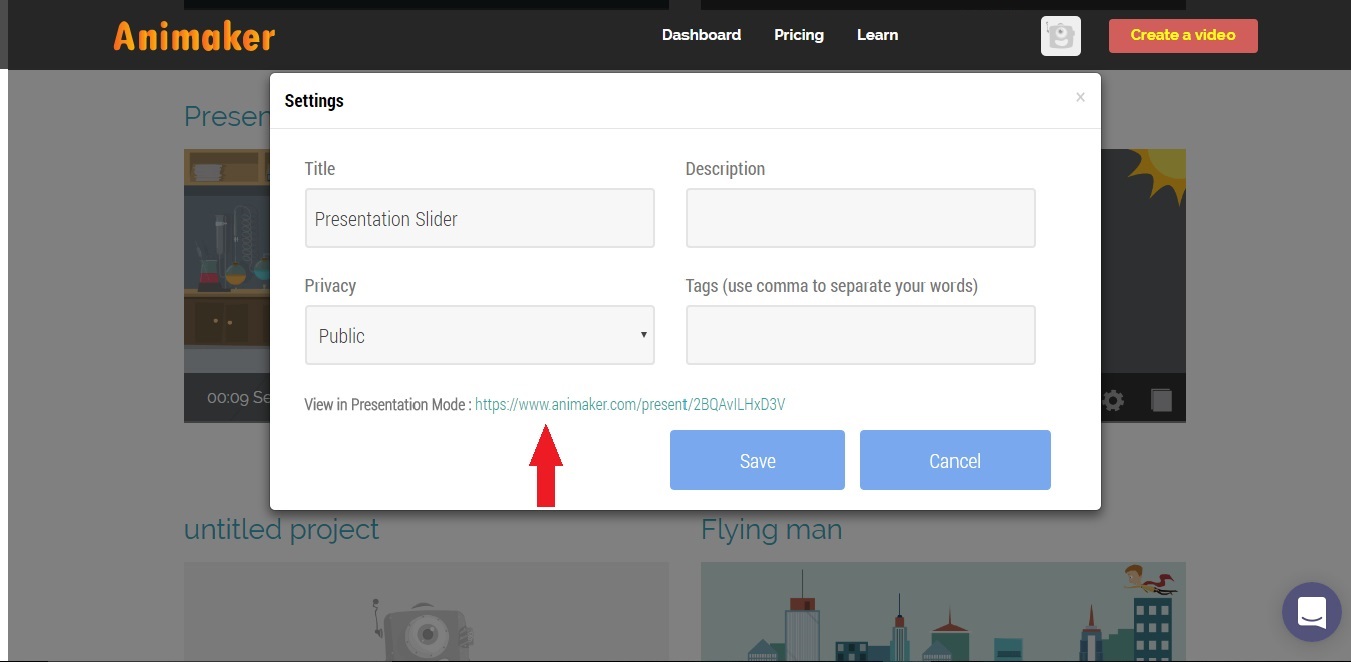
This is what you see when you click that link. The all new presentation slider.

Here’s how it works

These two are the navigation buttons. Just like Power Point, it lets you navigate between the slides.

In case you want to play the presentation as a whole like a regular video, there is a specific auto-play button to do that too.
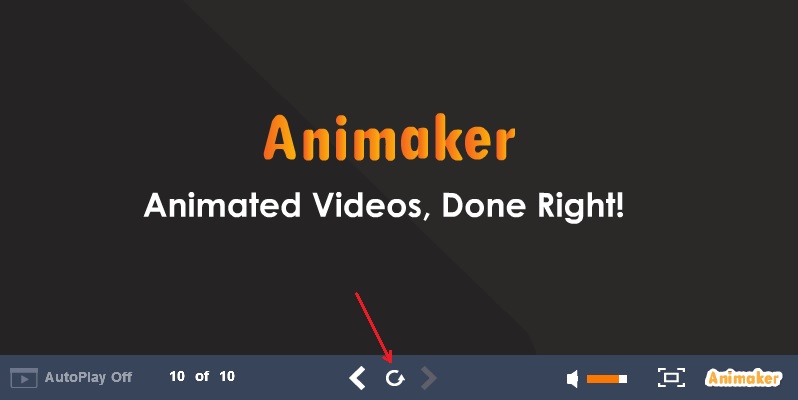
And here is the replay button which shows up at the end of the presentation. You can use this in case you want to go to the first slide very quickly. This button comes in handy when you summarize you presentation at the end.
As a bonus, here are some Pro Tips for you to get the best out of the Animaker Presentation Deck.
Tip 1: The Scenes
Keep your scene duration less than 5 seconds. Anything more than that and it will look more like an animated movie than an animated presentation slide.
Tip 2: Pre-Built Text
Instead of spending your precious time on choosing which font style and font color to use, you can choose one of the pre-built text styles from the Animaker library. Not only does it save time, it also looks stunning as it was created by one of the World’s best Animation teams.
Tip 3: The Characters
Use at least one character in each of your slides. Adding actions to the characters which are relevant to the text makes sure that your audience have their eyes glued to the screen during your presentation session.
Tip 4: Video Infographics
I am openly going to say something that can agitate quite a few people. Numbers are boring.
Wait! Hear me out before cursing me for saying that.
The truth is that too much of numbers can overwhelm anyone. Be it a student or a venture capitalist. Given that they already spend most of their days looking at it, just throwing more numbers at their face will do nothing but leave them unimpressed.
It’s no secret that Video Infographics trumps textual information. Since you are already here on Animaker reading this, I am assuming that you know what I am talking about.
Tip 5: Props
Add tons of props which support any text that you put in the video presentation. The more visual your content, the less bored your audience will be.
Tip 6: BG
Backgrounds(BGs) which are visually appealing and relevant to the context of the information on the slide, helps the audience understand your pitch/idea better.
It simply makes it easier for your audience to process information.
It doesn’t matter if you are a teacher trying to get the ‘cool teacher tag’ on the first day of work or an entrepreneur trying to impress a venture capitalist. Animaker and its Presentation Deck makes the whole experience far superior and unique for your audience than the regular Powerpoint ppts.
Create your video presentation now and let us know how it worked out for you in the comments section below.

